
Likes
Comments
Share


@1Right_Angle
Follow
Sept 18th
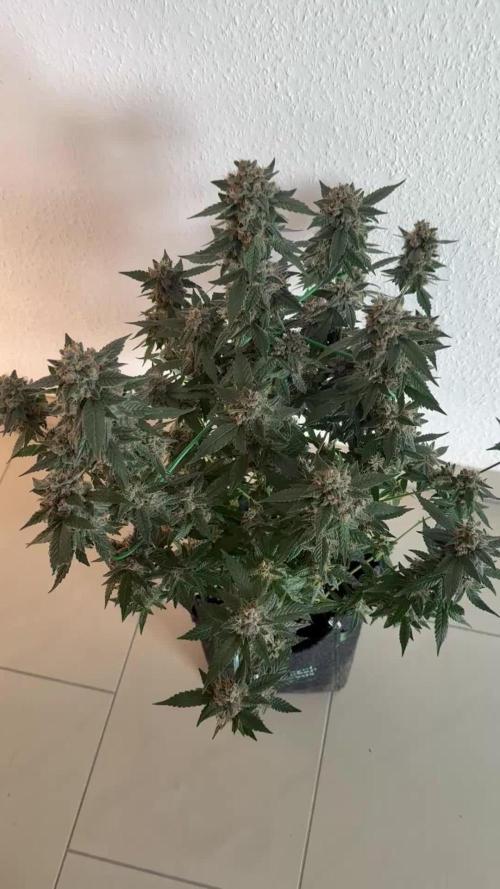
- LST scheduled for N.M. this evening. She is ready to be exposed
- next meal 19th or 20th depending on moisture of the soil; 5L Congo / 4.5L N.M. (getting close to target)
- might be a problem with the main stalk on the N.M. at the upper Topping site. A hole has appeared at the base of the upper Topping site.
Sending it to “questions” w/ photo
*** have released & removed Natural Mystic from this grow, so Congo can be considered on its own… Games, ok I’ll play
- details for N.m. still to be relayed cuz its in the same soil/tent. Ohmmmmm
20th
- kelp meal added to surface, scratched-in ~ 8 & 6 tbsp ea.
- feeding tonight for sure; menu above, congo 5L / Nat Myst 4.5L
22nd
- did a little defoliation in removing some of the leaves along the branches. Removing any Larf from this grow… Its the Colas we are after this grow
- man has the Natural Mystic (guest) ever turned things up. Its hapnin.
- wondering about the life expectancy of the Autoflower in the tent. The Northern Lites Express will dictate when “Lights-out” happens for these 3 photo-periods, as they then go into flower. May need all the room available lol as it looks like a 10 week veg is easily going to happen. (Not rushing auto)
- Power Failure has entered the 3rd hour for half of Sarnia. Its all new for me on this one
- just opened the tent doors for some air flow/O2
- 4+ Hour power outage last nite. Power returned and they will get a couple of hours of extra lite today
Sept 24th
- last day week 6
- 1/2 volume h2o / molasses tonight; 2.75L congo / 2.5L n.m.
***Oct 8 is Lights-out for 36 hours, heading into Flower.
Northern lights Express auto… is going to take too long to finish, so it is being moved, and a 4-week old Green Mountain Grape will be taking its spot. This tent will be ready for flower with such a strange cast***
- 2x 9-week plants, 1 x 8-week plant and a 4-week old hybrid will be ready at lites-out in 2 weeks ** had to make a call, cant veg forever. My early LST actions really seem to have delayed basic bud development on the auto. Things are moving, just seems another 5-6 weeks is realistic for it

Likes
3
Share

@DE_BW
Follow
Last week. She is an absolute beast! Can‘t wait to harvest her.
D79: 2l with Flawless Finish. Harvest is in two days
D81: Harvest. Will update in a week

Likes
2
Share

@Trinidad
Follow
Titan f1 QRS unsure of number of days. They are nice short plant with sparkly buds and pleasant smell. I think she will make a smooth smoke. Fresh reservoir change out today.

Likes
1
Share

@Wenz004
Follow
Diese Sativa ist echt erstaunlich - obwohl vor 3 Wochen alle Blattränder und Spitzen durch heftige Übersalzung verbrannt wurden und unzählige Blätter ganz kaput gingen - hat die dennoch erstaunlichen Durst - meistens so 4 l pro Tag - an manchen Tagen sogar 5 l - somit bleibt noch Hoffnung auf eine leckere Ernte - noch so 4 Wochen bis dahin - Sativa halt

Likes
41
Share


@bypado_farm
Follow
Day 70:
Watered the plants 0.5L without nuts, 4L total, 170 ppm, 360 us/cm, PH 6.5
Flushing from today
Day 73:
Watered the plants 1L without nuts, 8L total
Day 75:
Watered the plants 1L without nuts, 8L total
Likes
9
Share


@Donjuanweedo
Follow
No nutes this week I’m doing a water water feed and when I feed I’m still giving light nutes. Was having issues with the humidity but I found out about dehumidifier bags so I bought those... super beneficial!! Keeping my girls at a steady 48%
Pretty proud of myself so far 😊 also applied the trellis until my new tent and light comes!! Gotta love Mars hydro

Likes
26
Share


@Earthy_Greens
Follow
🌱✨ Hey friends, check out these gorgeous bushes! 🎉🍀 At just 8 weeks old, they’re already looking absolutely stunning 🌟💚. Our girls are thriving, feeling their best 💪🌞, and getting ready to bloom 🌸🔥.
We’re working hard to tilt them 🌿🔄 and grow them horizontally 🌱✨ so that every single bud 🌸💎 can soak up as much sunlight ☀️ as possible during the flowering period. This strategy ensures even growth and helps maximize their potential! 🚀🍃
It’s going to be a beautiful sight 🌟, and we can’t wait to see them in full bloom. 🌸🌞 Keep following along for more updates—you won’t want to miss the magic! 👀📔👊💚✨


Likes
459
Share


@Ju_Bps
Follow
Hello my friends 👨🌾👩🌾,
This week was good,
I've started the training for the #1 and #2, and topped the #3
They are looking really happy and healthy 🌲💚
I've founded one thrips this week, I'll treat after banana will be harvested.
💦 I give water each 2 or 3 days
300/350 ml/plant
Water + rhizo + tera vega
Water + rhizo
Water + Rhizo + canazym
PH@6
Lamp is 100%
Thanks community for follow, likes, comments, always a pleasure 👩🌾👨🌾❤️🌲
Mars Hydro - TS 1000
https://www.mars-hydro.com/ts-1000-led-grow-light
Mars Hydro - FC3000
https://www.mars-hydro.com/fc-3000-samsung-lm301b-led-grow-light
Mars Hydro - SP3000
https://www.mars-hydro.com/sp-3000-samsung-lm301b-greenhouse-led-grow-light
The High Chameleon - Vannila T
https://www.thehighchameleon.com/shop/vanilla-t-5

Likes
7
Share


@MrPott
Follow
she one bushy girl. doing some LST on her and I can see other bud sites. looking healthy and green so far. also sharing her nutes with other upcoming babies. no signs of overfeeding so far


Likes
25
Share


@crystal_garden_0
Follow
Great week, everything going well, plants are really growing fast now , started low stress training and the ladies are happy. Excited to try the flavors of them .
Likes
2
Share

@goatpharms
Follow
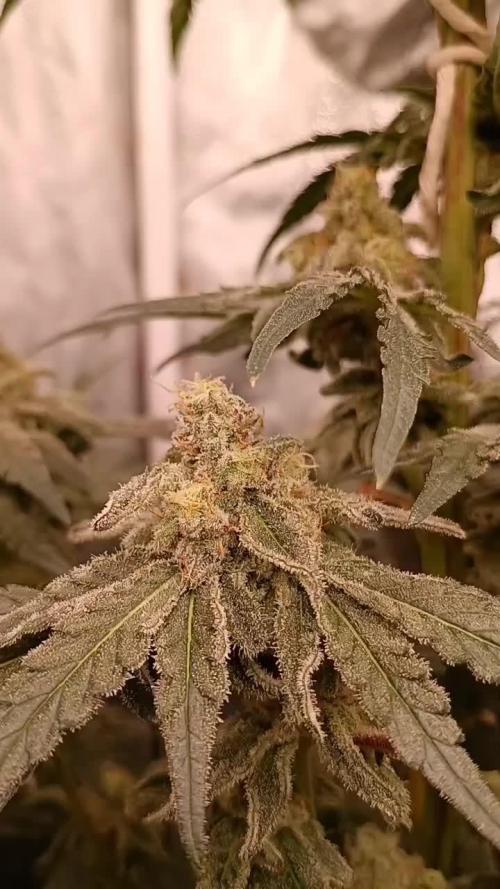
Filing for divorce this week… Mrs Mac is looking way too fine to ignore 😍😅
Despite last week’s 30°C heatwave, the girls didn’t flinch. Temps have eased off now, and there’s zero sign of stress — just happy fattening buds.
PK 13/14 and booster are in the mix (as always, I start as soon as I see bud sites and keep it running till flush). Buds are stacking up beautifully with a solid coat of frost starting to come through.
New Oscillating Cloudray S6 installed
If you’re like me and have gone through multiple crappy fans, the Cloudray S6 Gen 2 is a solid choice — well-built, quiet, powerful, and it can be hooked up to a controller 🌱💚

Likes
57
Share


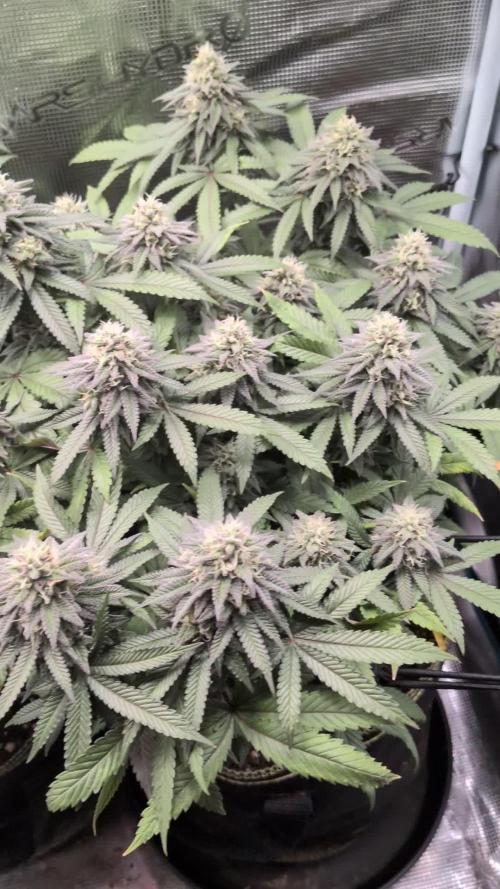
@Zurban_Poison
Follow
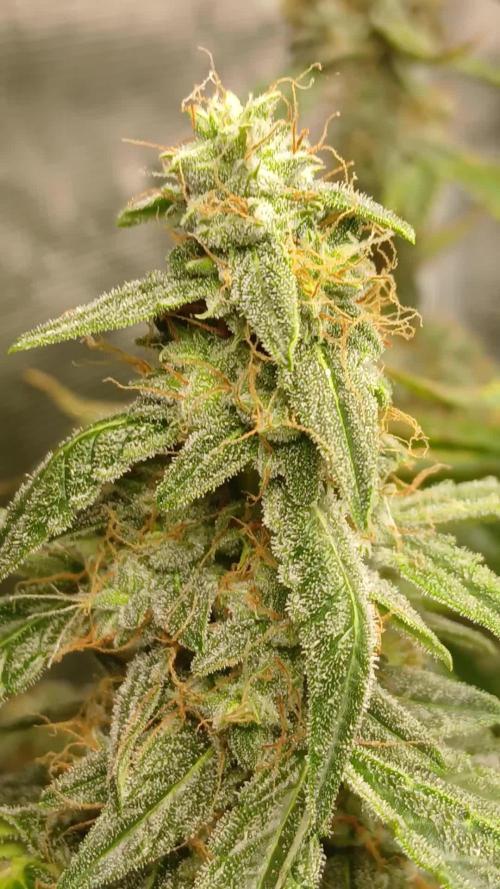
Well guys! home stretch!
as you can see in the photo, harvest day is not far away))
Both plants look amazing! the structure of the Buds, trichomes, smell, stickiness and oiliness, all this is in excess!))
Buds are very solid and elastic .. very happy ..

Likes
3
Share


@Firepharmer
Follow
Cut a few clones to Secure the genetics rooting them in the eazy cloner
Everything’s growing good switch more them to flora flex nutrients lots cheaper for me


Likes
15
Share


@Drgreenthumb627
Follow
day 14 flower and those buds are just starting to peak out! the plant is happy and healthy :)

Likes
17
Share


@LuvSDreams
Follow
Last two plants are flushing now. My stunted mango smile yielded about 36 g which I made about 7g of rosin from and kept a few nugs. My first sour crinkle yielded about 55g. They seem like they will yield much more. Seems like if you want smaller faster plants use airpots or bigger plants w a longer lifecycle do fabric pots.

Likes
21
Share

@therealgrowmie
Follow
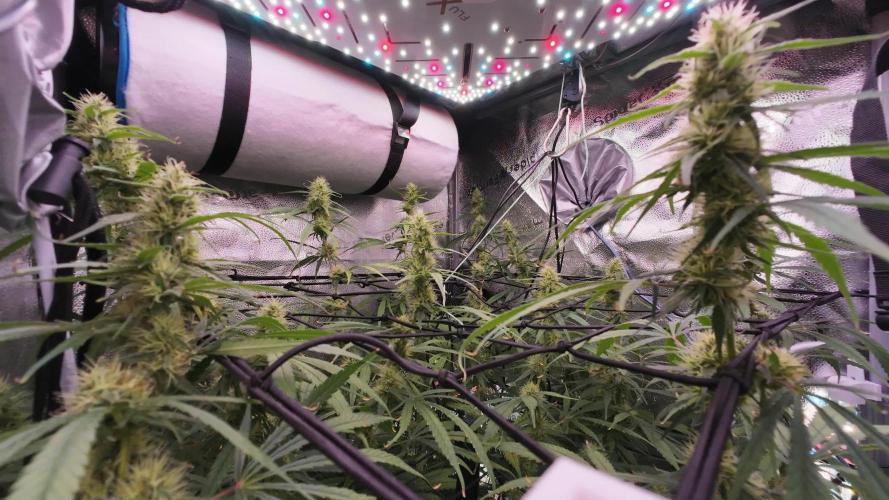
The buds are really starting to stack and bulk up, and man… the frost is coming in nicely. Some of those tops are getting properly coated, and the smell hits you the second you open the tent.
You can clearly see the contrast between the plants — the NLs are staying nice and dark green with heavy frost, while the Critical Mass fades out into those limey/yellow tones. Not perfect, but at this stage I’m letting them ride. The flowers themselves are developing well, and that’s what counts.
Structure-wise, I’m pretty happy. The canopy is fairly even, multiple solid tops across the board, and everything is getting good light exposure.
Stats so far:
💧 Watering: Every third day
🌡️ Temp: 26–28°C
💦 Humidity: 60% RH
📈 VPD: ~1.18 kPa
💡 Light: ~700 PPFD


