


Likes
Comments
Share


@PielgrzymkOlaMagicGarden
Follow
End of vege REPOT 14 l to 20 l with plagron batmix. 5.10 lights switch to SpiderFarmer SF4000 12/12.

Likes
99
Share


@Sativagrad
Follow
I have already said everything, in principle, I advise everyone to grow this variety, I got an amazing tree half purple with giant cones and a large harvest, I am delighted!

Likes
11
Share


@hannabis420
Follow
fast growing auto, overloaded on nutes with this one but she still produced beautiful buds

Likes
4
Share


@Hello_Jeff
Follow
Too Tall, Almost touching LEDs and lightburn is becoming an issue as well as the outer parts receiving too little light. After some more desperate attempts at LST and even fumbling the scrog net on top again..... The girls need to move out of the budget home and get something proper!
Never thought the additional growth during flowering is this much x)

Likes
3
Share


@Philippovic
Follow
Läuft, ich schätze dass der Grow noch mindestens 3-4 Wochen läuft. Wie zu sehen sind die Trichome erst gerade am entwickeln und natürlich noch Glas klar. Die Temperatur überschreitet 22C seltenst, dementsprechend zieht sich dieser grow garantiert in die Länge.


Likes
Comments
Share


@GreeneScene
Follow
GIVE THIS GROW A THUMBS UP 👍
WEEK #2 DAY 9:
She was stunted day 6 & is recovering from that currently .
She is in a 5x5 with 3 autos between 35-42 days old .
The plan is to veg this single Cereal Milk out to fill this entire 5x5 once my Autos are harvested .
This is my first run with this cultivar & breeder however it was an easy choice considering I adore the taste , smell, & smoke of the strain!
Week 1 issues:
The tents VPD was out of whack . Due to the VPD being out of proportion slowed/stunted growth occurred equally across all 4 plants in the tent . Plants showed deficiencies of CalMag and interveinal yellowing , necrosis leaf spots , reddening leaf petioles & leaf stems slowly progressing in the worst affected plants to red leaf veins & lastly droplets of condensation on the leaves (plants were sweating)
Anyways after I fixed the VPD issues , I added a makeshift dome for humidity retention of the Cereal Milk & 3 days later which is today she has added 2 new nodes almost catching up to where she would be with normal healthy unstunted growth at day #9.
She was transplanted from her starter pot last night into a 2 gallon with plenty of dry amendments mixed in for a 6-8 week veg.
I’m debating on scrogging this plant or LST & Supercropping the SHIT out of this plant . I’ve never scrogged before and am not welcoming any new learning curves at the moment which is my main reason not to even though I think it may be the biggest help to filling this tent & “supporting” the enormous load of bud sites I am planning to grow .
I worry about to inconvenience of defoliating & training branches down without being able to get around the outside of my tent given its location in a corner .
If I had anticipated wanting to grow a single 2lb + plant when determining my grow location I would’ve placed it more ” openly “.
If I can think up a work around to canopy maintenance so that I can keep it clean & by the books I’ll quit complaining & try it .
Otherwise she’ll be LST’d & Supercropped OR topped and mainlined .
Day 14 END OF WEEK #2 I’ve added remote temperature & humidity monitoring/controller. Now I can monitor the dips & swings while making adjustments to better dial things in .
(Just trying it on for size here , for full disclosure I am not in love with it & if I can not modify what it is that is bothering my existence I WILL be returning this unit AND purchasing another brand with the capabilities I am looking for the connectivity for this specific unit I am trying was a BIG deciding factor for me but all in all is not enough to make me settle on this one if I can potentially have it all. . Odds are highly leaning towards returning this unit .)
Finally raised the pot to level with the older girls in flower currently . I was wrong when I reported in setup that she was “30 inches “ from the light . She in fact was 35 inches‼️away so I raised her to be 26 inches from the light by placing a 1 gallon bucket beneath her .
I WILL NOT LET THE MID-END OF FLOWER & DRYING to cause my run to get derailed
Likes
67
Share


@AwfulBuddy
Follow
Hi buddies im back to the diary
Everything is going well, the girls drink a lot 3 to 5 liters of feed per day, the Ph and EC remain stable.
I see new roots and buds continue to bloom💣 so I think they are fine and healthy.
Sensi Seeds indicates Skunk#1 with 8 weeks flowering
now i am at the beginning of week 7 bloom but I still don't see milky or amber trichomes and not even so many brown pistils, so i will repeat the week 5 feed as AN advice...
maybe from the next one I'll start with overdrive .. who knows? 😁
I made some macro videos of the trichomes, in the next few days I will update the diary with photos.
Thanks for the answers and advices to the grow questions, I know you don't do it for the free seeds, its only love 💚😜 love you too buddies
as usual thanks for stopping by and good growth everyone !!
Update: I need a tripod to take better macro shoots. Sorry for low quality pics

Likes
Comments
Share




Likes
20
Share


@Bread_n_Buds
Follow
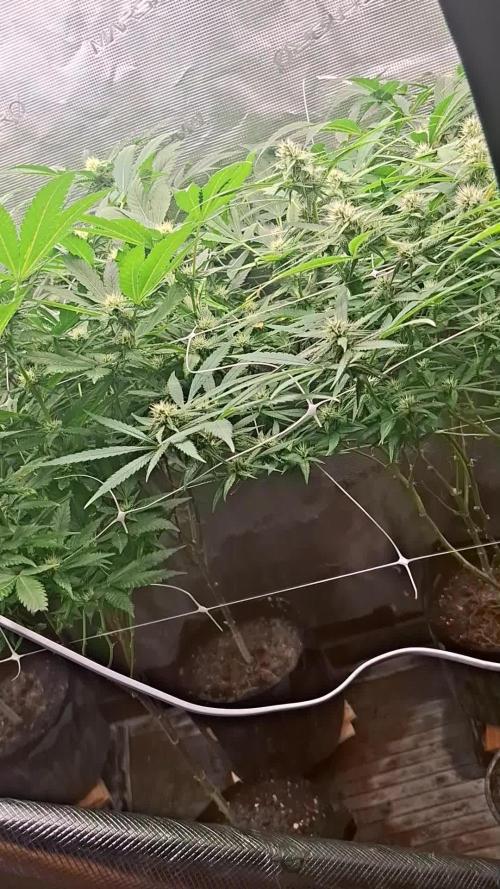
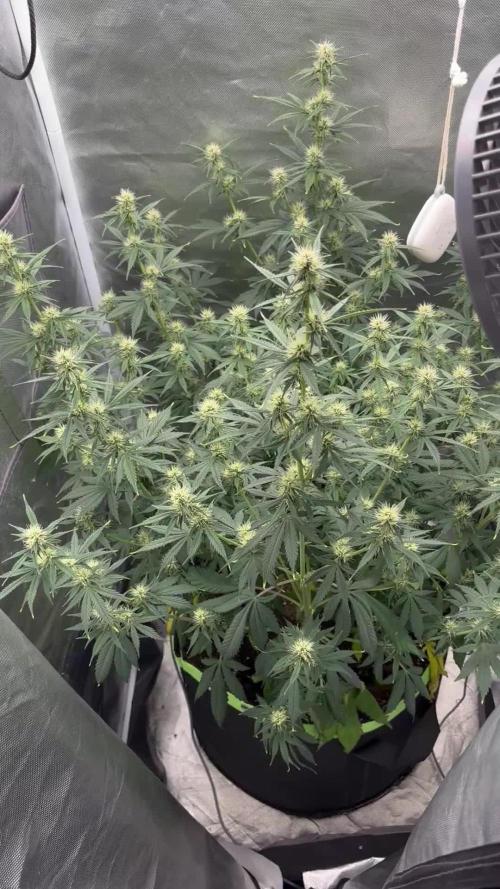
We have reached the second week of flowering for our beautiful photoperiod ladies of Zamnesia. Born 1 September now at day 45 amazing.
---- The general environmental conditions are good, there is always a little too much heat from next week we should have just enough for the resining a sharp drop in temperatures that could also give us beautiful foliage for this period.
--- Our Runtz are two very stable and regular plants that will give us great satisfaction. They are not very big and although we do not have a couple of not very tall growboxes it is very good, they flower quite quickly, there are already some buds formed unlike others. Like its auto and f1 version it eats a lot of fertilizer especially in the initial and medium flowering phase you need to give it fuel. Our two are very healthy let's be clear but it is one of those plants that eats food a little more than the others. I’m only defoliating and pruning and lollipopping in lower side of the plant no LST because i need to save space, yes very nice tecnique but not very good to save space.
--- Fertilization program - The fertilizers are always Plagron and I am following the table that I generated on the site depending on the chosen substrate. Create your own card and follow it, never be presumptuous my friend as I have been in the past, follow the card and look at the plants, not all need the same amount of fertilizer. We have reached the moment of giving a good dose of iron in the first weeks of flowering on the advice of Plagron directly foliar and I am at the end of the second week of flowering. It had started a little quietly but now it is proving to be among the best.
---- https://plagron.com/en
- Power Roots - 1 ml/l
- Alga Bloom - 4 ml/l
- Pure Zym - 1 ml/l
- Sugar Royal - 1 ml/l
- Vita Race - 5 ml/l
--- The Plagron 100% Organic pack is available on Zamnesia at: https://www.zamnesia.io/en/11457 -pla gron-easy-pack-natural.html
--- The dehumidifier now works between 50% and 55%
// Strain Description // Guys, we have really reached a turning point! Our breeders have recreated one of the most sought-after strains by Californians: the very powerful and exquisitely delicious Runtz. This cross between Gelato and Zkittlez is everything you could want from a cannabis strain: tasty, powerful, balanced, productive and fast flowering. Buy the seeds and try it yourself!
- Get a seed of this fantastic strain --- https://www.zamnesia.io/it/6000-zamnesia-seeds-runtz-femminizzato.html
- Soil and Fertilizers entirely organic --- https://plagron.com/en buy on www.zamnesia.io
- Growbox and air sistem --- https://www.secretjardin.com/
- Light - Sp3000 - https://marshydro.eu/
- Music and sound --- I made my girls listen to 432hz frequencies and music from www.radionula.com
- Z --- You can find these seeds, much more from the world of cannabis, mushrooms and an incredible series of accessories and gadgets on the reference site not only mine but of many growers
—— https://www .zamnesia.com

Likes
10
Share

@carlitoshaze44
Follow
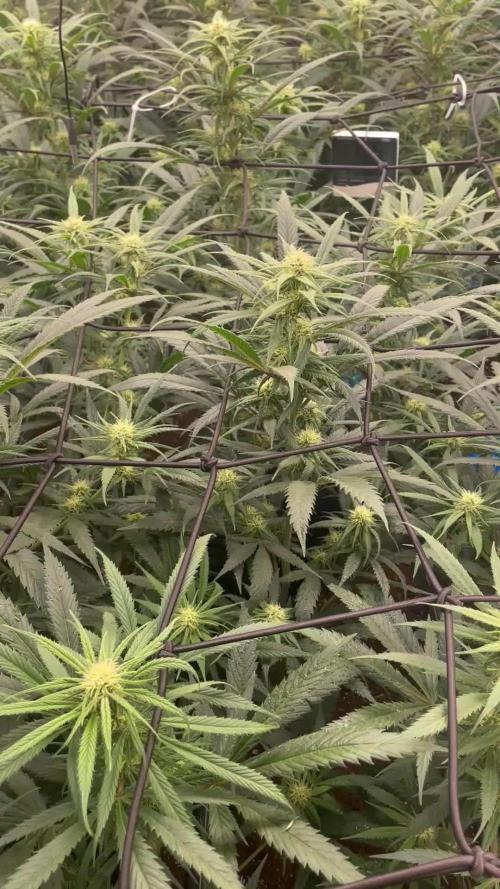
Otra semana más
Creo esta semana hoy día 27
Anunciando así el próximo día 28 inicio de esta quinta semana de floración del calendario de mis niñas,semana en la que comienzo subiendo la cantidad de comida y con ello de agua para mis niñas.
En los últimos riegos de la cuarta semana fui subiendo hasta alcanzar los 1700.
Las plantas mayoritariamente lo aceptaron,así que con ello subiré esta semana hasta alcanzar los 2000.
No defoliaré ninguna planta
Hoy ajuste la luminaria a una altura de 30cm con respecto a los 45 de la anterior semana.
Esta semana pegarán un buen apretón con la subida de PK,y la ayuda de los azúcares.
Seguimos con muchas lluvias y una humedad muy alta que dentro del armario se combate entre ventiladores extractor y desumificadores pasivos de sales de silicio.
Que me mantienen un 35% menos de la que tengo en el exterior llegando muchos días a los 45/50% de humedad.
Tengo que añadir que vivo a un kilómetro de la playa.
Día 28
Di un pequeño fumigado, de agua con ajo y jabón potásico en la entrada al cuarto de cultivo.
Como preventivo ante cualquier insecto que quiera acercarse atraído por el aroma.
Hoy e podido ver que el último riego de 1700EC,no causó ningúna sobre fertilización apreciable en el cultivo casi nula,viendo esto en el siguiente riego subiremos a 1900Ec.
Likes
7
Share

@Growfather1
Follow
Hello everyone,
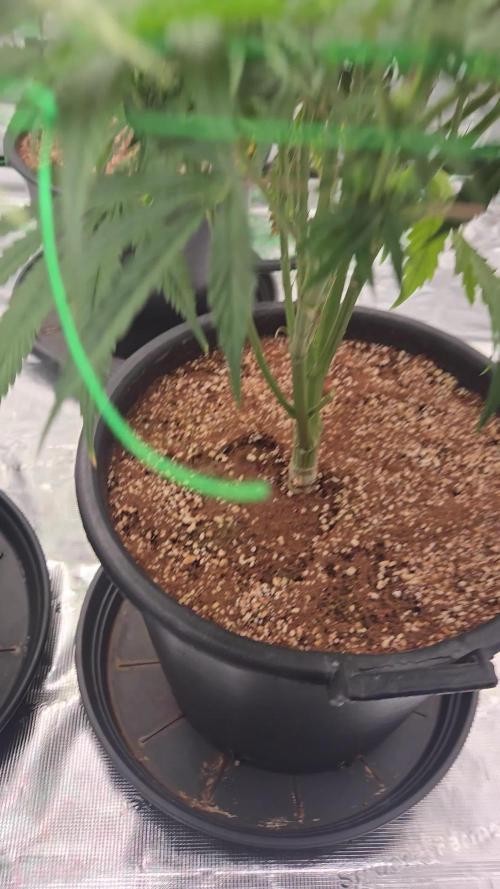
Another week has passed by and the plants are in good health.
I took off some leaves and some lst.
The amnesia in the back is going in here 4th week and the stretch is over.
Thanks for stopping by and have a nice week.


Likes
4
Share


@The_Chef_420
Follow
I can't believe how big she has gotten for surviving in just a solo cup! Kinda opens doors in my mind on ideas for gorilla grows at low cost (only takes 1gal to run vs 3+ in a normal dwc bucket). I'll be honest and admit I've made the biggest rookie mistake and overfed, I knew I was really pushing her and wanting to see how far I could actually take her and burnt her tips in the process. The new growth is still green at the tips by the buds which is promising. I lowered her nutrient uptake slightly by 1ml for each base nutrient and gave a little less than 1/8 tsp of bloom booster. She got pretty tall and therefore top heavy, so the one afternoon I checked her and she was tipped over but no breakages, which was awesome. I tied her to the ceiling of the tent and now she is going nowhere. Been removing lower leaves and small growth that isn't showing sex yet. Once the colas have pre-flowers I remove all lowers that don't to help send energy upwards. I'm still seeing evidence of what I believe is rust fungus, though its growth has become much less noticeable than a few weeks ago.

Likes
6
Share

@CannaArchive
Follow
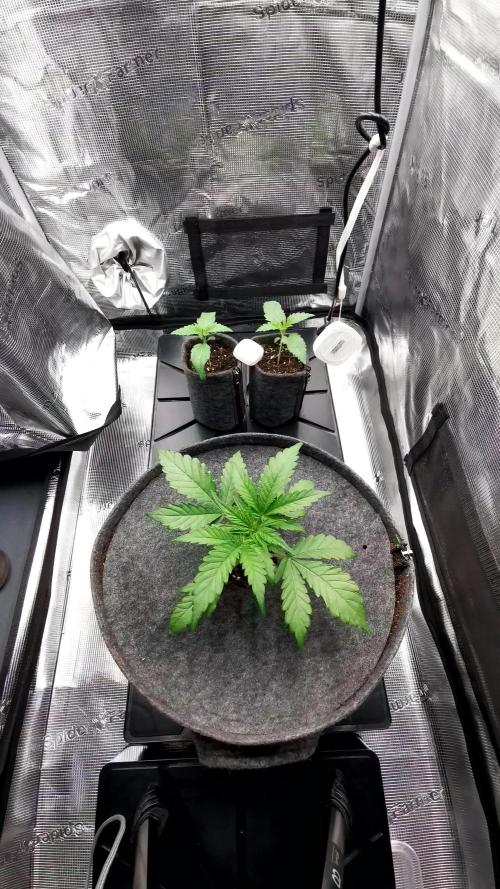
Growth Stage: Vegetative
Environment:
140 × 70 tent
Temperature: ~24.5–25 °C
Humidity: ~60 % RH
Light cycle: 18/6
Light intensity: ~400 PPFD. ☀️
Watering / Feeding:
Watered every 2–3 days, based on pot weight, with approx. 1.5 L per watering using RO water + CalMag. 💧
Additionally, the plant received 1x Startrex during this week.
Observations:
Growth remained steady and healthy. The plant still has a slightly thin structure, but overall looks vigorous. 🌿
Leaf color is normal green, briefly a bit lighter after topping, but quickly returned to a healthy tone.
At the end of the week, the plant was topped above the 4th node, aiming to keep 6 main branches. ✂️
The topping was handled very well, no visible stress reaction, and growth continued almost immediately. 🙂
Structure is now much more even compared to the earlier stretch.
Notes:
Week 4 was very positive. The plant transitioned from vertical growth into structural development smoothly. With topping completed successfully, the focus now shifts to recovery and branch development in Week 5. 🌱💪

Likes
4
Share


@AustinRon
Follow
OG 4Q24 Flower Week 10
Orangegasm (Fem) [ IRIE Genetics ]
12/12 @ Bolt (Day 21)
Germination: 20 November 2024
#3A Earliest Harvest Date: 9 February 2025
#3B Latest Harvest Date: 19 February 2025
_________________________________________
Start of Week: [Wed Feb 12, 2024 CR2 4Q24 64:F:9:1]
End of Week: [Tue Feb 18, 2024 CR2 4Q24 70:F:9:7]
OrangeGasm Fertigation:
- MAX: EC: [ 1.6, mS]
- LightIntensity MAX: [ 850, µMol/m2/s]
______________________________________
__
Wed Feb 12, 2025
OG 4Q24 64:F:9:1
Refresh Reservoir
- Amount: [ 5, gal]
- EC: [ 1.6, mS]
- Primer A&B: [ 48, ml]
- SLF-100: [ 15, ml]
Reclaim Dehu
- Amount: [ 4, gal]
EC: 1.6
Runoff
- Amount: [ 1.25, gal ]
- EC: [4.3 , mS/cm2]
- EC∆: [ 1.6 , mS/cm2] # Danger!!! (I don’t think so - Happy Plants)
__
Thu Feb 13, 2025
OG 4Q24 65:F:9:2
Runoff
- Amount: [ 2, gal ]
- EC: [ 4.6, mS/cm2]
EC: 1.5
Refresh Reservoir
- Amount: [ 2, gal]
- EC: [ 1.5, mS]
- Primer A&B: [ 32, ml]
- SLF-100: [ 10, ml]
Reclaim Dehu
- Amount: [ 2, gal]
If we see the pistils of the last two plants shrink/collapse in the next 3 days, we may be ready Tuesday/Wednesday . . .
I also note we’re about 2 days after from OPTIMAL BUD Structure, Foxtailing is becoming less well formed at largest top and some of the sooner ready buds …
__
Fri Feb 14, 2025
OG 4Q24 66:F:9:3
EC: 1.4
1.5 gal dehu
3 gals+ refresh
Reduced Fertigation Time 50% as Tank is at refill after 4+ gal yesterday, again. :-{
__
Sat Feb 15, 2025
OG 4Q24 67:F:9:4
Reclaim Dehu
- Amount: [ 2.5, gal]
Refresh Reservoir - 2 Gal
- Primer A&B: [ 17.9, ml]
- Resin Bloom: [ 9, ml]
EC: 1.3
Runoff
- Amount: [ 0.5, gal]
- EC: [ 3.0, mS/cm2]
- EC∆: [ 1.7, mS/cm2]
__
Sun Feb 16, 2025
OG 4Q24 68:F:9:5
Refresh Reservoir - 2 Gal
- Primer A&B: [ 16.5, ml]
- Resin Bloom: [ 8.3, ml]
Runoff
- Amount: [ , gal]
- EC: [ , mS/cm2]
- EC∆: [ , mS/cm2]
EC: 1.2
__
Mon Feb 17, 2025
OG 4Q24 69:F:9:6
EC: 1.1
__
Tue Feb 18, 2025
OG 4Q24 70:H:9:7
1000
- Remove Plants from Tent
- Remove Drip Tray
- Remove Light
- found water unseen in bottom tray - the reason for unreasonable humidity
- Removed Drip Rings
- Dried bottom drip tray
- Resealed Tent - Low RH
_______________________
Harvest Log
Max Min Average
Height (in)
40 21.5 29.875
Weight (g)
700 157 385.5
Secondary Stem Count 30 17 21.125
Est Dried Trimmed Wt 140 31.4 616.8

Likes
8
Share

@Bncgrower
Follow
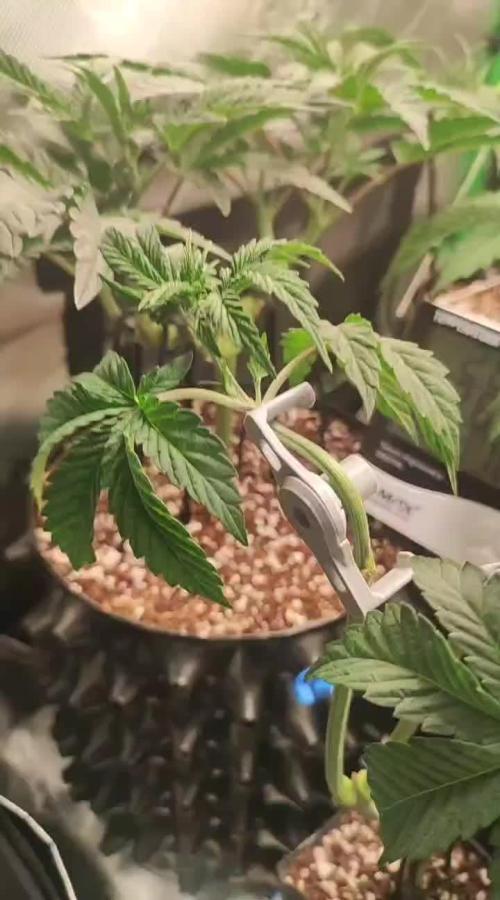
Sorry, I'm a bit behind on my updates... Everything is going according to plan 💪🌿
Likes
12
Share


@BrMarijuana
Follow
Ótimas plantas, floração ok, alimentação ok, rega e alimentação todos os dias, plantas satisfeitas, verde bonito, ótimos buds se formando, cheiro doce


Likes
13
Share


@HomeGrownFamz
Follow
I went away for a week and forgot to switch the lights over to 12-12. They had an extra 5 days veg! Things are getting too big for my tent now! I’ll top it and see how it goes.
Likes
11
Share


@STAYINGONMYMAINCBATORUNTWO
Follow
I will always go organic from now! Especially using rqs nutrients had the best grow and the best outcome I’ve ever had! Dense buds all over and end weights matched that! And I didn’t even top it or stress it Too much! Wanted to see what happened if I just let it grow and I’m amazed! Royal queen seeds deserves the top place!