The Grow Awards 2026 🏆 


Likes
Comments
Share
@UGrowGuy
Follow
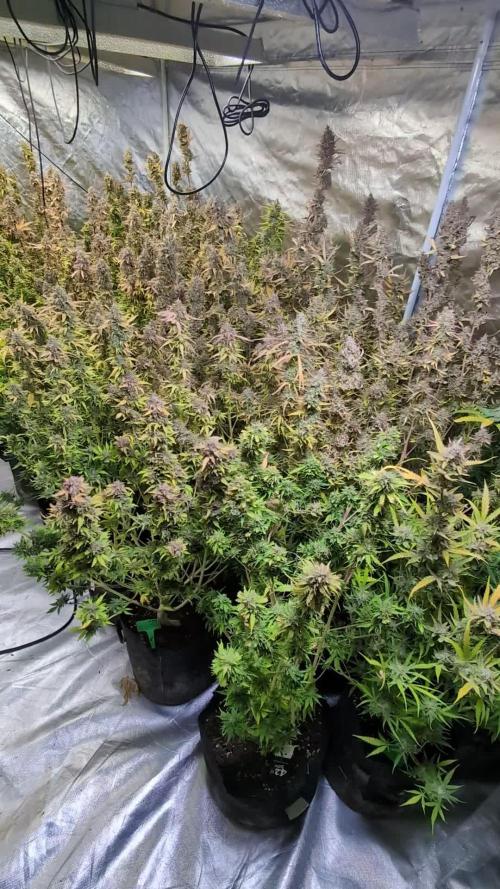
Day 50! Start of week 8! I am watering with only 3800ml water and enough Bokashi Tea to get my PH to 6.5. The Bokashi Tea is derived from fresh Mango, Pineapple, Cantaloupe, Banana, Apples, Basil, Potato, and Inoculated Bran. In my opinion, “Terp Sauce”, helps insanely with the terps and many other things. Camera work is not my strong point.
Day 53 Gave 3800ml of water with only enough Bokashi Tea to PH water to 6.8.
Day 56 Gave 3800ml of water with only enough Bokashi Tea to PH water to 6.8.
Likes
8
Share
@Bdizzle
Follow
Growing strong and healthy!! Baby buds are coming in all over :) Can’t wait to watch them grow!! She has doubled in size over the past few weeks & has started to slow down to focus on flowering. Stems/stalks are growing strong & thick ready to support some good bud growth :)

Likes
10
Share
@teabee
Follow
So far so good, changed the fan in the tent, Gotta make a better mount for it before i have it oscillating. Not sure if im gonna get those long dense colas yet or not, Its starting to fill in pretty nice so far tho

Likes
19
Share
@GanjaGecko
Follow
WEEK 9/6F // D57/36F - D63/42F
Diese Woche war nicht viel zu tun. Die Guava entwickelt sich prächtig und hat wunderschöne frosty Buds. Am Donnerstag Abend wurde die Lady für das Wochenende reingeholt und vor das Südfenster gestellt. (Was bei drei Tage Regen und Wolken eh komplett witzlos war). Allerdings wollte ich kurz vor der Ernte der Dame nicht 3 Tage Dauerregen aussetzen😄
Die Guava wurde heute das letzte Mal gegossen wird ab morgen bis kommenden Freitag nicht mehr gegossen und wird dann Samstag früh zusammen mit den beiden Helgas in das Zelt zum trocknen aufgehangen.
Bei Regen wird die Guava reingestellt damit die Blüten nicht mehr unnötig nass werden vor dem trocknen.
Gegossen wurde an Tag 57/36F, Tag59/38F, Tag61/40F und an Tag63/42F.
An den Tagen gab es jeweils ca 1L-1.2L.
Bei jedem zweiten Gießen wurde gedüngt.
Der Topf wird vor dem gießen leicht angehoben um zu abzuschätzen wie viel die Dame benötigt.
Temperatur
Tag: 22-26°C
Nacht: 13-19°C
Höhe 84cm

Likes
3
Share
@Diy_autoflowers
Follow
ET vs Widow.
Personal cross.
day 19 in the pics.
Today makes day 21


Likes
7
Share
@Nikkov
Follow
What's up guys
let's go to a week passing by, right?
and I'm happy that they have resined a lot, it's a shame they didn't develop better but due to the heat and low humidity this cycle they didn't grow much but I'm already improving in the next cycle and we'll see what happens. =D
Likes
6
Share
@smoking_hills9
Follow
Harvested around 1 week ago, slowly drying with around 22° and 60% humidity. N2 the frostiest from the start but no smell at all, another 2 are quite stinky. N3 got some nice colours .I definitely prefer Opium auto.

Likes
19
Share
@sellem
Follow
Starting this week of with some (in my eyes) beautiful nighttime - shots! Also, i finally found out why Whitebalance is important on my Camera. Whoopsie!
Plants got watered on Day 45 with 2,5L each, ramping up BioBloom to 3ml/L as well. If the plants dont tell me they need more, im probably only gonna ramp up topmax from here on out. With the watering, i did some more "aggressive" defoliation, focusing on the inside but also removed some larger fanleaves everywhere.
PH in stays 6,5 and out Stays at 6,1 for plant B and 6,2 for Plant A. Sounds good to me!
They also started to smell. They did so before, but mainly when i stuck my nose into the tent, and in the bygone weeks, it was, for my untrained nose, more of the typical "weed growing" smell we all know and love. But now - oh boy, now shes showing her olfactorial potential, and i swear to god i can make out banana (more like the peel not the fruit, but banana is banana), but my SO tells me im probably having a stroke. ill die on that hill though - i can smell banana.
Theyre done stretching since a bit now, but in the timelapse (which ill add at the end of the week) you can see the flowers starting to swell up and see a difference daily. I said it a lot already, but i will say it again, they grow FAST, they grow beautifully and now they also get budmass going. I dont think they'll be ready to harvest in Week 8 (yet), just because i topped and couldve given more light, but if anyone tells me they harvested their BPP in 8 weeks, im inclined to believe them. My impatient a** is still in awe just how hard they are stepping on the gas.
I measured their size for once, Plant A is 62 cm from soil to top, Plant B is 56 cm from soil to top. Plant B is also sitting on a weight as a slight elevation boost since this week.
Bit late, but added the timelapse for week 7 for you to enjoy!
Likes
19
Share
@DrLaggis
Follow
HELLO GROWING FRIENDS - Please look at my Aftermovie Growvideo, which cost me about 4 hours to create. hope you like it!
Day 72: The Finale 🌿🌟
It’s finally time. My very first grow is coming to an end—at least the cultivation phase. The plant is now ready for harvest, and I can’t believe how incredible this journey has been. I never expected to enjoy the whole process so much—from nurturing the plants to watching them grow and evolve. I’m absolutely hooked and can’t wait to dive into the next steps: harvesting, drying, curing, and of course, starting a new grow soon with fresh ideas and experiments!
While it may not be the largest yield, the quality of the buds speaks for itself. The time, love, and care I’ve put into this grow is visible, and I’m pretty proud of the results. I’ll admit, I was a bit impatient at times (which I think every first-timer can relate to 😅), but the experience was priceless.
Here are a few interesting highlights from my trimming and harvest process:
1️⃣ Dark Phase Before Harvest
Two days before harvest, I put the plant in complete darkness to encourage resin production. I'm not sure if it really made a difference, but it was worth trying!
2️⃣ Wet Trim vs. Dry Trim
I decided to go for a wet trim because the buds were really dense, and I wanted to avoid any risk of mold. I’ve read that wet trimming can speed up drying and may slightly impact the quality, but this is part of the learning experience. Next time, I’ll try a dry trim for comparison!
3️⃣ Yield Update
Wet, the total came in at 209 grams from my plant. Trimming took around three hours, and it was actually a lot of fun, despite the time commitment.
4️⃣ Curing Plan
The buds are now hanging in the tent for about 8 days. Once dried, they’ll go into jars with Boveda Packs (62% humidity) for another 3 weeks of curing. I'll update the smoke report once they’re fully cured, but I’ve already had a sample of the same strain from a friend, and I can say it’s pretty amazing.
Final Thoughts on My Grow 🌱✨
As mentioned earlier, this grow has been an absolutely incredible experience, and it has definitely set me on a path to jump right into my next grow. There were ups and downs along the way, such as over-pruning, which I believe stressed the plants a bit. Additionally, I think they could have benefited from an extra week to mature. We also faced many temperature fluctuations this summer, which impacted the plants due to external weather conditions.
I’m really pleased with the quality of the buds. The quantity is okay—I can’t fully gauge it yet—but I’m sure there’s more potential to unlock. I’ve gained valuable experience in what worked well and what didn’t. Overall, the countless lessons learned during this grow far outweigh the few mistakes made. I’m incredibly proud of my first results!
As this long journey comes to an end, I want to thank everyone who followed along. I hope you enjoyed all the content. In that spirit, happy growing, and see you next time! 🌟
Likes
26
Share
@Sun_Sweeds145
Follow
She grows up fast and eats well. I think she's probably starting to lack micronutrients tip that starts to yellow. 😐
Likes
33
Share
@burnerac
Follow
Day 127: nothing remarkable to report. Smells good.
Day 128: preparing for harvest. New toy, the Trim Tray, arrived today. Decided to put off watering until tomorrow although I think it could use a gallon.
Day 129: added one gallon pH6.5 water with 2 tablespoons Herculean Harvest.
Day 130: no water added
Day 131: no water added. I really want to harvest but I really feel like it needs one more week.
Day 132: added one gallon pH6.5 water with two tablespoons Herculean Harvest
Day 133: I really want to harvest today but suspect I need one more week. Thoughts?

Likes
30
Share
@Canadian
Follow
This plant have a very strong smell and there are very high THC with a good balance that allows you to still be productive on my day . All popcorn and small buds were chopped into pieces and put in a pot for edibles.
The buds that grow from the plant that did very well are very dense and heavy the main cola waited 15.56 grams dry

Likes
50
Share
@Mr_Motalovah
Follow
Hello growers and tokers! 👋 👩🌾 🧑🌾.🔥💨
There has been much change this week!!
First there was a big defoliation done, I cleaned the bottom of the plants.
All the growth that wouldn't amount to anything because the light doesn't penetrate that low.
Also took off the biggest fan leaves to give more room for light.
Then finally switched to 12/12..
After just 36 hours after the defoliation there was a major change.
New growth everywhere, colas started stretching upwards fast.
By far the tallest girls in the tent. Her colas are stacking up nice and tight if she keeps that up we'll have some nice dense colas. 😁
Great reaction to the defoliation and 12/12 switch.
I'm still watering every other day, After the defoliation I watered with only Enzymes 2ml/L to clean the roots a bit then started with the nutrientes again.
I dropped the amount of grow nutrients from 3ml/L to 1ml/L and started adding bloom nutrientes 2ml/L for now.
I'll slowly be upping the bloom nutrientes and after week 2 I'll no longer add grow nutrients.
That's it for this week. Stay tuned to see how they flower.
Stay safe!

Processing
Likes
5
Share
@Mr_nugs_lover_David
Follow
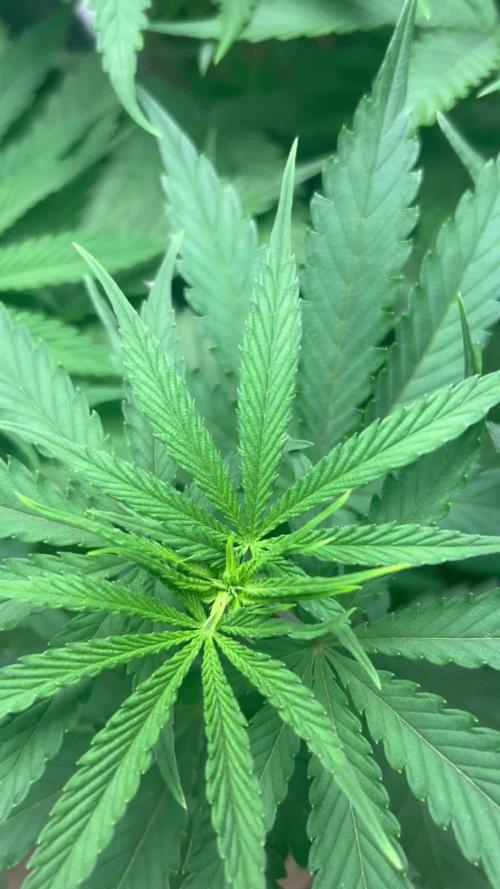
She's looking gorgeous on her 3rd week of life in this crazy world. Love this pheno and love how she's developing, let's see what we can do!


Likes
50
Share
@Igrowneil
Follow
Will update here with smoke and dryed report the drying is nearly done and about time for a cure , she smells great

Likes
25
Share
@HippyHemulen
Follow
Weather is starting to get warmer finally and now we can see she start growing little bit. Nothing issues or anything just little bit worried if she start flowering like in next week cause its already 3 weeks veg to autoflower. 😊
Likes
2
Share
@JamrockGrows
Follow
16/07 - Week 6 of veg and the ladies are looking very happy after their last watering yesterday. I added some nutes for flowering and they are about to reach the scrog net. I will flip in a few days when the Lemon skunk grow hits week 6 as well.
18/07 - Watered with just water phd at 6.8. Gave both of them 1L. One of the plants had some burnt/curling tips so I increased the light by 5 cm. Three more days until flip. I’m expecting a lot of vertical growth in the next few weeks.
21/07 - I watered the brown pit with 1L of water. The other pot still felt a little heavy so I’ll water it tomorrow.
Hope you have a great day!
Peace

Likes
21
Share
@Karamellu
Follow
With a bigger pot could have definitely pulled off more but very happy with the result and quality of buds produced.
Likes
11
Share
@Young_agronomist
Follow
Всем привет 👋
Сегодня 02.10.23- и 94 дня от прорастания и 34 12/12.
На данный момент это мое любимое растение !
Она имеет множество крепких веток и ровный навес . Шишки и листья супер липкие …просто жесть)
Растяжка замедляется .
Я продолжаю изредка убирать большие листья и радоваться проделанной работе .
Спасибо за отличную генетику
