


Likes
11
Share


@YeniHarman
Follow
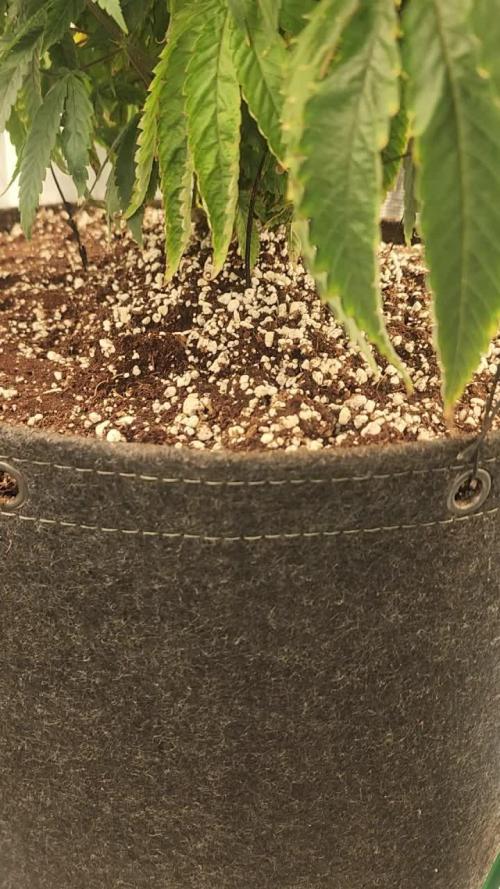
Saksı değişimi yapıldı. (7 - 26L), 80*80 kabinden 60*60 kabine alındı.

Likes
10
Share


@Herbz_Unkraut
Follow
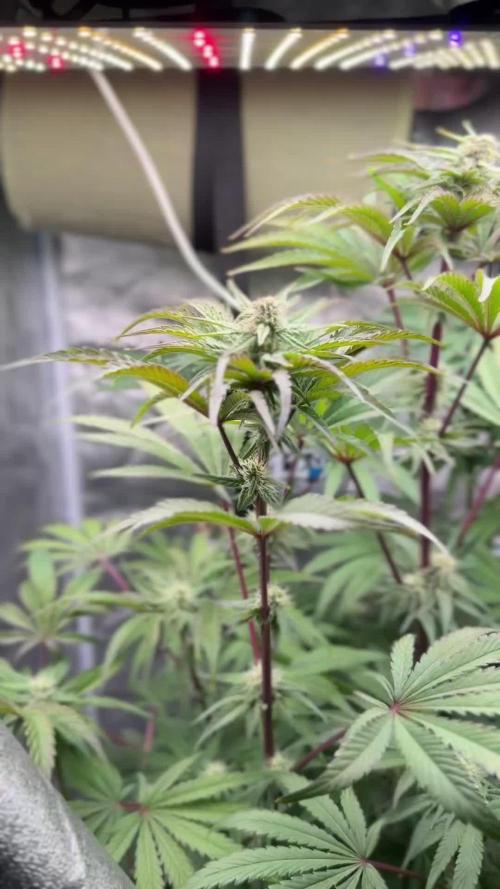
nice strain with a rich terpene profile! sweet, gelato like, hard hitting smoke!
sadly my phenos had no banana taste but still very nice

Likes
7
Share

@GREENPHOENIX6262
Follow
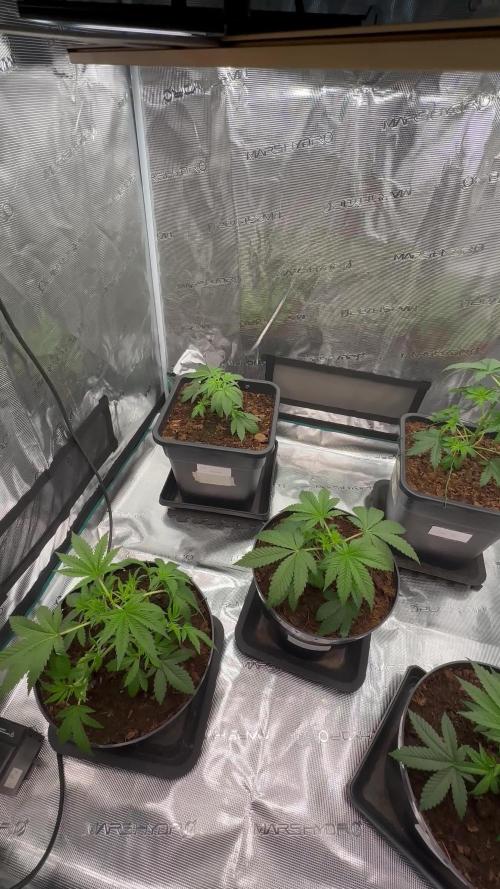
01/19 - Tied her down completely (HST) - full light coverage - running in 2x2 until clones in 3x3 are complete then transplanting into 3x3 - offsetting clean water and nute feeds.
01/24 - She got a little funky on me a couple days ago after the tent and light transfer, She is in recovery mode right now - She should be back to norm by Mon - Tuesday.

Likes
10
Share


@Gutismoke102
Follow
Just feed the girls some compost tea and overall they look healthy growing stronger by the day... she has a lot of bud sites and is getting thicker by the day

Likes
11
Share


@Gonach
Follow
Se comienza a completar la carpa con la técnica scrog. Quizá sea muy poco 2ml/l de biogrow, se está notando el deficit de nitrógeno colocandose hojas de color amarillo como pueden apreciar en las fotografías, posiblemente producto de la cantidad de fotones entregados por el LED, que es de 240 Watts.
¿Como poder regular la falta de nitrogeno, a puertas de pasar a floración???

Likes
16
Share


Likes
2
Share


Likes
1
Share


@kauilmayel1996
Follow
Me está gustando mucho como huele
Muy frutal
Estoy agradecido ya que las plantas resistieron y siguen creciendo
Revisando parámetros y limpiando
Alistando para el día de corte


Processing
Likes
20
Share


@French__flair
Follow
Dernière semaine de croissance.
Changement de solution fait le dimanche 22/11 car le ph commençait à descendre en dessous de 6.2 et cela faisait 1 semaine que j'avais fais le précèdent changement.
Le PH lors du changement était de 6,8. Il est monté jusqu'à 7.5 mais je laisse le filtre faire son oeuvre. Il est actuellement à 7.1 et continue de descendre naturellement.
carence en fer. Ajout d'une dose supplémentaire de Sensi CalMg
Edit au 25 :
Malheureusement ce que je sentais venir est arrivé, saturation en N.
Le Ph et l'EC continuaient de baisser tous les deux. Les parties basses des plantes étant sombre et ayant une carence en fer sur la partie haute (puisque élément mobile), j'en ai déduit que c'était une carence en fer induite par une surfertilisation en N. J'étais à un EC de 1, je suis revenu à 0,8 le mardi 25 au soir. La bioponie est très capricieuse au niveau de l'azote. Le mercredi 26 le ph remonte ce qui signifie qu'on a stopé le processus de dégradation du N. Je devrais changer la solution mais je dois passer bientôt en flo donc j'ai enlevé de l'eau et rajouter, histoire de tenir jusqu'au prochain changement de solution qui est prévu samedi sauf si la situation dégénere de nouveau avec le PH.
Last week of growth.
Change of solution made on sunday 22/11 because the ph was starting to drop below 6.2 and it's been 1 week since I made the previous change.
The PH at the time of the change was 6.8. It went up to 7.5 but I let the filter do its job. It is currently at 7.1 and continues to drop naturally.
iron deficiency. Addition of an extra dose of Sensi CalMg
Last update :
Unfortunately what I felt was coming has happened, N saturation.
Ph and EC both continued to drop. As the lower parts of the plants were dark and iron deficient (on top because is mobil nutrient), I deduced that it was an iron deficiency induced by N overfertilization. I was at an EC of 1, I came back to 0.8 on Tuesday evening the 25th. Biopony is very capricious in terms of nitrogen. On Wednesday the 26th the ph goes up which means that we stopped the N degradation process. I should change the solution but I have to float soon so I removed some water and added more, to hold until the next change of solution which is planned for Saturday unless the situation degenerates again with the PH.
Ultima semana de crecimiento.
Cambio de solución hecho el domingo 22/11 porque el ph empezaba a bajar de 6.2 y ha pasado 1 semana desde que hice el cambio anterior.
El PH en el momento del cambio era de 6,8. Subió a 7.5 pero dejé que el filtro hiciera su trabajo. Actualmente está en 7.1 y sigue bajando naturalmente.
deficiencia de hierro. Adición de una dosis extra de Sensi CalMg
Ultima hora :
Desafortunadamente lo que sentí que venía, la saturación de N.
El pH y la EC continuaron bajando. Como las partes inferiores de las plantas eran oscuras y con deficiencia de hierro, deduje que se trataba de una deficiencia de hierro inducida por la sobrefertilización de N. Estaba en un EC de 1, volví a 0.8 el martes 25 por la noche. La bioponía es muy caprichosa en términos de nitrógeno. El miércoles 26 el PH sube, lo que significa que detuvimos el proceso de degradación del N. Debería cambiar la solución pero tengo que flotar pronto así que saqué un poco de agua y añadí más, para mantenerlo hasta el próximo cambio de solución que está previsto para el sábado a menos que la situación degenere de nuevo con el PH.


Likes
3
Share


Likes
10
Share


@PEAKYPLANTERS
Follow
Hi guys, what's up
I had set up this very small tent to test my gardening skills but I have to admit that even on this occasion I outdid myself .. the rest I leave to you to judge
Likes
Comments
Share

@Budhunter
Follow
Lemon Cherry Pie apparently seems happy and healthy. Not super grown but going well.
I topped her on day 26 and soon I will start with some lst. Let’s go 💪🏼🙏🏼🙌🏼
Likes
38
Share


@DomanAtrik
Follow
I keep finding these little green caterpillars eating leaves 😑 Thankfully I also keep finding praying mantis. I really hope the Sensibloom with PH perfect fixes my soils high PH of 7.2.

Likes
49
Share


@masterofsmeagol
Follow
6/1 I'm anxious to get my plants in their final homes. Another 90 degree day today and then it will be cooling off with some showers. I plan to take advantage and utilize that to make the transition. I have some small burns on a couple plants bit considering the weather we've had its nothing. Temperature swings 50 degrees. I hope these girls do OK outside. I was tired and stoned last night and I accidently topped a plant I had already FIMed. Oh well. Transplants soon. Supports screwed in after the heat. Plants have been handling this weather like a champ. Big thick healthy stalks.
UPDATE PUT THE PLANTS IN AROUND 730. Cutting down on light hours I'm poverty close to where we are. It was 95 today. Plants have suprisingly little burning. My fan was taken so they go without that tonight too. In the next few days it's going to cool down and that's when I'll transplant. Only thing left before transplant is sanitizing trellis and supports. Easy peezy. Especially if it's supposed to be in the 50s. And people dent climate change lol. I'm hoping that all this adversity makes my flower a higher quality. I'm glad to have the quantity to pick the best phenos for the BIG POTS. Im trying to stay excited but it's just so dumb hot. Oh well. If the plants can do it so can I. I'm planning to give them some kelp me kelp you next watering and may start some light organic nutes.
6/2 Phone doesn't like uploading my videos. Broke record high temp yesterday 95 and tomorrow we will break the record low 50. Plants withstood the heat well and are doing great. Transplant soon. They were a little light but I held off on the water. Plan on it tomorrow. May transplant tomorrow. I have several videos that haven't uploaded. I thought they did but I was wrong. Oh well.
UPDATE: Forgot to water. Some were light and others could've held off. Did the half a powerade bottle ahain. A litt ke less on the heavier ones. However I'm looking to transplant into final homes tonight and into this weekend. I sanitized a fifty and a forty so my bags and two pots are sanitized. Cage is sanitized and ready and pallets are sanktized and in place. The 40 and 60 fit PERFECT in the small space left from the pallets. Plus the plants always lean the opposite direction so things should go smooth. Only thingvleft is sanitizing stakes, bamboo, plastic garden stakes and all the other plastic training stuff. I'll just soak it while I transplant. Gotta mix the soil first too though.
UPDATE. Heat went higher than expected and hit 90. I figured I'd go back around three and screw in suppirt stakes and begin getting everything ready for transplant (i.e. supports, mix soil, sanitize trellis) before I transplanted tomorrow MORNING was what I had planned. Unfortunately we got a huge thunderstorm with a shot ton of rain and it's gonna continue throughout the night. I think this is God's way of telling me to take a break. I can get up early and get those support stakes screwed in. Then when I get back from the wife's doctor's I can do the transplants. I'm trying to break the labor up into manageable chunks. Looking at my other diaries I can see that my plantscare fine in their three gallon homes. It'd a little disheartening seeing such big clones that I started so much earlier on the other diaries. However I always was fighting SOMETHING (usually more than one thing) and last year was a shit show. At least this year I stay away from anyone else's cannabis any clones and I'm extremely cautious. I've seen my cousin out perform me multiple times with healthy plants like this I'm excited to see how it goes. I really needed the break anyway but tomorrow morning the stakes will be in. Hopefully they'll be outside.
6/3 Broke the record for low days after breaking record for highs. I saw it 94 yesterday and the day before. On the way to my grow at 6am it was 44 degrees and it's not warming up much. Fifties at best. Rainy. I left the door closed. The big door on the otherside got opened as the other end of the garage neededcto he used. If the rain let's up I'm going to set up the grade stakes so I can transplant in the morning and throughout the day. I think I'm going to light dep a couple of them and leave them in the 3's. We'll see.
UPDATE: At 12:30 the temp today was 44. Yesterday it was 94. I can't believe this. Plants are doing great though and are in the garage under lights for the day. The BIG door was open part of the day. Didn't take any pictures (or even enter the grow area) as I sanitized the last 40 gallon pot and a bunch of grade stakes. I drilled the grade stakes to the pallets in the front. The first row is done. Just need to sanitize the plastic trellis itself and finish attaching the other grade stakes. I don't need the fill trellis up by transplant. I just need the bags to not knock over and have SOME support. I'll be back over there either to tonight to put more supports in or tomorrow when I actually plan to start transplanting. I'm getting excited. After dealing witb the stiff that I sanitized I didn't dare go fuck with my plants so I looked through the window. I'll finish sanitizing the net tomorrow. These plants look great. I'm wondering if doing the two diagonal I poles with zipties actually works. It would save me some kone for sure. I'll definitely update in the morning.
6/4 It's warmed up to a balmy 44 degrees. My plantsxare in the garage still. Weather sucks this whole week but after this heavy rain it should be perfect weather to transplant these girls. A little to chilly but it will warm up and I need to get this shit done. I'm trying to do to much at once. I need to just out dirt in bags and get them outside. I'm glad I waited until after this craziness. Breaking temp records for high one day then breaking it for low the next can't be good for the plants. I'll update what gets done today. I may mix soil or I might wait until tomorrow. It will let up some then. Plants still look fabulous 👌
6/5 50 degrees still raining like hell. Rain until Friday. Plants are inside under the onecworking light. Lots of indirect light through the massive windows though. I'm planning on mixing soil today and tomorrow and getting bags and pots half filled. Just trying to break the labor up into manageable pieces. It's probably a good thing I didn't put them in their huge containers before all this rain.
UPDATE: MIXED SOIL 1/3 of each (FOX FARM OCEAN FOREST, HAPPY FROG, AND ROOTS ORGANIC 707). I prepared I believe 11 containers for transplant. I need to sanitize two more containers and I'm good. I got a lot done. Might go back over. Set up extra cams too. I'm excited. Talked to my commercial buddy amd he motivated me. No reason my plants can't handle this shit. I've just had massive personal shit going on. Friday is the next GOOD day but these girls might go out earlier. I'm checking the forecast. I'll sanitize the other containers in the morning and fill them.
6/5 Today is usually my watering day but shit still seems heavy so I'm going to hold off. Despite that i need to transplant. I think they're wet enough. I could do it today. Plants are looking good and weather takes a better turn Friday. It's not raining hard though. It's just sprinkle right now. I may transplant some today depending on how things go. I'll keep the diary updated.
UPDATE: I went back over with the intent to just mix soil and let it acclimate. I decided to try to transplant one. I grabbed a 10th planet and started to go. I had done a bunch of manual labor already so i wasn't thinking. Of course the fucker was dry and didn't wanna come out ofcthe pot and the root ball pretty much decintigrated in my hand so I'm not sure how that will go. Tried again with the Blueberry Cheese Cake. I thought the roots just might not have been rootbound abdcthat could've been the case. After having another rough transplant I recognized I was tired, all the hard stuff is done and it's gonna keep raining until Friday. I wanted to transplant three and put them outside but with the wind and rain and the difficult transplant I let them sit under the light in the garage in indirect light. I had the doors open for a while. Should be open now but i don't want to have to go back over and shut it. Plus I'm not to keen on getting water on my light. Let's hope for a better day tomorrow. This was the only thing I had going good. Phrple punches are still behind. I've decided I'm oing to light dep ttwo of the plants in the 3 gallon pots. The two shittiest or smallest plants (probably purple punch will be light deped.
WENT BACK OVER AT FIVE AND IT APPEARS EVERYTHING IS ALRIGHT. WILL HAVE CHECK IN MORNING. Vid won't upload. Tried multiple times. I'll try again tomm.
6/6 Waiting for a doctor's appointment when I should be transplanting buy whatever. Everything is looking really good. Despite me disint9grating the rootball in my hands the two transplants look great! When I get back I'm planning to get some more work done. It's still lightly raining off and on but the door is up. I'm lettingvthe soil mix acclimate a little bit too. Hard labor is mostly done. Now the intricate part. Wish me luck. Not sure if it will be today bit I'm hoping.
WENT BACK OVER CAUSE IT WASNT RAINING BUT AS SOON AS I WAS CLOSE IT STARTED POURING SO THE PLANTS ARE UNDER THE ONE WORKING 150HPS AND THE AMBIENT LIGHTING FROM THE WINDOWS. TOMORROW IS TRANSPLANT DAY. I WONT HAVE A VEHICKE SO IT WILL BE TRICKY BUT IM GONNA MAKE IT HAPPEN. Opened doors at 530. Video still didn't upload
6/7 Still raining. It's off and on and a nice rain though. It's 53 degrees at noon. I transplanted two 10th planet's into 20 gallon pots. I transplanted these two a little differently. I put the bags in there final spot I side my cage andctransplanted in the misting rain. The first one came out and seemed to be heavier on the bottom and broke off. I tend to "throw" them in the hole before they collapse. With my anxiety I suck at transplanting. Plus these plants haven't filled the 3 gallon pots with roots yet but i want hem in their final homes and its time to go outside. I transplanted the other two plants indoors and let them have days in the garage with the door open and the light on then protection from the elements at night. I've been doing this for awhile. They would all be outside if the weather wasn't so shitty. This rain is supposed to stop. I'm curious as to what will be the fate of the two plantsci transplanted and left outside. I'm praying and hoping for the best. I also put my back tarp up so I have a wind break between rhe buildings. I stopped working because I didn't want to fuck anything up. Anxiety disorders suck. TOOK A BUNCH OF VIDS BUT THEY WONT UPLOAD. GOES FROM 9% TO 65% BUT ALWA7S TURNS RED "FILE FAILED TO LOAD". I'LL KEEP THE DIARY UPDATED. ESPECIALLY IF I GO BACK OVER. WAS ABLE TO LOAD A COUPLE VIDEOS. I GUESS ITS NOT AS BAD AS I THOUGHT. AT LEAST I HOPE. WENT BACK OVER AT 3 AND CHECKED THINGS OUT. THE TWO REXENT TRANSPLANTS I LEFT OUTSIDE SEEMED TO BE IMPROVING. DESPITE THE FACT I DUMPED A SHIT TON OF SOIL ALL OVER ONE OF THEM. IT SNAPPED A LITTLE BRANCH CLOSEST TO THE SURFACE. ITS STUFF I'LL REMOVE ANYWAY BUT STILL. IM REALLY CROSSING MY FINGWRS AND PRAYING THESE GIROS WILL MAKE IT. With everything i have going on tjis is my respite.IM GOING TO TRY TO SEE WHAT I CAN ACCOmplish TOMORROW. SOME OF THE PURPLE PUNCHES ARENT READY FOR TRANSPLANTING THOUGH. I ALSO ADDED TEO TARPS TO THE CAGECTO COVER THE WIND TOWER BETWEEN THE TWO BUILDINGS. THIS IS GOING TO BE A GOOD YEAR! Shut the door at seven. For some reason the two 10th planet's I transplanted (that fell all over the plant and I thought mightve broke it) look awesome lol. Despite the ridiculous pouring rain. It's going to let up soon and we are do fir some good weather. I'm trying to get everything (that isn't getting light depoed) into the cage. Four transplanted. Ten (I mean 8 more) to go.
Processing
Likes
7
Share


@greenthumb_fredro
Follow
using soil so im still only watering wit 30 ppm of only calmag since im using 0ppm ro water
