


Likes
Comments
Share


@GanjaJack
Follow
Really impressed with this SCHLUX SZ-PT400 light. Done another round of LST really bringing th bud sites to the light. Also been tucking my bug fan leaves, don't believe in trimming autos. Captain Redbeard Seeds are really impressive at this point. Will be top dressing with Coast of Maine lobster compost, as well as worm castings and the OG bloom dust. Happy growing

Processing
Likes
12
Share


@HylianGrass
Follow
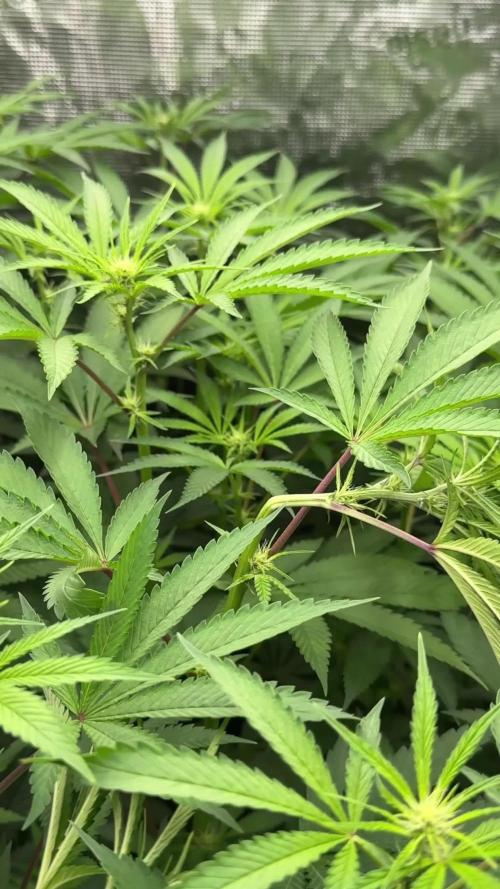
This is it! the start of the most unforgiving part of growing weed, now i have to chek my girls more than i did and wach the climate carefully as a mistake could significantly reduce potency or total yield . The smell of this strain is just beyond pleasant, sweet cirus arome fills the aire everytime i open the growbox and each time getting the same looks and same awnser , DUDE smells just like fucking lemons
Likes
10
Share

@DogDoctorOfficial
Follow
💙 Project Blue Tent – Week 9
Blue Waffle F1 – Pheno A
🌿 Too Much Stretch, Then a Big Reset
Hello everyone, and welcome back to another chapter inside Project Blue Tent! 💙🌱
If you're new here, Project Blue Tent is our little experiment with four individual Blue Waffle F1 plants from Zamnesia, each documented separately from seed to harvest.
All four girls share the same environment, lighting, irrigation, nutrition and general cultivation philosophy.
And yet, as always...
they each have their own personality.
Last week I was wondering just how much these girls were going to stretch after seven weeks of vegetation.
Well...
I got my answer. 😂
They stretched.
A lot.
And this week became one of those weeks where the grower has to stop watching and start acting.
The plants were getting simply too tall.
With the height of the pots and substrate, the drainage system underneath them, and the distance between the canopy and the LED fixtures becoming increasingly limited, some of the tops were getting dangerously close to the lights.
So we made some changes.
A fairly big reset, actually.
And looking at the room now?
I'm very happy with where we landed.
🌿 Pheno A – She Took the Invitation to Stretch Seriously
Plant A is now approximately 145 cm tall.
😂
Yes.
One hundred and forty-five centimetres.
And when you add the height coming from the pots, substrate and drainage arrangement underneath the plants, that number becomes even more relevant when you're working inside a relatively limited vertical space.
Last week she was already moving quickly.
This week she basically said:
"Hold my nutrient solution."
😂💙
The structure she built during those seven weeks of vegetation gave her an enormous amount of material to work with.
The SCROG distributed that growth beautifully.
But once flowering stretch really kicked in, all of that established structure began pushing upward.
And eventually...
we simply ran out of comfortable vertical room.
So rather than fighting the plants continuously, we changed the room around them.
🕸️ The Second SCROG – Because These Girls Are Getting Big
One of the biggest changes this week was the installation of a second SCROG net.
This wasn't done because the first net failed.
Quite the opposite.
The first net did exactly what we wanted during vegetation:
It helped distribute the plants horizontally and build an even canopy.
But now these girls have become much taller.
And as flowering progresses, those branches are going to become heavier.
So the second net is there for something different:
support.
We're essentially creating another layer of structure through the upper portion of the plants.
This gives the flowering branches something to lean against as the flowers develop and gain weight.
And with plants this tall, I would much rather organize that structure now than discover later that a heavy flowering branch has decided to take a dramatic trip toward the floor.
😂
The second net also helps keep the canopy organized after the major defoliation.
And looking at the room now...
I think it was absolutely the right decision.
✂️ The Big Defoliation
And then came the other major event of the week.
Defoliation.
Not a little cleanup.
Not removing three leaves and calling it a day.
We went deep.
The room had become extremely dense, and with the plants stretching this aggressively, we needed to open everything up.
We removed leaves where they were creating unnecessary congestion and took out foliage from stems where appropriate, leaving the productive growth and flowering structure we wanted to carry forward.
This wasn't about making the plants look naked.
It was about making the structure functional again.
And there's an important distinction here.
We're not defoliating because removing leaves magically creates more flowers.
That's not the objective.
Leaves are valuable.
They're part of the plant's photosynthetic machinery.
The objective here was to manage excessive congestion, improve visibility through the canopy, increase air movement through the plant and reduce the amount of unnecessary foliage competing for space around the developing flowers.
We're trying to create a better working environment for the plant.
Not punish the plant.
Not stress it for the sake of stress.
And certainly not remove every leaf we can find.
🌿 What We Expect From This Defoliation
Now comes the interesting part.
After a significant cleanup like this, I don't expect the plants to immediately look like they're growing faster.
Quite the opposite.
There can be a period where they need to settle.
They've lost a considerable amount of leaf area.
We've physically changed their architecture.
So I expect the plants to spend some time adjusting and continuing their transition into flowering.
What I'm hoping to gain is something different:
better structure.
Better airflow.
Better light penetration.
Better access to the flowering sites.
Less congestion.
And a much easier canopy to manage as the flowers continue developing.
Will it completely stop the stretch?
No.
I wouldn't expect that.
The plants are already well into their flowering transition, and genetics, plant maturity and environmental conditions still have a huge influence on how much they stretch.
But by removing excess congestion and adding the second SCROG, we've made the remaining structure considerably easier to manage.
Now we watch.
🔥 A Few LED Burned Tops – And We Caught It
There was another little lesson hidden inside all that stretching.
Some tops had gotten too close to the LEDs.
And we saw a few leaves and flowering tips showing signs of LED stress/burning.
Nothing catastrophic.
Nothing that concerns me at this point.
But definitely something we needed to address.
And honestly?
I'm glad we caught it now.
Because once the plants were getting that close to the lights, we were already running out of room to work with.
So we attacked the problem from several directions.
We moved the ventilation equipment outside the tent.
We raised the LEDs.
We opened the canopy.
We installed another SCROG.
And suddenly...
we gained some valuable vertical breathing room.
That little bit of extra space can make a huge difference inside a tent.
🌬️ Moving the Carbon Filter & Extractor Outside
Another major change was moving the carbon filter and extractor outside the tent.
Previously, having that equipment inside the tent was consuming precious vertical space.
And with these girls reaching toward the lights, every centimetre suddenly became valuable.
So we moved the filter and extractor to the top of the tent.
The system now pulls air from the tent through the carbon filter and extractor and then exhausts it outside.
This gave us the space we desperately needed.
And that allowed us to raise the LED fixtures closer to the top of the tent rather than having the ventilation equipment occupying that valuable ceiling space.
It sounds like a relatively small modification.
But in a tent with plants this tall?
Huge difference.
Sometimes the solution isn't changing the plant.
Sometimes it's changing the room around the plant.
😂💙
💡 More Room for the Lights
And this is one of the most satisfying results of the whole operation.
Once the ventilation equipment was moved outside, we could bring the LEDs higher.
That immediately created more separation between the flowering tops and the fixtures.
The few areas that had experienced LED stress were addressed before things could become serious.
And now we have much more room to work with.
That's exactly what I wanted.
Because I don't want to spend the remainder of flowering constantly fighting the ceiling.
I want these girls to have somewhere to finish.
They already have plenty of height.
Now we need them to put their energy into the flowers.
🌬️ Two Fans – Creating a Vortex
We also added a second Zamnesia clip fan, positioned underneath the canopy.
So now we have:
One fan above.
One fan below.
And the goal isn't simply to make the leaves move.
We're trying to create a more complete circulation pattern through the tent.
With one fan moving air across the upper canopy and another helping move air underneath, the airflow can circulate through different levels of the room rather than leaving the lower portion relatively stagnant.
The idea is to encourage a kind of vortex-style circulation through the canopy.
Air moves.
Circulates.
Changes direction.
And continues moving through the plant structure.
This is particularly important now because we've spent the week opening the canopy and creating space.
There's no point creating all that space if the air simply sits there.
So now we've got airflow working from above and below.
And looking at the room?
It feels considerably more alive.
🌿 The Room After Defoliation
I have to say...
I love the way the room looks now.
Before the defoliation, it was an absolute jungle.
Beautiful.
Healthy.
But incredibly dense.
Now?
You can see the architecture.
You can see the branches.
You can see the flowering sites.
You can see the second SCROG.
You can see the airflow equipment.
And most importantly...
you can see the plants.
😂💙
The room feels organized again.
And that's exactly what we needed.
These girls have been growing extremely aggressively.
Now we're giving them a structure in which that growth can actually be managed.
✂️ A Word About Scissors
I also want to mention something that might seem insignificant but is actually very important to me.
The Zamnesia curved scissors.
I really like these.
For much of my defoliation, I actually use my fingers.
If a leaf can be gently removed without cutting anything else, that's often my preference.
But that's not always possible.
Some leaves are tucked into awkward places.
Some are smaller.
Some are delicate.
Some require a precise cut.
And that's where the scissors come in.
But there is one rule I don't compromise on:
Clean scissors.
Always.
Even when they're brand new, I still like to make sure the scissors are clean before using them.
When you're moving from plant to plant and making multiple cuts, cleanliness matters.
We're working with living tissue.
So there's no reason to introduce unnecessary contamination into the process.
Clean tools.
Gentle hands.
Deliberate cuts.
And don't cut something just because you happen to have scissors in your hand.
😂
💙 Pheno A After the Reset
And now...
let's come back to our girl.
Because despite all the work this week, Pheno A looks fantastic.
She's still one of the larger structures in this tent.
She's tall.
She's vigorous.
She's got plenty of flowering sites.
And after the cleanup, her architecture is much easier to appreciate.
The plant has gone from:
"How the hell are we going to fit all of this in here?"
to:
"Okay. Now we have a plan."
😂💙
The flowers are there.
The structure is there.
The health is there.
And now she has additional support underneath her developing flowering branches.
This is a very good place to be heading into the next stage.
🌸 From Building Plant to Building Flowers
This is the transition I'm most interested in now.
Up until this point, so much of the conversation has been about growth.
Height.
Branches.
SCROG.
Canopy.
Stretch.
But now?
The plant has done enough building.
I want to see her start putting more of that energy into flowering.
The architecture is established.
The second net is installed.
The canopy has been opened.
The lighting has been raised.
The airflow has been improved.
The room has been reorganized.
Now we let her work.
And hopefully...
the next photographs will show us exactly what all that preparation was for.
Beautiful flowers getting bigger.
💧 Nutrition – The Girls Are Hungry
Another important development this week is nutrition.
The girls are absolutely loving the feeding.
So we've increased the Hydro A and Hydro B recipe slightly.
We're now running:
Plagron Hydro A — 2.2 ml/L
Plagron Hydro B — 2.2 ml/L
Plagron Hydro Roots — 1 ml/L
Plagron Power Buds — 1 ml/L
pH adjustment as required
That small increase has brought the EC up accordingly.
Current recorded EC is approximately 2.49 mS/cm.
And again, this wasn't some dramatic change.
It was simply a small progression because the plants are consuming aggressively and showing us that they are ready for it.
They're growing.
They're flowering.
They're drinking.
They're hungry.
So we listen.
And we adjust.
That's the whole philosophy.
Don't feed a number.
Feed the plant.
🌡️ Week 9 Environment
The current recorded conditions are:
🌸 Flowering: Week 9
📏 Height: approximately 145 cm
💡 Light schedule: 12/12
☀️ Day temperature: 27°C
🌙 Night temperature: 27°C
💧 Relative humidity: 67%
⚗️ pH: 6.01
⚡ EC: approximately 2.49 mS/cm
🌡️ Solution temperature: 25.3°C
🌱 Substrate temperature: 24°C
🌬️ CO₂: approximately 666 ppm
? Pot size: 8 L
💦 Watering: approximately 1.6 L per plant / 24h
The environment remains remarkably stable.
And that's especially valuable after a week where we've physically changed so much of the room.
The plants have enough to deal with simply adapting to their new architecture.
I don't want environmental instability adding another variable.
So now...
stability.
Consistency.
Observation.
🔬 Same Room. Same Conditions. Four Different Girls.
One thing that's fascinating about this particular project is how uniform the room remains despite the plants being so vigorous.
The four Blue Waffle F1 girls are remarkably similar.
They all went through the same long vegetative period.
They all experienced the same lighting.
They all received the same irrigation.
They all received the same nutrition.
They all experienced the same environmental conditions.
And now they're all showing that same general flowering transition.
There are individual differences, of course.
That's what we're documenting.
But overall?
They are behaving like sisters.
And that's making this experiment incredibly interesting.
🌿 What I'm Watching Now
After this week's reset, there are several things I'm going to be watching closely.
First:
How quickly does the stretch settle?
Second:
How do the plants respond to the heavy defoliation?
Third:
How does the second SCROG hold the flowering branches as they gain weight?
Fourth:
How does the new airflow pattern perform under a developing flowering canopy?
And finally...
How much of that beautiful vegetative structure is going to turn into flowers?
Those are the questions now.
We've done the work.
Now we observe the results.
🌸 The Big Lesson From This Week
If there's one thing this week reminded me of, it's that a grow isn't always about having a perfect plan.
Sometimes you make the best plan you can.
Then the plant laughs at you.
😂
We knew they might stretch.
We didn't know they'd stretch this much.
So we adapted.
We moved the ventilation equipment.
We raised the LEDs.
We cleaned the canopy.
We installed another SCROG.
We added another fan.
We adjusted the nutrition.
And now?
The room is looking better than it did before the problem appeared.
That's what I consider a successful grow.
Not avoiding every problem.
Recognizing them early and adapting intelligently.
🔭 Looking Ahead – Now We Let Them Flower
And this is where things get exciting.
The girls have been through a major reset.
The canopy is open.
The second SCROG is in place.
The LEDs are higher.
The ventilation system has been moved outside.
Airflow is now working from above and below.
The plants are receiving their updated nutrition.
And Pheno A?
She's standing there at 145 cm, looking at me like none of this was particularly dramatic.
😂💙
Now I want to see what she does with the room we've created for her.
Hopefully the aggressive vertical growth begins to calm down.
Hopefully the flowers start becoming the dominant story.
Hopefully the second SCROG gives us the support we need as those flowers gain weight.
And hopefully those few LED-stressed tops recover without further drama.
I think we caught that issue early enough.
Now we watch.
💙 Final Thoughts – The Room Is Back Under Control
What a week.
Seriously.
😂
We went from:
"They're stretching a little."
to:
"Okay, these girls are going to hit the LEDs."
And then we went to work.
The carbon filter and extractor moved outside the tent.
The LEDs went higher.
The canopy received a serious cleanup.
A second SCROG was installed.
A second Zamnesia clip fan went underneath the canopy.
Airflow now works from above and below.
The nutrition was increased slightly.
A few LED-burned leaves and tops were cleaned up.
And after all of that...
I look at the room and smile.
Because it looks beautiful.
The plants look healthy.
The structure is organized.
The flowering sites are everywhere.
And Pheno A is absolutely shining.
She's tall.
She's vigorous.
She's beautifully developed.
And now she's finally got some breathing room.
🌿💙
The defoliation wasn't about making her smaller.
It wasn't about forcing her to flower.
It wasn't about chasing some magical yield increase.
It was about taking an overly crowded flowering structure and making it more functional.
The second SCROG isn't there because we expect failure.
It's there because these girls have become substantial plants and we want to support them properly.
The second fan isn't there simply to make the leaves dance.
It's there to help create better circulation through the entire canopy.
Moving the ventilation equipment wasn't cosmetic.
It gave us precious vertical space.
And raising the LEDs gave us more room between the fixtures and the flowering tops.
Every change had a reason.
And now...
we wait.
The girls have done their part.
We've done ours.
Now let's see what Blue Waffle F1 Pheno A does with this new chapter.
Because I have a feeling the next few weeks are going to get very interesting.
💙🌸🌿
🙏 A Huge Thank You
A huge thank you once again to Zamnesia for making Project Blue Tent possible and for giving us the opportunity to explore these beautiful Blue Waffle F1 genetics phenotype by phenotype.
Thank you to Plagron for the Hydro nutrient line and everything supporting these girls through this very vigorous cycle.
A massive thank you to Zamnesia for the Phytonaut LED lighting and for the curved scissors and clip fan that have become part of the practical side of this project.
Thank you to Mars Hydro for the irrigation and drainage system that continues keeping these girls supplied while they absolutely demolish their water.
😂💙
And thank you to GrowDiaries for giving us the platform to document all of this craziness and share it with growers around the world.
Most importantly...
thank you to everyone following Project Blue Tent.
This week was definitely one of those chapters where the plants reminded us who's actually in charge.
We planned.
They stretched.
We adapted.
😂
And now the room is ready for the next phase.
Four Blue Waffle F1 girls.
One room.
One environment.
One very ambitious flowering canopy.
And a second SCROG ready to catch whatever these ladies decide to throw at us next.
Let's see how they finish.
Until next week...
More room. More airflow. More support. And hopefully a lot more flowers. 💙🌸🌿
Growers Love, happy growing, and take care everyone! 🌱💙
Likes
7
Share


@El_Bottanico
Follow
Hello.
Just a quick update as I didn't do much. only watering.
Mid 7th week, everything going fine in the tent, they are beginning to make some resin and smell,
Gave some microelements to see if the intervenal discoloration gets better. It didn't got worse in the last days anyway so I'm positive it won't be much of an issue in the end.
Ciao!




Processing
Likes
39
Share


@DjDaveAtHome
Follow
Plants are acclimating to the flower area and new 5 gal buckets. DinaMed's leaves were damaged by the Diatomaceous earth dusting. The colouring is mottled green and growth is twisted slightly. Defoliated both plants a bit. Now, a week to let them grow.


Likes
20
Share

@gr3g4l
Follow
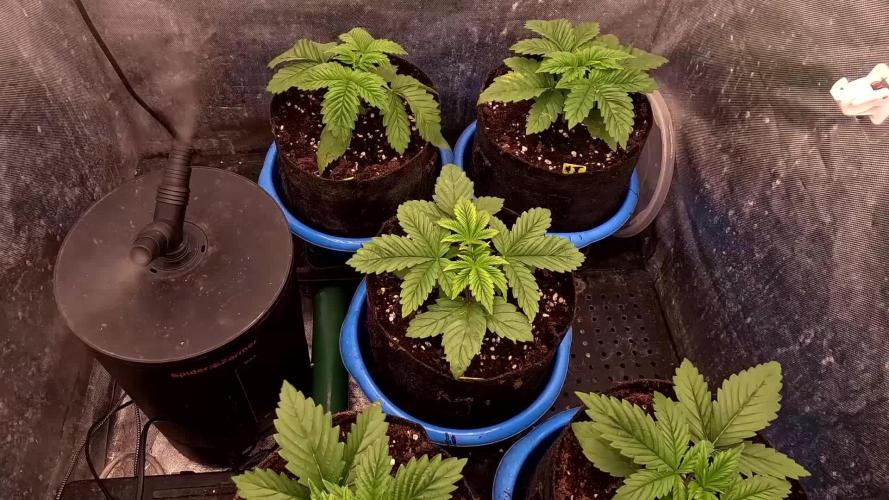
One week of topping.
After 19 days, they grew enough to safely cut the apical buds, and I also removed the first node from each plant, leaving only three nodes. A total of 6 branches per plant, which I will let continue growing. Later, before switching them to flowering, I will perform LST.
The plant structure clearly shows its indica dominance, with broad leaves, short turnudal distance, and a good thickness of the main stem.
At the end of the week, seeing that they were starting to get a good size, I increased the power or intensity of the light to 220W. And they will continue like this until I change the photoperiod to 12/12h and increase it to 300W.
Una semana de poda de apicales.
Con 19 dias crecieron lo suficiente como para poder cortar los apicales sin correr ningún peligro y también me deshice del primer nudo de cada planta dejando solamente tres nudos en cada una de ellas.
Total 6 ramas por planta que dejaré que sigan creciendo y más adelante, antes de pasarlas a floracion, les haré un LST .
La estructura de la planta muestra claramente su predominancia índica, hojas anchas , distancia inturnudal corta y un buen grosor del tallo principal.
A finales de semana visto que empezaban a tener buen tamaño aumenté la potencia o intensidad de luz a 220W. y así pasarán hasta que cambie el fotoperiodo a 12/12h. y lo suba a 300W.

Likes
111
Share


@Salokin
Follow
Hi Growmies,
I feel I had a root issue, may have even been root rod. So as I saw a few of the very deeply submerged roots turning brownish and decay, I decided to generously cut away the affected areas and cleaned everything with hydrogen peroxide as good as I could and then properly rinsed the whole system.
It seems, however, like she has started a whole new set of roots that started to submerge after I started feeding the orca from plant success (can be seen in the video below). Can highly recommend this product! She has also not show any signs of stress due the suspected root issues.
Other than that she is a super pretty indica lady :) almost crazy how symmetrical she is. I have trained all main colas horizontally until the canopy had evenly opened up. Now I will let her grow towards the scrog and depending on her stretch, I will flip her at some point towards the middle or end of next week.
Here is the code that’ll give you 20% in Zamnesia‘s online store, just input ZAMMIGD2023 at checkout.
Thanks for stepping by and until next week!
Likes
143
Share


@Tropicannibis_Todd
Follow
👉Alrighty Then👈
We are back this week and they are killing it 👏 😎 🙏 zero issues 😀
👉So we are now starting our forth week of Flowering and the stretch is almost done I hope , and the buds are pumping 🤪
👉I did a slight defolation and I've continue to emend my nutrients plan for full Flower ..... 👈
😳So I will be showcasing just 3 this round even thoe I am growing 7 plants 😳
👉Black Domina From Weedseedsexpress 👍
👉Permanent Marker From Weedseedsexpress 👍
👉Sleepy Joe OG From Weedseedsexpress 👍
The other 2 are repeats cause they are pure fire 👈 You can view these 2 in the 👉Summer Classic Diary 💪 Had issues with the Banana Biscotti germination, so it's way behind and also the extra seed I popped
👉Purple Oreoz From Seedsman 👍
👉Persian Pie From Greenhouseseeds 👍
👉Banana Biscotti From Seedsman 👍
👉Gorilla Cookies From FastBuds
Soil by Promix
Nutrients by Cronks
Lights by MarsHydro & Vivosun
Well this should be fun 🙃
Thanks to all my growmies out there for stopping by its much appreciated 👈
👉Happy Growing👈

Likes
20
Share


@ukterpdoc
Follow
Been going so well plants looking amazing they're going to find bigger pots by next weeks update and be in the veg room under there new lights and out of the tent lots more space and lots more light

Likes
31
Share


@Hempface86
Follow
Well, as you guys can see, I broke another branch which ended up topping her on one side, and she has this Y shape going on. I'm not mad about it.. Hopefully she ends up looking pretty cool.Been better yet smoking even better.. We have a few more weeks of veg before I have room to put her in the flower tent .. thank you for checking out my page.God bless and happy growing everyone ✌️

Likes
2
Share


@CannaIGrow
Follow
Transplant week! Some of the girls in the tent started to droop but this one didn’t! She’s looking pretty good to me
Come hang out with us in the discord!


Likes
Comments
Share


@Lynx_361
Follow
16.06.2025
The Plant's had a ruff time with me recently! I lost one branch from Number 1 (the short one in the middle). And I had no Time to give them the needet attention. And I did my last Topping. So from now on it's just waiting till flower.

Likes
2
Share


@Trinidad
Follow
Another week complete. As usual pH problems and accompanying nutrient deficiencies. Keeps swings up every 12hrs. Flowers are stacking in size now. Fingers crossed I can make it to the end. Added final part nutrient today, heading into week 8.
1st indoor, 1st auto.
Likes
57
Share


@Kmikaz420
Follow
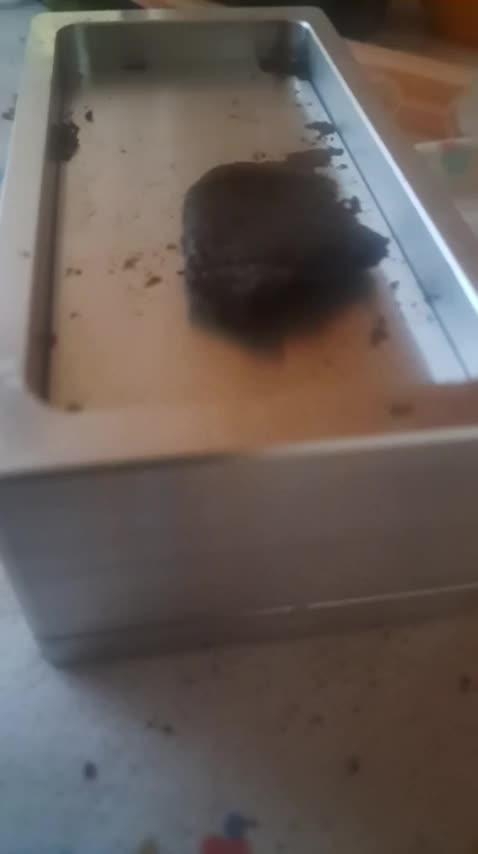
Alors aujourd'hui je fais du BHO et pour vous remercier de votre fidélité je vais vous montrer ma méthode (que j utilisé dans le passé (j ai depuis acheter du matériel un peut plus professionnel ;)
Alors pour tous sa il vous faudra
=1..2 seringue de 300ml ou plus dispo sur mamazon
= des filtres à café (NON BLANCHIE !!!)
=des colier de serrage pour fixer les filtres.
= et bien sûr du gaz (butane et en général je prend du gaz filtrer 12x pour éviter les saleté qu il peut y avoir dans certain gaz .
=et enfin il vous faudra un bol pour récupérer tous le nectar^^
(J UTILISE DES MOULES A GÂTEAUX EN SILICONE (rien qui accroche)
Mais si vous utilisez un extracteur en plastique et ou un moule en silicone il faudra absolument prendre du butane et non pas DME =CAR LE DME ENMENE DES PARTICULES DE SILICONES EY DE PLASTIQUE LORS DU GAZAGE
Voilà voilà je vais commencer et prendre des vidéo au fur et à mesure que je vais poster pour vous montrer .
Après 1heure de dégazage vous aurez une fine couche ai fond qu il va falloir travailler pour y faire rentrer de l air (ne t inquiète pas j vais poster une vidéo se soir ou tu pourra voir comment faire..)
Le crumble est je pense la seul sorte de bho que l on peut faire sans trop d équipement (pour le reste il faudrais evaporatrice rotative ou autre etc )
Avec le crumble c est votre main qui fais le travail = l objectif est que l air touche toute les partie de la patte comme sa le gaz sort et l air oxyde les trichome etc etc

Likes
28
Share


@SmokingTiki
Follow
No fertilizer this week. I harvested the Apricot and the Pound Cake. I will wait one more week for the Orange Sherbet because it doesn't seem ready even if it's in the Fast Buds harvest range. This week should be the last "flowering" week, next ones will be the harvests. I don't want to add another flowering week just for the Orange Sherbet, there will be nothing to see that will not be included in the harvest.
During half of the grow, the weather was really bad, especially for the summer period. The worst weather was during the vegetative phase. The plants didn't receive enough light which resulted in poor roots and leaves development. Because of that, the plants didn't have the chance to grow nice buds even if the sun was there during most of the flowering phase. Last summer, I grew a Tropicana Cookies (also from Fast Buds) in a tiny pot at the exact same spot and had better results despite the smaller pot. I didn't record the sun for that year but the weather was better from what I remember. I'm disapointed by the weather but cannot blame the plants. You cannot expect beautiful plants and buds if they don't have light 😞 In the end, my summer grows are more like bonus grows (my main grows are under a light in the winter) and I make them just for fun and to be able to taste new weeds without too much investment. So, mission accomplished 😎
Parameters :
-------------------------------------------
Humidity range : 30-70% depending on the sun
Temperature range : 22-30°C depending on the sun
SUN Average : sunny
Likes
Comments
Share


@Santaclaus
Follow
Día 40 me ha dado carencias de calcio magnesio y posforo y potasio, me he dado cuenta un poco tarde... Las hojas estaban caídas y se me estaban poniendo amarillas con manchas marrones...les puse calmag y empezaron a buscar la luz ... También me di cuenta, que las Lili que no veía se me ponían las hojas moradas, creía que era exceso de nitrógeno, pero no era posforo y potasio... Así, que lo que no quería hacer, lo he hecho he metido a tope de nutrientes y más... Espero no liarla más...

Likes
10
Share

@eldruida_lamota
Follow
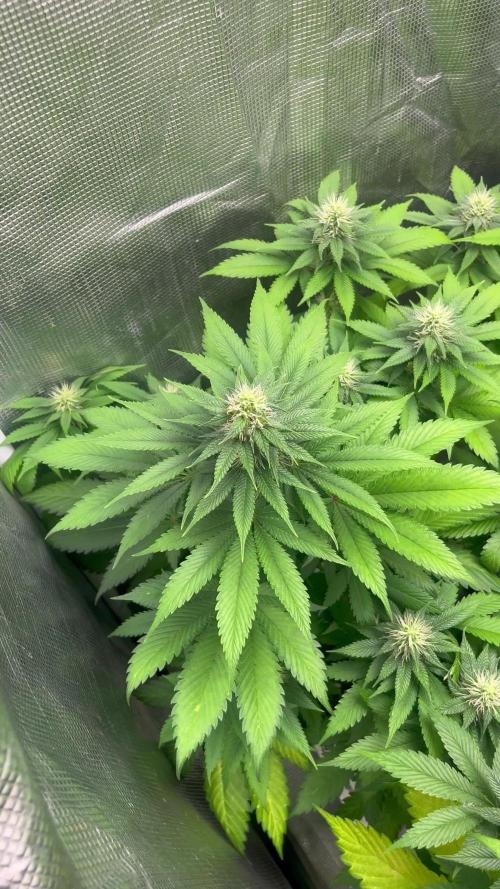
Venga familia actualizamos la cuarta semana de floración de estas Oreoz USA de Kannabia seeds.
Tienen un color bien verde sin carencias por el momento y se ve que están sanas, las plantas están en macetas de 7 Litros definitivamente, con tierra top crop, con una altura similar a 40 cms.
Empezaron a salir pelitos y van formándose las flores con un progreso adecuado.
Añadí también tiras de color azul / amarillo para prevenir y controlar mejor el tema plagas.
El riego que aplicamos son 800ml de agua cada 48 horas y el ph se controla en 6.5, la temperatura la tenemos entre 22/25 grados y la humedad ronda el 50%.
El mismo día que escribo esto el foco está al 100% de potencia. Me gusta subirlo muy progresivamente, las manías.
- os dejo por aquí un CÓDIGO: Eldruida
Descuento para la tienda de MARS HYDRO.
https://www.mars-hydro.com
- los nutrientes directamente desde https://agrobeta.com/agrobetatiendaonline/36-abonos-canamo
• Estoy muy agradecido por el aprecio y la acogida a todos los que me seguís, tanto a seguidores como a marcas que apoyan todos estos proyectos, aquí seguiremos cultivando y aportando nuestro pequeño grano de arena a este gran sector.
Hasta aquí todo, Buenos humos 💨💨💨

Likes
3
Share


@FastbudsFanatic
Follow
Last few days of feeding for strawnana
Second week of flush for gelato