
Likes
Comments
Share


@JerMeds
Follow
Day 43 Update. Well the tall girl stretched past my lights maximum height. So I LST her main branch. See the first 2 pictures. 😀
Its very hard to capture there true beauty with just pictures so I took a video. So give it a watch.
Well they exploded this week. The big one doubled her size and I had to move her down too the bottom level because she pushed her LED light out of her way to grow past it. Other ones only gained 5-10 inches. Very happy with these girls. 5 of them got defoliated, the other 2 didn't really need it.
I was able to give the 6 bigger girls 2 shots of Bud Igniter before I ran out. I will have to get some more when I have the money.
However I did just get Nirvana at the beginning of the week and they seem to love it. I'm still being careful I don't want to over feed them.
The 7th one is still in veg at day 28. She got LST and defoliated 2 days ago but now you can hardly tell. I don't think she has even started stretching yet. She could be massive.
They are being watered/feed every 1-2 days now.

Likes
60
Share


@Cannibalgardens
Follow
This girl has been packing on some weight now and has started to get a lot of crystal forming on my sugar leaves.The long white hairs are really filling the gaps now on the internode spacing thisgirl is beautiful.smell is still very lemony ans skunky the plant smells so strong i love it these dinafem genetics are amazing.ive been feeding her same levels nutrients i might upit a bit, cant wait to harvest this beast ....

Likes
Comments
Share


@BIYEI
Follow
Plantula 12-11-2024 a 21-11-2024
Semana 1
12-11-2024 Se mantiene en rehidratacion constante y vigilancia ya que son los dias mas vulnerables de la plantula.
15-11-2024 Se coloca por la tarde en el recipiente hidroponico ya que la plantula ya tiene la madurez necesaria, y se colocan nutrientes en dosis muy baja.
16-11-2024 Primer Contacto de raizes en agua.
18-11-2024 Se nota la evolucion radicular de la planta y se observa mejoria.
Parametros Utilizados
Temperatura del ambiente 24 C°
Extraccion de aire 4 pulgadas
Humedad 75% a 90%
Potencia de la lampara 50%
Ec Original 0.4
Ec Nutriente 1.0
Ph 6.5
Likes
25
Share


@Kakui
Follow
Veg22, riego con 3.0 EC y pH 5.9, drenaje promedio de 5.8 pH y 2.6 EC(muy bien), primer riego con Sensizym para limpiar un poco las raíces, y este será el último riego de vegetación con Voodoo Juice, Tarantula y Piranha.
Se hizo una pequeña defoliación de las hojas abanico más bajas y se volvió a ajustar el LST, ya van tomando la forma final.
Veg23, creciendo bien.
Veg24, se mide la temperatura de las hojas 22°C y se compara con la temperatura del indoor 23°C, con una humedad de 50% RH, la calculadora arroja un valor de VPD=1.24 kpa, lo que está dentro del rango óptimo.
Veg25, hoy toca una pequeña defoliación y probaré también hacer un último apical en 2 o 3 plantas a modo de prueba.
Al final, tomé un gran riesgo, y hice varios apicales extra y una defoliación más grande de lo que tenía en mente, tengo fe que resultará bien 😎👌
Veg27, riego con 0.8 EC y pH 6.0, drenaje de 6.0 pH y EC 2.0, se están alimentando y creciendo bien, quedan casi 2 semanas para pasar el fotoperiodo a 12/12, espero que crezcan suficiente para esa fecha.
Veg28, un par de hojas de 2 plantas presentan mordidas tipo oruga, revise y no encontré nada, aplique spray insecticida, espero no siga pasando. A parte de eso siguen creciendo bien, quedan un poco más de 10 días para el paso a 12/12.

Likes
5
Share


@HapticNation
Follow
lots of cloudiness and a hint of amber starting to show in the trics, overall banging growth on the blue dreams. I mislabeled one (the purple AF one) so thats unknown strain. lol I won't have someone help germinate next time. lol other than that. looks like a great run. ill be doing multiverse beans run next. going to make a seed to harvest video for the Haptic Nation Growmies YouTube channel too.


Processing
Likes
37
Share


@MG2009
Follow
08/29/2018
Been a hot week but the girls don't seem to mind,90s in the day 82° at night and sticky,muggy weather. Their leaves all pointing ☝️,lets me know they are happy ☺️ .watered with plain water they were pretty dry pots weight was very light. Will feed and water in in morning sleep well and medicated😎
08/31/2018
Just a note today #1 is very green compared to the other 4 plants, could be potted plants running low on nitrogen? My soil has plenty according to soil test. I know last year's crop in soil was pale like other 4 plants, maybe biochar is helping soil retain it's nutes better? Year 2 for biochar, first year could have tied up some nutes....hmmm?
Ps
Last feeding today Fox farms big bloom at heavy feeder dose 1/2 cup per gallon, should see nice gains this week! 🙏🙏🙏.
Pss.
G GTH #4 loosing her smells, #3 smells of Skunk and coffee ☕,#2 minty chlorophyll orange,#1 menthal,skunky but very lite scent.
Should I pollinate a branch of each? Oh my God the pressure! Do I have enough pollen? Oh sorry for rambling on just smoked lemon sour diesel and thoughts very racy😀
Got to garden see you next week
😎😎😎😎😎😎😎😎😎😎😎😎😎


Likes
4
Share

@leondovych
Follow
It was easy. I'm satisfied by result. Dried weight 180g, pine smell, relaxing, strong effect for 4-5 hours.

Likes
18
Share


@AcidBurn_40
Follow
11.01.25 VD#1
Good evening everyone ✌️😁
Welcome back to the Eternity Grow Cup 25' from Zamnesia & Plagron. The Runtz is doing wonderfully.
The first 3 finger leaves are coming so I'm counting Vegitag#1 as of today, anything before 3 fingers has always been the seedling stage for me.
It is now in the 4.5L pot where it can spread and strengthen its roots for a while before it goes into the 30L fabric pot. At the moment, until Vegitag #21, the little lady is only getting Soil Activating Hesi PowerZyme 2ml/L& Hesi Root Complex 5ml/L.
I add Biobizz Calmag from Vegitag #1 in a preventative dose until rinsing.
Starting with 0.3mlL, then increasing with 0.2ml per week of the vegiphase.
The irrigation water has a pH of 6.5, so all nutrients can be absorbed by the plant in this phase.
I'm happy for everyone who has stopped by and good luck to all participants.
Stay healthy and stay high.
May all your ladies grow healthy and splendid and provide you with tasty stuff 👌
■■■■■■■■■■■■■■■■■■■■■■■■■
11.01.25
VD#1
Guten Abend zusammen ✌️😁
Willkommen zurück zum Eternity Grow Cup 25' von Zamnesia & Plagron. Der Runtz geht es wunderbar.
Die ersten 3 Fingerblätter kommen so zähle ich ab heute Vegitag#1, alles vor 3 Finger ist für mich schon immer die Keimlingsphase.
Sie ist jetzt in dem 4,5L Topf dort kann Sie erst mal eine gewisse Zeit ihre Wurzeln ausbreiten & stärken, bevor es dann in den 30L Stofftopf geht. Zur Zeit bis Vegitag #21 bekommt die kleine Lady nur Boden Aktivierende Hesi PowerZyme 2ml/L& Hesi Wurzel Complex 5ml/L.
Biobizz Calmag gebe ich ab Vegitag #1 in vorbeugender Dosis bis zum Spülen bei.
Angefangen mit 0,3mlL, dann pro Woche der Vegiphase steigernd mit 0,2ml dazu.
Das Gießwasser hat einen Ph von 6,5 somit sind für die Pflanze in dieser Phase alle Nährstoffe aufnehmbar.
Der Biobizz Light Mix ist vorgedüngt die Erfahrung hat mir gezeigt das der Hesi TNT Complex erst ab Woche 3-4 der Vegiphase nötig ist.
Freue mich für jeden der vorbei geschaut hat, weiter hin viel erfolg für alle Teilnehmer.
Bleibt alle Gesund and stay high.
Mögen all eure Ladys Gesund und prächtig wachsen und euch mit schmackhaften Stuff versorgen 👌
Processing
Likes
34
Share


@DudeGrowsWeed
Follow
Seedsman Sour Diesel Haze is in its pre-flowering stretch, she grew a lot over the past week and I don't think she's done stretching yet. Excited to see how big she gets! 👍

Likes
16
Share


@MisterMaGoo
Follow
Water change day .. Drinking. 2000 ml each per day.. So 6 days on the nute change...
*******************
2 Buckets done .. 5 Left . I may leave the caramel cream autos until tomorrow , they are drinking slightly less per day , but the big girls are drinkers for sure ....
So getting better at mixing nutes, bought giant bag of disposable droppers, god damn so much easier for me . I have visual impairment, and shaky hands from the brain tumors. The visual impairment is bad, but the shakes come and go . I normally get a few good rips on the Dr Dabber Switch before i start to help.
But the mixing went much better . less mess and i simply pitched the pipette after each use . YEs i know wasteful .... but for me , for now its what i have to do. 1 pipette for each nute for each bucket, they are cheap enough. This way not contaminating anything, and at the amount im mixing, 3 mils - 20 mils each .
Biggest problem i have, and i guess maybe not a bad problem ...
I have 4 girls on one side of the 4x9 tent, and 3 on the other. The four on the one side are all Glue Gelato Autos and my lord I can not get to the back left side bucket at all with the amount of foliage. So moved a bucket to the other side to allow me to drop in a pail to do a siphon out and refill. See pictures...
So I am 10000% upgrading to the 13 gallon x 8 fall ponic system after this grow .....
THANK GOD the caramel cream autos are half the size and 1 of the glue gelatos is slightly smaller on the right to allow me to move around the tent slightly, and im a lean dude....
But i am surprised each day when i check the progress just how far they have come for my first try ...
Still have low expectationsfor crops and yields , but am loving the time learning and getting to know hydroponics.
I TOTALLY get when the OG growers say just listen to them they will tell you what they need, legit all i have done is feed, maintain enviroment and observe.
positive i can not make the same moistakes i made so far net time just by learning my lessons and understanding better the purpose for each Nute and how to spot when the plants are asking for them .
Well have atleast 2 more to do tonight most likely will get all the gelato glues done
Cheers
Check out band i recently turned on to .. Fortunate Youth on Sugar Shack ...

Likes
4
Share


@UnicornSparklehorn
Follow
I was away for the entire week. I have no watering systems so I just saturated before I left. The plant had just dried up when I was back, but showing light nutrient deficiecies.

Likes
10
Share

@mattdecarlo
Follow
Starting to follow a feeding chart that I’ve put together myself, but they’re looking great so far it’s working out pretty good. Everything is green, luscious and healthy.
Likes
Comments
Share

@Rare_Terps_5280
Follow
Another week and great growth, expanded nutrient regiments with bat quano and bio-fish. Rode out some big storms this week as well. Shes big, she's bad, hope this trend keeps goin.
Processing
Likes
4
Share


@chiefredeyes
Follow
Week 7 - Venom OG and an unknown seed strain.
No nutes - tap water - 12hr light schedule
So VenomOG was originally in a normal pot. She stretched, got too tall and fell over, we moved it over to a five gallon bucket. Gave her some clean water, and tied her to a pole. This was the end result.
She had tumbled over twice at this point now. So we were definitely worried shit might herm on us.
Likes
Comments
Share

@Budhunter
Follow
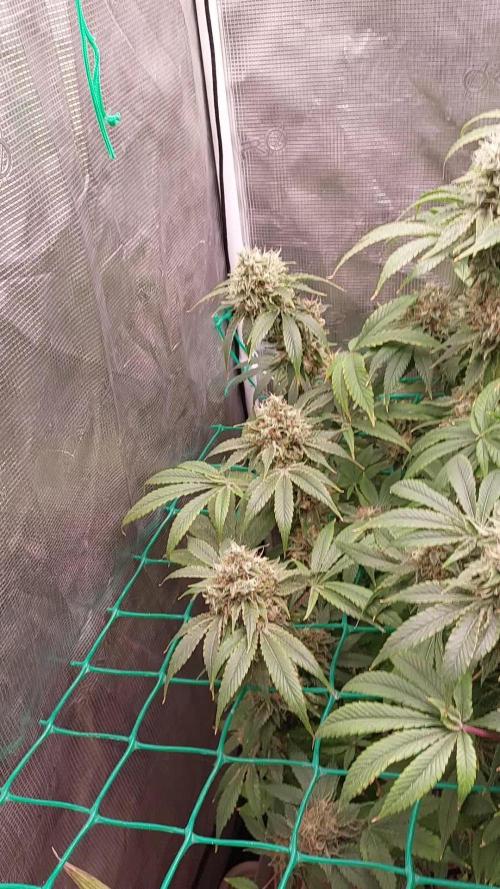
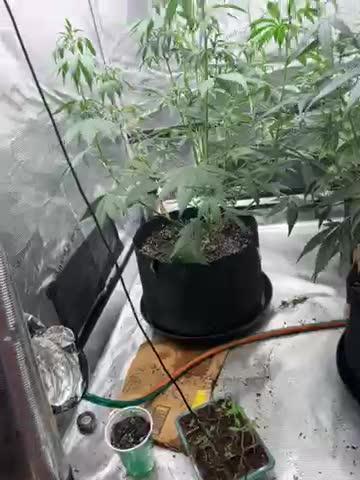
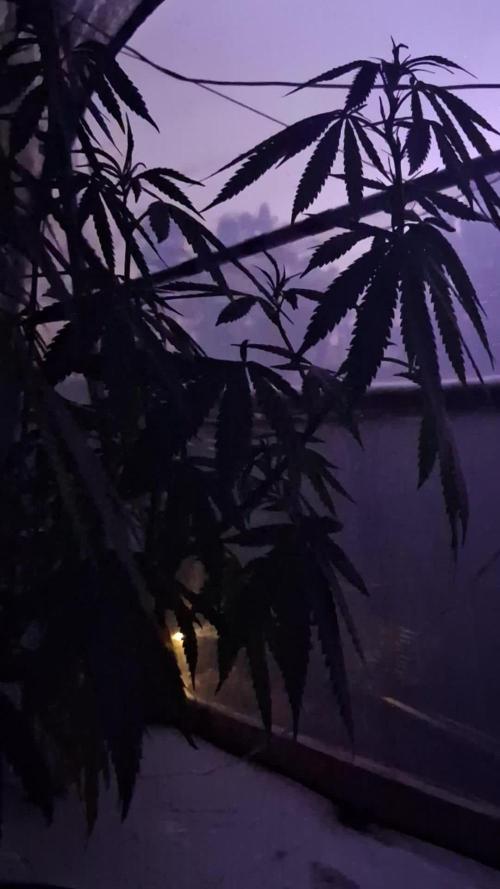
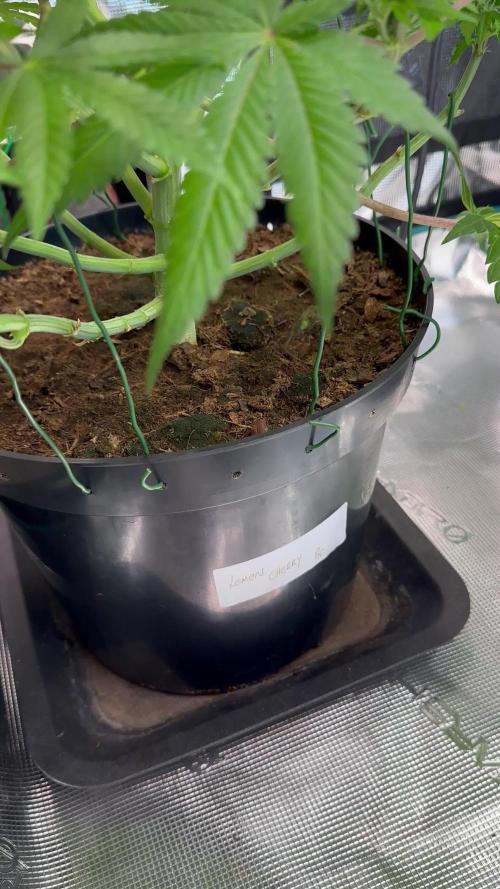
Week 4 flower - Day 27 of flowering - Day 83 of life
Lemon cherry pie is a medium size plant(at least mine 😅) lots of buds sides and they are getting frosty. Not as big as I wish but they are getting tasty and smelly. Let’s go
Likes
15
Share


@Newfie80
Follow
Things are coming along here now, won’t be too much later for these plants. Probably start thinking about flushing 2 of them soon, I suspect the soil is loaded with a high ratio of nutes, think next time won’t use the high nute soil and go for total control. Already harvested one plant already, it was the smallest one, a bit early but she was milky and a few ambers, think she got me 25.55 dry in jar now. Letting the Others hit 50 % amber before harvest those. Two in back big stretch on them,the one left in front short and fatter, say she going next in a bit


Likes
25
Share


@pifflestikkz
Follow
Day 43
12/08/24 Monday
Feed today, it was warm again so they drank the whole 300ml each so I have topped up another 150ml to see run off to prevent salt build up.
Thriving 😍✌️💚
Day 45
14/08/24 Saturday
Another watering today using de-chlorinated tap water pH 6 only.
Day 48
17/08/24 Saturday
Another watering today using de-chlorinated tap water pH 6 only.
Picture and video update ✌️ 💚
