Likes
126
Share
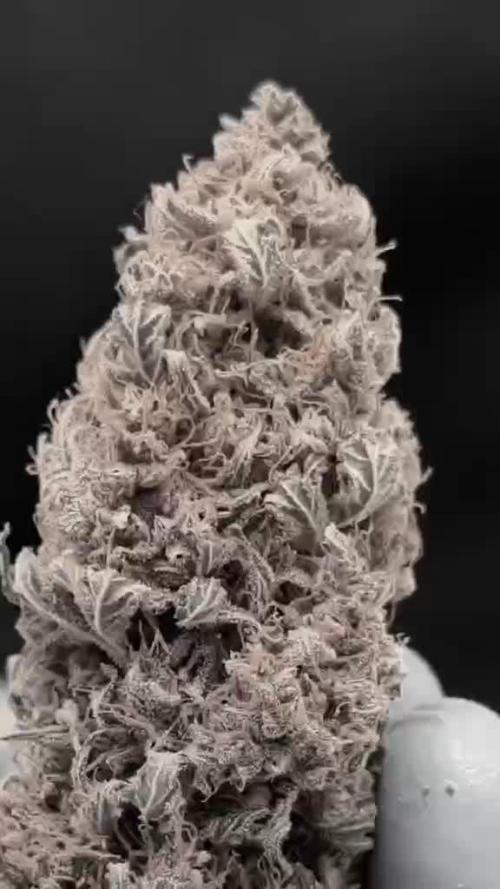
3 days late into update... personal issues... All girls doing great , sweet and sour is the only one experiencing some gold color on the leaves so i didnt feed anything after the last flush. Sweet deep grape - amazing scent, its like i can smell berries and grape mixed together Sweet and sour + strawberry - very sweet very fruity, similar to grape but here i can also feel some pineapple with mango, crazy Remo chemo - nothing too strong but very sweet Ayahuasca - nuts and petrol, she actualy stinks so i am afraid i wont like it Og kush- amazing , sticky and greasy and huge buds, amazing orange color and very sweet scent Blue medi kush - reminds me of my mega, hashy smell to it with sweet undertones, i blv i will love it Og candy dawg and grandaddy both have rockhard structure and smell similar, grandaddy is kinda more hashy like though Amazing garden this time, really is I am very happy with where i am today and i give compliments to every seedbank i am currently growing, it feels great to be your friend. I respect you all and its my pleasure to show the world a bunch of different strains 💪
Likes
22
Share
@Naujas
Follow
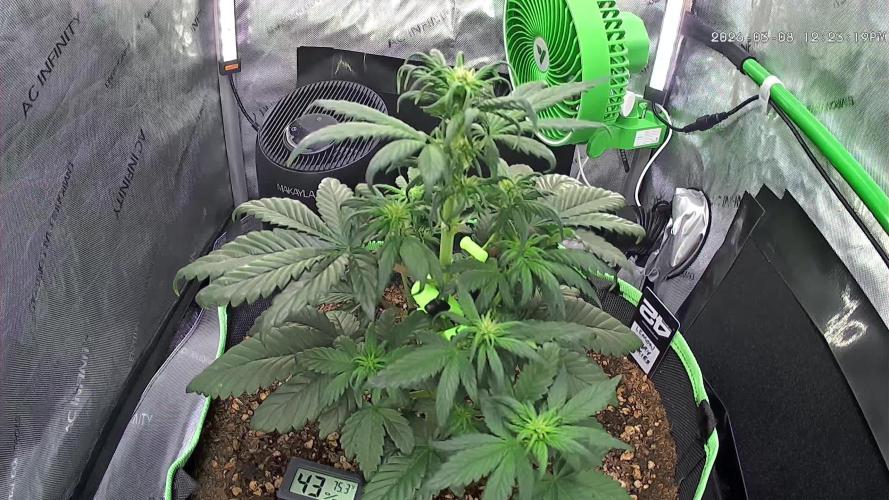
Well, I came back after vacation, and this is what I found: it jumped up to the light.... I made a little cropping and tried to use more LST, the problem is that it no longer fits :D :D :D but at the same time, it's really interesting to me trip :)also, several rings are already affected by the light, my 50w light currently shines at 100%, maybe it would be better to reduce it to at least 80%?.
Likes
8
Share
@Bryankush
Follow
Giorno 2 bene ragazzi ho già notato che le ragazze si stanno allungando, sono in forma e non vedo l'ora di vederle a fine settimana. Annaffiata con 2,5L di acqua Giorno 4 defogliazione e lollipop Giorno 6 LST Giorno 7 annaffiata con 2,5L di acqua
Likes
7
Share
For now she is getting only water and will be harvest soon.
Likes
2
Share
@donttrip
Follow
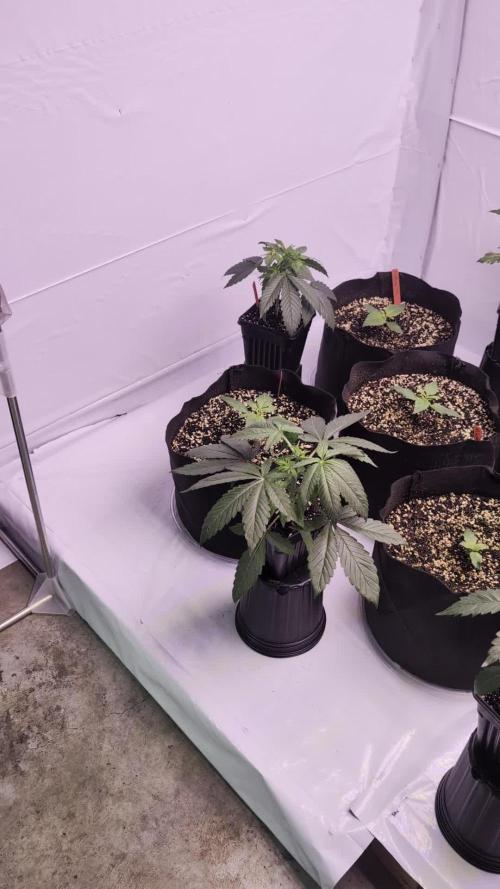
Vegged for quite a while time to flower .
Likes
15
Share
And that completes my grow for my FastBuds420 grow Truly was a fun and exhilarating experience learned a lot about each, and every strain would absolutely grow each and one of them again, but photos are in the future. Can’t wait to get my hands on a pack of those fast.buds Photo.
Likes
21
Share
@Lontra
Follow
In week 3 I continued with the LST, but the plant showed more and more of its namesake genetics and grew into a kind of lettuce head. So towards the end of the week I started to remove a few leaves to improve aeration and light exposure. Additionally i slowly started incresing the power of the LED to about 75%.
Likes
59
Share
Beginning of week... Out of the blue.. For no reason at all.. I went ahead and topped her. The branches are already beginning to form.. so I just wanted to speed them up a little 🤷 lol.. I also removed the bottom node (leaves and branches).. They usually just don't grow like the 2nd, 3rd, etc... and the branches were not symmetrical whatsoever lol.. That really grinds my gears (it really bothers the shit outta me lol).. She is left with 3 nodes at the moment.. I will decide which nodes I want to use and go from there.. So I will be going up a tad on the Armor Si.. Up on the CALiMAGic, adding in some FloraGro, amd going up just a tiny bit on the Floralicous Plus to bring it up to the normal dose.. Still using the Hydroguard and the MYCO Plus (powder) at the normal doses.. Other than that, just been watering/feeding when the top of the medium is dry, and when you can clearly feel the weight of the pot (bucket of butter lol) is pretty much weightless.. Basically, I feed on a Monday.. Then just plain pH'd water on Thursday or Friday.. Then back to feeding again on Monday.. This will obviously change once the roots fill the pot (bucket o' margarine) within the next couple weeks or so.. Btw.. Not sure if I mentioned this already.. Dont feel like going back and checking lol.. But I put about 2 - 3 inches of just perlite at the bottom.. Not sure if this helps or does anything lol.. But I've seen other people do it.. Had some extra on hand.. Sure! Why not? I never let this sit in runoff.. Infact, when I water/feed, I place the pot on top of a cup so that she won't be sitting in runoff and so I can collect the runoff as it drips out the bottom.. So far, the runoff pH comes out a little low still.. Going in at 6.2 and the runoff will be like 5.8 or 5.7.. But, I do believe that it has been slowly making its way up.. I should really start buffering and finding a way to remove roots when I harves, so I can keep reusing and avoid issues.. Anyways.. She is happy and healthy.. Topped her and remove the bottom node.. That's all there is to report on so far.. Will be updating mid week and end of week as I usually do.. So excited!!! 😁 Mid week.. So it looks like the bottom 2 branches are triploids! I could be wrong.. But that's what it looks like to me! Can't be mad about that! Lol.. I can tell she is going to be a short thing.. Perfect for this grow box! Not sure what these weird markings are.. But this literally popped up overnight.. Will be keeping an eye on it!.. Hopefully nothing.. But we shall seeee!... End of week... She's doing good.. I removed the very top node that I left.. Lol.. Yeah I can be very indecisive when it comes to that stuff.. Can always just remove one later if I need too.. But yeah.. I've kinda just been tucking the top 2 branches under the bottom 2 branches so that the bottom 2 can get some good lighting too.. So I try to switch once a day or sometimes twice a day.. Once the tops grow a bit more they should all be able to get their own light without the tucking and whatnot.. But still just been feeding toward the beginning of the week and just plain pH'd water toward mid/end of the week.. The runoff pH is a little acidic.. But it doesn't seem to be hurting anything so far.. The roots have made it to the bottom of the pot.. They did a long time ago, but have really filled the pot alot already.. But I've pushed plants alot longer in much smaller (veg for 6 weeks in a 9oz solo cup).. Her branches are so thick and sturdy! She is gonna be so strong!.. I really need to make sure I don't LST too late cuz it's gonna be hard to bend these tree trunk branches.. But I'm playing with her at least twice a day, so I doubt I will miss the opportunity lol.. But I can't wait to taste some Blue Berry!!! On to the next week!...
Likes
16
Share
Flowering days 27 since time change to 12 / 12 h Hey guys :-) The ladies look beautiful and are growing very well. The sweet smell starts to blow through the whole tent :-) . This week it was watered 3 times with 1l each (nutrients see table above) Nothing else happened this week. Everything has been checked and verified. A lot fun and stay healthy 💚🙏🏻 👇🏼👇🏼👇🏼👇🏼👇🏼👇🏼👇🏼👇🏼👇🏼👇🏼👇🏼👇🏼 You can buy this Nutrients at : https://greenbuzzliquids.com/en/shop/ With the discount code: Made_in_Germany you get a discount of 15% on all products from an order value of 100 euros. 👇🏼👇🏼👇🏼👇🏼👇🏼👇🏼👇🏼👇🏼👇🏼👇🏼👇🏼👇🏼 You can buy this strain at : https://www.ripperseeds.com/en/feminized/kmintz-feminized-cannabis-seeds Water 💧 💧💧 Osmosis water mixed with normal water (24 hours stale that the chlorine evaporates) to 0.2 EC. Add Cal / Mag to 0.4 Ec Ph with Organic Ph - to 5.8 - 6.5 MadeInGermany
Likes
20
Share
Grow Report — Nectar Drip GrowDiaries Week 10 (Actual Week ~6–7 from Seed) First things first, a small clarification for anyone following the diary closely. On GrowDiaries this report appears as Week 10, but in reality the plants are around week 6–7 from seed. The reason is simple: the first entry in the diary was created during germination and no photos were uploaded at that moment, so the timeline shifted a little on the platform. So for accuracy: plants are currently around week 6–7 from seed and well into early flower. Now let’s talk about what has been happening. ⸻ Quick Recap For anyone just arriving to the diary, here’s the short version of the journey so far. The goal of this run has always been simple: grow healthy plants, observe them carefully, and share the process honestly. The environment has been kept stable and relatively simple: • 12/12 from seed • balanced feeding schedule • steady environmental control • minimal intervention unless the plants ask for it Up until now we mostly focused on guiding growth and observation, allowing the plants to express themselves naturally while keeping the canopy organized. And they are doing exactly that. ⸻ This Week — The Garden Is Exploding This week the girls are looking absolutely incredible. Structure is strong. Color is perfect. Leaf health is excellent. And the most exciting part: trichomes are already everywhere. Even at this stage the plants are starting to sparkle. Resin production is clearly ramping up and the flowers are stacking beautifully. Height is now roughly around one meter to a little over one meter, creating a very healthy canopy without stretching out of control. Honestly, these are beautiful specimens and a joy to watch develop. ⸻ Defoliation — Why We Did It Now This week we performed a targeted defoliation. This was not done because the plants were struggling or because something was wrong. We did it by choice and by timing. The reasoning is simple: It is often easier and less stressful to remove certain leaves earlier in flower rather than waiting until the canopy becomes dense and airflow becomes restricted. So we removed only what was necessary to: • improve light penetration • increase air movement inside the canopy • reduce future humidity pockets • allow the flowers to develop in a more open environment Nothing aggressive. Nothing excessive. Just removing leaves that were clearly blocking key flower sites. This kind of intervention is always a balance. Different growers prefer different approaches, but in this case it felt like the right moment to open the canopy a bit. Now we observe how the plants respond. ⸻ First Structural Training This week also marks the first time we applied some stronger structural training to these girls. Until now the plants were mostly guided and allowed to develop naturally. At this stage we introduced a bit more direction to the structure so the canopy develops evenly and future flower sites receive better light exposure. Again, nothing extreme. The idea is simply to help the plant organize itself for the next weeks of flowering. The real feedback from this will come in the next report, where we will see how they react. ⸻ Environmental Conditions The room is currently running around: Temperature: ~28°C Relative Humidity: ~68% Outside conditions at the moment are: ~10°C with about 87% humidity Considering the outside environment, we are actually very happy with how stable the room is staying. But one thing worth mentioning: We don’t chase room VPD numbers too aggressively. What really matters is leaf VPD and plant response. Plants tell the truth much better than charts do. Right now the plants look extremely happy: • strong leaves • no stress signals • steady growth • excellent resin development So the environment is clearly working for them. ⸻ Nutrients Feeding remains exactly the same for now. No changes this week. The current nutrient schedule continues to support healthy growth and there is no reason to modify something that is clearly working. Sometimes the best move in the garden is simply: don’t change what isn’t broken. ⸻ Introducing a New Team Member This week we also officially welcomed a new member to the team: Mr. Baggy. He has already been making appearances around the garden and many of you may have spotted him in some of the photos. He’s now officially part of the crew and helping around the studio and garden. Please give him a warm welcome when you see him around the diary. He’s a cool guy and we’re happy to have him with us. ⸻ Gratitude As always, huge appreciation to everyone who takes time to visit this diary. To the: • longtime followers • new visitors • curious growers • supporters • skeptics • lovers • haters Everyone has a space here. If energy crosses paths here, something is being exchanged and that always has value. Special thanks as well to: • the breeders behind these genetics • the GrowDiaries platform • the entire GD community And of course to the sponsors supporting the project. ⸻ What To Expect Next Over the next weeks we will mainly observe how the plants respond to the structural adjustments made this week. Things we’ll be watching closely: • flower stacking • resin development • canopy response after defoliation • structural balance of the plants If everything continues like this, the next weeks should be very exciting. The girls are clearly entering the phase where the flowers start building real weight and character. And we’ll be here documenting every step. 🙏 Thank you for your patience and continued support. FOR DISCOUNT CODES AND MORE JUST FOLLOW THE LINK https://website.beacons.ai/dogdoctorofficial 📲 Don’t forget to Subscribe and follow me on Instagram and YouTube @DogDoctorOfficial for exclusive content, real-time updates, and behind-the-scenes magic. We’ve got so much more coming, including transplanting and all the amazing techniques that go along with it. You won’t want to miss it. GrowDiaries Journal: https://growdiaries.com/grower/dogdoctorofficial Instagram: https://www.instagram.com/dogdoctorofficial/ YouTube: https://www.youtube.com/@dogdoctorofficial Deleted by Youtube Vimeo : https://vimeo.com/dogdoctorofficial Under construction stay tuned ⸻ Explore the Gear that Powers My Grow If you’re curious about the tech I’m using, check out these links: 🔆 Lighting & Environmental Control • Future of Grow — Advanced LED lighting technology https://www.futureofgrow.com/ DISCOUNT CODE: DOG20 • Lumiflora — Under-canopy LED lighting https://lumiflorade.com/ • TrollMaster — Environmental controllers and automation gear (past collaboration) ⸻ Genetics • Zamnesia Seeds — Genetics used in this project https://www.zamnesia.com/ ⸻ 🌱 Soil, Substrates, Boosters & Root Support • Plagron — Substrates, bio mixes, and supportive products https://plagron.com/en/ ⸻ 🎒 Storage, Curing & Preservation • Grove Bags — Curing and storage solutions https://grovebags.com/ ⸻ Straw Baggy Links 🌍 Website https://www.strawbaggy.com/?ref=339 10% discount code for our Community - Dogdoctor10 📸 Instagram https://www.instagram.com/straw_baggy/ ⸻ 📸 Photography Equipment & Tools (Not sponsors, but part of my creative toolkit) • Sony A6700 • Sony full-frame macro lens + few more • Stacking photography workflow - learning • iPhone (for behind-the-scenes shots) We’ve got much more coming as we move through the grow cycles. Trust me, you won’t want to miss the next steps, let’s push the boundaries of indoor horticulture together! As always, this is shared for educational purposes, aiming to spread understanding and appreciation for this plant. Let’s celebrate it responsibly and continue to learn and grow together. With true love comes happiness. Always believe in yourself, and always do things expecting nothing and with an open heart. Be a giver, and the universe will give back in ways you could never imagine. 💚 Growers love to all 💚 📸 P.S. – The Eye Behind the Lens All photos in this diary (for now — except for the ones showing the camera, which I took with an iPhone) are taken with a Sony A6700 paired with a Sony full-frame macro lens and a few more. Photography is part of the story — it’s how we share the fine textures, the glow, and the quiet details that words can’t always capture. I’ve also started experimenting with photo stacking — a technique where multiple images, each taken at a slightly different focus point, are layered together to create one perfectly sharp image from front to back. It’s not digital enhancement or AI; it’s pure photography — a way to reveal the plant’s beauty in microscopic depth, from trichome to petal. You’ll even see a few shots of "ghost me" capturing the shots — camera, lens, setup — because every grow deserves not just to be cultivated, but documented like art. FOR DISCOUNT CODES AND MORE JUST FOLLOW THE LINK https://website.beacons.ai/dogdoctorofficial NEW DISCORD - Official Server Invite Link : https://discord.gg/ksjAkA5T74
Likes
5
Share
@Lazuli
Follow
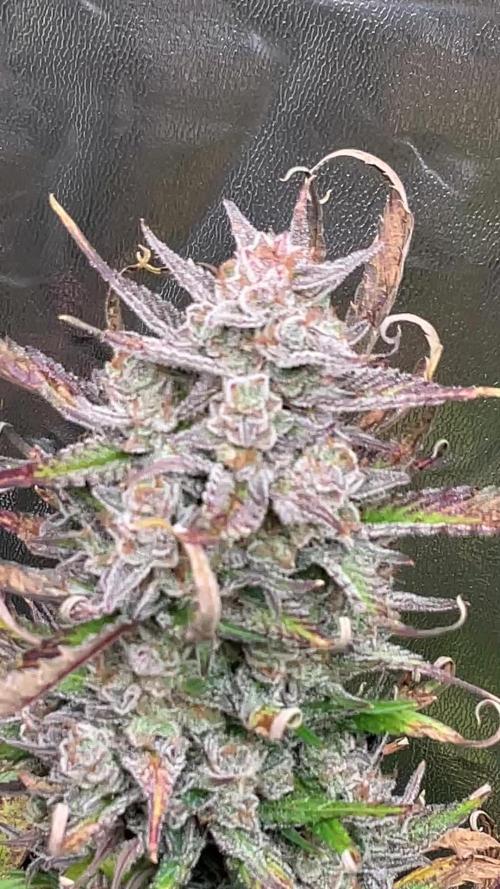
I can smell the frost on the leaves Its 100% the best strain ive ever smelled such fresh piney smell it comes straight from heaven 💚 She also didnt stretch too crazy I just defoliated her a bit around week 3 to expose buds and shes perfect. There is also purple in the flowers but its not vissible yet with the flash on I reccomend everyone to grow at least one of these , absolute art
Likes
Comments
Share
Pretty much done. I think this is the prettiest plant I’ve ever grown. That purple color
Likes
2
Share
💚 Amnesia Haze Auto by Zamnesia – Pheno A Week 5 | The Elegant Stretch Before the Storm Welcome back to another chapter of the 8×8 Adventure! Every week these ladies remind me why phenotype hunting is such an exciting journey. Today’s spotlight belongs to Amnesia Haze Auto – Pheno A, a plant that’s beginning to reveal the classic characteristics many growers hope to see from an Amnesia Haze. Tall… Graceful… Open… And now officially beginning her flowering journey. While many of her neighbours are building dense canopies, this lady has chosen elegance, creating a beautifully structured framework that should allow every future flower to enjoy plenty of light and airflow. ⸻ 🌱 The 12/12 From Seed Adventure For anyone discovering this diary for the first time, welcome! This entire project is being grown using my favourite experiment: 12/12 From Seed. From the day these seeds germinated, they have lived under a 12 hours on / 12 hours off lighting schedule. The goal isn’t simply producing smaller plants. It’s about discovering how different genetics and different phenotypes naturally express themselves under identical conditions. Every plant shares: • The same grow room • The same environmental conditions • The same lighting • The same nutrition • The same training philosophy • The same care Only the genetics decide how each individual develops. Amnesia Haze Auto Pheno A is already showing a wonderfully classic sativa-style expression. ⸻ 🌿 Stretching With Purpose At approximately 75 cm, she’s among the taller ladies in the room and continues displaying excellent vertical growth. Rather than producing a dense bush, she’s built long internodal spacing with beautifully stacked branches reaching confidently toward the light. Those longer distances between nodes might look sparse now, but for flowering they’re actually a huge advantage. Each future bud site has room to breathe. Each branch receives excellent light penetration. Each cola has space to develop without excessive crowding. Sometimes less density early on creates better flowers later. ⸻ 🌸 Flowering Has Officially Begun This week marks an exciting transition. Fresh white pistils are now appearing across every growing tip, confirming that flowering has officially begun. Although she’s entering bloom, she’s still carrying plenty of vegetative momentum. This is completely normal. During this transition period the plant continues stretching while simultaneously beginning flower production. Because of that, her feeding program still reflects both stages of growth. She’s no longer purely vegetative. But she’s not yet fully flowering either. She’s standing right in the middle of one of the most important phases of her life cycle. ⸻ 🍃 Gentle Leaf Tucking Instead of Heavy Defoliation Training this week remained very gentle. Rather than removing healthy leaves, large fan leaves were carefully tucked beneath developing branches to expose additional flowering sites. Leaf tucking is one of my favourite techniques during this stage because it increases light penetration while allowing the plant to keep all of her valuable solar panels. Healthy leaves continue producing energy. Hidden branches receive more light. The canopy stays open. It’s a simple technique, but one that often delivers excellent results. ⸻ 💧 Feeding Through the Transition Since the room currently contains plants at slightly different stages of development, the feeding program reflects that transition. Instead of switching immediately to a full flowering recipe, the plants are currently receiving a carefully balanced combination of vegetative and flowering nutrients. Current nutrition includes: • Plagron Terra Grow • Plagron Terra Bloom • Power Buds • Sugar Royal • Power Roots • Pure Zym • pH adjustment using pH Plus and Lemon Kick This balanced approach allows the plants to continue supporting vigorous green growth while simultaneously providing the phosphorus, potassium, enzymes and biological support needed as flowers begin to develop. It’s all about easing them smoothly into bloom rather than making an abrupt change. ⸻ 🌡️ A Stable Environment One advantage of documenting every phenotype separately is that each plant shares the exact same controlled environment. Current room conditions include: • Day temperature: 31.1°C • Night temperature: 25°C • Relative humidity: 72% • Solution temperature: 21.6°C • Root zone temperature: 21°C • CO₂ concentration: 636 ppm Keeping these parameters consistent allows each phenotype to express its true genetic potential without environmental fluctuations becoming part of the equation. ⸻ 📸 This Week’s Gallery The photographs this week beautifully capture the beginning of her transformation. The full-plant portraits highlight her elegant sativa structure, with long branches and an impressive central leader dominating the canopy. The close-up images reveal clusters of fresh white pistils emerging from nearly every node, confirming that flowering has truly begun. One of my favourite details is the clean spacing between branches. Rather than competing for light, every future cola has its own place to develop. The healthy green foliage, strong stems and open architecture suggest this lady is preparing for an exciting flowering stretch over the coming weeks. ⸻ 🔮 Looking Ahead Over the next two weeks I expect this Amnesia Haze to continue stretching before gradually shifting her energy toward building flowers. If she follows the classic Amnesia Haze profile, those long internodes should soon begin filling with elegant, elongated buds covered in bright white pistils. The framework is already there. Now it’s time for the flowers to write the next chapter. I can’t wait to watch her evolve. ⸻ 💚 Thank You Thank you so much for following another chapter of this 8×8 Adventure. Watching every phenotype develop its own personality while sharing the exact same environment continues to be one of the most rewarding parts of this project. A huge thank you to: 💚 GrowDiaries for providing an incredible platform where growers from around the world can learn, inspire one another, and document every stage of their journeys. Zamnesia for providing the genetics that make this phenotype hunt possible. 🌱 Plagron for supplying the nutrition supporting these plants from seed to harvest. 💡 Future of Grow LED for delivering the consistent light powering every day of this grow. 🌿 TrolMaster for helping maintain a stable environment where each phenotype can express its full genetic potential. And finally, Growers Love and thank you to everyone following these diaries, leaving comments, sharing knowledge and joining me on this adventure. Every plant has its own story, and Amnesia Haze Auto Pheno A is only just beginning to tell hers. The stretch is underway, the first flowers are forming, and the best is still to come. 💚🌿
Processing
Likes
12
Share
Checkout my Instagram @smallbudz to see the Small budget grow setup for indoor use, low watt, low heat, low noise, step by step. 01/11/2019 - Started using BioBizz Alg-a-Mic on spray, using it once per day at lights off, 1 or 2 puffs to create a light mist, only on non feed days, I mixed 0.1ml on 100ml water 6.4 PH. 03/11/2019 - Gave her 250ml plain water with 6.4PH 05/11/2019 - Gave her 0,15ml of each BioBizz Grow, Max and Bloom on 300ml water 6 PH didn't manage to get it higher to 6.3 at least. 06/11/2019 - She started to show some pistols, probably entering pre-flower. 07/11/2019 - Soil was to dry due to 2930c temps gave her 0,500ml of 6.5PH water with 0,25ml Grow, 0,25ml Max, and 0,45ml Bloom BioBizz.
Likes
14
Share
@AndrewC
Follow
So this is the Tear Down week. The timing of it makes it so i will need to the harvest flag in a few days when I can weight and test the plants. I have included the Cleaning, and Cutting and some Root Porn. I will make the harvest post in about 4-5 days, when I can trim these plants. There is a lot of Plant here. I got way more than I was expecting. I don't have a scale that measure this amount of plant, without taking like 10 measurements and then adding them together. So I will just be posting the dry weight. I will post the wet weight as dry weight * 1.65. Autopots: Wow, what a great product. I have been blown away by how well and how easy it was to work with them. They really did solve the watering issues. Excellent product. If you are a beginner, start with Autopots. -= Lessons Learnt =- - Overdrive the air to your Autopots. In my control plant, I used a small rectangle air stone (instead of a standard air dome). This lead to root rot and some other issues, it also put significantly less air into the water. The root rot, give the material for the Brown Algae to grow. Using a huge Air-disc-Air-Stone would be an excellent combo to mix in with the air dome itself. Something like this: https://www.amazon.ca/Pawfly-Diffuser-Suction-Hydroponics-Aquarium/dp/B01MY3AQ33 at the bottom and the air-dome on top of it, will be what I do with my next experiment. - Air stone in the reservoir. I had two instances where algae grew into the res. An air stone would have helped. It would have also helped my control plant get less root rot. Given the amount that the air-domes and air sources got engulfed, having the water have more o2 in it would have only been beneficial. - Don't grow 6 plants in a 4x4. Since my control plant was about 1/8th the size of the others, I think I could have grown 5 in the shape of a 5 (on a 6 sided dice)⚄ This placement would give a much more spaced canopy for airflow and more importantly light. The sides of some of the plants were lighter green and produced larf due to lack of light penetration. - This tent was on 19-5 schedule. This worked out very well for this strain. After every lights on, they were in the praying position, so this strain was able to recover in that 5hrs off. If I had more seeds, I would run these again, and try 20-4. I think this strain could handle it. All for all, I think I'm going to 19-5 as my default timing. This kept up a solid DLI. - Staring at .9EC (really .7 EC cause my water here is .2 EC) Then bumping up at .1 a week, until 1.6EC worked out VERY well. I experimented on this crop all the way up to 1.9EC, which burnt the tips of this plant. I think if I did this strain again, I would do 1.6EC until 3-4 weeks left then crank it to 1.9. It did plump them up when I went to 1.9, however it left them looking rough. Bulk was added though. - Sticking to 6.0PH for all of veg, and 2 weeks into flower worked great. The plant had solid and consistent color and leaf shape . The plant's did get hurt, due to some issues (as noted on the weeks). I switched to 6.5 PH in the last 3-4 weeks and it helped them recover, and plump up noticeably. -VPD. The #1 thing I focused on was VPD. I keep it .9kpa range, as best as humanly possible. It was honestly, HUGELY noticeable compared to my other grows. I know truly understand the value of properly dialed in VPD. This is the one lesson that will stick with me forever. - Super-cropping: On the plants I give the chiropractic treatment too, had much thicker stems as much larger channel internally. I did this treatment to 4 of the 6, and the 4 that had it done has larger buds and recovered from defoliation faster. TLDR; VPD is king. Super-cropping is worth the time. Keeping PH and EC dialed in were all wins. Autopots kick ass.
Likes
4
Share