
Likes
Comments
Share


@DreamIT
Follow
Sponsored by:
🌴SPLIFF SEEDS🌴-💡VIPARSPECTRA💡-💐GREEN BUZZ LIQUIDS💐-🛠️WEDRYER🛠️
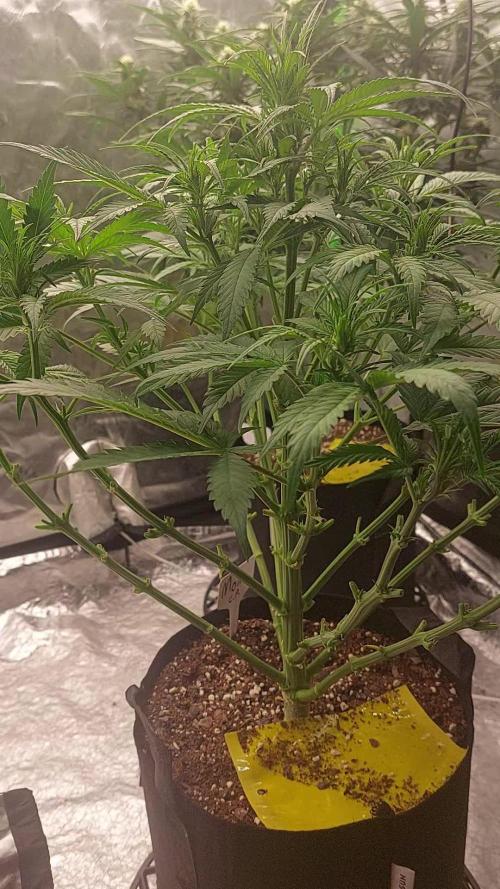
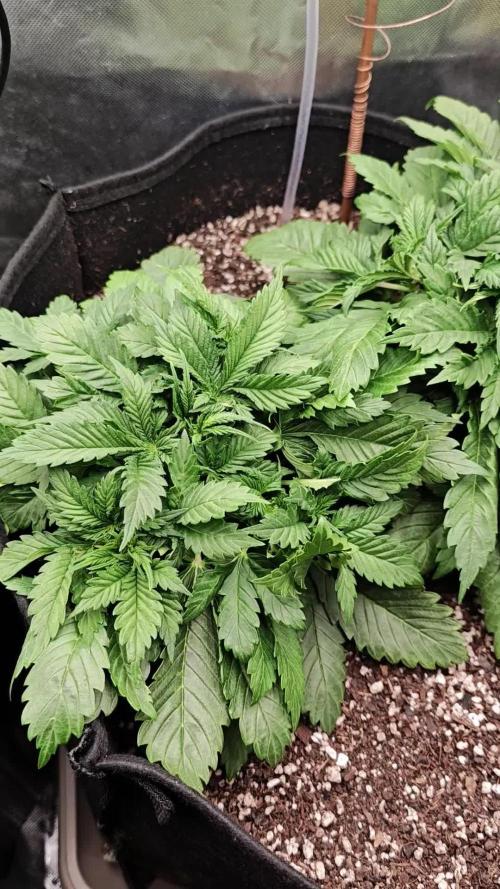
28/7 almost ready to go into bloom. They perform well and grow even better. we will see how they behave at the switch
2/8 it took a few days of absence to discolor the leaves and dry out the soil. Today I will be watering properly with Green buzz nutrients fertilizers before sending them into bloom
__________________________________________
Personal advertising (contains affiliate links)
__________________________________________
🦄 Are you new to the world of cultivation and don't know where to safely buy your seeds?
Fast and anonymous shipping. Check out their hilarious graphics. (no affiliate links)
✅https: //bit.ly/spliffseeds_
__________________________________________
Did you know that Green Buzz Liquids fertilizers are 100% vegan? A complete line of products ready to give the best to each of your plants! Visit the site and see my journals to see how they work 🦄
🤯 And with the code "dreamit" you will immediately receive a 15% discount on your purchases
✅https: //bit.ly/GreenBuzzLiquidsPro
__________________________________________
👀 Are you looking for a good lamp to start with? 👀
🌞Viparspectra has something more than the others, take a look at their site.
⏩ Use "GDVIP" for an extra discount or "DREAMIT3" for an extra 5 %% discount
👀 Search for it on Amazon
✅Amazon USA: https://amzn.to/30xSTVq
✅Amazon Canada: https://amzn.to/38udUVe
✅Viparspectra UE: bit.ly/ViparspectraUE
✅Viparspectra USA: bit.ly/ViparspectraUS
______________________________________________
🌈 Tired of blowing on your weed hoping it dries quickly? Check out the Wedryer website! You will find a well-made accessory that will help your weed dry in just 8-10 days without the annoying risk of finding mold or other annoyances! (no affiliate links)
✅https: //bit.ly/Wedryer_
______________________________________________
📷🥇Follow the best photos on Instagram 🥇📷
https://www.instagram.com/dreamit420/
Backup
https://www.instagram.com/dreamit4200/
🔻🔻Leave a comment with your opinion if you pass by here🔻🔻
🤟🦄💚 Thank you and good growth 💚🦄🤟

Likes
2
Share

@Lazpool
Follow
Blackberry is gorgeous. Rub a stem or lightly touch a bud and your left with a deep berry smell with a backing of the earthy kush. Hope to see the flowers put on some real mass soon.
Now I have some pics of the others.
Whiskey blew part Blackberry in height. The stretch is crazy. No matter how close or far the light is she reaches for it.
Cherry is a squat little girl. She is thicc. With 2 "c".


Likes
3
Share

@mjumbo
Follow
Week 11 / April 19
The plants are growing a lot these days. I think they Will love the tricomas and flora booster. Its been 1 or 2 weeks that I have stop the 12/12 cycle
Likes
18
Share


@Stonyways
Follow
trimmed and netted the plants last night, 12/30, and the energy pushed the plants to stretch another 1/2 inch+
this will be the last week of vegetation as I prep this light leaking tent for flower, not a fan of mars hydro at all right now. their poles are the weakest I've encountered yet, too many light leaks and this is the first grow with it. My high cfm fan , which is only a 4", is pulling the fabric too much and causing the leaks to grow a bit. This is not new, its been happening with indoor tents for a while now but I thought a grow company such as MH would have a decent, respectable tent. My solution is Blackout Curtains draped over the sides. However, I am hesitant to do this with the MH tent as the poles for the tent are too weak as it is, tsk tsk tsk mars hydro.
will continue to increase the watts the next 6 days
HAPPY NEW YEAR
a combination of light and fresh soil has made the plants stretch so I will finish tightening up the MH tent today and ill start flower tomorrow, day 62.
while adjusting the height I must have nudged the dial for the dimmer and sent it to 184w. this would have been a big jump but manageable but I lowered the light 7" and the plants took a bit of a hit. I adjusted the light back down to 160w and I'll let the plants recover before anymore adjustments.


Likes
57
Share


@Krisis
Follow
So i apparently lost a buncha the pictures from this. :/
Fatso is probably my favorite plant so far. Very pretty and also very forgiving.
Probably the most pictures I’ve ever taken of a plant before.. which makes it extra sucky that I’ve lost most of the ending pictures.
She made nice buds even though she was starving to death for a couple weeks from lockout. It took me that losing to get it sorted. Her buds would have probably been even bigger than they were.. jeez.
Anyhow, after drying and curing a little bit - good goood smoke and high. If you’re not a heavy/long time smoker.. I’d suggest not doing anything that needs real focus. Definitely a make you miss your exit weed.. not that anyone should be driving high lol.
Sorry bout the lack of pictures.

Likes
3
Share

@Mortelinos
Follow
holky si protrpěli své ale snad to zvládneme dokonce :)
(ano byli 3 skončili jsme na 2)
Likes
17
Share


@Kirsten
Follow
26.1.25:
I have had a mistake 😕 I spilt some Fish Mix as I was experimenting with a syphon from some aquarium tubing I have. Unfortunately, I forgot to take the syphon out! Ugh 😣
However, it is fish emulsion and very thick consistency. Therefore, I was able to scrape it up with 2 of my business cards up off the counter. So added this extra into the next 2 ltr solution I mixed.
All plants were watered with at least 1ltr of dechlorinated water PH'd to 6.3.
Containing the following nutrients;-
♡ 3ml Seachem Seaweed
♡ 4ml Biobizz Fish Mix
♡ 4ml Biobizz Bio-Grow
♡ 3ml Biobizz Bloom
♡ 2ml Xpert Nutrients Bloom Booster
♡ 2ml Xpert Nutrients Cal-Mag
♡ .25g Ecothrive Biosys.
♡ 2.5g of Bicarbonate of Soda as PH UP.
Unfortunately I have broken my PH pen too. Accidentally submerged it under water, then the readings went crazy.
I'm leaving it to dry by standing it up but I'm most likely going to need a new one, which is extremely annoying 😑
I'm going start implementing the Scrog net probably some point next week if I let the plants that are in flower to just grow up now, as I do believe that I stunted Watermelon 🍉 by using too strenuous LST.
Hopefully the plants still are able to grow upwards at this stage during flower for all the Purple Punch P1, P2 and P3.
We will soon see!
28.1.25:
My PH pen has packed up 😣
I've got to wait to get another.
It's super annoying 😑 so I'm just judging by memory how to regulate it.
Unfortunately, that's my only choice! I'm also out of the dechlorinator 😕 things are not going very well this week so far 😅
I guess we will have to make do, until I can get replenished.
29.1.25:
I removed all the plants, hoovered, and disinfected the tent.
There were several accidents when watering, causing some debris and splashes.
I decided to just go ahead and get a few other things done. It's crazy how quickly things can become neglected! 😣
So I defoliated moderately on all plants except Gorilla Cookies seedling.
I have absolutely dropped the ball on my lighting situation!
My light was much further away than I thought!
I turned it up to 100% and dropped it down to just under 2 feet away.
After I reset the tent, I set up my scrog net. I removed 80% of all LST pegs. I am planning on letting the scrog net take over the training from here.
I really want to minimise the risk of mould, so I decided to start using my dehumidifier. It has raised up to 73% RH this week, so it's necessary.
Hopefully, I will be able to get my dechlorinator and PH pen soon! That's kind of essential to me.
It's been a little bit of a stressful day in the garden, to be honest 😅
30.1.25:
So I am expecting the arrival of my new PH pen today, as well as my new bottle of Ecothrive neutralise.
It is supposed to measure the TDS and EC in addition to the standard TEMP and PH, which I had previously. Obviously, time will tell if it's any good or not.
I realise, much too late now, that my lighting is very insufficient for this many plants. I need double the watts at least, and coverage is very poor.
I remembered I had an old LED floor lamp, which was in a corner being unused.
I decided to take the stand off, and Zip tied the pole onto the tent pole at the back left corner.
I have no idea what the wattage is, and it's quite pathetic 😅 but I mean, I might as well use it, being as I definitely cannot afford more lights! 😣
Next grow, I will probably only grow 2 plants, max 4, and just use larger 7-10 Gallon pots.
Being as I ran out of dechlorinator, I only watered some plants properly because I only had enough to make 6 litres. When my pen arrives, I will get everything properly watered.
31.1.25:
The leaves of several plants are showing signs of iron deficiency. This is likely due to my PH pen packing up earlier. I now have a new pen.
Due to this, I decided to use my Seachem Prime, which I use for my aquariums. As I wanted to get them watered properly, and my Ecothrive Neutralise hasn't arrived yet.
I watered each plant with 1ltr of dechlorinated water PH'd to 6.0. I added .25g Ecothrive Biosys to the water.
May give them a breather on the nutes and just use the Cal-Mag and Biosys.
Being as I've just topped dressed with rich fertilisers, I'm sure that will be OK for the next several waterings.
Bubble Kush
Likes
10
Share


@Fat_Olsh_Farms
Follow
Day 73. This should be under week 11 but made a mistake lol.
This thing has my room smelling like a bakery mixed with strawberries and cream. Fragrant frost monster.
Day 75. Gonna give 1 more dose of nutes next watering, then flush.
Processing
Likes
39
Share


@InnerCityGardens
Follow
This is Week 1 of Flower, flipped on Monday (01/04/19).... More to follow as the week progresses #RecycledSystem #PeyoteCookies #Cinderella99 #BlueGelato41 #GorillaZkittlez #BarneysFarm #HerbiesSeeds #FreeSeeds #GrowTent #MeizhiLED #Meizhi300 #CustomLED #UkGrown #TheUKGrowsToo #CannabisCommunity 🇬🇧


Likes
16
Share

@AestheticGenetix
Follow
NOTE: other harvest pics will be in the week before. I can't upload everything into this week so I picked a few but I want to save space for dry bud pictures as well. If you wish to see more harvest pictures. Go to the week previous and look at the end.
Chopped at day 63 with about 15% amber on the top buds and then only cloudy on the mids and lower

Likes
4
Share


@Olduffybastard88
Follow
Not much going on in week 1 I have other plants at different stages while we wait for movement here's a quick your of my tent the smaller ones are week 1


Likes
2
Share


@toriyama
Follow
Wie man sieht, haben die beiden F1-Samen ein enormes Wachstum gezeigt, während das Apple Flitter langsames Wachstum zeigte. Ich baue zum ersten Mal F1-Autoflower-Samen an und die Wachstumsrate ist wirklich beeindruckend. Nach drei Wochen habe ich Holzstäbchen zur Unterstützung hinzugefügt, und die Wachstumsrate der F1-Samen ist weiterhin beeindruckend. Sie sind bereits bereit, Blüten zu bilden.
ご覧の通り、2つのF1種は驚異的な成長を見せたのに対し、Apple Flitterは遅い成長を示しました。私は初めてF1オートフラワーの種を育てていますが、その成長速度は本当に驚異的です。3週間が終わった時に木の棒を挿して整理しましたが、F1種の成長速度はやはり驚異的です。すでに花を咲かせる準備ができています
Likes
2
Share

@trelopoulos
Follow
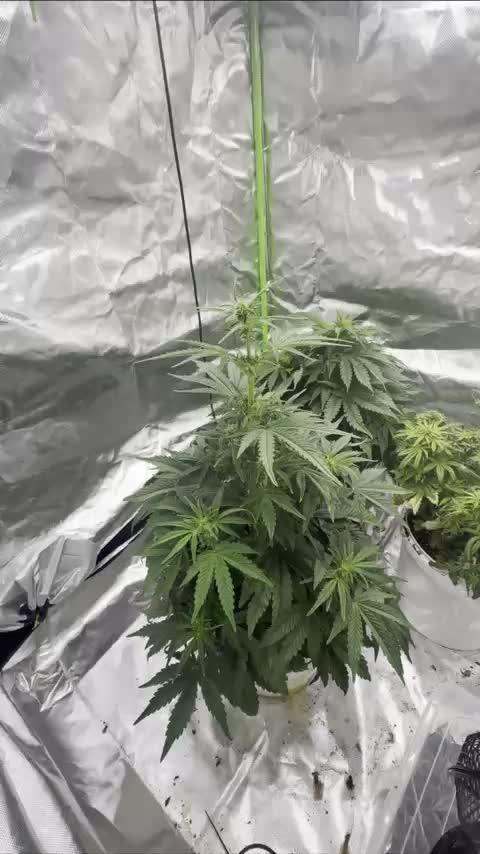
Ladys growing very fast..they are bushy and strong 💪 Lst is hard, i top them and organize them with metal sticks in ground atm. I also lower the ppfd from the lights for them to stretch a bit.. because i was blasting them with light
Likes
8
Share


@Random80
Follow
Probably last foto session out of the grow box. Solution of Orgatrex and PK-5-8 with every watering, she is now getting 2 lit per day manually. I will connect autopot during periods of my absence but I am afraid that she may stay without enough nutrients. I am still under trauma of my first grow when I left them for 10 days unsupervised and at the time I was back there was lot of damage.

Likes
35
Share


@valiotoro
Follow
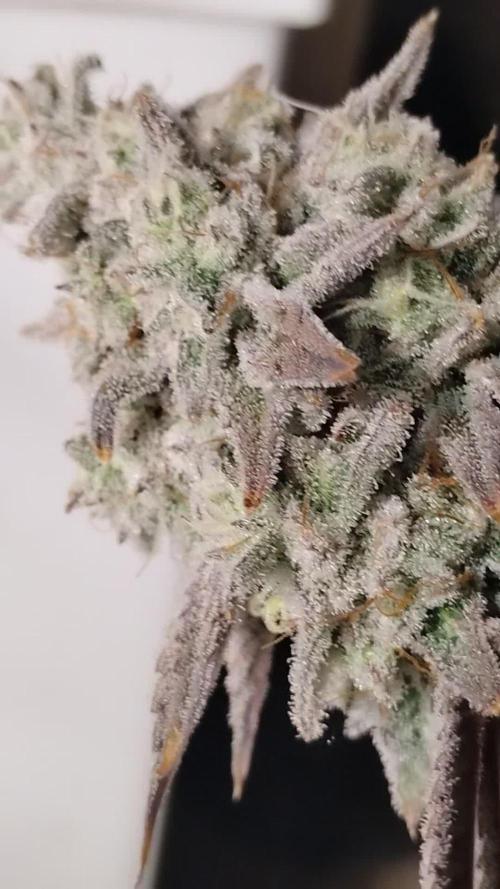
A wonderful genetic thank you Fast Buds ❤️🔥🤩
The trim was super easy the buds are FAT & FROSTY full of resin 🤤
I’m very happy with the harvest 103g !!
For the light i’ve used the Spider Farmer SE-7000💡
Likes
8
Share


@Motaybongs
Follow
Dli:35.
Nice final stretch. One plant got stressed because of the light. It a bit behind the siblings.
Let’s hope everything goes well nevertheless, they look really good.

Likes
15
Share


@RamirezDusha
Follow
It was time to wait. All I had to do is to feed them properly. And I managed to do it. In just a week, the flowers have grown significantly, and I am no longer afraid of receiving popcorn as previously.
Processing
Likes
10
Share


@Fibro_Witch
Follow
Critical Cure is still trucking alone nicely. No sign of bugs or nute issues. I had a friend who had issues with a couple of her Girl Scout Cookies that she's doing. She definitely had some lockout from heavy rain that we've been getting. That's why I'm glad I put down lime, but also got away from using mineral salts, because I think that was definitely an issue last year. Very happy with the results so far of going au naturale!
Likes
5
Share


@Tetiana_Riz
Follow
Harvest Report – Runtz Automatic (Zamnesia Seeds)
Final dry weight: 160g
Grow setup: Indoor | Mars Hydro FC-3000 EVO | 10L pot | Plagron nutrients
What an amazing result! This Runtz Auto truly delivered. The buds are super dense and hard, like little stones, and absolutely covered in sugary trichomes — they sparkle like they’ve been dusted with crystals.
The aroma is strong, the structure is perfect, and visually this is top-shelf quality.
Final dry weight came in at 160 grams, with the plant growing without any stress throughout the cycle. The genetics are truly impressive.
Huge thanks to Zamnesia Seeds for this banger and to Plagron for consistent, reliable nutrition. This autoflower definitely earned a place in my top list!
