


Likes
Comments
Share


Processing
Likes
7
Share


Likes
44
Share


@Cogollo_eu
Follow
**Encontrarás la traducción a español al final de la descripción**
From/Desde: 10/05/19 || To/Hasta: 16/05/19
From day/Desde día: 78 || To day/Hasta día: 84
You can find the Money Maker Diary here:
** Podéis encontrar el diario de las Money Maker aquí:**
https://growdiaries.com/diaries/25667-gorillamakingmoney-gorilla-vs-money-m
-----IMAGES & VIDEOS-----
5 - HomeMade Organic & Cheap CO2 generator (more info in week summary)
9, 10, 11 & 12: The bud on the right is a Gorilla one, the buds in the left or/and in the middle are Money Maker ones.
15 - Same Gorilla plant buds, one affected by CO2 in the roots and the other not.
-----WEEK SUMMARY-----
The smell is more sweet and intense every day, friends that came home turned them eyes into crystals when they see this little babys. The size isn't awesome, but the high ammount of buds full of crystals plus the strong sweet aroma makes them awesome. Buds are growing and fattenning very very well.
This week i added a boost of HomeMade CO2, i never measured the results of this invention so i can't give CO2 measurements. This method is widely used in home aquariums and there is where it comes from. For those interested i'm going to write here more detailed instructions. The 4 liters i've made will last for about 2 weeks.
---NEEDINGS---
- 250 ml Bottle
- 6~10 l Bottle
- 400 g Sugar / l water
- 1 Envelope of organic baker's yeast / l water (CHEMICAL WILL NOT WORK)
- 3 mid plastic tubes 40~50 cm
- 1 short plastic tube 5~6 cm
- 4 tube adapters
- Hot glue to seal adapters
The process of creating CO2 is simple, mix water, organic yeast and sugar in a bottle, and the sugar will free CO2 in the process of fermenting to alcohol due to the yeast.
1. Make a hole in the center of the big bottle cap, insert an adapter and secure it with hot glue
2. Make 3 holes in the small bottle cap and glue the other 3 adapters
3. Link both caps with one of the mid tubes and insert the other tubes on free adapters
4. Insert a short tube in the bottom of the small cap in the adapter that came from the big cap
5. Watch the Video!!
-----WATERING CALENDAR-----
Plants are beginning to drain the pots a bit faster so from now on i will raise the water ammount on each watering day 0.25 l.
11/05/19 - 1,5 l with All week nutrients -(Nirvana & Blombastic) also Big Bud half dosed @ PH6.4 & 2 E.C.
14/05/19 - 1,5 l with Bud Candy, Big Bud, Nirvana, B52, Bud Factor-X, Sensizym & Blombastic @ PH6.4 & 1.5 E.C.
*****ESPAÑOL*****
-----IMÁGENES Y VÍDEOS-----
5: Generador de CO2 casero, barato y orgánico (más info en el sumario semanal)
9, 10, 11 & 12: El cogollo que sale a la derecha es de una Gorila, el de la izquierda y/o el de en medio son de una Money Maker
15: Dos cogollos de la misma planta, uno afectado por CO2 en las raíces y el otro no
-----SUMARIO SEMANAL-----
El olor es más dulce e intenso día a día, los amigos que vienen a casa a verlas se quedan ojipláticos al verlas. El tamaño no es una maravilla, pero la gran cantidad de cogollos llenos de cristales añadido al aroma que entra por las fosas nasales las hacen increíbles. Los cogollos crecen y engordan de maravilla.
Esta semana he añadido un boost de CO2 casero, nunca he hecho mediciones de los resultados por lo que no puedo darlas. Este método es ampliamente usado en peceras caseras y de ahí saqué la idea. Para aquellos interesados dejo aquí instrucciones más detalladas. Con los 4 litros de agua que he preparado yo da para unas 2 semanas.
---NECESITAMOS---
- Botella de 250 ml
- Botella de 5 a 10 litros
- 400 g de azúcar por litro de agua
- 1 sobre de levadura de postre orgánica (LA QUÍMICA NO FUNCIONARÁ)
- 3 tubos de plástico de tamaño medio 40~50 cm
- 1 tubo de plástico de tamaño pequeño 5~6 cm
- 4 adaptadores para los tubos
- Cola caliente para pegar y sellar los adaptadores
El proceso de generar CO2 es simple, mezcla agua, levadura orgánica y azúcar en una botella, y el azúcar liberará CO2 en el proceso de fermentación a alcohol.
1. Haz un agujero en la tapa de la botella grande, inserta un adaptador y séllalo con cola caliente
2. Haz 3 agujeros en el tapón pequeño y haz lo mismo con los otros 3 adaptadores
3. Conecta los 2 tapones con uno de los tubos y conecta los otros 2 tubos a los adaptadores restantes
4. Conecta el tubo pequeño en la parte libre del adaptador del tapón pequeño que viene del tapón grande
5. Mira el vídeo
-----CALENDARIO DE RIEGO-----
Las platas comienzan a secar los tiestos un poco más rápido, asi que de ahora en adelante incrementaré 250 ml de agua adicionales en cada riego.
11/05/19 - 1,5 l con todos los nutrientes semanales -(Nirvana & Blombastic) BigBud mitad de dosis @ PH6,4 & 2 E.C.
14/05/19 - 1,5 l con Bud Candy, Big Bud, Nirvana, B52, Bud Factor-X, Sensizym y Blombastic @ PH6,4 & 1,5 E.C.
Likes
11
Share


@JoeyGonz
Follow
Lots of preflowers and already frosty AF. They are just now turning from pre's to buds.. I am also mimicking insects as crazy as that sounds.. Every other day I cut few leaves off, or slice off some leaf tips.. Besides cold nights I think that's a good way to make them think they have to defend themselves. Haven't had any health issues or insect issues thank God. The two girls I transplanted late are looking good didn't slows down. If anything they looked like they are happier, leaves up and creating tri's all over. About four weeks to go, But once again things are good to go.
Likes
Comments
Share


@High_Grade_Dadli
Follow
Growth been good had to space them out a bit to give them so
Likes
17
Share

@TrickzGrowz
Follow
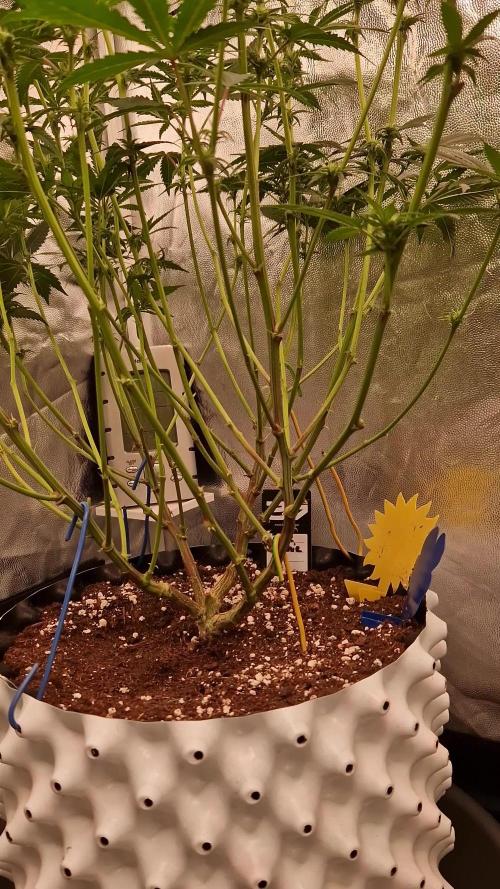
Bei ihr hätte sich das Scrognetz wohl gelohnt. Viele Triebe die am abhauen sind und schon viel höher sind. Hier und da musste ich nochmal toppen. Sonst macht Sie sich sehr gut.
Likes
20
Share

@StickyHands
Follow
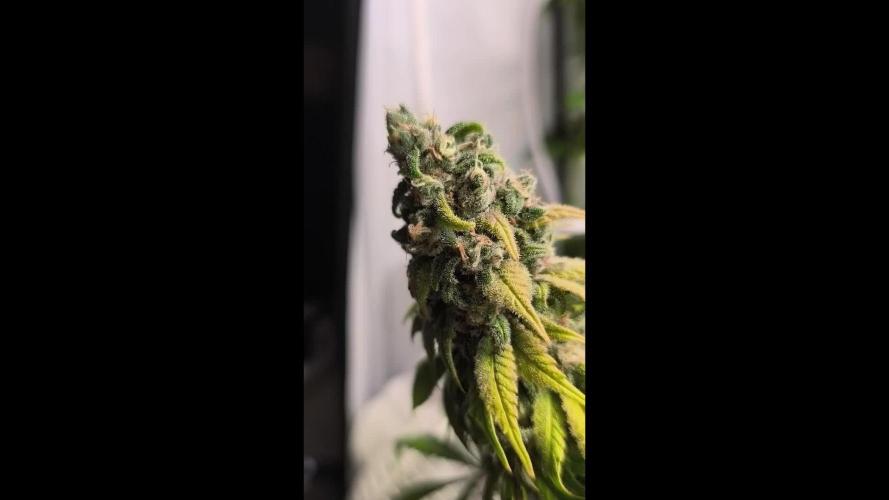
Day 61 of flowering
The ladies are ripening well and will probably be harvested next week.
I'll let the soil dry out almost completely a few days before harvesting.

Processing
Likes
14
Share




Likes
11
Share


@Papastroumf
Follow
Day 42 : Watering with co2 tab / 5L. Also added food again because i think they need it. Increased ppm to 850. Maybe the next one will be pure water. Ventilation works all the time when lights are on. Temp and humi are stable and this is good for the girls. 6 cm in 3 days. Patience is the key always. Also removed some burned leaves from all ladies. She is beautiful community.
Edit (Day 46) : Watering with co2 tab every 5L. I watered with juices again at 850ppm because i felt that they need it. Only DsD drank pure water because of burns. She stopped height grow. Her buds are the most fat. She will be the first chop chop guys. :D :D :D . She is full of crystals.
Likes
Comments
Share

@GangbudsGenes
Follow
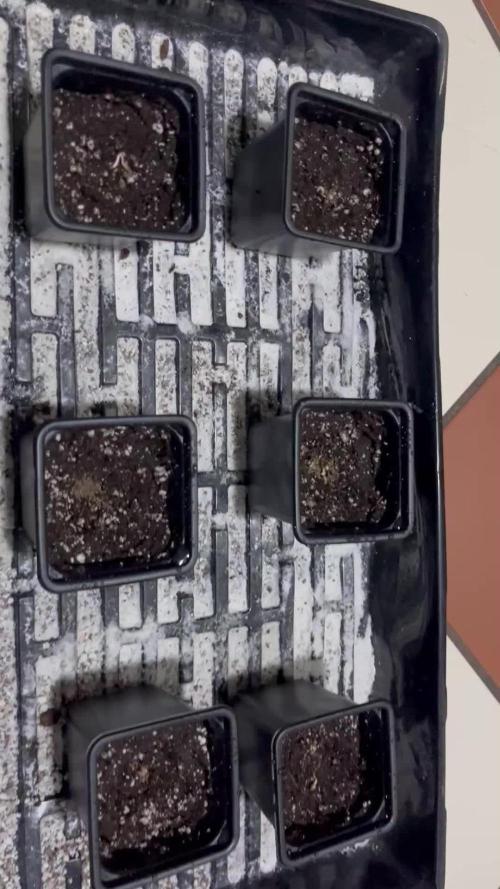
Vamos a darle a estas bellezas de@tikimadman
Se abrió blíster cheque bien semillas y listo directo a vaso con agua un poco de agua oxigenada 5 hrs y después directo a toalla húmeda y después de 7 hrs en toalla ya abrieron hoy pasé a maceta pequeñas de germinación y a domo con un poco de Perlita húmeda en la bandeja
Likes
8
Share


@maxrockatansky20
Follow
Welcome to the second week, the plants continue to grow steadily and healthy.
The temperature in the tent is a steady between 22 and 25 degree Celsius.
I am beginning to add my nutrients to the water. I use Canna, I always start with the CalMag additive, and from there i add the proper nutrient for the plants current phase.
Its a bit difficult to type in the exact values of what I use in the diary, so I will have it exactly written in the Week comments most likely.
I prepare a 10L watering can, there i add CalMag, and after that Terra Vega.
As this is the first dose for the plants, i start off easy with 8ml/10L, that water should suffice for the next two days. After that is used up, I will raise that continuously.
Im happy with how they are growing.
Thanks for everyone who’s tuning in and have a good day :)

Likes
2
Share

@Cukito
Follow
For now the vegetative stage is going perfectly!
Ajusting humidity and doing some toppings to spead the plat out!!
I think I will put her to flower in 4 weeks!!

Processing
Likes
8
Share


@Max1973
Follow
Day 35 - few pics and vids..... everything going along nicely 👍
This is a pretty big update, so i'll add to it over the next few days, as i
finish building it all....
i'm building these 2 x SS haze, the full tent, just finishing up the setup.....
trimming them, changing solutions to 12/12 and flower.....
changed the exhaust fan and filter setup to the better outside the tent method....
and installed 12v CPU computer fan, lol ("alta9" fits in 4in ducting perfectly), drops wattage on extractor fan.... 10w tops...
got a few kg of active carbon and making/replacing the carbon filter ....
i'll add afew vids of the new setup in afew days...
Day 36 - few pics/vid of new tent setup...... "alta 9" fan :)
post tomorrow after i finish trimmin and settin up night mode etc......
and into tomorrow we go, lol ... Day 37....
slowly getting there..... little bit more to go...
this should make things abit more interesting..... right tank (short babie) has : 19 lts of tap water @18oC + 150 ml -dutch master one gold FLOWER.... 6.4 PH - 1400 PPM
left tank has : 19 lts of tap water @18oC + 50 ml of elements a and 50ml of b and 10 ml of nitro and 20ml of Crystalic (molasses/pot) .... 6.5 PH - 1200 PPM
more pics / vids of the finished tent setup.... roots, transfer, etc... Day 37 is alot of vids of the clean and change to flower.....
edit - day after build noticed left tank (nutrifield) not enough bubbles..... pulled out the 4 air pump and swapped to the 2 x original oxipumps...
much better, also to fix the problem with ph goin high, and bubbles not stirin the mix, was to add another 10ml of crystallic and another 5ml of nitro...
then pumped both tanks with ph down and set em to 5.8-6.2 - both plants have fully recovered from the big trim, and bounced back within 12-24hrs,
post pics/vid in abit.....
Day 39 - made a freaky video... was curious about what the plants would see looking up at the lights...
the lights and buzzing of air compressors and bubbling tank water, and dazzling lights turned out pretty cool in vid editor,
was in selfie mode....
and final vid of the bounceback from trim :)
👍😎


Processing
Likes
11
Share


@Ledbelieve
Follow
The Deep Purple #1 is doing the best in the garden. The only one that is doing great. The other Deep purple is stunted like the rest of them. We had heavy rain for like a week straight, and they did not like it. The FB CBD#1 is curling leaves and all weird. It is either to much nitrogen or to much water from the rain. Hopefully they will kick it into gear here soon. Better weather is coming so I hope they take off. I sprayed them with some FAA, FPJ, and OHN this week.

Likes
19
Share


@CannabisAprendiz
Follow
Hola , luego de estar 8 días en macetas de 7 litros las pasamos a floración este cultivo de clones y semillas ,agregamos el otro panel que teníamos apagado para abarcar bien todo el espacio de cultivo con el espectro de luz .
realizamos una poda de bajos para potenciar las flores más altas .
Se realizo foliar preventivo de tierra de diatomeas.
Hello, after being 8 days in 7-liter pots, we passed this clone and seed crop to flowering, we added the other panel that we had off to cover all the cultivation space with the light spectrum.
We perform a low pruning to enhance the highest flowers.
It was made preventive foliar of diatomaceous earth.

Likes
202
Share


@CrazyHorse
Follow
Hello my friends 😇
Purple Lemonade had been flush today !! She looks beautiful that purpul-dark buds are amazing. In next 3 or 4 days I will cut her 😇
Cinderella and Bruce Banner drinking less from a avg. 1.7l/day to 1.25l/day, so end of flowering for this two will be in around 2 weeks.
Cinderella looks really good, she should give a good harvest.
Update:
Day 67
Happy time !! Harvest time !! Finally Purple Lemonade get to the final point.
At this moment there is 0% of lemon scents, BUT !! There is a beautiful smell of berries, chocolate and leather in the air. I can't wait to try it
All the best, You Lovely Girls Growers 😇 💪 🙏