


Likes
Comments
Share


@steadfast_grower
Follow
#########################################
HARVEST (Day 93 / June 4)
#########################################
-----------------------------------------------------------
GROW SUMMARY
-----------------------------------------------------------
Grown in 4x4 tent - but I only used 2x2 space because of heater and dehumidification and other plants (Outlier Z). This plant used a dedicated CMH 315 light. The plant was grown in hydroponics using a custom single-site PA hydroponics clone RDWC system with Advanced Nutrients Sensi Coco line, Microbial Mass and Orca for beneficials. I also experimented with Rapid start in the RDWC system, but I didn't see explosive root growth relying on Rapid Start as an additive to the system verse using it when starting in rapid rooters which worked well.
All around a pretty easy grow and things went very well. Topped twice for a mainline structure and she really spread out. Sparkling golf ball size nugs down the branches and spaced out nicely. The scent off her was like burned rubber/tires or maybe fresh blacktop. A single water change which was only performed when switching to bloom nutrients around week 7.
-----------------------------------------------------------
HARVEST
-----------------------------------------------------------
No dark period and no flush. On day 93 she was chopped and hung to dry.
-----------------------------------------------------------
DRYING
-----------------------------------------------------------
Entire plant hung upside down for 15 days. The temps were dialed in at 60F by using the S6 intake fan pulling air from the AC through intake vent on side of the tent. Humidity was dialed in at 63%/60F for 24hr, 62%/60F for the next 48hr. Then 60%/60F for the third day and onward. AC Infinity T6/S6 exhaust and intake fans were on the setting of '2' during drying until day 7, then I could turn down to a setting of '1' once the plants were not transpiring excess moisture. Trimmed on day 18. Then the jars were left open in the tent for another 12 more days for a full 30 day dry at 60%/60F while rolling the jars frequently. Also ran dehumidifier in the tent but it only ran for 1-2 minutes every hour because the AC was doing most of the dehumidification on the intake.
-----------------------------------------------------------
TRIMMING
-----------------------------------------------------------
Trimming was an absolute breeze. All swelled nuggets, very little sugar leafs left to trim.
-----------------------------------------------------------
CURING
-----------------------------------------------------------
Flower product was transferred to 1L mason jars averaging 35g of product per jar. I added a mini hygrometer to each jar and chose not to use a boveda this time. The RH averaged 62-64% when trimmed flowers went in jars.
Jars were left open in the tent for a total dry time of 30 days from harvest keeping the tent at 60%/60F.
Once closed, the jars were burped once a day for the first seven days, once every other day for the next seven days, rolling jars often. The burp was only for 3-5 second for air exchange until a. 62% was maintained in the jar.
-----------------------------------------------------------
YIELD
-----------------------------------------------------------
* Weight calculated at 62% humidity after 30-day dry and 14-day cure.
==============================
FLOWER PRODUCT
==============================
180.41g (6.44oz)
==============================
TRIM PRODUCT
==============================
57g (2.03oz)
** All major fan leaves, stems, and branches removed from trim product.
==============================
TOTAL OVERALL YIELD
==============================
Total: 238.41g (8.51oz)
==============================
SPACE YIELD
==============================
238.41g / 4 sqft (2x2 canopy) = 59.60g per sqft
==============================
WATTAGE YIELD
==============================
315 Watts / 4 Square Foot (3x4 canopy) = 78.75 watts per sqft.
238.41g / 315 watts = 0.76 grams per watt
-----------------------------------------------------------
PRODUCT TEST
-----------------------------------------------------------
Bag appeal is top-notch. Trichome covered, with aromas of that unique 'kush' you can quickly identify based on experience.
Best OG Kush I've ever tried, hands down! The flavour is kushy, smoke is smooth and definitely my favorite strain in my tote of cured harvests at the moment. I can't keep my hands off of the jars. Definitely not a daytime strain, even for experienced users, although I'll use it in the afternoon when life is throwing curve balls. The effects rise you up, then sets you right down and will wash away all that anxiety after a long day. Put it this way....if I puff a few hours before bed, I still feel it the next morning when I peel my eyes open. No joke.
I'll definitely be growing this one again, maybe even next run because I'll be sad when I run out.
-----------------------------------------------------------
REGRETS
-----------------------------------------------------------
Not running more of this amazing plant.
-----------------------------------------------------------
NEXT RUN
-----------------------------------------------------------
This was the first run at my new residence so it will take some time to get it dialed in. I had some calibration issues which are now fixed. I'm going to be shooting for 1gram per watt on the next run.
-----------------------------------------------------------
FINAL THOUGHTS
-----------------------------------------------------------
DarkOwl is the best autoflower I've grown yet. I'm now eager to give the Bruce Banner #3 they released a run and will surely acquire future releases from DarkOwl.
-----------------------------------------------------------
THE END
-----------------------------------------------------------
Thanks for checking out my diary! I typically journal in my notebook but I put some time and effort into documenting my grows on this platform in hopes it will help a new or experienced grower with their DWC journey. Any questions or suggestions are welcomed.
Happy growing!


Likes
8
Share


@Cadman
Follow
So the nuggets are dense and doubling in size every few days, the trichomes are cover the plants and they are sticky.
The Girls are thirsty, I'm topping them off every other day with 1.5 gallons of nutes, at this point I feel like all i'm doing is mixing nutes in the reservoir.
By the time I switch over season two to the grow room, i'm going to increase the size of my reservoir to 10 gallon so I can spend less time mixing.
I'll be flushing out the buckets in 2 weeks to give the girls fresh water for the final 2 weeks!
My Burp bucket project worked out great. Thanks to several youtube videos those videos are much appreciated!
I made a few modification to what I saw online.
so here's the parts list:
(1) 3.5 gallon Menards Bucket
(1) Gamma Bucket Lid
18" Black Irrigation drip tubing
12" Fish tank air hose
(2) Fish tank check valves
(1) tee for air line
(1) small fish tank pump
I started out modifying the input, most of the videos I saw had a hose with a check valve just poked in the lower part of the bucket with pin holes and end tied off.
What I did is I took the black tubing and circled the bottom of the bucket, then I took a small drill bit and drilled holes through the tubing about every 2 inches to disburse the air all the way around the bucket then I used a tee to connect the 2 ends of the circle and connected that to the tube entering the lower portion of the bucket.
the next change I made was instead of having a short hose poke through the upper portion, I drilled a small hole and hot glued the check valve inside the bucket with only the top of the valve sticking out of the bucket.
After you get all the hoes and check valves in snap on the Gamma Lid, Tighten it up and turn on the pump. I added the hoses going into the water so you could actually see that its working
I plugged the pump into a smart outlet and set it to run for 20 min 3 times a day, so no need to manually burp your nuggets while they are curing.
You'll also need to put a 62% boneva 2 way pouch in the bucket with the nugs to keep the humidity correct and optionally have a small hydrometer to verify, I'm going to mount one on the lid to be able to check it without having to open the bucket. unless curiosity gets the best of me....

Likes
32
Share


@Wilmer
Follow
05/07 start of week 3.
They are growing fast and very bushy, today I gave fert for the first time.👹
I'm having problems to reach the plant at the right corner, I hope she don't develop too many pop corns 🙌


Likes
17
Share


@CanadianFillmore
Follow
Howdy growfessors! Welcome to week 7F in the 4x8 theatre. The ladies are hungry, I've been increasing their feeding and they still want more!
Defoliation performed, removed a lot of small dead or dying leaves from the lower branches.
Not much else to say, thanks for stopping by growfessors 👽🌳💚


Likes
17
Share


@GERGrowDesigns
Follow
Welcome to Flower Week 5 of SuperStrains OreoZ
I'm excited to share my grow journey with you from my
SuperStrains Project . It's going to be an incredible ride, full of learning, growing, and connecting with fellow growers from all around the world!
For this Project , I’ve chosen the Feminized Photo Strain OreoZ:
Here’s what I’m working with:
• 🌱 Tent: 225x150x150
• 🧑🌾 Breeder Company: SuperStrains
• 💧 Humidity Range: 50
• ⏳ Flowering Time: 8-9 Weeks
• Strain Info: 22%THC
• 🌡️ Temperature: 26
• 🍵 Pot Size: 20
• Nutrient Brand: Hy-Pro
• ⚡ Lights : 600W x 2
A huge thank you to SuperStrains for allowing me to try my Best with this amazing collection from Photo Strains they managed to Sponsore side by side with theyre Hy-Pro Nutriets . Big thanks for supporting the grower community worldwide! Your genetics and passion speak for themselves!
I would truly appreciate every bit of feedback, help, questions, or discussions – and of course, your likes and interactions mean the world to me as I try to stand out in this exciting competition!
Let’s grow together – and don’t forget to stop by again to see the latest updates!
Happy growing!
Stay lifted and stay curious!
Peace & Buds!
Likes
7
Share


@Pjm70
Follow
9/2 8 tablespoons of Foxfarm Big Bloom 15 MLS Foxfarm Tiger Bloom 1/2 teaspoon Foxfarm Open sesame per 2 gallons.
9/4 32 MLS of each PH Perfect micro, grow and bloom. Per 2 gallons. She needs to be fed more often.
9/7 Two tablespoons of liquid kelp. 1 teaspoon Foxfarm Open sesame. Fed 1 gallon.
I have to give her water daily. If I don't the water will not soak into the entire fabric pot.
9/2 is the end of her first full week in flower. She seems to be doing well. Some lower leaves are turning yellow. Not sure if the yellowing is from the leaves not getting sun or not enough food. I pulled some off and fed
Keep pulling off little growth spots here and there. Been leaving 3 bud sites per branch.
Every once in a while I hit her up with some PH Perfect. Just to make sure everything is in check. I need to get a ph meter. The PH strips have been getting me by. I think I have been able to stay in the ballpark with them.
The feedings need to pick up. So what I am going to do is feed every other day. That will be 3xs a week. Then 1 day off to dry out.
9/6 two days of solid rain. 9/7 Another cloudy day. She was covered for the rain, but her fabric pot soaked up a bit of rain. So on 9/7 I'm feeding Foxfarm Open Sesame 1 teaspoon in one gallon of water. The pot is soaked, but that will not last in the sun.
She needs more food than I been giving. After the gallon, I will let her dry a bit. Then give another solid feeding with a good amount of run off.
For a moment I was wondering, if I was going to need to support for her in flower. Most of her branches are being pulled down. There is steady tension on them. If I were to cut the ropes, the branches would wip up, like a catapult. Her branches are way to strong to need support.
I thought this plant was big last month. Her canopy is so large, I could use her as a big umbrella.
Likes
9
Share


@Herbz_Unkraut
Follow
Defoiled alot of leaves underneath and some of the leaves that put shade on budsites
Also defoiled for reducing RH and increasing airflow

Likes
18
Share


@Canna96
Follow
Hey now, I hope everyone is having a great week. It was a good week again for the 5 mainlines, I did some final LST to try and keep the mains level, and I also defoliated the lower leaves to improve the air flow. I am still feeding the same veg nutrients which is just amor si, cal mag, and maxi grow. I will start transitioning to flower nutrients tomorrow and I will gradually switch over to all over flower nutrients by the end of the week.
The ladies are about 24" inches tall, but I do anticipate them growing some more before the stretch ends. I am pretty much done with LST at this point, I will just continue to defoliate as necessary and make sure they are enjoying their environment.
Still very happy with the Spectrum X from Medic Grow. I am running her at 69% and the plants seem very happy and healthy. The heat and humidity are finally letting up in my region so it is nice to be able to open some windows and drop the temp outside the grow tent.
I hope everyone has a great weekend, Thanks for stopping by, Stay Safe and Blaze On!!! 💪
Website: https://medicgrow.com/
https://growdiaries.com/grower/medicgrowled


Likes
22
Share


Processing
Likes
10
Share


@DudeGrowsWeed
Follow
ITS A MONSTER!!! Holy cow, this girl is huge! She finally seems to have stopped stretching at 48". Now the buds are starting to fatten up. Several weeks til harvest, but stay tuned....

Likes
1
Share


@pareto
Follow
Everything went well appart from the afids in the end. She looks very pretty and smells awesome!
Yield could be a litle higher... Still shooting for less than 1€/g. I think I will stop topping my plants.
Maybe next time.
--------------------------------------------------------------------------------------------------------------------------------------------------------------------------------
Set up cost (fixed costs)
-Lamp: 40€
-Timer: 3,5€
-Pot: 4€
-Total fixed costs: 47,5€
Given 5 years (or 15 grows) usage time translates to around 3,17€ per grow in materials.
Variable costs:
-Seed: 10€
-Soil: 6€
-Fertilizer: 3,50€
-Power (68 days 20h/day): 19,58€
-Total variable costs: 39,08€
-Total costs per grow: 42,25€
-Cost per Gram: 1,63€

Likes
10
Share


@CryptoProphet
Follow
Growing quickly ,Humbolts Nutrients works great with mini silica doing 6 on 2off total of 18hrs light and 6hrs dark

Likes
92
Share


@DogDoctorOfficial
Follow
🌱 Week 1: The Journey Begins! 🌟
Hey Grow Fam! 🙌 We’re off to an epic start with our TrolMaster adventure, and I’m already feeling the love for the setup, the seeds, and the growth happening in the room! So, let’s dive right in and get into the details of this exciting week!
🌿 Germination Update:
Our first Gorilla Melon seed from Fast Buds didn’t sprout, but no worries—round two was a success! 🦍🍈 The second seed has germinated and is looking full of potential. I’m throwing in a Sweet Seeds Papaya Zoap into the germination station too, so we’re keeping this exciting lineup going strong! Germination is such a key part of the journey, and having a healthy start is what it’s all about.
🔧 Room Build & TrolMaster Setup:
The build is coming along beautifully, and I gotta say, the TrolMaster system is blowing my mind! Everything’s under control like magic 🎩✨, and the TM+ app? Wow, just wow. I mean, I can literally be in the bathroom and still keep an eye on the plants—check all the metrics, adjust settings, and fine-tune what I need, all from my phone! 😂💧 This level of control is next level. I’m loving how smooth and seamless it makes managing the room. The gear is just unreal, and seeing it all come together is truly something special.
🌱 Nutrition Talk:
As for feeding, we’re starting light but smart! I’ve begun with 0.15ml of Regulator and 0.25ml of Startbooster per liter for now. I always believe in starting easy and ramping up as the plants develop. These early stages are crucial—balance is everything. For the time being, I feel this is more than enough to keep the babies happy and healthy. 🌿💧 The Regulator is working wonders in maintaining plant structure and health, while the Startbooster is fueling the early root and vegetative growth, laying down a solid foundation for the weeks to come. It’s about getting it right from the start—too much too early can be a killer. Keeping it steady with precision, that’s the goal!
Big Shout-Outs:
To the amazing team at @TrolMaster, @Fast_Buds, @Sweet_Seeds, @AptusHolland, and all the incredible sponsors—I’m beyond grateful for the support! 💚 And to my GrowDiaries fam and followers, you guys make this journey what it is—thank you for the love, and I’m so honored to have you along for this ride. 🙏
We’re just getting started, and I can’t wait to show you what’s next. Stay tuned for more updates, epic builds, gear reviews, and plenty of insight. Don’t forget to follow me on GrowDiaries, YouTube, and IG for exclusive content, and let’s make this grow the best one yet! 🌿🔥
Growers Love to All 💚💚💚
P.S.- A deep dive into the Full Spectrum Quantum Sensor (MBS-PAR):
The Full Spectrum Quantum Sensor (MBS-PAR) is an essential tool for any serious grower looking to optimize their light environment. This sensor measures photosynthetically active radiation (PAR), which refers to the spectrum of light that plants actually use for photosynthesis—typically between 400 and 700 nanometers and more depending .
What makes the MBS-PAR sensor special is its full spectrum capability, meaning it accurately detects not just visible light but also far-red and UV light—which are crucial for maximizing plant growth, development, and flowering. With this tool, I can monitor the exact intensity of light my plants are receiving, making sure they’re getting the optimal levels for every stage of growth.
By using this sensor in my grow room, I’ll be able to ensure that the light distribution is uniform across the canopy. Plus, it allows me to fine-tune the light output from my ThinkGrow LED setup, ensuring my plants are thriving under the best conditions. Whether it’s increasing light during the vegetative phase or fine-tuning it for flowering, the MBS-PAR sensor helps me keep everything on point. And the best part? I can monitor it all through the TrolMaster app, ensuring I can make adjustments whenever needed—even if I’m not in the grow room!
This level of precision means healthier plants, better yields, and maximum efficiency. It’s a game-changer for taking the guesswork out of lighting and getting closer to growing perfection! 🌱💡
Growers Love to All 💚💚💚


Likes
1
Share

@peterfly98
Follow
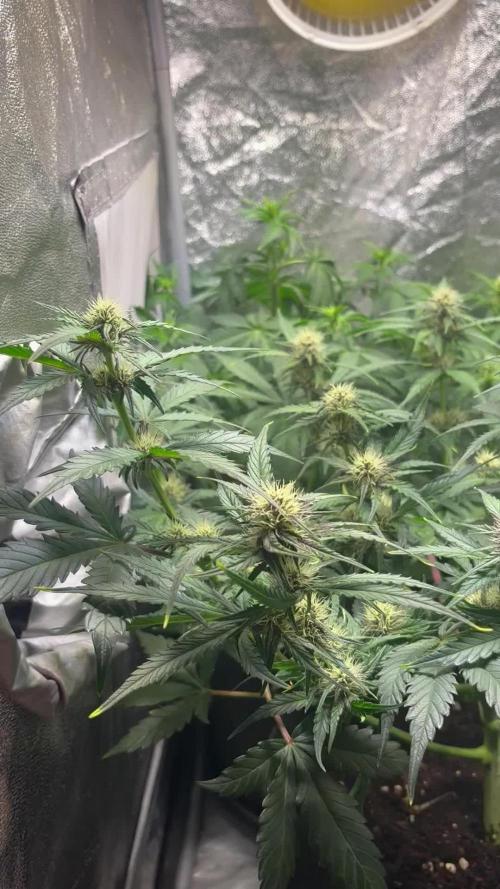
Really good week with lots of growth.
G1 is very frosty and is starting to put on some weight. Her phenotype is purple with a very gassy terpene profile. Can’t wait for her buds to fatten up.
G2 is producing trichomes. She is green with a sweeter aroma. I defoliated both plants and removed the bottom third and some popcorn buds that wouldn’t get enough light.
Frostbanger is stretching very tall and is towering over the others even if i raised them a bit. She is starting to flower so I hope it stops.
Watering 2L every other day, added some calmag as I noticed some deficiency on G1.
Light is at 100% at 40cm 800ppfd
Likes
3
Share

@Organic_G
Follow
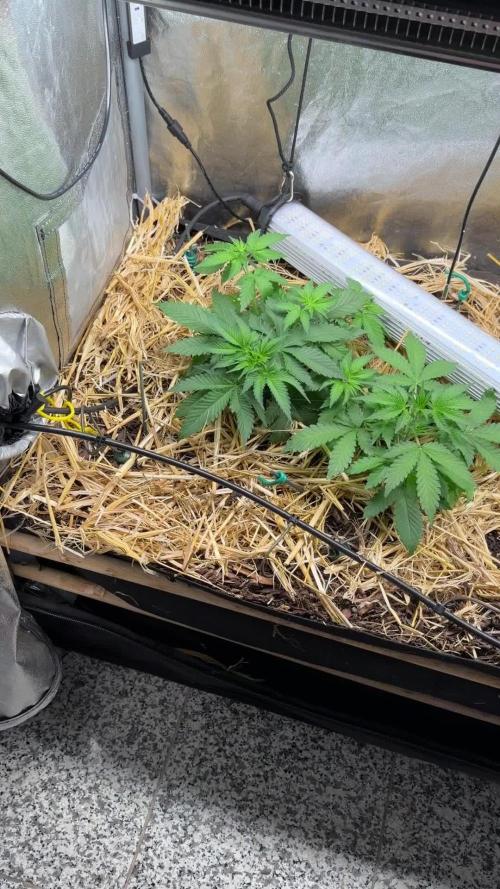
Wachsen aber gehen an mir vorbei hahaha muss nicht wässern, muss nichts machen einfach wachsen lassen und vergessen das ist immer das beste ;)
Werden heute oder morgen auf 12/12 wegen der Photoperiodischen umgestellt, zeigen erste Vorblüteerscheinungen, zumindest die Autos, daher muss die Purple Mango Kush nachziehen


Likes
2
Share

@Eniiamrej_01
Follow
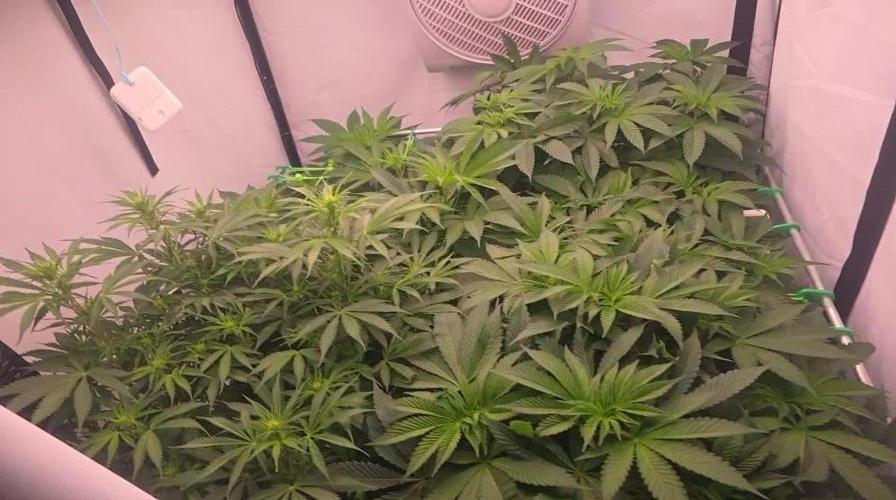
Jetzt wurde die Blüte eingeleitet und Woche 2 ist rum. Zum ersten mal gibts jetzt auch Blütedünger 2mlpro liter advanced nutrients Organic Iguana Bloom.
Likes
12
Share


@Philippovic
Follow
Läuft alles gut, nur hab ich eine durchschnittliche Luftfeuchtigkeit von 70% was so langsam erste Opfer fordert…
Man könnte denken, dass die drei Pflanzen von unterschiedlicher Genetik sind, dass sie so extrem unterschiedlich sind. Obwohl alle Drei Painkiller XL sind, Wachsen sie extrem unterschiedlich, eine wird langsam Purple Die andere ist sehr hoch, Und eine verträgt, wie man sieht nicht besonders viel Licht, dass sie ein Spitzen schon leicht ausgebleicht ist. Sehr interessant, die drei verschiedenen Phenos
04.08
5 weitere Headbuds von Panikiller 1 sind dem Schimmel zum Opfer gefallen 😭
Dafür entwickelt sich Nr. 2 wunderschö
05.08
Es sind mittlerweile 8 Headbuds dem Schimmel zum Opfer gefallen… die restlichen Headbuds von Painkiller 1 und 2 wurden Not-geerntet. Hoffentlich wird das Wetter endlich besser das die Luftfeuchtigkeit sink. Es wurde Radikal entlaubt um die Luftfeuchtigkeit weiter zu senk
Likes
17
Share


@LockDownGrow
Follow
Really starting too fatten up and even signs of ripening I gave her one week at the beginning of this week and am now just feeding water,