
Likes
Comments
Share


@BurningTreezz
Follow
this week our evo's arrived! they have quite a bit of power, much better than the Q-series.
today is day 28 and the ladies look great!
they are already starting to smell nice


Likes
10
Share

@D4D3DHOMMIES
Follow
Starting the second week of flowering, first day! And they are beautiful.

Likes
12
Share


@555ABKY555
Follow
I have a low consume of electricity today i change the light upped 50 watt the next week i started to fertilized. More auto of Dutch passion have more weeks to live for this in this time i prefer dont use any fertilized. I dont have idea the cbdv are strong plant for this i think wait to fiammingo the plant in the future in this time IS very early mi waiting... Next week bye

Likes
3
Share


@Paul_on
Follow
Terps on this cultivar are banging ,colours starting to show now some purples and pink plus yellow n green and she still has 3 wks to go , I've added a second Migro Aray 3 ,to try get fatter buds ,hope it works 💪, happy growing Growmies

Likes
15
Share


@Siriuz
Follow
Enjoy the videos and pics
Whats good brothers
How you doing?
I hope you like it👽💚
Likes
2
Share


@CannaIGrow
Follow
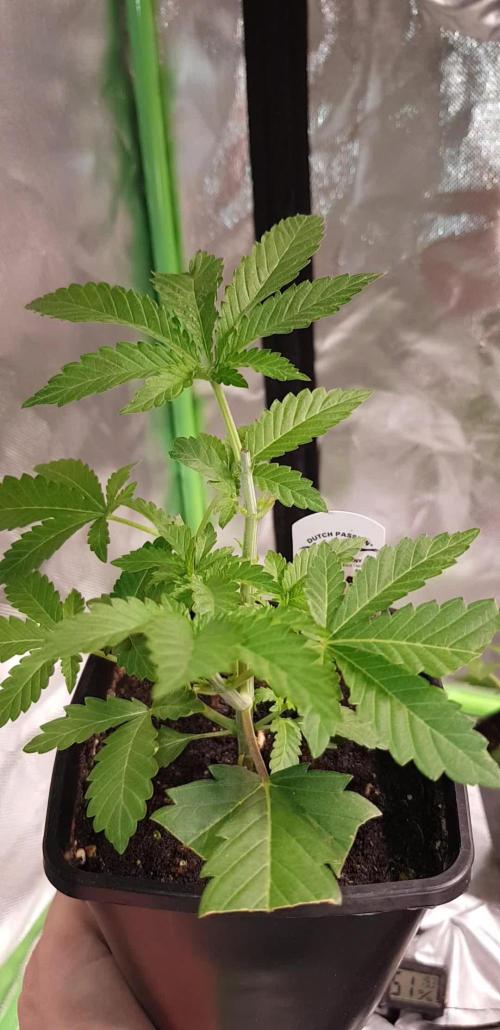
Transplant week! Some of the girls in the tent started to droop but this one didn’t! She’s looking pretty good to me
Come hang out with us in the discord!
Processing
Likes
14
Share


Likes
21
Share


@SupremeTimmy
Follow
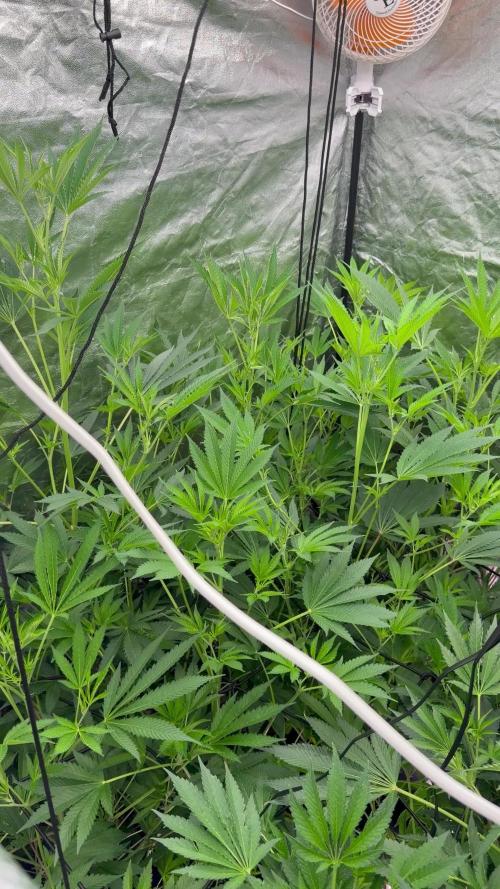
the week passed splendidly, the bushes began to bloom and the smell was crackling
the plants develop very well, I continue to water them with clean water and do not use chemicals.
I removed the large leaves that were inside, on the sides I left now the light penetrates better in the middle

Processing
Likes
149
Share


@CBD_Sweden
Follow
Hi all the happy people here in GrowDiaries.
This is my second cultivation ever and it will be fun to try a bigger space than my closet grow.
First, I'm just going to say I'm done with the construction of my new growroom.
I put some pictures on the construction here in week one.
The room is 2.14 meters by 1.7 meters and has a ceiling height of 2 meters.
It provides a floor area of 3.6 square meters.
I use a 54 Watt Lightwawe T5 for germination and 2 Pcs 400 Watt HPS lamps.
I have a channel fan that replaces the room air about 40 times an hour to get a comfortable theme in the room, the air enters a fresh air intake from the outside.
The air is purified through a carbon filter to then leave the room to the rest of the basement.
Then I use that heat to heat the rest of the basement.
I will use 8 pcs 15 liter Autopots to grow with and a 100 liter water tank that supplies the pots of water and nutrition.
I will grow completely organically in soil and will watercure my buds to get the best possible medicine for me.
But there are no cultivation rooms to be displayed here, so I continue with what is most important.
Today I have put my seeds in my moisture dome and hope the seeds have germinated within a few days.
I am very excited to see how the new growroom will work and how this Blue cheese Auto from Royal queen seeds will turn out.
Blue Cheese automatic cannabis seeds are a cross of Blueberry Automatic and Cheese Automatic that has been perfected over five years of breeding and careful selection. The result is a feminized, autoflowering strain with superior yield, flavor, and effects to either of its distinguished parent strains.
THC: 16%
CBD: Low
Yield Indoor : 325 - 375 gr/m2
Yield Outdoor: 60 - 110 gr/plant
Height Indoor: 40 - 70 cm
Height Outdoor: 60 - 110 cm
Flowering: 7 - 8 weeks
Harvest month: 9-10 weeks after planting
Genetic Background: Blueberry x Cheese x Ruderalis
Type: Sa 35% In 40% Ru 25%
Effect: Cerebral and uplifting
Climate: Mild
..............................................................................................................................................................................................................................................................................................................................................
Update 2017-08-15. All 4 seeds have germinated and planted in small pots inside the humidity dome.
I'm so glad it worked so well and now it's just hoping they'll start growing and become 4 big healthy girls :)
...............................................................................................................................................................................................................................................................................................................................................
Update 2017-08-16. I have mixed my own soil today. Its 40% sieved peat harrow H2-H4 0-30 mm, 45% sieved peat harrow H4-H6 0-30 mm. 5% sand and 10% of compost soil. And i use 15% of perilite and mix it all together.
................................................................................................................................................................................................................................................................................................................................................
Update 2017-08.20. Nr1 and 2 grow and thrive.
Number 3 just got rid of the seedpod and is folding out the sheets.
Number 4 is a bit shy and can only be seen if you look carefully into the soil.
.........................................................................................................................................................................................................................................................................................................................................
Update 2017-08-21. Nr 1 and 2 is doing well. Nr3 is trying to catch up and Nr4 is still shy.
--------------------------------------------------------------------------------------------------------------------------------------------------------------------------------------------------------
2017-08-23. Transplanted 2 girls from humidity dome and the small germinating pots to 15 liter autopots. The other 2 girls have to wait a little more before transplant to the autopots.
................................................................................................................................................................................................................................................................................................................................................................................
2017-08-27. The girls have settled in to there new home of the 15 liters autopot after a little transplant chock. Now the real week 1 starts for me and the girls.
--------------------------------------------------------------------------------------------------------------------------------------------------------------------------------------------------------
2017-08-28. New pic and movies.
---------------------------------------------------------------------------------------------------------------------------------------------------------------------------------------
2017-08-28. Nr3 is transplanted in 15 liter autopot.
-------------------------------------------------------------------------------------------------------------------------------------------------------------------------------
2017-08-29. New movie of the girls. Its no water for 3 days now for Nr1 and 2 so the roots develop more and match the plant above the soil. The temp controlled fan is awesome, its easy to set what temp you like to have in the room. Right now its 28 celcius. And humidity is 56%.
------------------------------------------------------------------------------------------------------------------------------------------------------------------------------------------
2017-08-29.
Hello to you who read my diary, I just want to say that I am pleased that you have chosen to check in with me and in my diary.
I just want to say that I do this for myself and for a steady flow of my medicine.
Everything you read and see in my diary is 100% honest and I will never distort or beautify anything here.
I document my crops so that I can learn from my mistakes and also to look back at those different crops.
I try to update with pictures every day and with text if something special has happened in the garden.
This is my strainhunt for the best medicine and the beginning of my journey with cannabis and the cultivation of it.
-----------------------------------------------------------------------------------------------------------------------------------------------------------------------
2017-08-30. Cleaned the room this morning, just vacuuming and cleaning with chlorine solution. Im testing the fan to control temp and humidity, it works great.
Added some pics with measurements and movie. Everything is looking great right now.
---------------------------------------------------------------------------------------------------------------------------------------------------------------------------
2017-08-31. New pics and videos.
---------------------------------------------------------------------------------------------------------------------------------------------------------------------------------
2017-09-01. New pics and videos. Gave each of the girls with 2 ml Alg-A-Mic, 4ml Bio-Grow, 4ml Bio-Heaven and 10 ml Formulex mixed in 2 liters of water.
I hope they like it :)
-------------------------------------------------------------------------------------------------------------------------------------------------------------------------------------------------------------------------------------------
2017-09-02. New pics and the girls liked the water and nutrients yesterday.
-------------------------------------------------------------------------------------------------------------
2017-09-03. New videos of the girls this morning. Nr1 and 3 looks great and nr 2 is looking a little funny, maby a little stressed.
Kl. 16.00. Did some defoliation on the girls. Added video.
Kl.. 23.00. New videos, defoliation and leaftucking.
-----------------------------------------------------------------------------------------------------------------
Likes
4
Share


@Andres
Follow
none of this bank has given me an abundant harvest hopefully it can be commemorated with its taste smell and knock out
Likes
18
Share


@J_diaz420
Follow
Comienza el lavado de raíces con riego de flawles finish para que la planta absorba sus reservas. En el vídeo se aprecia como burbujea el sistema casero de co2 en base a mezcla de fermentación.

Likes
1
Share


@sunshinegroww
Follow
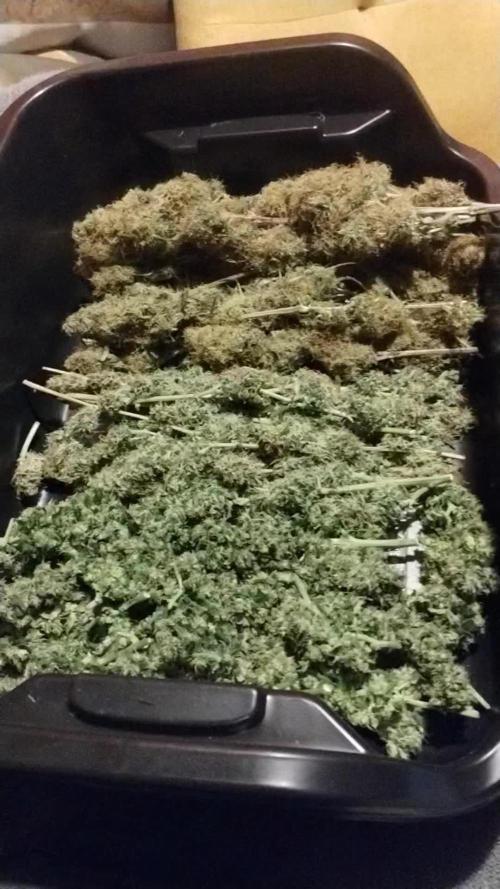
Super sticky and super dense flowers ,started flushing now for the next 2 weeks

Likes
31
Share


@Screwie
Follow
Today i changed the light from Mars Hydro300W classic to MH TS1000. Can tell straight away its much brighter and more like the sun. Hopefully it’ll be better and they grow strong!
Ive had the ladies in their 2 litre fibre pots and been watering a bit more now that they’re out of the propagator since 3 days ago. Actually i took them out late i suppose, and maybe the reason one of them has splotches is because of the high humidity of those couple of nights i thought it would be ok without the extraction fan for a few hours, however the ranges were going from like 90-70 or something. Anyway they’re big enough now to be outside on their own.
Might be a bit late to start nutrients but going to pick some up on the weekend and start them off on Biobizz standard nutrient.
Got to be watering more than i have as today noticed on 2 of them the leaves were drooping. Think they should be watered twice and around 75ml per plant but still getting used to these fibre pots that dry out quickly. Last thing i want is to screw it up early and lose any of these precious babies.
Going to ask a couple questions to clear up some queries i got.
Till next week...


Likes
Comments
Share

@MADMANk
Follow
Amazing plant! Easy breezy 8)
All around "no hassle" genetic! Hashy orangey terpes!

Processing
Likes
26
Share


@MG2009
Follow
02/01/2021
Going to sprout my last 2 Bluedreamatic seeds from
(fast buds). Will be sprouting in mini greenhouse on heat mat. Once seedlings are ready they will be moved under 1000w MH for veg and flowering.
10+hours later they are on bottom of water and time for paper towels in baggie.
02/03/2021
1 seed sprouted and I dropped the other in soil 🙏 I hope because it disappeared! So got at least one Bluedreamatic on the way hoping to see other one sprout in mixing tray.
02/05/2021
She's above ground! Day #1 , currently under 150w compact flourecent 3 way bulb when first true leaves form
(Not single finger let)I will start veg cycle under 1000w MH see you in 3-4 days for weekly update.
topped seedling pot with vermiculite 1/2-3/4 inches
leaving the cotdtyledons 1/2-3/4 inches above surface. Roots should fill up this container quickly, moved under1000w MH light for vegging. Seedling is 3-4 ft away from light but also off to the side no serious heat just about room temperature. I could not feel heat from light where I put seedling, comfortable on your skin is good for plants.
02/11/2021
It's day #6 above the soil, she is doing well already grown 2" above where I topped with vermiculite. At lights out I put her in humidity dome with my tomato seedlings main area of grow gets very cool at night,so I try to keep her at a better temp 72°f.
Likes
24
Share


@Mr_Cannuccia19
Follow
Ottimo raccolto, bei fiori sani buoni e sopratutto forti. Sono contento di avere da parte 2 semi nuovi da coltivare!! La pianta da subito è cresciuta in altezza mantenendo lo spirito sativo

Likes
96
Share


@DogDoctorOfficial
Follow
Greetings, fellow cultivators! Week 9 with our illustrious Big Cheese Auto is like witnessing a botanical sprint to the finish line, and the excitement is hitting a fever pitch. A massive shoutout to Seeds Mafia for the genetics that keep our green queen in perpetual amazement.
Our green sprinter is charging through her ninth week of flowering, and oh my, the acceleration is breathtaking! She's growing at an astonishing speed, embracing her full potential. The Autopot system remains the orchestrator, providing her with a nutrient symphony that propels her towards the grand finale. It's like the final act of a botanical masterpiece.
In response to the swift growth, a tactical adjustment is in play. I've cut back on nitrogen (P-Boost) and increased potassium (K-Boost). Picture it like fine-tuning a racing car for the last lap. Nitrogen, essential for vegetative growth, takes a backseat as potassium takes the wheel. Why? Because potassium is a key player in the flowering game, boosting bud development, enhancing taste, and improving overall quality. It's like switching gears for a turbocharged bloom.
The trichomes are stealing the show! Their numbers are skyrocketing, covering every inch of our Big Cheese Auto like a blanket of shimmering diamonds. It's like a botanical galaxy forming right before our eyes. The visual spectacle is not just mesmerizing; it's a testament to the plant's potency and readiness for harvest.
Ah, the unmistakable scent of cheese is now an aromatic symphony that fills the air. Each day, it becomes more robust, like a crescendo building up to the grand finale. The olfactory journey is now at its peak, promising a flavor profile that will linger in the memory.
Our TDS remains robust at 390, and the pH orchestrates a harmonious melody at 6.0. The Autopot and the nutrient adjustments are now conducting a final symphony, ensuring every element harmonizes for the best possible finish.
The final grooming session is in progress. The leaf-bending ballet continues, creating an even canopy that bathes in the natural light. Defoliation is like the last-minute touch-ups before the grand performance. It's like preparing for the curtain call of this extraordinary botanical journey.
A colossal thank you to Seeds Mafia, Aptus Holland, Grow Diaries, and the phenomenal community. Your support has been the guiding melody of this green odyssey.
As we approach the climax of Week 9, the excitement is tangible. Our Big Cheese Auto is not just growing; she's hurtling towards a botanical crescendo. I can't wait to witness the final act of this sprint to greatness.
Let's continue to cultivate greatness together!
Genetics -Seeds Mafia Big Cheese Automatic
Light - LUMATEK ZEUS 465 COMPACT PRO
Food - APTUS HOLLAND
All info and full product details can be find in can find @
https://seedsmafia.com
https://aptus-holland.com/
https://lumatek-lighting.com/
As always, thank you all for joining me on this journey, for your love, and for it all. My horticultural odyssey would never be the same without you. Your love and support are cherished, and I feel both honored and blessed to have you in my life

Likes
9
Share

@GERGrowDesigns
Follow
Welcome to Veg Week 3 of Kannabia Clementine Slush BioBoost Edition
Need a Fail-Safe Germination and Express Flowering?Kannabia Makes It Easy with BioBoost, Sproutly and Its Fast Genetics . More informations to find at The Kannabia Blog on GrowDiaries.
Check out Kannabia Seeds with my link [https://www.kannabia.com/de?ref=61966] and grab the germination device or the strains I used . Trust me – it’s worth it for sure !
Get another 20% Discount at all products using the code [GGD] at the checkout. little Holiday Present to the Community btw ☃️
For this Project , I’ve chosen the Feminized Photo Strain Clementine Slush BioBoost :
Here’s what I’m working with:
• 🌱 Tent: 120x60x80
• 🧑🌾 Breeder Company: Kannabia Seeds
• 💧 Humidity Range: 60
• ⏳ Flowering Time: 65 Days
• Strain Info: 21%THC
• 🌡️ Temperature: 26
• 🍵 Pot Size: 0.1
• Nutrient Brand: Hy-Pro
• ⚡ Lights : 600W x 2
A huge thank you to Kannabia Seeds for allowing me to try my Best with this amazing collection from Photo Strains they managed to Sponsore . Big thanks for supporting the grower community worldwide! Your genetics and passion speak for themselves!
Let’s grow together – and don’t forget to stop by again to see the latest updates!
Happy growing!
Stay lifted and stay curious!
Peace & Buds!
Likes
21
Share


@darb35
Follow
Probably 2-3 weeks left, giving them nutrients almost every watering.
They started to smell really nice, very frutiy.
Hopefully this lasts after curing (: