


Likes
Comments
Share


@Listening2thestatic
Follow
Welcome to week 5,
Herbies just been chillin' as always, keeping the other plants company as they finish their last couple weeks. I've started watering twice a day, as the plant is now consuming more water.
Plant has not stretched much, definitely due to the auto's restricted root growth. Hopefully we keep her happy and grow a nice big nug!

Likes
24
Share


@3lementa1
Follow
This is the 8th week. Thursday will be 9 weeks of 12/12. Some trichs are amber. They just added a good bunch of girth over the past few days, but most of the pistils are red now. The rest of them have been dropping leaves consistenly but the canopy remains full so they must be putting out more leaves.
I just flushed to 80% runoff and found out that I had 1200ppm. I just got an ec meter but my last reading said closer to 600 so idk what happened there.
I flushed until I had runoff ppm of about 150. Now they're back in the grow tent. I don't want to keep assaulting them with my microscope. I think they're ready. Just gonna let them settle another day or two to dry out a bit.
I took one small branch off the small Wedding Cake plant on Thursday and I've just been watching it dry on my counter. It's been 5 days and the stem snaps but still leaves a fiber connecting. I put it into a small jar with a 64RH thing. I just want to try it. It already smells amazing.
The leaves on the big CBD Blue Shark plant are going really yellow and some other colours are starting to come out as well.
The buds all fattened up and got more frosty again. I was worried they were foxtailing but they got more calyxes underneath the peaks and have been making more of a pyramid shape. They're really close to peak. Harvest day will be March 17 or 18.
March 17 1023pm chopped and hung after lights off all day. RH was 65% before I chopped and 50% after I closed the window and cut the plants off the saturated pots. I did a wet trim to prevent mold. The buds are sticky af. Gonna hang them to dry for 7-9 days before curing in jars :)
March 18 : checked the RH when I woke up and it's chilling at 45% 😎
March 19 : just checked to see how they were drying. There are seeds in every plant. RIP
I'll update when I put them in jars and again a few weeks later for final review. Overall it was a good grow despite the rocky start and a good introduction to the mainline technique and my new grow space. Next grow I should have everything pretty well dialed in.
March 23
They were hanging for 3 days. Rh was around 45, then spiked to 65 overnight when I forgot to turn the fans back on. Temp was high at around 26.they felt wet after 2 days, and bone dry after 4 days. The stems still didn't snap but I put them in jars anyway. A day later, jar RH was 50%. I burped all the jars and there was a smell from the new jars. I took all the weed out, washed out the jars, and did a dry trim on the weed.
One of the Wedding Cake plants must have gone hermie. I didn't see any bananas and didn't even realize there were seeds until the very end. The seed pods looked just like calyxes while the plants were growing. Many of the nugs are unusable. Under the sugar leaves are just layers and layers of seeds. Some weren't hit that badly. The CBD Blue Shark is much better off but still has some seeds.
I'm trying to stay positive. It's a bit of a shock though. I'm anxious to try the finished product. If the flowers at least taste good and have a good effect, all is not lost.


Likes
2
Share

@Weed_Wizard
Follow
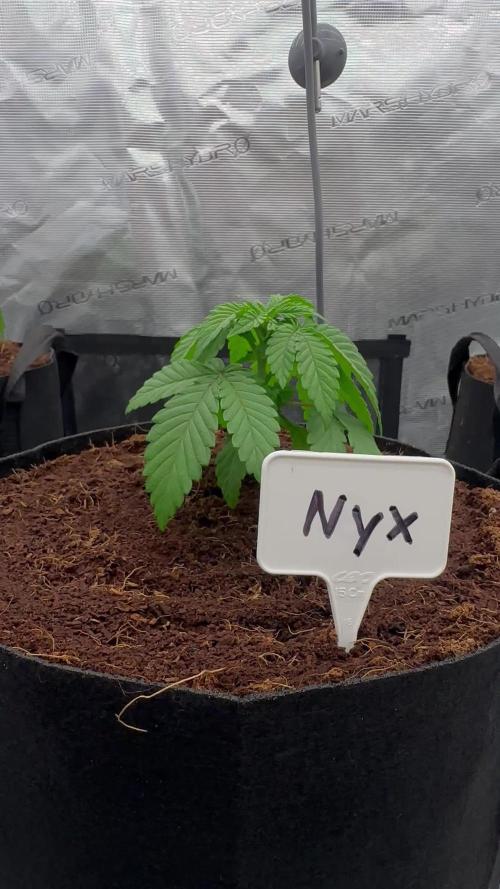
The girls are doing well so far. Advanced nutrients in combination with the Lumatek Zeus 600W Pro 3.1 is a killer combo. Also the coco substrate is working well so far. I placed them in bigger pots today . 🌱


Likes
6
Share


@KcKush
Follow
*Looks like I missed one week and didn’t even notice.
*Didn't feed for the last week.
*Chopped it down one week early. Could of gone for more but need the space.

Likes
113
Share


@Tropicannibis_Todd
Follow
Well growmies this one is a keeper that's for sure 👈 couldn't of asked for better Genetics 😉
She lead the pack during the entire grow ....
Amazing Plant
Thanks to Fastbuds for killer Genetics 🙌
👉 Big thanks to all my Growmies out there in GD land 👈 Much appreciated 🙏
Thanks To MarsHydro for the FC4800 and the MarsHydro UR45
www.marshydro.ca
👉I used NutriNPK for nutrients for my grows and welcome anyone to give them a try .👈
👉 www.nutrinpk.com 👈
NutriNPK Cal MAG 14-0-14
NutriNPK Grow 28-14-14
NutriNPK Bloom 8-20-30
NutriNPK Bloom Booster 0-52-34
Likes
87
Share


@squalino
Follow
voilà les vacances sont malheureusement fini.
toutes les bonnes choses ont une fin 😥😥
voici les dernières vidéo
dimanche ont sera à la maison
je vais pouvoir retrouver ma plante et observer comment elle aura évolué pendant le mois d'absence. ❤️❤️
PS: n'oubliez surtout pas de suivre nos aventures avec THC-HUNTER VS SQUALINO SUR LES GRAINES AUTO SEED
DÉBUT EN SEPTEMBRE
ON VOUS ATTENDS NOMBREUX.
DE NOMBREUX CADEAUX À VENIR POUR L'OUVERTURE DE NOTRE FUTURE CHAÎNE YOU TUBE ET NOTRE CHAÎNE INSTAGRAME
PLUS D'INFORMATIONS TRÈS BIENTÔT
ALORS SUIVEZ NOUS ❤️❤️😍😍
Likes
24
Share

@Grower_Tom
Follow
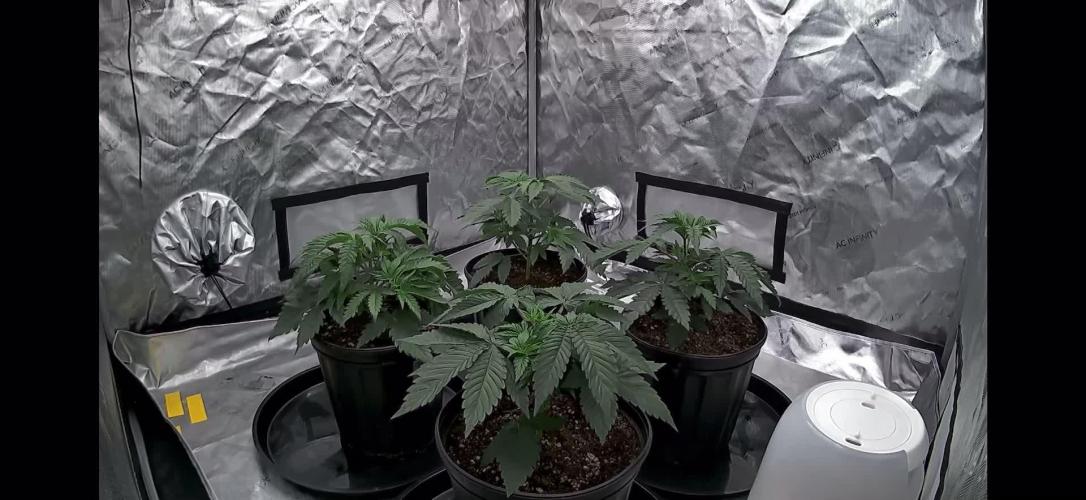
Day 21: plants acclimated great to their new 1.5g homes, and have already rebounded. I’m currently running about 47% on the dimmer of the sf7000 @ 25” above canopy. All plants are very level making lighting easy thus far. They dried out a bit since the transplant watering so I’m back to feeding roughly 500ml to 700ml per day. That may change, I want to do a bottom feed next, so we’ll see how long that takes before I stay on the top feeding and implement a standard watering schedule.
Day 27: added a video of the growth over the past 6 days. Starting to show signs of vigorous growth. Excuse the Timelapse as I am leaf tucking and rotating once in a while. Haven’t seen a need to tie down yet, since the fan leafs are so huge it makes tucking easy and super viable in this position.

Likes
13
Share

@Janerussel
Follow
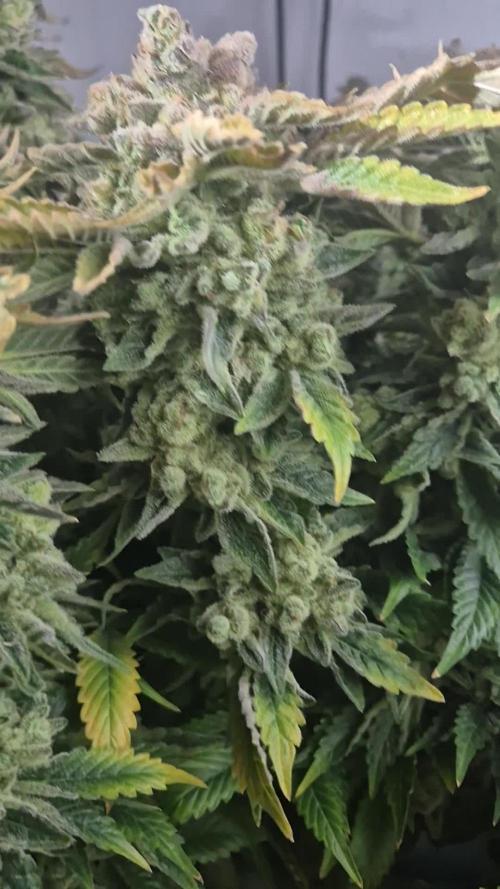
Flushing started. The reason why this plant took longer to flower than expected was probably because I kept the light too close. I also think that during the plant's life cycle I should have done a few cleansing flushes on the roots so that they would have absorbed the nutrients better and that's why the plant suffered from an overdose of nutrients. The quality of the buds seems very good. The buds are rock hard and have a lot of resin on them. I'm waiting for the amber to appear in the trichomes before I harvest. The plant is also still swelling. The flush may take a little longer.
Likes
36
Share


@SolitudeCorners
Follow
Can't wait to blazeeee
Feeding💪
10/17 Water30L+Cleanse80ml+calmag@190ppm
Ph6.3
Ebb 10.42/11.32/12.26/13
Clone 11.35/12.21/13.05/14
Average runoff ec1.5
Keeper 300ml per pot
10/18 Water26L+Flawless90ml+calmag@300ppm
Ph6.3
Ebb 11.38/12.24/13.17
Average runoff ec1.2 ph6.5
Clone 12.38/13.56/15.20/16.10
Average runoff ec1.5 ppm750
10/19 Water26L+Cleanse80ml+calmag@200ppm
Ph6.3
Ebb 11.12/11.48/12.24
Average runoff ec1.4
Clone 11.50/12.12/12.37/13.37/14.40
Average runoff ec1.3 ph6.6
10/20 Water30L+Cleanse30ml+Calmag@190ppm
Ph6.4
Ebb11.42/12.22/13.20/14
Clone 12.40/13.20/14.20/14.45/15.15
Average runoff 1.2ec ph6.4-6.7
10/22 last light day
10/23 2 Pm Cut and hang
Plan 21day at 23temp 55rh

Likes
23
Share


@sebino
Follow
HI guys, she made it wonderfully so far entering the tenth week. She is terminating flowering stage and I already begun watering her with just water. Today I flushed the pot two times. Cheers

Processing
Likes
9
Share


@Hattrick
Follow
recovering from heart surgery, wanted to switch last weekend but was still in hospital. switched 0n 04/12 to flower.
doing what i can when I can and with some luck all will work out


Likes
1
Share


@Professor_Chaos
Follow
Beginning of week..
So I went ahead and did a late defoliation.. humidity is sitting too high in the tent.. its been around 50 - 55 % RH but it does sometimes get up to 60% RH.. removing some of these leaves should help lower the RH AND lower the chances of getting mold.. these are gonna be some fat colas.. and those are the ones mold can creep up on.. doing my best.. dehumidifier just cant keep up.. but I also dont run it inside the tent due to the heat that thing and it's transformer give off when it runs for over 24 hours or so.. but she shouldn't mold.. I've got 3 fans inside just moving air.. but of course, sometimes that isn't enough.. but we will see how this goes.. may even add another fan.. keep it on the floor of the tent an point it up.. we shall see! But damn she smells so amazing.. i can smell alot of similarities from the Mandarin Cookies in here.. which also has Mandarin Sunset as a mother.. just as this one does.. but you can smell the skunk along with it.. but not as powerful as the citrus.. aw man the citrus.. love that shit.. I even chewed on a trichome covered fan leaf.. very delicious! So glad I have 9 more of this strain and a few others from ETHOS.. next run may be some Aura Genetix.. I've gotta see what fast versions are all about.. I bougt some of the Peach Bellini.. should be pretty epic.. keep an eye out for that diary after this one!
Mid week..
Lower branches are getting plenty of light after the defoliation. The smell is getting intense. My carbon filter has began to smell like shit lol. Not literally.. but it stinks.. maybe like rotten skunk or something.. I've ordered a new one but I took that smelly one off for now.. so the whole block smells like member berries right now till the new filter comes in.. tomorrow. I couldn't figure out what the smell was untill i accidentally got my face into the exhaust fan wind.. smelled like rotten skunky shit.. lol. I guess I forgot things need to be changed out every so often.. just figured "air" running thru it wouldn't make it crap out so fast. Been maybe 8 - 12 months.. something like that. Never used one before this.. but running some ETHOS, it is a must! So citrusy! Purples are slowly coming in. She really reminds me of the Mandarin Cookies I grew.. but I also think the Mandarin Cookies was heavier on the Mandarin Sunset phenotype side.. and this one is pretty similar. Scent, growth, stretch.. but I know I cant say for sure that's what it is.. this is just what I believe is going on. But wow.. such a beautiful plant.. I've had to run a a few twist ties to other branches in order to keep them from flopping over, leaning on eachother and the sides of the tent.. should have scrogged I guess lol.. live and learn tho.. but so far its not too bad.. but this early on shows me what I might have to be dealing with in the next couple of weeks cuz they are beginning to get STACKED! I've said it before, and I'll say it again... ETHOS for the win 🏆
Later that day...
Wow.. going back in again and now she smells just like the Early Lemon Berry! Wth! How is that even possible?! She is doing amazing things! Some calyxes are beginning to turn purple. Some of the top leaves are as well. Tried to get some decent pics of it.. but I guess I cant figure the new phone out.. as you can see, some pics are a little blurry. And sometims the capture is delayed behind the flash and I still get a dark pic as if it didnt even flash.. but whatever.. I can't wait to see what she has to offer! Such a gorgeous girlie! So happy and excited for this one!
End of week..
Nothing left to do now but feed/water for about 1 more week and she will be ready for the 2 week flush!.. I normally like to just water as normal (without nutes, duh) for the entire 2 weeks and still keep checking runoff.. maybe FloraKleen once a week and then just water till harvest! So far, I am starting to see some milky! Still mostly clear, but that means she is getting closer! So excited! This girl really smells just like the Early Lemon Berry I grew! But still with a bit of sweetness to it too! Aw man I can't wait! Anyways... on to the next week!...

Processing
Likes
38
Share


@AlpineGoat
Follow
Tuesday, day 50. Half journey is gone and now is just patience and care.. only the right amount of water, not too much and not many times per week - maybe tomorrow, friday and sunday.
The Nana is the tallest now, since it wasnt stressed by any kind of activity, she’s presenting a beautiful purple tone on her leafs and flowers begin to grow very well.
The other topped girls looks pretty same, 55cm in height, a lot of dense buds cover my stems, yeah!
The fimmed girl is the shortest but the biggest in terms of yeld!
I wanna see the difference between the three metods and see which one works better with the genetic!
Sunday - day 55 - cold is dropping hard during these days, temperature start colling down of 1-2°C and I’m worried about the plants.. how can I avoid to kill them with the cold? What’s the minimum temperature for this genetic?
Now I’m hitting 15 during the night phase and 17.5-18 during the daily phase (between 6pm and 6am).


Likes
14
Share


@Chubbs
Follow
What up Fam. Weekly update on these Orange beauties. They got a major defoliation this week, they needed it for sure as they're not the biggest so it'll allow the lower flower sites to mature better. All in all Happy Growing.
Likes
30
Share


@Silverback_Guerilla
Follow
9/18:
New week...fed with Boomerang and Kangaroots
9/19:
Applied Axiom harpin proteins and boomboom spray
9/20:
Fed full strength TPS One...decent growth. This strain really likes the Nitrogen..they were starving...
9/21:
Tucked a few leaves and took some photos and a video.
Looking good. Just a couple more days of 24/0...
9/22:
Switched out the 560w of 5000k CCT lighting for 720w of 3000k CCT lighting and set the timer for 12/12.
Decided against 13/11 with emerson effect...trying to save a few bucks on electricity.
I'm keeping the lights at 30" from the tops for a day or two.
9/23:
The girls loved their first night of sleep...so perky!


Likes
50
Share


@Mr_Motalovah
Follow
Hello Growers and Tokers! 👋 👩🌾 🧑🌾.🔥💨
Sorry for the delay on the weekly updates, had some things I had to attend but I'm back and at it!
21-day defoliation has come..
These pictures were taken on day 20 of flower.
So these ladies can get quite bushy with those big indica fan leaves. So a much need defoliation was done.
I'm loving the CC2 structure but not so much CC1 & CC3, training with those two got out of hand, had to make so weird ass bends!
Distribution is all off with CC1 & 3.. I'll se what I can do moving the colas around to even out the light penetration.
The split on both look pretty dope tho and CC3 has that little half loop.
I'm thinking about trying a canna bonsai next spring with an autoflower jus because of that half loop. 😂
That sweet sweet cream caramel aroma is getting more and more noticeable. 😍 😍
Trichomes are coming in nicely as well. Pretty happy with the results as always with this strain.
Height is different on all three so 77cm is an estimate between the three..
I'm sure buds with start filling in this week after the defoliation done.
Only going to be watering with bloom nutrients for the next two weeks then I'll start adding an organic PK booster to the mix.
Have a great day!
One love!