
Likes
Comments
Share


@Gabroxxx
Follow
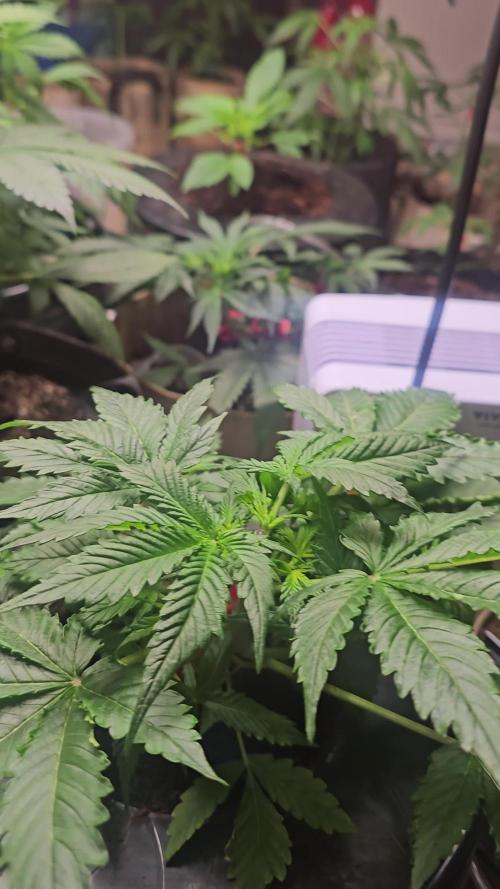
Settimana di crescita per le piante, aspetto che le ultime due abbiano abbastanza apparato radicale per stare al passo di quelle già messe in precedenza, vedo che stanno crescendo bene tutte, ho ancora dei problemi con gli insetti, non so se le coccinelle abbiano aiutato o no, a breve credo di utilizzare un prodotto per cercare di eliminarli completamente perché piano piano stanno formando dei puntini nelle foglie.
Del resto tutto bene, sto aggiungendo i soliti prodotti in più che ho citato nelle altre settimane, dimmer della luce alzato un po più del 50% per avere più luce e anche innalzare leggermente il calore all’interno del box.
Ho aggiunto delle piante grasse e 2 animali giocattolo per fare compagnia alle piante😂


Likes
Comments
Share

@Samsationalseeds
Follow
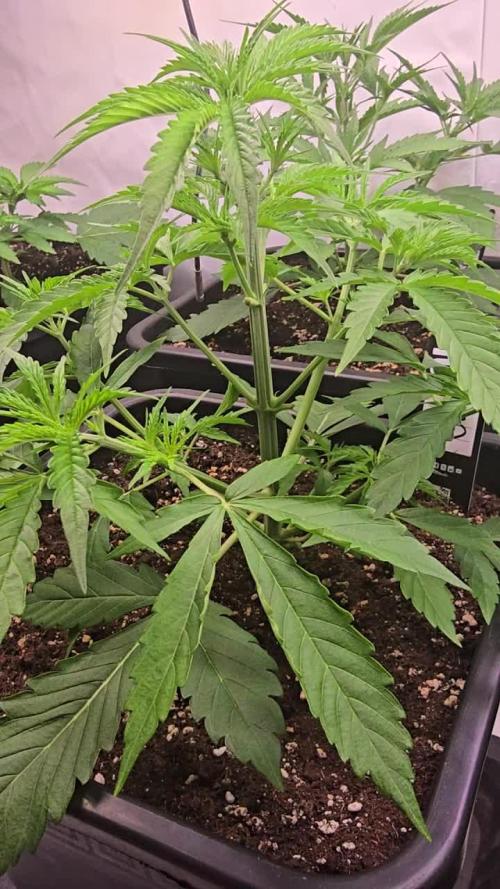
the two BPP R3 in soil went into bloom. the dwc are starting to enter bloom slowly as well
36-42
The veg and seedling cycle on the three gallon pot was short and it's gone into bloom with very little stretching. All of the plants look healthy, they look fine, no nutrient. Or PH issues
Only one banana purple punch has been in bloom for about two weeks.Two out of the other four are about to finish stretching and go into bloom, and the fourth one is still a little stunted.And delayed.
The cherry lemon gelato in the deep water culture just entered bloom.
The gorilla z is still in veg

Processing
Likes
10
Share


@yaron
Follow
Hi guys!its getting kind of boring but again a rainy day.They need sunlight bad,the coming days the sun will shine so we will see what happens.
Cheers!
Finally we have sunshine!The smallest one,a gg,just will not grow i dont know whats wrong with her and she is already in flower.
The rest is doing fine i think.
Cheers!
Likes
8
Share


@PollenSax
Follow
I just noticed my PH has been around 7, and a couple of the seed mothers are showing CAL/MAG deficiencies..
I use well water, and I don't have to adjust it in the summer, but around late fall the PH raises.
I forgot to get good pics of the seed mothers, since I was focused on the STS formulas at the time, but these are the Pollen donors transforming into male flowers. 5 weeks old.
The seed mothers are coming along nice with dime sized buds on them. I Topped them all at the 5th node, just before the cola, so the canopy would all be even under the lights.
I just sprayed these reversed buds 1 time only on day 17, after the first STS treatments, with 50ppm of Gibberellic Acid (GA3) to stretch them out away from each other.
Gibberellic Acid causes plants to stretch enormously, and PPM's of 50 to 100 can cause females to reverse to males.

Likes
14
Share


@Simsim
Follow
Hi Guys !
The plant suffered of a Nitrogen/Calcium deficiency, so I fed her with more FloraMicro and I raised the CaliMagic dose for the past week.
She's lookin fine today !
I think I killed all the bugs, I added some Neem Powder on the top of the soil and 3/4cm of clay peebles !
The blooming really starts and this little girls starts to smell weakly.
I just remove the leaves that covered the Bud, and I did some LST that works a lot !
See you next week, keep on growing !🕉️

Likes
27
Share


@GrowInger420
Follow
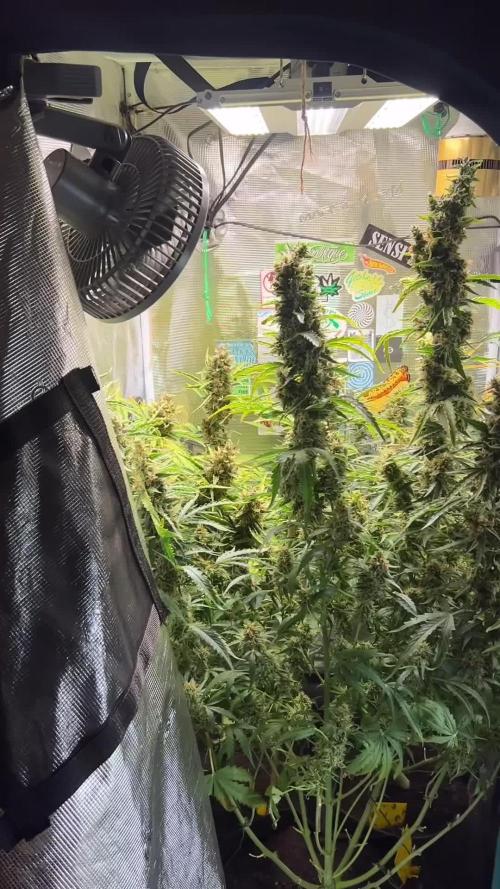
This week is start of 4th flower week. The plants look good but i need buy some yellow cards. Buds become bigger and start to smell more intense. The lemon haze surprised me, because i germinated her 15 dsys after them other 2 and shes the biggest of them all. Hope, everything will be fine. ✌️
In the middle of the week i took the net away because it seems they stretched finally and they have a good shape now.


Likes
5
Share


@ZHunterZz3
Follow
Hey guys week 2 flower check in,
Flower nutes started.
She's stretching.. around 6-7 inches of stretching within the first week
had to Defoliate the lower canopy again to keep good airflow and to promote upwards growth, appears to be working.
looking forward to keeping you guys updated in the upcoming weeks. :D
Likes
4
Share


Likes
22
Share


@Aedaone
Follow
The temperatures, humidity, and watering volume(if measured) in grow conditions are all averaged for the week. The pH is soil pH. Any watering done by me is well water which is 7.6 pH and 50° F. Any listed nutrients are ml/gallon of soil.
Day 1 we have temperatures in the mid to upper 70's, clear skies, and lots of sunshine. We have no rain in the forecast for a few days 🙏
Day 2 we had lots of sunshine and clear skies. Highs in the upper 70's and 49% humidity. We needed the dryness. 🙏
Day 3 we had clear skies and sunshine. Temperatures were in the mid to upper 70's.
Day 4 we had partly cloudy skies and temps in the middle 70's. I added some potassium and they seem to be responding well.
Day 5 we had temperatures in the low 70's. Sky's were cloudy and we had showers in the evening.
Day 6 we had rain the previous night and intermittently throughout the day. Temperatures were in the low 70's with cloudy skies.
Day 7 we had clear skies sunshine. Temperatures were in the low 80's.
This week was a success. There was more rain than I or the plants liked. We did have a few pistils brown up from the rain. There was zero boytritis and zero powdery mildew. These plants have not been treated with any preventative and they've flourished on their own resistance. The plants added a little more height. I expect that their stretch is over. Next week I'll add potassium to pump these buds out.
Likes
19
Share


@emeraldlabs
Follow
Growing like crazy; a lot of upcoming LST to get her ready for flower tent. Did a bit of defoliation this week, all the lowest leaves of plant to clear up some space - plan to top the soil when switching to flower.
Moving to flower in 2 weeks, once banana kush is harvested.
Photos/video taken 63 days after breaking soil.

Likes
18
Share


@Dunk_Junk
Follow
Doubled her height this week.... from 3cm to 6cm 😂 but she pushed out a fair few leaves into the process.
Going well so far.


Likes
18
Share


@StickyFingah420
Follow
Planta resistente, de estructura mayormente indica, con una producción importante de resina.
Planta de rápido desarrollo que tolera bien el estrés provocado por el topping, LST y frío.
Altura media, con flores realmente densas y duras, tal como prefiero, avanzando en la floración dejará ver colores rojizos que deslumbrarán.
Se desarrolló muy parecido a una Gelato que crecí del mismo banco.
Un desarrollo fuerte y rápido para terminar brindando hermosos brotes que desprenden sabrosos aromas dulces y lucen una apariencia de dispensario innegable!.
Sin duda buen trabajo de Fast Buds en estas genéticas.
Likes
16
Share


@Oimjr
Follow
Wish I'd know about this site when she started. In week 9 since dropping the seed. Started Jan. 1st.


Likes
42
Share


@FlorChaquena
Follow
Desde 13/12 a 20/12
13/12: empezó el día con lluvia en la madrugada y mucho viento. Esperemos no haya sufrido la planta ya que estaba atada y no pude ir a cortarle los hilos.
El pluviómetro marcó 130ml. El viento fue fuerte pero lo soportó como una campeona.
El problema es que los caminos estan feos y no se puede entrar. Tendré que esperar hasta el miércoles o jueves para poder ir a verla.
14/12: temperatura de 29ºC. Humedad de 63%. Me dicen que sigue creciendo bien, aun no se mejoran los caminos rurales así que hoy no podré ir a verla. Mañana posiblemente si y subo fotito.
15/12: tuve que pedirle a un amigo que me lleve en moto porque en auto no se puede entrar, hay mucho barro y aún no se escurre el agua de los caminos. La nena no sufrió nada. Crecio mas de 15cm desde la ultima vez que la vi. Parece que con el viento se desataron los hilos así que volví a atarla. No hizo falta riego ya que aún dura la humedad de la lluvia del domingo.
16/12: hoy fui a verla y a regarla. Me llamo la atención la fuerza que hace para irse para arriba, tanta fuerza que desató varios hilos. Tuve que volver a atarla. Se marcó a tal punto de casi quebrarse el tallo en la punta, donde doblé la planta. Le puse aloe vera natural para que cicatrice, espero de buen resultado. Por otra parte regue con 20 litros y saque muchas arañas blancas, muchos huevos y varias chinches. No nos olvidemos que el lugar de cultivo está cerrado por monte autóctono y virgen, hay cualquier cantidad de insectos. Suelo ponerle musica a la planta cuando voy a verla, hoy escuchamos el CD “Lobo suelto, cordero atado” de Los Redondos. ¿Ustedes creen que las plantas disfrutan de la música como nosotros?
18/12 - mucho calor durante la siesta/tarde. Conserva bien la humedad. Hoy regué con manguera. No encontré ningún huevo de araña, pero si una araña pequeña. Ayer no pude venir a verla por falta de tiempo, y hoy note el crecimiento de los dos días. Va bastante bien. Esta semana descansa de fertilizantes. Esperaré a fertilizar fuerte pasado el cuarto menguante.
19/12: como de costumbre fui por la tarde antes de que cayera el sol, y me encontre con la sorpresa de que tenia mucha araña roja varios sectores de la planta, muchos huevos debajo de las hojas grandes. Tuve que volver a mi casa a buscarlo Jabón Potásico para hacerle aplicación foliar. Le puse 1 litro con dos tapas de jabón; esperemos haga resultado. Mañana tendré que dedicarle más atención a la nena y sacarle todo lo que pueda de forma manual. Hoy es luna llena y alumbra muchísimo, la nena lo siente, le gusta.

Likes
11
Share

@ThatsmyGrow
Follow
🌱 Week 3 – Gorilla Cookies Auto Pheno Hunt
Another week down and the differences between the phenos are becoming more obvious every day 👀🔥
The environment stayed very stable this week with temperatures, humidity, and VPD remaining consistent. Because all plants are growing under the exact same conditions, it’s really interesting to see how differently each phenotype develops genetically.
📈 Current observations:
Several phenos are already reaching close to 30 cm in height
Meanwhile, some smaller phenos — especially Pheno #6 — are still around 13 cm
Leaf structure and overall plant shape continue to vary a lot between phenos
Growth vigor is clearly different from plant to plant now
💧 Feeding & maintenance:
This week the plants received their first proper feeding with around 4 liters of nutrient water.
Some phenos seem to react more sensitively to the nutrients, as a few plants are starting to show slight brown leaf tips, so I’ll keep a close eye on them over the next days 👀
I also removed more large fan leaves to improve light penetration and allow the lower branches to develop more evenly.
📊 Current environment:
Temperature stable around 26°C
Humidity staying between 63–65%
VPD maintained around 1.3 kPa
Light intensity remaining at 35%
Now I’m really curious to see when the first flowering signs will appear 🌸🔥
💬 Which pheno would you pick so far?
Likes
11
Share
@chrizzle
Follow
just plain water last week, will try to harvest them in a few days when temperatures drop


