


Likes
51
Share


@eldruida_lamota
Follow
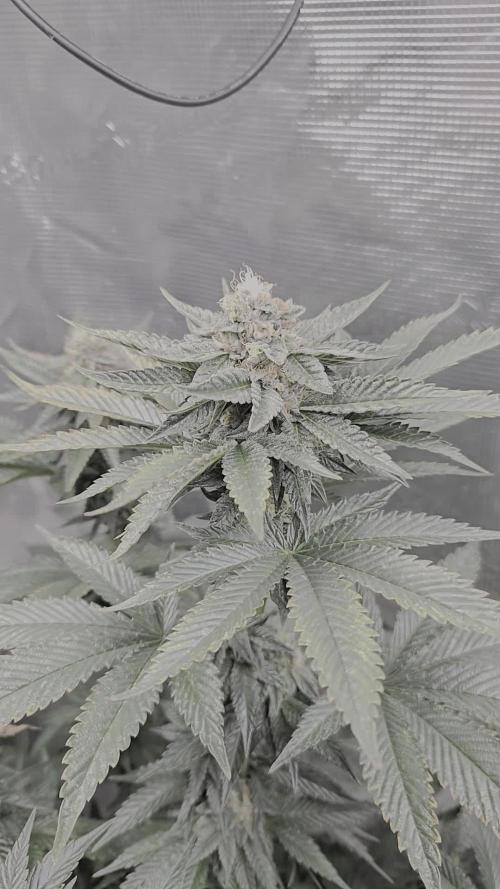
Bueno resumiendo cookies gelato es una variedad híbrida muy fácil de cultivar pero ojo, cuidado con los últimos riegos si no queréis perder cosecha por moho. Lo demás de 10 pegada heavy sabor increíble, cogollos duros como rocas y bañados de una gran capa de polen.
El ambiente del secado se mantuvo en 23 grados de media y la humedad estuvo por debajo de los 45% en todo momento.
Poco más la verdad estuve encantado de poder cultivar una genética tan potente .
Un saludazo que paséis un final de año increíble y por supuesto buenos humazooos💨💨💨.

Likes
38
Share


@Suprmoux
Follow
On this beautiful monday I reveal to you the evolution of these wonderful Black bud 😇. I am waiting with excitement to prepare them for harvest, they are so close. I have tried as much as possible to present to you their details and colors which are as close as possible to the view I have here in front of me. I'll leave you with this update and come back for the serious stuff 🙌✌️👨🌾.


Likes
3
Share

@HomeToGrow
Follow
Moin,
Die 2. Blütewoche ist mittlerweile vorbei und wie befinden und an Blütetag 15. Der Stretch ist noch nicht komplett durch nimmt mittlerweile aber deutlich im Tempo ab und die Zkittlez fängt mit der Blütenbildung an mit jeden Tag kommen neue Pistils dazu und die ersten Trichome bilden sich auf den kleinen Blättern.
Vom Wuchs ist die Z wirklich kein Kraftpaket im Gegensatz zu ihrer Nachbarin, die Internodienabstände sind groß und die Triebe bleiben relativ schwach und dünn. Immerhin der Stretch verlief gut und blieb bisher gut unter Kontrolle. Seit 2 Tagen werden auch keine Triebe mehr gescroggt.
Am Wochenende wird nun gelollipopt und die Intercanopy-Lights kommen als zusätzliche Beleuchtung dazu.
Hey,
The second week of flowering is now over, and we’re on day 15 of flowering. The stretch phase isn’t quite over yet, but it’s slowing down significantly, and the Zkittlez is starting to form flowers—new pistils are appearing every day, and the first trichomes are forming on the small leaves.
In terms of growth, the Z really isn’t a powerhouse compared to its neighbor; the internode spacing is large, and the shoots remain relatively weak and thin. At least the stretch phase went well and has remained well under control so far. We’ve also stopped scrugging the shoots for the past two days.
This weekend, we’ll be lollipopping the plants, and the Intercanopy lights will be added as supplemental lighting.

Likes
8
Share


@OBXGuy61
Follow
Big big week. Site prep in woods 400 yards from home, middle of neighborhood urban GG.
Babies getting strong indoors as temps outside are cool at night on the 50’s but hot in the day, around 72 - 77, Some fun inside and outside.

Likes
12
Share


@DBQush
Follow
Dear diary,
Week 10 total and week 1 of flower is behind us. Will just be making sure all tops are exposed and somewhat in the right place as I let them stretch for about 21 days before some defoliation.
🌸🌸🌸🌸🌸🌸🌸🌸🌸🌸
⏰ Day 67:
Feeding was given in the evening with a solution of 1.87ms and pH of 5.6. During this feeding, I guided most of the tops into their designated positions within the net, ensuring they are adequately spread out to receive optimal light.
I also checked the runoff, which measured 2.3ms, but considering the extra dissolved salts from full draining and collection that would be higher that it really is, I will aim to bring it back to the desired range of 1.65-1.7ms to be sure.
⏰ Day 68:
In the evening, the plants were fed with a solution of 1.64ms at a pH of 5.8.
⏰ Day 69:
Evening feeding consisted of a solution with 1.66ms strength and a pH of 5.9. I also took the opportunity to confirm that the lights were positioned at a 48cm distance from the canopy.
Additionally, I'm testing the exhaust system by venting it outside the room. Currently, the relative humidity (RH) ranges from 53-55% during lights-off and 58-60% during lights-on, while the temperatures remain around 18°C with lights off and 23.5°C with lights on. These conditions fall within the desired vPD (vapor pressure deficit) range of 0.95-1.2.
⏰ Day 70:
Feeding was carried out in the evening using a solution with a strength of 1.66ms and a pH of 5.9. To enhance air circulation, I added a fan at the top of the tent.
Furthermore, I checked the light intensity, which measured around 760-780ppfd.
⏰ Day 71:
During the evening feeding, the plants received a solution with a strength of 1.64ms and a pH of 6.4. The RH levels range from 55-65% as the girls get more bushy, while temperatures vary between 23-18°C, depending on whether the lights are on or off.
⏰ Day 72:
Evening feeding included a solution with 1.64ms strength and a pH of 6.4.
⏰ Day 73:
The plants were fed with a solution having a strength of 1.66ms and a pH of 6.0. As indicated by the feeding schedule, the A+B mix was increased to 3.5ml/l.
I also ensured that the lights were positioned approximately 50cm above the canopy and set to 90% intensity to provide additional heat.

Processing
Likes
18
Share


@CanadianFillmore
Follow
Week 7 begins for Divine storm. Both ladies are looking good and healthy, bud sites continue to bulk up and frost up. Switched out big bud coco for overdrive as we approach the end of the grow.
Thanks for checking in, tune in next week! 👽🌳🔥


Likes
12
Share


@PedroAndHisPlants
Follow
Day 22:
Hey everyone!
Update on the second grow: the plants are looking very healthy and seem to be growing much faster than the first batch. 🌿 I feel like we've already done a lot better with these plants compared to the first grow.
What do you all think? Any thoughts or suggestions?
Day 26 (Second Grow):
Hey everyone!
Exciting news: the plants in our second grow have names now too! 🌿 This will make it easier to identify and keep track of each one, especially if they get moved around. It should also help you all follow along more easily with the pictures we post.
We've built a SCROG (Screen of Green) net for the plants in both grows. For those who don’t know, a SCROG net helps to train the plants to grow horizontally, which maximizes light exposure to all parts of the plant and promotes more even growth. We're using it to ensure all plants get plenty of light and develop a uniform canopy.
Additionally, we've placed a hygrometer among the plants to measure the humidity between the leaves. We've noticed that the humidity sometimes exceeds 70% in those areas.
We're considering whether we need more fans, an intake ventilation system, or if a dehumidifier would be a better option. We're leaning towards adding more fans to improve air circulation, but we'd love to hear your thoughts and suggestions!
Stay tuned for more updates as we continue to watch both grows progress!


Likes
Comments
Share

@Hsihs
Follow
Цикл занял
16 недель и 2 дня или 114 дней от семени в рюмку.
из них 9 недель и 2 дня цвет
все было просто.
пробовал, очень сильная.
Likes
3
Share


@Kanokpalm
Follow
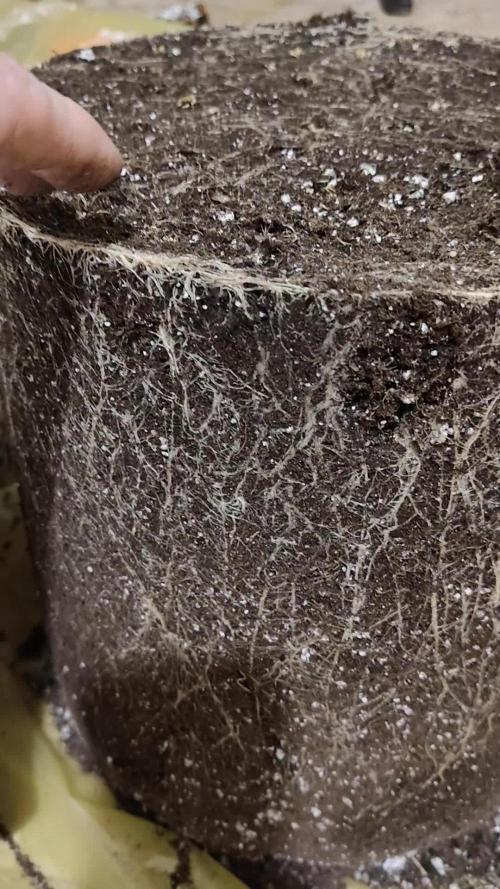
After 7 Day
From 2" Pot to 3 Gallon Fabric Pot
Keep Going on
My First Season! 😁


Likes
1
Share


@SweedDreams
Follow
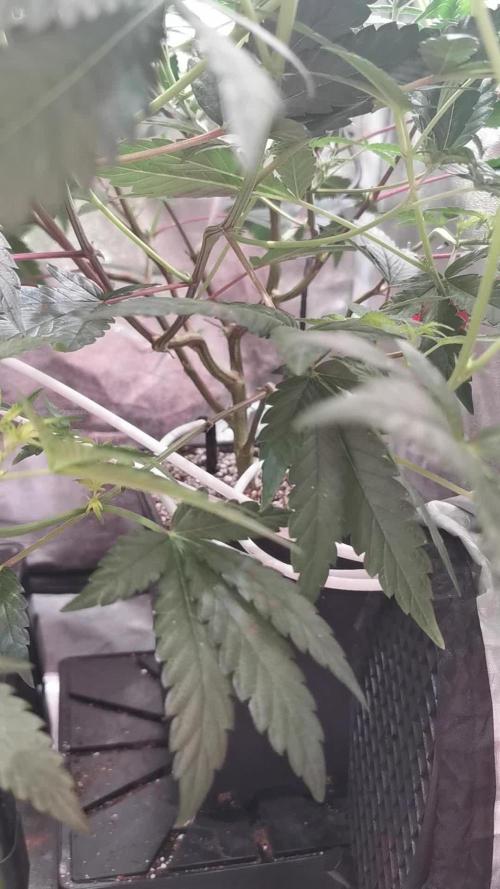
Woche 6 meines Indoor Cannabis Anbaus:
Pflanzen: 2x Lemon Cherry Cookies, 1x Strawberry Banana, 1x Mimosa Cake , 1x CBD Auto
Diese Woche lief eigentlich ganz gut. Ich hatte ein kleines Problem mit Trauermücken, aber dank meiner Klebefallen und etwas Neem Öl, habe ich das wieder im Griff.
Die Strawberry Banana habe ich gut runtergebunden. Das hilft, damit das Licht besser verteilt wird und die Pflanze besser wächst.
Die Lemon Cherry Cookies sind noch nicht so weit, weil ich sie später eingepflanzt habe. Ich habe sie noch nicht runtergebunden, aber das mache ich in den nächsten Wochen.
Die Mimosa Cake und die CBD Auto entwickeln sich gut. Besonders freue ich mich über die CBD Auto. Sie hat sich wieder verbessert und die Blätter sehen wieder normal aus.
Ich bin gespannt auf die nächsten Wochen und hoffe auf eine gute Ernte.
Likes
10
Share


@KingCatfish
Follow
End of week 8 and mid way through week 9. Already put nutrients in and already finished first flush. Will be flushing from now on, trying to get 6.5 everytime. Room is 24 degrees at 55 percent Rh sometime 45 or 65. Smell starting Ng coming from no where, good bud smell coming from them.


Likes
41
Share


@Mastr
Follow
Hi everyone Today day 23 and yesterday I snap branches and thigh is with tape but today I seen branches bend down but it hill I'm going to start use bloom on her
I feed her this week with
1ml silica
.5 calmag
4ml grow
2ml heaven
2ml activera
.5 bloom
.5 topmax
Next week will go down grow and go up with bloom hope she grow big and bushy but will see
Day 24 I flush each with 3L water due run off ppm was 1300 if you not check run off ppm autoflower will be late flowering and we don't want that I make this mistake on last grow orange sherbat yeah I didn't flush her and she preflowering for 4 weeks lol
So after that I decided to give plain water once a week it safe some money too but I'm always greedy to give more nutrients


Likes
8
Share


@Hiroots420
Follow
27/04/2021 (Day 42)
Todo viene muy bien, las plantas están comiendo con muchas ganas y consumen unos 15L de solución diario.
La preflora está comenzando!
Ya se puede observar como van estirando y mostrando bastantes pelos!
Los Citizen x 8 están trabajando a un 80% rondado los 500W.
28/04/2021 (Day 43)
Se realizo un nuevo cambio de solución, las plantas ya están tirando pelos y los leds están al 80%, se observo un gran crecimiento radicular y las paredes del tallo son increíblemente gruesas y duras.
03/05/2021 (Day 48)
Las plantas vienen con un crecimiento optimo pero la flora se está tardando demasiado en hacerse presente, se estima que es debido al estrés que tuvo en semana 3 de vege produjo un retraso de algunos días.
Esta semana se incorpora Safe Roots al sistema con la finalidad de que deje la solución lo mas limpia posible.
También se realizaron bastantes defoliaciones ya que no existía penetracion de luz teniendo en cuenta el tamaño que están ocupando (85% del espacio de cultivo a 30/35 cm de altura)
