
Likes
Comments
Share


@TheFattyMcCoy
Follow
Hey yall!
Thanks for tuning in this week.
Had a great look under the microscope of my soil, I just ordered a camera for my scope so next week look forward to seeing and identifying some beneficial microbiology!
Another round of compost tea, I added Kiwi 🥝 😋 Fermented Juice, to this round of tea. Also adding food for the bacteria (simple sugars) and for the fungi (complex carbs). I suggest using diverse food for increased biodiversity.
The mycelium network is really established at this point. Which is why I highly recommend to keep reusing your soil, and the larger the pot size the better. I am in 10 gallons for now. Once I move into our house will be into living beds, 100 gallon +
If you can't be in a bed, use 25 gallon. You will benefit in time.
So at this point only using inputs I have made from organically grown plants, mostly grown in house. Anything else was wildcrafted, sustainably, so if I take something from nature I am replacing it with something else. Balance in all things.
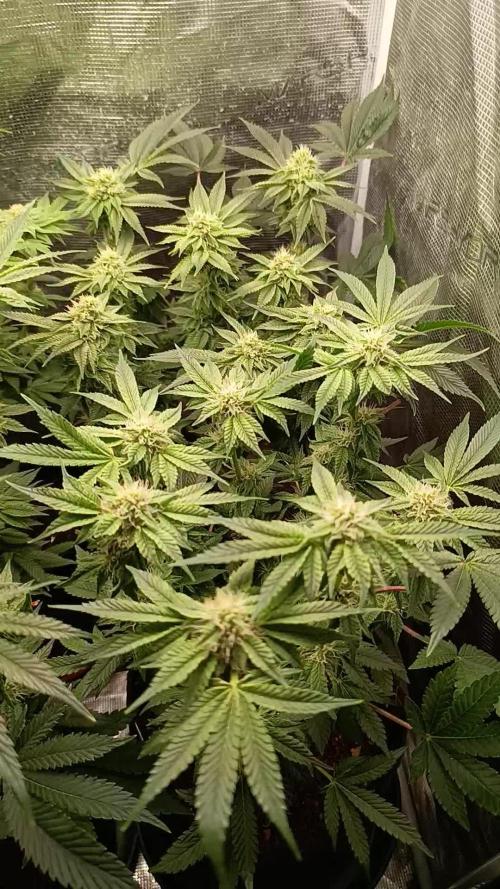
Added the fruit for pushing the flowers. Pistol hairs are growing.
This strain is a sativa dominant, and thus my flowers are not as compact and "looser" than indica dominant strains I have always grown.
Review on this sativa dominant cultivar is: harder to grow than most strains, longer flowering time is also a pain while increasing my costs with more days with the lights on.
Getting COAs on the finished flowers and I will post on here, I am hoping for higher levels of THCv, let's get into the rare cannabinoids and higher terpenes!

Likes
3
Share

@420DeepGrow
Follow
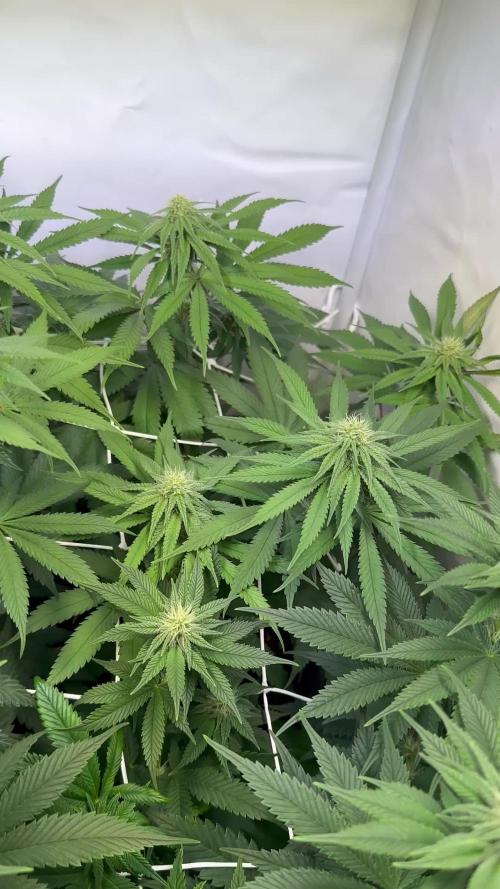
📆 Semana 5
El cultivo entra de lleno en fase de engorde, con las flores ganando volumen y densidad día a día. El stacking se intensifica y los cogollos empiezan a compactarse, formando colas más definidas y pesadas.
La planta mantiene una estructura sólida, con ramas que soportan bien el peso y una canopia estable que sigue aprovechando al máximo la luz. La producción de resina aumenta claramente, cubriendo ya gran parte de las flores y extendiéndose hacia las hojas cercanas.
El perfil aromático se vuelve más complejo e intenso, empezando a mostrar matices propios de cada genética, señal clara de que la maduración avanza en buena dirección.
Seguimos creciendo fuerte 💪!
Likes
33
Share


@MadeInGermany
Follow
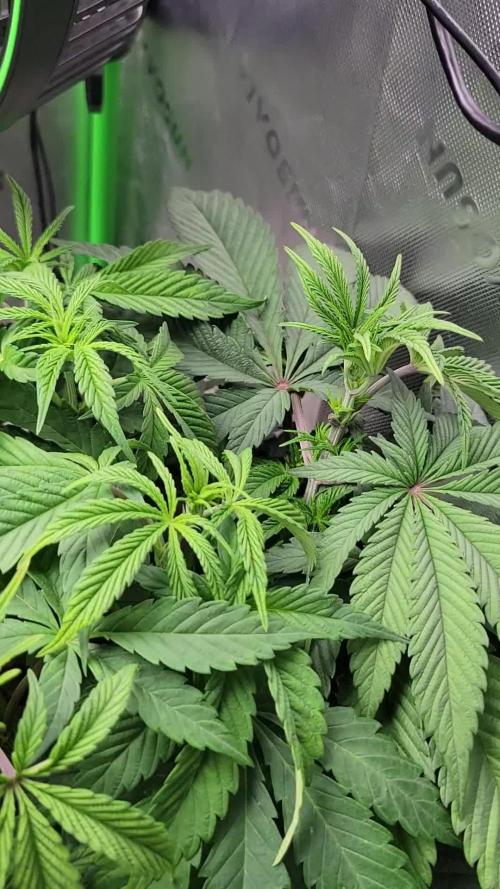
Hey guys :-)
She is growing great and will be ready for the flowering tent in the coming days :-)
A few cuttings are taken beforehand.
Was poured 2 times with 1 l each.
I'm looking forward to the start of flowering :-)
have fun and stay healthy 🙏🏻
👇🏼👇🏼👇🏼👇🏼👇🏼👇🏼👇🏼👇🏼👇🏼👇🏼👇🏼👇🏼
You can buy this Nutrients at :
https://shop.greenhousefeeding.com/us/
👇🏼👇🏼👇🏼👇🏼👇🏼👇🏼👇🏼👇🏼👇🏼👇🏼👇🏼👇🏼
You can buy this strain at :
https://www.amsterdamgenetics.com/product/choco-cheesecake/
Water 💧 💧💧
Osmosis water mixed with normal water (24 hours stale that the chlorine evaporates) to 0.2 EC. Add Cal / Mag to 0.4 Ec Ph with Organic Ph - to 5.8 - 6.4
MadeInGermany

Likes
6
Share

@Oldwied
Follow
Mhmmm yummy
Light Power: 100%
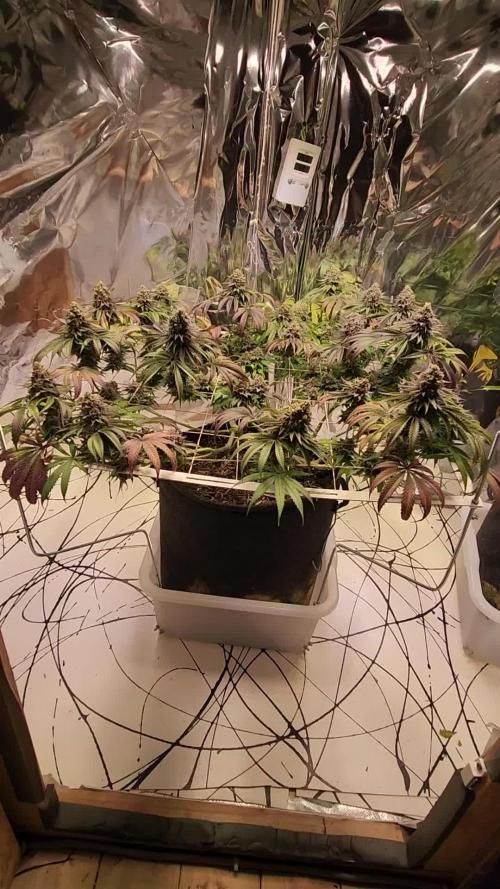
Day 106
Flower day 59
Defoliation
Day 109
Flower day 63
Last Photosession in Sanlight
Likes
16
Share

@PavementPunk
Follow
This bushy beast is just staring the preflower stretch and making lil flowers. So much foliage. Im gonna do a defoliation after lights on and watering at 5 will update. Alls well tho gave her a dose of myco+ might give her low dose bloom boost tonight. Had the lamp a bit too close been raising it an inch at a time trying to keep about 15 inches distance to canopy. Happy growing friends ✌️


Likes
10
Share


@I_Identify_As_A_Dan
Follow
Week 14 for White Widow by greenhouseseedco
Really didn't plan on defoliating again but she was getting a little top heavy + light just wasn't being able to penetrate very well.
Might flip to flower earlier than I planned as I don want her getting much taller.
3 of her outer branches are also struggling to keep up withy the rest and are slowly falling behind the rest, will try to fix that.

Likes
88
Share


@ILoVeThiSpLaNt
Follow
Fatto leggera defogliazione giorno 45.Tra qualche giorno giro a 12/12 👍🖐️

Likes
14
Share


@Kakui
Follow
11 Noviembre: Primer riego con 2.5EC y 5.9pH, runoff de 2.9EC y 6.2pH, en una semana más ya deberían estar recibiendo 3.0EC y seguir con esa concentración por todo el cultivo. Alturas están entre 15cm y 20cm.
13 Noviembre: Riego 2.5EC y 5.9pH, runoff de 3.3EC y 6.2pH. Hoy se removieron los primeros nodos de cada planta y se les hizo poda apical.
14 Noviembre: Riego 2.5EC y 5.9pH, runoff de 3.3EC y 6.2pH en la mañana. En la tarde se realizó transplante a maceteros definitivos de 5 litros con 4 litros de sustrato aprox. el cual fue pre cargado hasta la capacidad de campo, con 3.0EC y 5.8pH, desde este punto se debe esperar un par de días hasta que el dryback(secado) del sustrato sea de un 35-40%, lo cual vendría siendo el primer P3 del cultivo, una vez se alcance ese porcentaje de secado, se comenzará con los primeros riegos de precisión llamados P1.

Likes
4
Share


@BADINFLUENCER
Follow
Cambio liquidos a floración por ver ya sus flores, muy contento con los resultados, la poda justo a tiempo. He tenido un problema con la mesa A, una de las luces se ha fundido, la sustituyo por una de 4200k mismo voltage, hasta que la marca me lo reemplaze por defectuosa.
Likes
14
Share


@BOMbolenath
Follow
We are very close to the harvest. One more week and it's good to go.
Feeding with water only. No more nutrients. Aroma from this plant its incredible, its like a very good man's perfume. Musky with fruit like tangerine and mango. Incredible.
Likes
8
Share

@I_Identify_As_A_Dan
Follow
Week 3 of flower for Ztrawberry by Greenhouseseedco,
Shes been getting daily small defoliations in prep for day 21 (today) Shes staring to put on some size.
She got a feed of 7.5g of BioBloom as her last proper feed, likely to feed some extra calcium later in flower.
Quite happy with how shes performing.
Starting to get a very small hint of strawberry smell.
Likes
5
Share


@WhatIf420
Follow
Week 5 is here and not really a whole lot going on except she is growing a lot and there are lots of pistils. I hope she gets more than 30g that would be cool. I did notice a small tree like coming off the fan leaves when I trimmed them but other than that I don't smell anything, yet! Through this experience I think I prefer photos to autos but I'm still learning and there is lots to learn, I could change my mind. Happy growing friends


Likes
9
Share


@Cheeba_Inu
Follow
November 16, day 28, Scrog and irrigation installed. With the net installed it's a little tricky (though possible) to hand water, so automatic watering is a nice quality of life improvement. Growth is very tight, maybe a little better suited to sog techniques. Smell is powerful for it's young age. Earliest signs of flowering have begun.
November 20, day 32, added video of irrigation.
🌱👉 Check out marshydro_aliexpress on Instagram (https://instagram.com/marshydro_aliexpress?utm_medium=copy_link)

Likes
35
Share


@McBubatz
Follow
3. Woche Wachstum startet wieder tip-top, Fatty ist gesund und munter und wächst wie wild 😁.
19. Tag
Wurde bisschen entlaubt, nur unten 4 Fächerblätter. Oben die großen soweit möglich unter die Seitentriebe gebogen.

Likes
1
Share


@Bakedgoldie420
Follow
I am very satisfied with the variety, it has good flowers with good effect. The yield is also very large for small time effort

Likes
14
Share

@J4kpvp
Follow
Hello:) it was a good week again:) my biggest enemy at the moment is my dehumidifier, I need to empty it every day to keep everything in check:) other than that, smooth sailing so far. They more then doubled in size since the flip and I think they should now mostly be done stretching. I also did the first big defoliation, I removed about the bottom half. The flowers also seem to develop a little bit faster than last time:)

Processing
Likes
5
Share


@ladyjane
Follow
9/16 - Did some light defoliation today and adjusted the LST. With the Nature's Living Soil Autoflower mix, I don't have to feed them. So these have been SO easy to grow. I just water with RO water and organic blackstrap molasses (unsulphered).
9/20 - Watered and adjusted LST. All 3 GSCs have begun to flower! They are now on their way.