Likes
Comments
Share
@Dunk_Junk
Follow
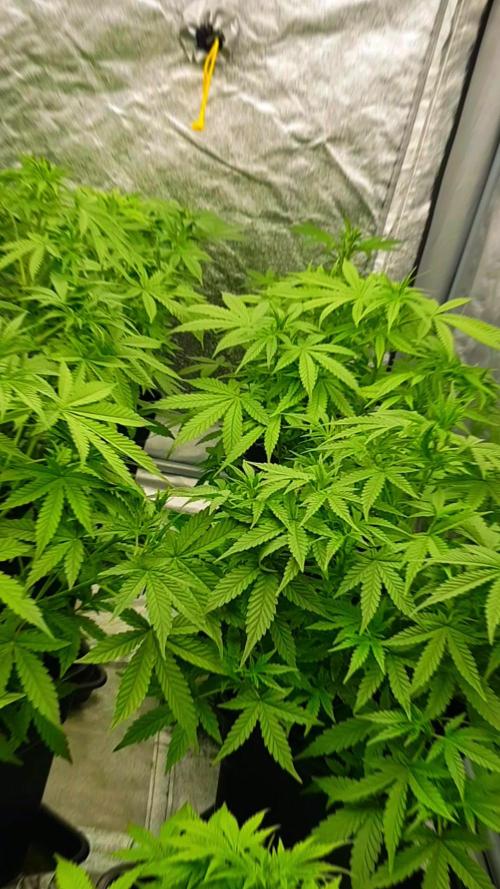
Day 21 - she got repotted into her 38 Litre airpot. She is not as close to the lights as I'd like, but saying that I wouldn't mind her to stretch a little bit.
Likes
26
Share
Today marks the end of the seventh week for my cannabis plant, and things are looking fantastic! The buds are developing beautifully, swelling up with each passing day. It's incredible to see how much they've grown in such a short time. The first trichomes are starting to appear.🌱💚 I'm also happy to report that the nematodes have done their job effectively. The plant is much healthier now, bouncing back from any issues it had before. I'm feeling optimistic as I watch it recover and flourish. I can't wait to see how the buds develop further as we head into the final stages!💚
Likes
24
Share
Well pretty big reveal this week. You get to see all the shit & roots.....and corn. Watering the girl proved to be hard to figure out. I've been watering her everyday because of the root reveal. And all that water goes down the pot. So I was worried I would over water. Well by now you know. I under watered. But I got it all figured out. I'm not ready to reveal the custom saucer I made yet. I'm still trying to grow these over the bowl roots but they were not ready for any of the reveal so now the exposed ones are tiny and the under the soil ones are much bigger. It is what it is. I will remove the soil on the side roots in the next couple of days so I can position them where I want them then repack with soil again.
Likes
13
Share
Day 31: 2L (PH6.3) with 1ml/L PK13-14 She's definitely well on her way to stretch, and some of the bud sites are already showing signs of consolidation and an increase of mass, not so much as to call it stacking or bulking, but a great early flower nonetheless. To aid with bud forming, I've started mixing in some flower nutes. I'm starting at half dose and will probably follow up with a regular watering later this week. Additionally, after taking the pictures, I removed the upper fan leaves of the main cola and the next highest too since it was outpacing the others. I'm trying to not agitate her too much to prevent stunting. Since she's grown so much, the main cola was receiving 900 PPFD, and the lowest canopy budsite - in the front on the pictures - was receiving about 450 PPFD. Hence, I raised the light up to 30cm above the main cola. I haven't remeasured the PPFD afterwards. Day 34: 2L (6.5PH) + 0.5mL/L CalMag Day 36: 2L (6.3PH) Discovered two her companion plants fostering an army of spider mites so I removed all of the companion plants. The citrus had to move out of the tent for a more natural day night cycle anyway, so that one will reside on the window sill for a few days. The affected pepper plants have received spider mite treatment and are currently outside until they recover. I'll have to keep an eye out for any webbing on the Northern Light, although I think that the infestation wasn't too bad. Additionally, today was the planned defoliation day so I lollipopped her. Watering is a lot easier now and I hope the lollipop will not be detrimental to her overall yield - it hurt when I removed some branches I'd otherwise keep. And that about sums up week 4, this week was all about the stretch and the lollipop. She received her first flower nutes and immediately told me she did not need them. She became a bit thirstier and is well on her way to become the biggest yielder I've grown!
Likes
1
Share
I’m loving these yellow training clips I bought off Amazon. Super easy to attach and adjust. Seems to be less hard on the stems vs. the wire I’d been using. Starting to node out big time!
Likes
7
Share
@GYOweed
Follow
It grew a bit in the 3 weeks from last pics. I'm sure indoor growers with 18hr+ light can do better. She could care less about 2 weeks of around 110f weather. I hope one is a female. Stem rub is oily and pungent already. Did a good trim job too.
Likes
16
Share
Great week. Cloudy days and laid off the water. Only issue has been a consistent influx of caterpillars. Have been picking them off and removing the damaged flowers. The smell is powerful. Happy growing to all the viewers. May your harvest be bountiful.
Likes
4
Share
01/29 day 23 start of week 4 and things are popping!! Haven't fed at all this week should tomorrow . 01/30 bed for 7 gallons water 2.5 gallons feed full bloom recipe
Likes
7
Share
Hi dear smokers and growers!! 😎 Chilling Racoons here 😏 We will show you one of the new genetics of Royal Queen Seeds, the Milky Way F1 Automatic! 🤩 F1 seeds have unparalleled uniformity, impressive resistance to disease, great productivity and flavours and effects that will inspire you to grow these seeds again and again. So we are sure to grow big and stable plants, we have only to cure them well!! We are excited to try the Royal Queen Fertilizers like the tablets and the easy boost! They will give a big kick to our plants 🤩 🤩 🤩 We posted some of the RQS Ferts and Merchandising, look at the stuff, I am happy like a child 🤤 Royal Queen Seeds is one of the biggest seed bank in the world, in addition to a wide variety of high quality seeds, on their site you will find many accessories for growers and smokers. Take a look to our friends! https://www.royalqueenseeds.com ✅ 🌱#1 WEEK VEGETATIVE🌱 💉🔍Fertilization schedule:🔍💉 📅 EASY BOOST MIXED TO THE SOIL 50g/pot Both seeds germinated in 48H, after the root came out, we immediately planted the seed in the soil. We are growing MILKY WAY AUTO #1 in a 11L Plastic Pot and the MILKY WAY AUTO #2 in 15L Smart Pot. Seeds are directly planted in the final pot to avoid transplant stress. We planted these seeds in different pots to see if there are difference in growing and yield. Germination rate: 100%, Royal Queen, what a pleasure to grow their seeds. 🧐 🤓 Milky Way F1 data sheet 🧐 🤓 Variety: F1 Hybrid auto Genetic Background: Blue Mammoth x Blue Dream x Sin Tra Bajo Auto THC: Very high Yield: XXL Height: 55 - 75 cm Flowering time: 42 - 45 days Harvest: 70 - 75 days after germination Major terpenes: Farnesene, Myrcene, Pinene Effect: Creative, Euphoric, Physically Relaxing Flavor: Chocolate, Citrus, Pungent, Skunk Climate: Short Summers 💸💸💸💸💸 Buy Milky Way F1: https://www.royalqueenseeds.com/uk/f1-hybrid-cannabis-seeds/617-milky-way-f1.html _____________________________________________________________________ OUR GERMINATION METHOD STEP BY STEP We germinate all seeds in cotton pads because in my opinion is the best way, I'll tell you why. You should use cotton pads because it is one of the fastest way to germinate seeds, it is also one of the more reliable way because with these few steps, you could have a 99% of success if seeds are fresh (we store our seeds in a dark and sealed container in the fridge and they last years!). This is a NOOB-FRIENDLY technique BUT you have to respect some little and easy steps: 1️⃣take one cotton pad, spray it 5 times with water; 2️⃣dispose seeds in the sprayed cotton pad, remember to leave minimum 1cm of space between seeds, 3️⃣take a new cotton pad, spray it 3 times with water, face the wet side down and put it on the seeds of the first cotton pad; 4️⃣spray the dry side 3 times. 5️⃣put your "sandwich/es" in a sealed dark container of a sufficient size to store them, I use a plastic container (glass or plastic are equal) with about this size: 15x30cm .It contains about 8 "sandwitches". 6️⃣store the container in a dark place with a temperature from 17°C (23/24 °C are optimal)and more. REMEMBER: More light they see and colder is the place,slower will be the germination and lower will be the germination ratio. *(If your seeds are old, not good stored and with a low germination ratio, I suggest you to use Seed Booster. Old seeds and maybe stored in a very hot place for a long time may will be death and may will not never germinate). Generally a normal cotton pad is good for 3 seeds. If you follow these steps, you will hardly have problem of non-germinating seeds. I tried all methods (except rockwool cube) and in the last two years (and I germinated a lot of seeds) I can tell this is the fastest and reliable way. I loved to use paper towel but with this method is very easy to put too much water... I really hope that this "rule" will help all growers to improve their skills. ENJOY. _______________________________________________________________________ 🔧💡OUR SET UP💡🔧 ✔️ 💲💲💲VIPARSPECTRA 🚀🚀🚀🌕🌕 ViparSpectra®️ XS2000 240W Infrared Full Spectrum LED Grow Light: Excellent ratio between wattage and ppfd, excellent light penetraton, perfect light spectrum (it also has IR 🤩) and it has the best build quality on the market. You can touch that quality. Materials are really strong, excellent driver and the best leds on the market. Heat dissipation is perfect, the lamp is never too hot and it has a passive dissipator so you will have zero noise. It also has IP65 certification. I like that this lamp is bigger than others, so the 240w of power are well distribuited on the space. Viparspectra has an awesome customer service, and shipping was incredibly fast! This awesome brand also offers 3 years warranty. This lamp has no rivals. A special thanks Viparspectra ❤️❤️❤️❤️ HERE YOU CAN BUY THIS PROFESSIONAL LIGHT: https://www.viparspectra.com/products/xs-series-xs2000 or https://amzn.to/3dyUoJl and here you can buy other awesome stuff: https://www.viparspectra.com ✔️ 💲💲💲MARSHYDRO 🚀🚀🚀🌕🌕 💡TS 600 FULL SPECTRUM 100W LED GROW LIGHT : with this light you will achieve excellent buds, you will not need anything more. This lamp replace a 150w HPS lamp, but, with this Led Light you will smoke bigger, harder and tastier buds because Led have a complete spectrum and a powerful light penetration, so your plants will work as much as possible to make you happy. Psssssss it it extremely cheap and it is only 100w, your bills will never be too high, YOU HAVE NO EXCUSES!! Here if you want this little beast: https://www.mars-hydro.com/led-grow-light/mars-ts-series-led-grow-light/mars-tsw-600-led-full-spectrum-hydroponic-led-grow-light Thank you Marshydro❤️❤️❤️❤️ 💣Quantum board - 480w - 4x120w Boards Samsung LM301B 288 led/board 3000K 0dB noise +24led/board led Osram 660nm Efficiency 2.6 umol/J 220 lm/w Driver: Meanwell HLG-480H-36B 💣Quantum board - 240w - 2x120w Boards Samsung LM301H 504 led 3500K 0dB noise +24led/board led Osram 660nm Efficiency 2.7 umol/J 220 lm/w Driver: Meanwell HLG-240H-48B -ESTRACTION FAN: Blauberg 125 Turbo Pro Series Maximum air flow: 430-560 m³ / h 50W 32-44 dBA 💊💉💊FEEDINGS TOP CROP: -DEEPER UNDERGROUND: to stimulate roots system -TOP VEG: for an excellent growth in the vegetative phase -GREEN EXPLOSION: to promote creation of bud sites and to allow a faster growth -MICRO VITA: bacterias for equilibrate the soil and to make the plant healty -BIG ONE: to stimulate bud sites and to stimulate resin production -TOP BLOOM: to achieve excellent big and hard buds -TOP CANDY: to feed the buds with molasses for a tastier smoke and to gain weight -TOP BUD: to enlarge buds and to gain weight PLAGRON: PK 13-14 to have big and hard buds and to feed plants with lower effort ADVANCED NUTRIENTS: Sensi Cal-Mag Extra-> for cal mag deficiency GROTEK: CAL MAG for cal mag deficiency HESI: PowerZyme to clean and balance the soil. It feeds the plant cleaning the soil. GHE: - Final Part (ex Ripen) accelerate the final flowering phase, dissolves minerals in excess - Flash Clean to flush the plant and to be sure that all excesses are out from plant and pot These two products improve A LOT the smoke of our babies -PURPINATOR to stimulate flavonoids and to have a better taste and smell. -BIOBIZZ: CAL-MAG, great product to correct deficiencies without Nitrogen! ____________________________________________________________________________________________ 🙏❤️ THANK YOU FOR BEING HERE ❤️🙏 Please leave a comment with your opinions, it is very important to us to have a comparison. If you like our job, tap the weed button and follow us. It will be really appreciated.🙏 We want to thank again everyone that help us in our project. You support us to support our dream. ❤️ SPREAD THE LOVE OF THIS PLANT ALL AROUND THE WORLD 🌿Thank you again🌿 ❤️Sweet hugs❤️ 👨‍🌾CHILLING_RACOONS👩‍🌾
Likes
13
Share
@Kersche
Follow
Langsam verveärben sich die Blätter und die Blüten wachsen weiter. Die Ernte rückt näher. Der viele Regen und die Kälte der vergangen Tage waren nicht optimal. Hoffen wir auf einen sonnigen Spätsommer ...
Likes
5
Share
@RatmanJR
Follow
Chopped Wednesday the 11th. Trimmed and began curing the 21st. 4oz of super dense sticky bud. 1 pound of high grade trim and 2 oz of low grade trim. This plant was truly strange the places it chose to grow Trichomes. Stay tuned because I will be making hash with the high grade trim. Also will be uploading smoke score in two weeks Thank you to anyone who followed and god bless!
Likes
7
Share
Week 3 going well. Topped her and doing a bit of lst as well. Week 4 fead her with 25ml off grow auto from living Soils. And did a bit of demolition as well.
Likes
17
Share
Die Woche ist sehr gut verlaufen :) das ist jetzt die letzte blütewoche ^^ Ich spüle seit 2-3 Tagen mit klarem Wasser die Erde durch :) Nächste Woche schneide ich sie dann ab & lasse sie trocknen :)
Likes
41
Share
So we have reached the end of Week 6 from and I am flipping the the ladies to flower. I have uploaded a video along with pictures..... Hope it plays. Stay Safe guys and Happy Growing, any questions just ask away 👍🏾💚
Likes
38
Share
Hello everyone! without many words! 100% in perfect condition !!!
Likes
9
Share
Transplant & Training: The plant was transplanted and trained this week, which temporarily slowed vertical growth. Training resulted in a beautifully even canopy, which is already taking shape and showing promise for future development. Environmental Conditions: Humidity remained high due to additional seedlings in the grow space. The plant was watered twice this week, adjusting for its needs. Growth Observations: The plant responded excellently to the training, adapting quickly without alot of stress. Hopes for the Future: I’m optimistic about maintaining the even canopy. Fingers crossed for continued success! 🌱 dein-onlineheadshop.de/ Use my referral code 420Shop at checkout to get a discount on your purchase. By using this code, you also support me, as I receive a small reward for each use. Thank you for your support!
Likes
170
Share
Bonjour à tous les padawans et maîtres jedis jour84 arrosage avec 25 centilitres d'eau ph6.3 Jour87 arrosage avec 30 centilitres d'eau ph6.3 Jour88 pratique de la techniques du tronc fendu (videos explicatives) et arrosage avec 20 centilitres d'eau ph6.3 COMMENT FENDRE LES TIGES DE VOTRE PLANT DE CANNABIS Pour fendre les tiges de votre plant de cannabis, il vous faudra : Une lame propre et aiguisée (une lame de cutter fonctionne bien) Un mètre ruban Une ficelle ou un adhésif pour marquer les coupures que vous ferez le long de la tige Un crayon, une baguette ou une brochette pour séparer la tige une fois fendue 1. Tout d'abord, commencez par mesurer la partie de la tige que vous allez fendre. Il faut faire une incision d'environ 10–20 cm juste sous la branche la plus basse de votre plant. Utilisez un ruban adhésif ou de la ficelle pour marquer le début et la fin de l'incision. 2. Ensuite, prenez votre lame et faites une incision en travers de la tige, en commençant par le haut. Attention à faire une coupe propre, jusqu'au centre de la tige. 3. Utilisez votre lame pour tailler en descendant vers le bas, jusqu'à la marque inférieure de la mesure que vous avez prise auparavant. Essayez de tailler aussi droit que possible. Une fois que vous avez atteint votre marque du bas, laissez la lame au centre de la tige, puis utilisez un crayon/baguette/brochette pour ouvrir la partie coupée, puis sortez votre lame. QUEL EST LE MEILLEUR MOMENT POUR FENDRE LES TIGES ? Il existe de nombreuses théories sur le meilleur moment pour passer votre tige au couteau, mais la plupart des cultivateurs suggèrent de le faire à la dernière semaine de floraison. Même si certains cultivateurs recommandent de le faire dans les 3 derniers jours avant la récolte, nous recommandons de le faire un peu plus tôt (7–10 jours avant la récolte). QUELS SONT LES RISQUES À FENDRE LES TIGES ? Fendre les tiges est une technique à stress élevé très agressive que nous ne recommandons qu'aux cultivateurs expérimentés. Nous ne recommandons également pas de fendre les tiges sur les variétés à autofloraison, car cela peut être bien trop intense pour elles. FENDRE LES TIGES, ÇA MARCHE VRAIMENT ? Il existe un solide ensemble de cultivateurs expérimentés qui déclarent que le fait de fendre les tiges peut produire de bons résultats. Malheureusement, peu de données qualitatives le prouvent. Cependant, il semble que la fente des tiges soit originaire des Pays-Bas, où elle est pratiquée par des cultivateurs néerlandais experts depuis les années 1970.