


Likes
Comments
Share


@OrganicPower
Follow
Week 9 flower is coming to an end and the Sour Diesel still has about a week to go. I could chop it down now with no complaints I think, the heads are mostly cloudy, no amber, but I’d like these foxtail like growths to fill out, if possible, now that they popped out. Think I had the light intensity to high and far along into flower and that’s why the GG#4 had a few nanners pop late, just displayed the stress in different ways, but what the hell do I know lol 😂. Flowers seem hard and dense but look a little weird with foxtails and the tips are stretched strangely and can see a bit of the centre stalk on a few lower and further from the light. The foxtail growth is also happening lower down as well which makes me think genetics, I dunno? Stripped most the large leaves that I could easily get at and just watering still letting the soil stay a bit on the dryer side, but consistent. Steadily lowering the humidity the best I can and manage, but it’s a bit difficult as I took down the humidifier to clean and get ready for harvest and got the dehumidifier going, but got another cold snap coming through and it’s dry outside and the house heat is running, don’t have a clean filter for the humidifier now, trying to get it right, right to the end, but Mother Nature is making my unnatural grow difficult lol. Thanks for the view and long read if you made it to the end! Keep calm and grow on!

Processing
Likes
11
Share


@Ledbelieve
Follow
Another nice week of beautiful weather. Have been on total cruise control this week on a little water here and there. Did some topping and super cropping. Not much at all to report the fast buds are in full flower and doing well. Happy growing folks🤙🏻


Likes
9
Share


@MG2009
Follow
01/19/2022
She was a he.
And he will be used for some pollination.
Not sure what both parents were, but growing nice, stem rubs stinky and definitely has fuzzy Melon smell.
Kinda reminds me of Tangie and model glue. Hopefully a good breeder will hit some choice branches on
Blue Matter F2 and test the offspring.
If interested Fuzzy Mellon is
Forbidden Fruit x Watermelon Zkittlez bred by Dying Breed Seeds & 3rd Gen Family.
Which is good genetics imo. But the wild card is who is th daddy?... Jerry springer show lol
According to leafly both parent are heavily on indica side so his stretch and node length points to a sativa daddy?
I never seen an indica with such large internodal spacing.
I know males will be stretching out more but still large compared to other males I've grown out.
So hope you follow along to see how his offspring will develop,
I will pollinate one branch of my favorite Blue Matter F2, and save some pollen for my Biscotti Skunk, Grape Skunk,and lemon og.


Likes
3
Share


Likes
18
Share


@DogDoctorOfficial
Follow
Week 4 Report: White OG – Bigger Roots, Bigger Heights! 🌟
What a week for our White OG! 🌱 She’s had an epic milestone week with her first transplant into a larger pot and her first topping at node 7. Each step has been about preparing her for greatness, and she’s taken everything in stride. Let’s dive into the details of her journey this week and why these steps are so important for her development.
The Transplant: New Home, New Opportunities 🌿
The first big move of the week was upgrading her from her small pot to a bigger pot with a perfect blend of soil and nutrients to fuel her next stage of growth.
Soil Choice: PRO-MIX HP Mycorrhizae + Bacillus
This premium soil mix is a grower’s best friend, designed to give plants a perfect foundation. Here’s why I chose it:
• High Porosity (HP): Promotes excellent drainage and aeration, preventing overwatering and ensuring roots have access to oxygen.
• Mycorrhizae: These beneficial fungi form a symbiotic relationship with the plant’s roots, increasing water and nutrient uptake while improving overall root health and vigor.
• Bacillus Subtilis: A powerful beneficial bacterium that helps protect against soil pathogens, enhances nutrient absorption, and boosts overall plant resilience.
This mix creates an optimal environment for strong, healthy roots to develop, setting the stage for explosive vegetative growth.
Aptus Holland All-in-One Pellets: Nutrient Perfection
To supercharge the soil, I incorporated Aptus Holland All-in-One Pellets into the mix. These pellets are a complete slow-release nutrient solution that ensures consistent feeding over time.
• Key Benefits:
• Long-lasting nutrient release (up to 2-3 months).
• Contains macro and micronutrients essential for steady, balanced growth.
• Supports microbial activity in the soil, further boosting nutrient availability.
• Easy to use and prevents nutrient burn.
By combining Pro-Mix HP with Aptus Pellets, she’s getting the best of both worlds: a thriving microbiome and consistent nutrition to fuel her development.
The Topping: Encouraging Bushier Growth 🌱✂️
At the end of the week, I decided it was time for her first topping—a critical training technique to shape her growth structure. I chose to top her at node number 7, leaving a solid foundation for future growth.
What Is Topping?
Topping involves cutting off the plant’s main growing tip to encourage it to grow multiple main colas (branches). This redirects energy from vertical growth to lateral (side) growth, creating a bushier, more productive plant.
Why Topping Matters:
1. Maximizes Yield: By encouraging more colas, the plant can produce more flowers during the flowering stage.
2. Improves Light Penetration: A bushier plant allows light to reach more leaves and nodes, improving overall growth.
3. Encourages Even Canopy: Topping helps create a flat, even canopy, which is ideal for maximizing light distribution.
The timing of topping is crucial, and at node 7, she’s strong enough to handle the stress while still early enough to recover quickly and focus on lateral growth.
Environment and Feeding Routine: Consistency Is Key 🌟
This week, the environment has stayed perfect for her needs:
• Temperature: Warm and steady, promoting steady vegetative growth.
• Humidity: Still high to support root development post-transplant.
• Lighting: The Future of Grow (FOG) LED continues to shine now at 300 PPFD, delivering just the right intensity for compact, strong growth.
Nutrient-wise, we stuck with the reliable Aptus Holland lineup:
• Regulator (0.15 ml/L): Strengthening her structure and managing stress from the transplant and topping.
• CalMag Boost (0.25 ml/L): Supporting chlorophyll production and preventing deficiencies.
• All-in-One Liquid (1 ml/L): Providing her with balanced, immediate nutrients to complement the slow-release pellets.
• Start Booster (0.25 ml/L): Encouraging her roots to keep pushing deeper and stronger.
Looking Ahead: Building on a Strong Foundation
Next week, I’ll be watching for her recovery from topping and monitoring how she adjusts to her new pot and nutrient-rich soil. I’m expecting explosive growth as she settles into her new environment and gets ready for the big stages ahead!
Shoutouts and Love 💚
A massive thank you to everyone who makes this journey possible:
• Seedsman Seeds for the amazing genetics—don’t forget to use the DOGDOCTOR 10% off discount code!
• Aptus Holland for their unparalleled nutrient line.
• Pro-Mix Soil for providing the perfect foundation for growth.
• TrolMaster for precise environmental control.
• Future of Grow LED for consistent, reliable lighting.
• Cannakan for helping with germination.
• And, of course, Grow Diaries, for giving us this incredible platform to share, learn, and grow together.
To all the lovers, haters, followers, and the entire community—you’re the heartbeat of this journey. 💚 Let’s keep growing strong!
Growers Love! 🌱✨
DISCOUNT CODE - SeedsmanSeeds - DOGDOCTOR 10% off
As always thank you all for stopping by, for the love and for it all , this journey of mine wold just not be the same without you guys, the love and support is very much appreciated and i fell honored and so joyful with you all in my life 🙏
With true love comes happiness 💚🙏 Always believe in your self and always do things expecting nothing and with an open heart , be a giver and the universe will give back to you in ways you could not even imagine so 💚
Friendly reminder all you see here is pure research and for educational purposes only
💚Growers Love To you All and remember to keep that smile big and alive 💚

Likes
2
Share


@eldruida_lamota
Follow
Vamos familia cuarta semana floración de estás Pink Runtz de RoyalQueenSeeds.
Que ganas tengo de ver el progreso de esta variedad, las plantas están marcando una deficiencia que estoy ya solucionándola aplicando los nutrientes necesarios, y estos días espero que recuperen el color.
La cantidad de agua cada 48h entre riegos.
Esta semana ya añadimos nutrientes de floracion estas próximas semanas veremos cómo avanzan.
Agrobeta:
https://www.agrobeta.com/agrobetatiendaonline/36-abonos-canamo
Hasta aquí todo, Buenos humos 💨💨💨

Likes
4
Share


@Familytrees19
Follow
HOLY SMOKES!! Y’all seeing this?? Look how fast they are growing!! Wow 🤩 I’m so impressed both with the light and the superponics!! The light is giving perfect node spacing and the superponics is speeding up the growth 💯.. so what I been doing is 4 days lotus nutrients than I empty out the res and add hygrozymes and hyclean. Both by the same compmany! Both helps with salt build up and cleaning the roots/res…
Plz follow my YouTube channel (Familytrees19)
Likes
124
Share


@SlowpokeFuegobud
Follow
Hello growmies, welcome to week 3! 🍪 💜
Foliar sprayed with Nutrispray on day 20. 💦Potted later that day..
Watered on day 17 and after potting. 💧
Thanks @Green_Buzz_Nutrients for sponsoring my grow, those products really do their job! 💚 If you want to give them a try, there's a generous discount code in my setup description. ⬇️
Thanks @SensiSeeds for the opportunity, let's do this!! 🚀 💚 🖤
_______________________________________________________________________________________
Purple Cookie Kush Feminized Seeds
[Girl Scout Cookies x Purple Kush]
Purple Cookie Kush Feminized seeds come from two well-known strains, Girl Scout Cookies and Purple Kush. The 60% indica / 40% sativa heritage leads to a well-balanced hybrid flower. Flavours range from grapes to sandalwood, and the terpene profile is a concoction of many complimentary aromas. Purple Cookie Kush Feminized is a short plant with good yields. Bud formation is dense, similar to many Kush strains.
About Purple Cookie Kush Feminized
Purple Cookie Kush Feminized takes the hottest GSC genetics and mashes them with a Purple Kush cultivar that was hand chosen for this project. No corners were cut in creating and selecting the right breeding stock for this fantastic strain. The result is a well-balanced hybrid that retains key qualities from its lineage.
The Purple Kush parent of Purple Cookie Kush Feminized has a lot to contribute, as evidenced by the plant morphology. The compact nature and sturdy branching can be attributed to those indica-dominant genetics. Another area that the indica influence is evident is in the terpene profile, which includes scents of spicy hashish and earthiness.
GSC contributes selected indica traits to Purple Cookie Kush Feminized, but the sativa side of the genes also had an impact. Complex, fruity expressions are detectable in both the mouth and nose of this strain. Before harvesting, during the last few weeks of flowering, growers will notice pleasant scents with floral notes lingering in the garden area.
Growth pattern of Purple Cookie Kush Feminized
Purple Cookie Kush Feminized seeds grow into a plant that represents in appearance both sativa and indica inheritance. Because this is a feminized strain, growers will not need to sex the plants at the early stages of flower and can accurately anticipate yields knowing that all plants will be flower-producing.
Purple Cookie Kush Feminized has sturdy branches, similar to its GSC parent. The strong branches can support the weight of flower growth through harvest. The plant itself is stocky with a compact stature. This is attributed more to the Purple Kush influence. Due to the lower profile and many branches, defoliation is beneficial at various stages of growth.
Indoor growers with a controlled climate report final heights in the 120 - 140 cm range. Purple Cookie Kush Feminized finishes flowering in a quick 50-60 day window, which is a distinctly indica quality. Outdoor growers in temperate / Mediterranean climates have seen plants reach over 160 cm with ideal weather.
The bud formation of Purple Cookie Kush Feminized is similar to the popular Kush structure. Flowers are dense and compact. The buds are a mixture of swollen, trichome-covered bracts with dark forest-green foliage below. During the last weeks of flowering, the GSC influence adds purple hues to the vegetation.
Purple Cookie Kush Feminized is a solid-performing, easy-to-maintain plant with good yields. It is not difficult to achieve the optimal indoor climate, and yields of 425 - 475 grams per m² are possible in these conditions.
The ideal outdoor environment will have moderately warm weather and a small percentage of rain within the growing season. Growers in those regions have reported yields reaching 550 grams per plant, sometimes even more!
Common plant training techniques are not crucial to the success of this robust, sturdy plant, but some growers looking to maximize yields will use them. Techniques that have been used with great success in canopy control include SOG, SCROG, Supercropping, and Lollipopping. Purple Cookie Kush Feminized handles them all without skipping a beat.
Effects, taste and smell of Purple Cookie Kush Feminized
The effects of Purple Cookie Kush Feminized usher in a more relaxed and easy-going day than most. It has the benefit of merging both indica and sativa attributes. Euphoric and uplifting effects are associated with sativa cultivars, and these effects are precisely how the Purple Cookie Kush Feminized experience begins.
Blissfully distracted from the fast-paced world, thoughts shift to creative endeavours and inspirational goals. As these feelings are front and centre, a mild buzz begins radiating from the inner core. Soon, the indica-leaning effects are felt. Effects turn towards the loosening of tense muscles, the easing of minor aches, and an embracing full-body stone.
The flavour profile of Purple Cookie Kush Feminized is almost like a full-course meal. The pairing of flavours is unique and somehow works perfectly. The taste of fresh peeled grapes sits well with the coffee and caramel elements. The indica genetics once again show their dominance with undertones of earthiness and spicy sandalwood to complete the flavour profile.
Purple Cookie Kush Feminized has an unmistakably loud grape smell. This trait is not commonly seen in cannabis, but it is fully displayed with this strain. The remainder of the terpene profile is what many would consider the finer aromatic qualities of the GSC strain.
Scents of spicy hashish float through the air, complementing the grape aroma whenever the jar is opened. Background notes of earth and sandalwood add another enjoyable layer to the terpene profile.
https://sensiseeds.com/en/research/purple-cookie-kush-feminized?sqr=purple%20cookie
_______________________________________________________________________________________
Setup:
140x70x200 cm Spiderfarmer tent
2x Monkey 16W fans (not oscillating)
1x Secret Jardin 30W
1x box fan 50W oscillating (on lowest level)
LED
Full Spectrum 320W AGLEX AGL-320W-MA
5,6 kg
foldable, dimmable
864 pieces Samsung LH301H
864umol/s
2,7umol/J
full spectrum white + RED 660nm + IR 740nm
wavelength range 380-780nm
covering 3x4ft
Green Buzz Nutrients https://greenbuzzliquids.com/
❗ Use code GD42025 for generous 25% discount (for orders of minimum 75€)
Biobizz Lightmix + coco + wormcastings + perlite
Carbon Active Granulate Filter 125/360 cm³/h
PrimaKlima exhaust EC 125-400/240 cm³/h

Likes
5
Share

@420DeepGrow
Follow
📆 Semana 5
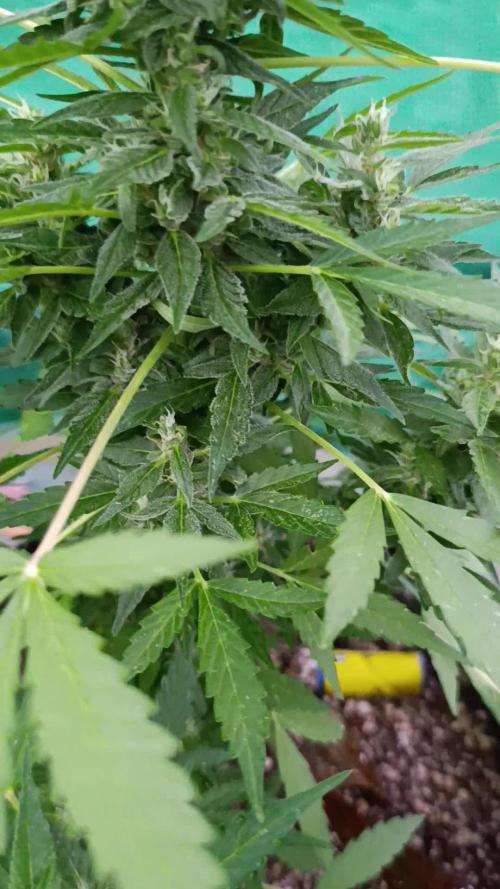
Esta quinta semana muestra una evolución clara en la floración. Los cogollos continúan desarrollándose y empiezan a ganar más volumen y definición, mientras la planta mantiene un crecimiento equilibrado bajo el sol directo.
La estructura floral comienza a tomar protagonismo y poco a poco se empieza a apreciar el potencial que puede desarrollar durante las próximas semanas. Mantengo una nutrición moderada, acompañando el avance sin forzar el ritmo de la planta.
⚡ EC: 0.95
💧 pH: 6.2
🌡️ Agua: 21°C
🌫️ Humedad: 45–55%
💡 Intensidad: Luz directa del sol
🔥 Nota de cultivo: La floración empieza a coger velocidad y los cogollos ya muestran una evolución más evidente. Ahora toca seguir acompañando el desarrollo y dejar que la planta vaya construyendo volumen semana a semana.
¡Seguimos creciendo fuerte! 💪

Likes
12
Share

@MrGrowDiarie
Follow
Day 84
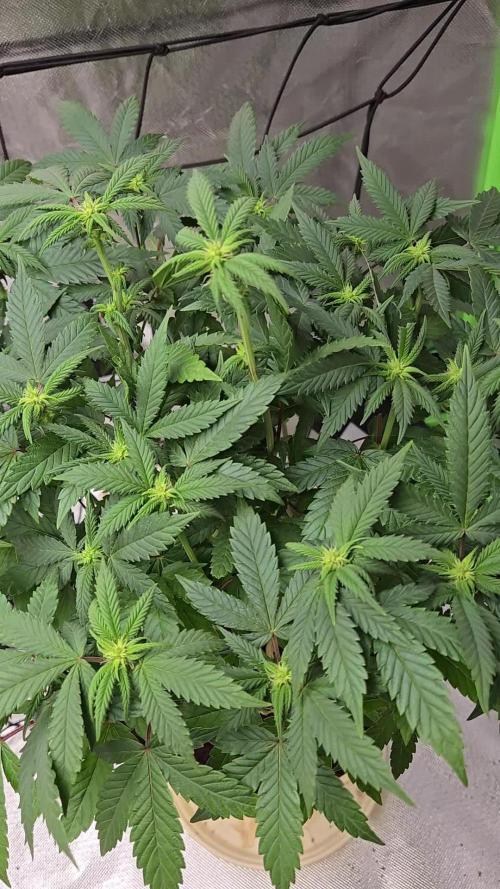
This smaller plant shows compact and balanced growth, with several short stems supporting evenly spaced leaves. The leaves are a healthy green color, slightly lighter toward the new growth at the top. The plant appears to be in an early to mid-growth stage, with developing shoots that suggest steady progress. It is potted in a well-aerated fabric container, and the soil looks moist but not overwatered. Overall, the plant seems healthy, stable, and properly maintained.


Likes
17
Share

@EllysGrow
Follow
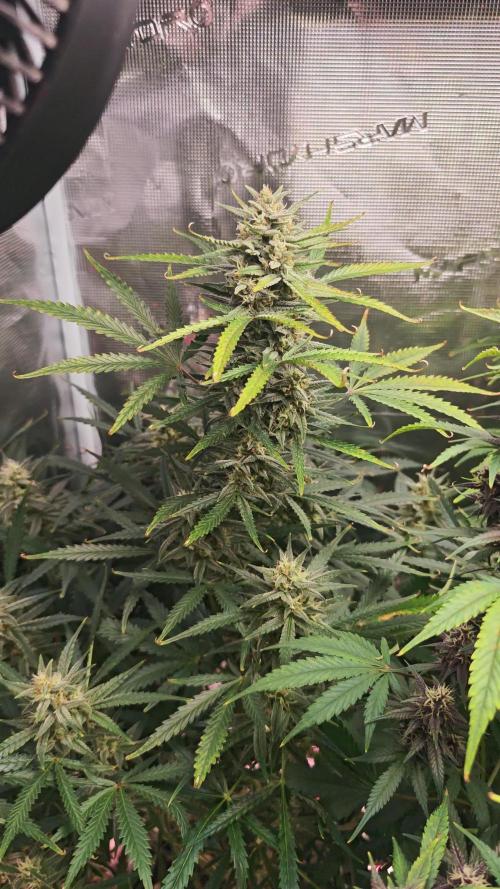
Anfang Woche 9 und es duftet.....die Tropicana Cookies versprüht wirklich einen mega tropischen Duft. Der Hammer!!!! Danke für so viele tolle Genetiken @Fast_Buds 😊
Likes
4
Share

@JeyGanesha
Follow
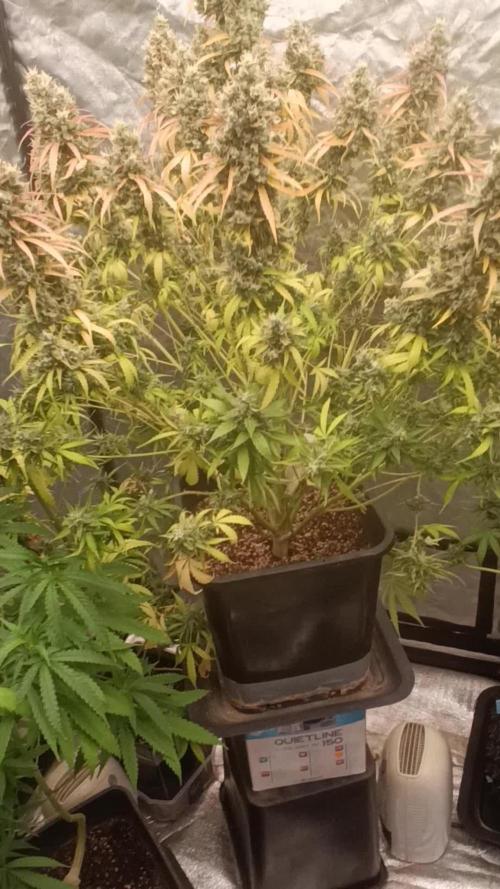
Ieri 24/7/2025 ho messo fuori in giardino del mio brother questa matanuska....qui dovrebbe esplodere 😂😉👍💪.spero che in questi 2 mesi di fioritura ci siano belle giornate di sole da dare alla pianta tutto il fullpower che ha bisogno,💪🙏
Likes
29
Share


@TightNugs
Follow
Well into flower now,no issues so not much to report.day 15 of bloom 🤞🍁
Likes
11
Share


@pHilosophy420
Follow
She's almost ready for harvest. Right now, she will be on plain water for six days.
Next, I'll give her one final big flush, let the coco dry out, and then it’s chop time. This strain is looking very dense and is covered in a nice amount of trichomes. Most of them are cloudy now, with a few amber ones starting to appear.

Likes
19
Share


@ukautogrower
Follow
I think I've over waterd her Abit so I'm going let her dry up over the next few days. It's not heat or lack of or light stress or over power of nutes or lack of nutes as the other one is fine. I've seen other diaries where some are deformed but I think with this one it's growers error
Likes
23
Share


@Elbernaweed
Follow
Las plantas se ven bien sanas con 25 días de vida, en breves trasplantare a tiestos de 5 litros para ponerlas a floración. Asta ahora solo e añadido estimulante radicular al riego y el sustrato es light mix. Ya e preparado los tiestos donde voy a trasplantar con el sustrato enriquecido,Como podéis ver la mezcla la ago yo mismo , intento dejar el sustrato esponjoso aireado y sin apretar,dejando que vaya bajando solo, si es necesario de aquí un mes le añado un poco más. Con esta mezcla de nutrientes e conseguido sacar cosechas abundantes y de muy altísima calidad! Intento que mis cultivos sean lo más natural y orgánicos posibles, utilizando fertilizantes respetuosos con el medio ambiente como el humus de lombriz o el guano de murciélago. Para prevenir hongos y ácaros suelo utilizar propolix y for-tec,que también son ecológicos y me van muy bien.

Likes
2
Share


@AcidBurn_41
Follow
04.12.24
BT#53
Mahlzeit zusammen 🙂
So die Mendocino Skunk geht langsam den Endspurt entgegen, ihr geht es wunderbar.
Auch sie hat nur PH angeglichenen Wasser bekommen damit Sie die nächsten Tage gut versorgt ist.
In 3 Tagen bekommt Sie das letzte mal Futter dann nur noch Wasser zum Spülen.
Paradise Seeds hat da eine sehr feine Gentik an den Tag gezaubert.
Komplett resistent gegen alles , wendet bei Ihr Training an somit fühlt sie sich am wohlsten.
Sie wird es euch am Ende doppelt zurück geben, aber auch ohne Training muss sie sich nicht verstecken.
Ihre extremen seitentriebe wollen hoch hinaus.
Freue mich auf nächste Woche dann gibt es wieder ein Update, bleibt anständig stay High.
Mögen all eure Ladys Gesund und prächtig wachsen und euch mit schmackhaften Stuff versorgen 🔥🤘
■■■■■■■■■■■■■■■■■■■■■■■■■
04.12.24 BT#53
Meal together 🙂
So the Mendocino Skunk is slowly approaching the final spurt, she is doing wonderfully.
She has also only been given PH-adjusted water so that she is well supplied for the next few days.
In 3 days she will get her last feed and then only water for rinsing.
Paradise Seeds has conjured up some very fine genetics.
Completely resistant to everything, she uses training to make her feel most comfortable.
In the end she will give you back twice as much, but even without training she has nothing to hide.
Her extreme side shoots are aiming high.
Looking forward to another update next week, stay high.
May all your ladies grow healthy and splendid and provide you with tasty stuff 🔥🤘

Likes
6
Share


@Eldorado_ed
Follow
Everything all still going well was pretty worried about the LST incase made mess of it was freaking out incase I put plant under to much stress

Likes
19
Share


@ArtisticGrown
Follow
Hello it's been such a journey already to be here at 11 weeks flower!! Bloom baby bloom! Soooo I think she's doing well and healthy! I'm blessed to be in week 11, I'm ready for more growth in the up coming week!! 🙏 much love that's all the time I have for today much love happy growing let's go GUAVA slushy