
Likes
Comments
Share


@Colo420
Follow
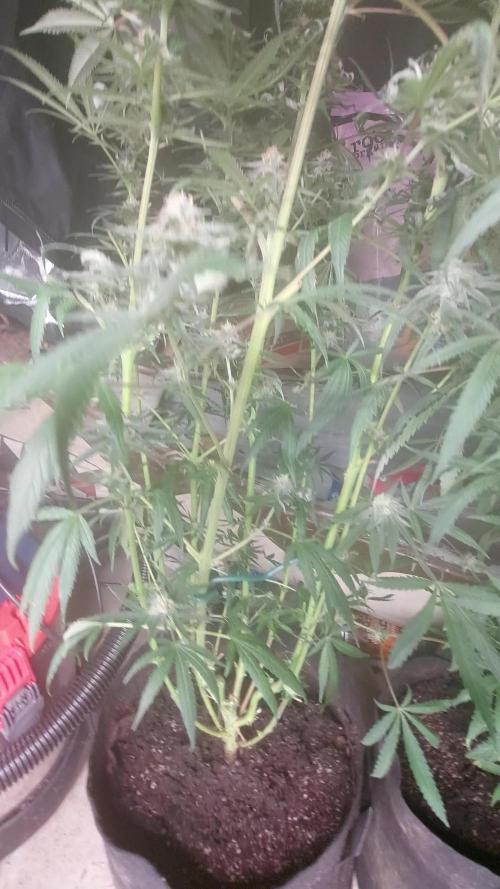
Las vacaciones complican tealizar el seguimiento de manera prolija, pero ahí seguimos.
Aclaro nuevamente que 2 de las plantas (fancy) estan en periodo 12/12 hace 15 días.
El resto está esperando que baje un poco la temperatura para transplantar a exterior y comenzar floración.


Likes
39
Share

@AestheticGenetics
Follow
4/9/25
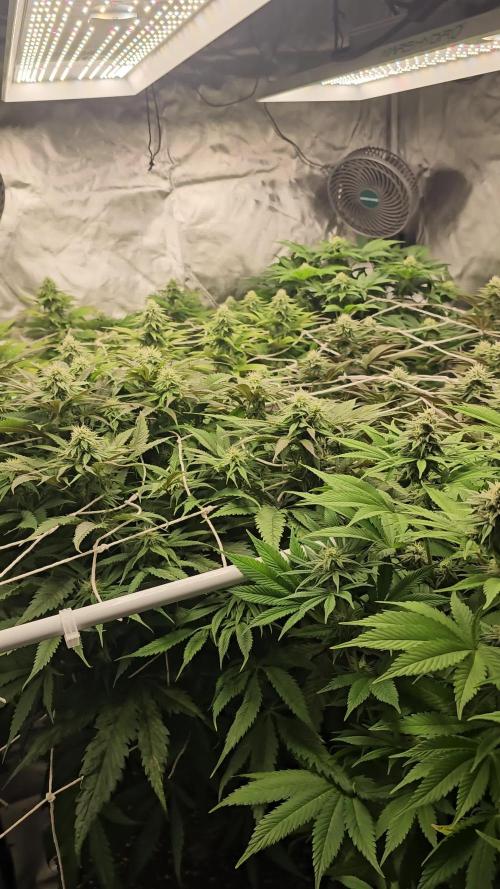
Welcome to another week. Week 5 since the flip of 12/12 just ended. So today is day 36 since 12/12. The begining of week 6.
About halfway done with flowering. Time to start packing on weight.
also its important to note that it took a week or so after 12/12 to have pistils show up. So its closer to 28 -30 days of Flowering.
I have a foxtailing pheno thats mostly green with thin buds.
I have a super chonker green pheno with ridiculously chunked up golfball sized nugs everywhere.(R3)
I have a sativa style but thicker buds with nice long connected colas (R2)
another smaller pheno with traits of some of the others and also green.
and then a singlular pheno that looks gelato dominant and its purple pretty much everywhere to the point that i didnt notice its coloring until it was next to all of its sisters that are straight green.
Very beautiful plants and a nice display of phenotypical expressions
Top dressed
2tsp bloom
2tsp microbe charge
1tsp bloom booster
A Special thank you to Zamnesia and


Likes
15
Share


@Messypies
Follow
Auto cinderella jack - Amazing week of growth. There are new nodes exploding from everywhere and its not showing signs of slowing down. They are currently loving the organic nutes and have started showing signs of flowering.
Auto critical cheese - this plant has shot up recently. It was planted a week later that the ACJ but is growing some seriously fat fan leaves. Should be a nice yeilder.
Peanut butter cookies - this girl is looking pretty sorry for herself. I am intentionally trying to keep her as small as possible so that I can get the autos out before flipping into flower but she is gonna be a beast. Will transplant into a final pot in the next day or so.


Likes
10
Share


@thevalar007
Follow
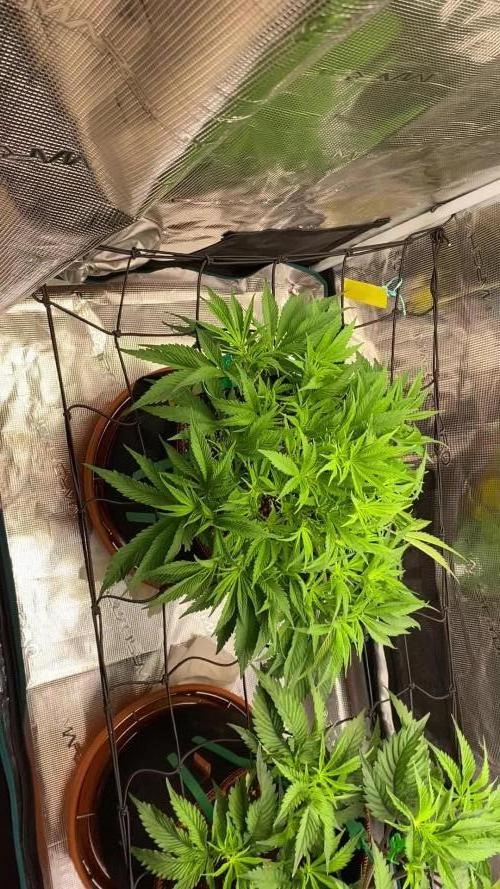
First week of flower, going well in the SCROG. Nothing fancy, just a 4x4 AC Infinity trellis. Will add a custom 2nd trellis if needed. She stunted in veg due to a bit of overcrowding causing less than ideal environment in her spot, but I fixed that by raising her, creating more space for her, and light defoliating. Other strains in this grow- Skywalker OG, Bruce Banner, Apple Betty, and Runtz. Check out my other diaries for those.


Likes
13
Share


@goeser
Follow
All plants growing well , buds developing well. Fat banana much stronger against the feeding then the Bubble Kush Auto, but still both growing well and dense buds .

Likes
Comments
Share

@AsNoriu
Follow
Day 57. Girl is flying and becoming tallest from all. Flowers are very chunky, it will produce few grenades ;)))) Still same 500 ppm as extra once a week of Mg. Approx 3g of mycos and phosphorus is added to the pot once a week.
Day 58. have very high humidity, so all oscillation fans on max, extraction fan on 70%.
Happy Growing !!!

Likes
24
Share


@Frank_cultiva
Follow
Las 4 nenas del scrog iniciaron con el ciclo 12/12 el día 05/11/2021: están siendo alimentadas con advanced nutrients(dosis indicadas en la foto de la tabla)
-micro
-blom
-grow
-b52
-rhino skin
-big bue
-bud ignitor
-bud candy
-sensi cal mag xtra
Las 2 nenas en macetas de 30LT 18/6:
por el momento están siendo alimentadas con advanced nutrients(dosis indicadas en la foto de la tabla)
-micro
-grow
-blom
-b52

Processing
Likes
12
Share


@Homegrown_Meds
Follow
This week I found a hermaphrodite amongst the ladies. I got rid of it but not before it dropped a little pollen 😭.. I,ve got my fingers crossed 🤞
Likes
8
Share


@NoProbation4Weed
Follow
Smell of the plant is amazing. Smells like red Berries. Buds got huge and medium dense. I only harvested the 3 main buds as they are developed the most. The rest of the plant can stay for one more week.
I Also removed some dead leaves.
Likes
6
Share


@RDWCGrowing
Follow
Huston I think we have an issue.. So the temp in the tent has been getting up to 90% for 4 consecutive days as well as the humidity has risen to 77. I know that it is from my room conditions now that I am running 3 lights in the room and it is causing the overall room temperature to rise. I have ordered a portable AC unit for my grow room and it will be here next Thursday so I can only hold on. Heavy defoliation commenced to try and bring the humidity and temp down as best that I can. The Maui Wowi hermied on me under the heat stress.. but it is too big to let it go so I am plucking Balls daily from anything I see. Also I had to chop the Blue cheese down it was dying from lack of light because you guessed it the Maui Wowi has stolen the show and light.


Likes
1
Share

@c1note
Follow
06.11 Woche 6 Blüte Tag1
Umstellung auf 12/12 nach 24 Stunden Dunkelheit. Dli 28- 30.
2L mit Ec1.72 5.8 ph so wie immer. VPD 1.1

Likes
Comments
Share


@Tryhard1988
Follow
She's proper Indica proper chunky buds and she doing well not ad a issue inwont be flushing but will feed her water from now till harvest
Likes
22
Share


@GreenHouseLab
Follow
Crazy stretch, amazing structure looking fwd to see some 🌲🌲🌲
🤟🤟🤟
GHL

Likes
3
Share


@Jsherriff420
Follow
Put the largest nothern lights in its own mini green house, both have x2 large bug nets around them instead of a plastic cover as the temps and humidity were off but are perfect now. Plus it will reduce the chances of bugs flying in while also allowing the wind to pass through, I’ve used some Biobizz leaf spray no further leafs have been eaten since using it which I’m happy about.


