


@Kelly420
Follow
Okay so after 48 hours instead of 24 of darkness. These ladies were begging to be chopped with how much more intense the smell got. Cheesy , sweet , skunky , and a floral incense kind of scent. Made lots of finger hash just getting them off the plants , already smoked.
I’m about 75% done with chopping all the major tops. This time I decided to cut off the branches and dry on an eight tier 24” diameter rack off Amazon. All 8 tiers are full with gorgeous top colas.
I’m drooling. Can’t believe just how much bud this is turning out to be. They are dense , and oozing. Not going to get a wet weight because this is just too much. But holding the rack it’s like 20 lbs or more. My scales don’t go that high. Lol.
Gotta say it, I think my buds look 10 times better than the advertisement photos g13 lab’s mozzarella. My 2 cents and honest opinion. Please do give me your opinions.
I know I didn’t show the full grow because life gets busy. My next grow I want to control the humidity and heat levels a bit better. Or just humidity and run co2 to withstand higher temps. I have every angle of the grow under my tips now. It feels amazing to have this kind of harvest after the dedication these plants received. I’m Convinced…. rdwc with a water chiller , is by far the best way to do hydro. When it’s dry I’ll add the final weights.
My nutrient reg is this. Jacks 321 , botanic are cal mag plus, hydroguard,PK booster is flower fuel(purple can off Amazon) and unsulfured molasses. If you don’t have an ability to keep water at 70 degrees then only use jacks hydroguard and cal mag. You’ll still do well but that molasses , that sauce is the boss.


@Ogchemst
Follow
Quick kush is called quick for a reason 👌, nice big indica leaves starting to grow and stretch pretty fast, i had to re pot one of the girls so one of them might look a bit sad but she will get better (its the salts)
Flushing and Buffering-
I am personally using Canna Coco Coir,mix with one brick of plagron coco coir(had one left).
1. Why you Should buffer your Coco. Lets get to reading! (Its Worth it for those that dont know about it)
There are cation exchange sites in coco that will interfere with nutrition until they are buffered. The cation exchange sites in coco naturally come loaded with sodium (Na) and potassium (K) cations. However, the Na and the K are only weakly held to the exchange sites. In the presence of calcium (Ca) or magnesium (Mg), the sites will release their Na or K cations and lock onto the Ca or Mg. These processes are known as “cation exchanges”.
Buffering coco is accomplished by soaking it in Ca and Mg. This allows the cation exchanges to take place prior to adding plants. Simply soak your coco in a solution of Cal/Mag water and the exchange sites will release their K and Na cations and lock onto the Ca and Mg. When the cation exchange sites bond with Ca and Mg rather than Na and K, it is “buffered”. The bonds that hold the Ca and Mg to the sites are very strong and cation exchange will largely stop. This means that all of the nutrients that you add to the water will be available to the plant at the ratios that you provide them.
2. Alot of growers Grow in Unbuffered coco coir and its a big mistake guys, I myself was a "victim"😬of unbuffered coco and it does cause alot of problems... now i am going to try and fix them!
-----GROWING IN UNBUFFERED COCO---
Many growers are unaware of the need to buffer the coco and they try to grow plants in unbuffered coco. In unbuffered coco, the cation exchange sites will strip the nutrient solution of the Ca and Mg and replace those cations with Na and K. This creates a sub-optimal Nutrient Element Ratio (NER) and renders Ca and Mg unavailable to the plant.
Failing to buffer the coco is why so many growers suffer calcium deficiencies in coco grows. Manufacturers of prepared coco products try to exploit these problems and convince growers that only their proprietary products are suitable for growing. However, it is actually very simple to properly buffer your coco yourself. This tutorial walks you through the process and provides all the information you need to turn even the cheapest brick of dehydrated coco into a superior growing medium.
I hope i Helped out someone who didnt know about this link on how to Buffer your Coco Coir is Here https://www.youtube.com/watch?v=OQi8AMMIyyA&t=18s
14/02/2019- I Decided tp raise up the amout of nutes and im giving them 1,5 ml per L so 15 ml's for 10 L / 2 Gallons of water



@Kinghaze
Follow
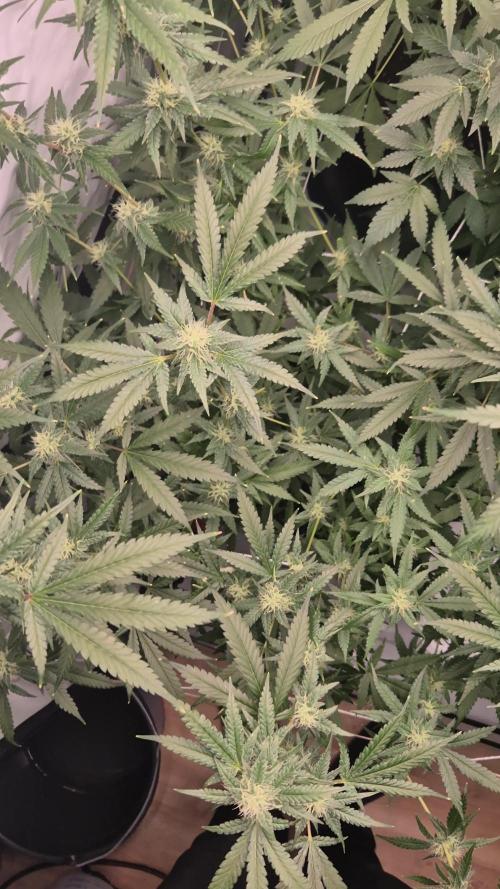
Week 5 of 12/12
Have some nutrient burn some plants more than the other. Thats a risk if you grow different types of plants.
Give them to much so now i lowered the ec a bit.
I have gave them also advanced nutrients revive with ph 6.0.
Next time i will give them just plain water and them slowly build up the ec again depending on the reaction of the plants.


@Youngicons
Follow
I'm noticing that some of the plans are growing at different rates and so the ones who are growing slower probably experience more trauma during transplant is my only guess. I've been reading more about the temperature of the water so I am focusing on that but the thermometer I got doesn't read the best so I'm going to get a new one here soon. For now I'm trying to stick between cool and lukewarm water to the touch.


@TyRun
Follow
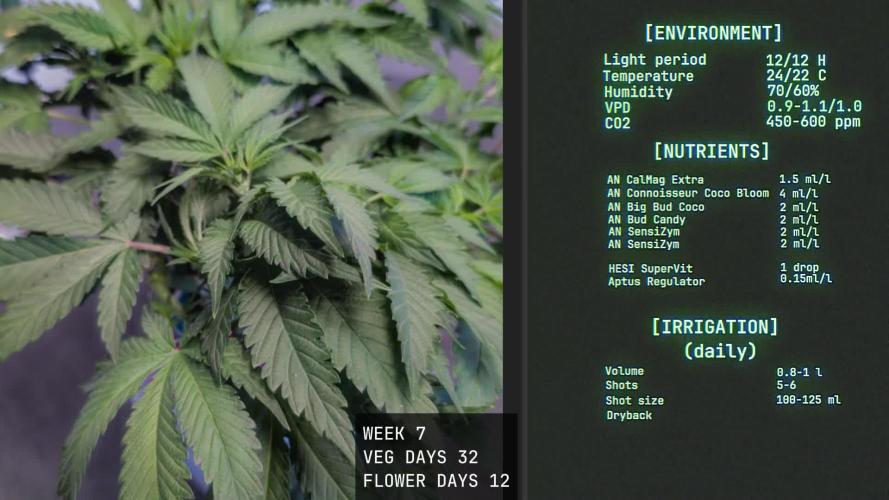
Clones termination. Mom's flowering.
Yep, this is an example of how it should not be done. The clones survived two cases of tip rot and a transplant after cleaning the tips.
They finally developed some roots, but still didn’t make it. I kept only one, but I need two. So… the mom is about to start flowering after stretching, and I cut eight branches again to make a second clone. After some bending and tying, the mom returned to the flower room. If your light has a flower mode, now is the time to turn it on. The fast stretch period is over, so add some red light. It helps with yield.
This time we’re going to do it right, using the experience from the first attempt at cloning.
Check the clones 2–5 times a day. Keep the propagator lid closed at all times, and don’t let water touch the cloning medium. Also, the cubes shouldn’t be soaking wet, just moist. This balance between water content and airflow is crucial for future roots.


@CANNASIM
Follow
------GENERAL COMMENT------
Exploding! Girls are amazing, super healthy, and growing very well.
------SM.BB COMMENT------
Less bud spots than the AK47, showing new branch attempts in the stem length. Liking a lot this strain, she is drinking around 1l everyday. Root mass is feeling very dense.


@IslandTerps
Follow
Strain: Fast Buds – Mixed Photoperiod Trio
Grow Type: Indoor
Pot Size: 3 Gallon (x3 plants)
Medium: Peat Moss & Perlite
Nutrient Line: Athena (Bloom)
Week 7 Update
These three are doing excellent strong, healthy growth across all of them. Each one has its own little character, but they’re all showing great structure and consistent development.
The canopies are even, the leaves look lush, and there are no signs of deficiencies anywhere. They’re taking their nutrients perfectly and stacking up nicely.
Really happy with how they’re progressing can’t wait to see how these three look as flower kicks into full swing.
Feeding
1.9 L Athena Bloom nutrient mix per plant (steady from this point).
Indoor Climate Conditions
Temperature: 24–27°C
Humidity: 45–55%
VPD: ~1.3–1.8 kPa
See y’all next week! And don’t forget to use my discount code ISLANDT for 15% off your next order at Fast Buds!





@Shivashamboom1
Follow
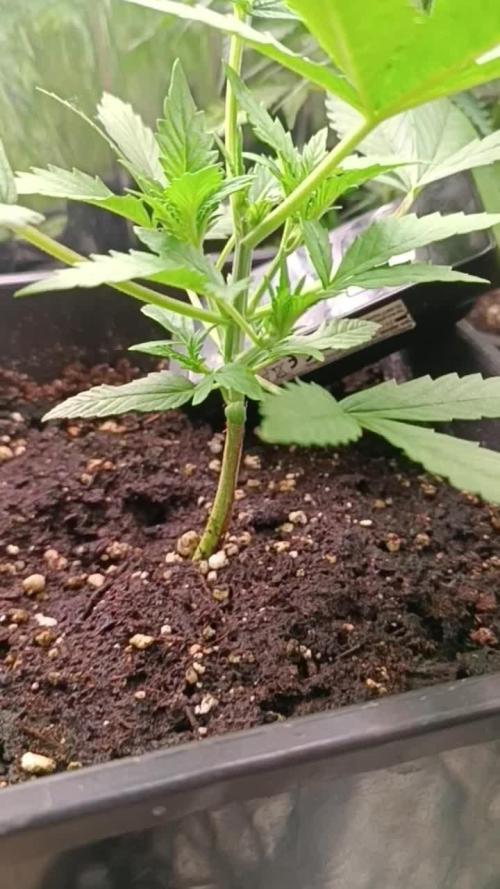
3°settimana, gli ho dato un taglio netto on the top 💪🙏. inizia già a crescere dai lati....



@ROY4L_GU4RD
Follow
Week 6 here and I'm going back to the 6/9ml macro/bloom amount. What do yall think so far? A little over halfway at this point.


@NordicClosetGrower
Follow
Thought I would have harvested already, but from the little I'm able to see, there still aren't really many, if any amber colored thc crystals, so I might wait some more days.
The second plant remains 1 week or so behind but might soon catch up and they could come down at the same time.
Still only flushing with water, some leafs are starting to curl and dry off. I'm just a bit paranoid that it is time to cut, I'm just not seeing the amber color because the camera can't pick it up. ¯_(ツ)_/¯


@Certifyed252
Follow
My GG is safe to say that she is frankensteins bride...this past week has been the most stressful for both of us...from breaking the second main that grew from the first topping resulting in me topping it again, to thinking i was getting early stages of WPM so i milk solutioned both plants, pots, the tent..to realizing that the TG def had a copper deficiency which i solved with a flush with nutes and grow big foliar spray and is now showing great healthy growth...def a learning experience...dont let anyone tell u its easy haha...and if ur finicky and have adhd, just let the plant be, hardest part yet 🤦♂️ also did a pretty heavy defol and screen comes up within a week.



@Salokin
Follow
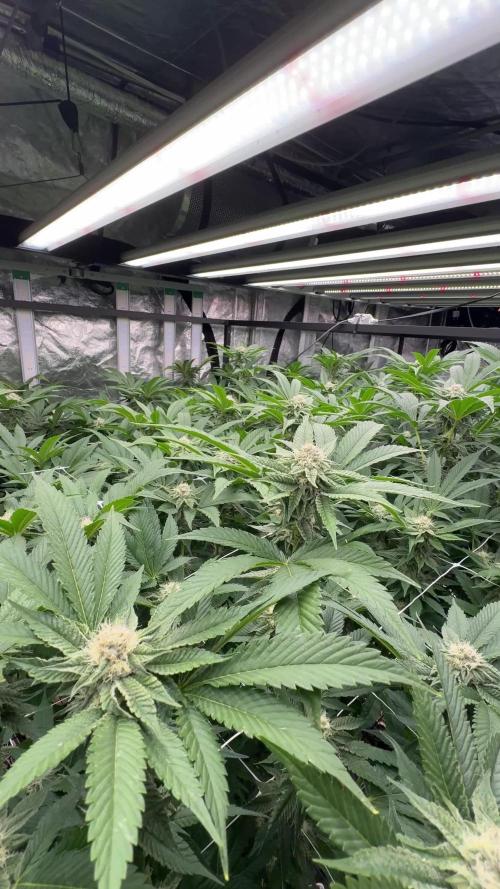
Week 4 Flower | GMO × Triangle Mints BX
Week 11 overall, and the room is shifting into a different gear. The buds are stacking, the structure is locked in, and the bud sites are developing exactly as expected from this genetics.
Defoliation this week was light — a few leaves here and there, nothing structural. The canopy management work from the previous weeks is paying off and the plants are doing the rest themselves.
This week marked the introduction of Super Microbes BoostX into the feed programme, applied every two weeks with the water cycle. It brings a broad microbial consortium — multiple Bacillus strains, Lactobacillus spp., Rhodopseudomonas palustris, Saccharomyces cerevisiae, Glomus intraradices, amino acids and vitamins. RootX was already applied at transplant, delivering mycorrhiza (Glomus intraradices), Trichoderma harzianum, 13 strains of Bacillus spp., humic acids, amino acids and vitamins directly to the root zone where it matters most. A living root zone is a productive root zone.
Plants now at 110cm, lamp sitting at 30cm distance — dialled in to push maximum photon delivery into the tops. Running 3.3L per plant per 24h, pH holding steady at 6.2, EC stepped up to 1.9 mS/cm. Humidity down to 60%, day temp holding at 27°C, nights at 23°C.
Nutrient stack: Canna CalMag Agent 1.1 ml/l, CANNA Aqua Flores A+B at 4.6 ml/l each, CANNA PK 13/14 increased to 0.46 ml/l in line with the escalating demand, Aptus Regulator 0.1 ml/l, Green Planet Rezin 1 ml/l. Feed rotation stays the same — two full feeds, third is 50/50 osmosis and tap, pH’d, carrying only CalMag.
Next update Sunday. Stay tuned.
shorts_status_processing


@Ageddd
Follow
Fattening week !! Alternating water/nutes irrigations...
Gave the plant Top Bud, 2 times this week, using 0.5ml/l each one, but switching BIG ONE AND TOP BUD so:
/ -WATER- / -BIG ONE- + -TOP BLOOM- + -TOP CANDY- / -WATER- / -TOP BUD- + -TOP BLOOM- + -TOP CANDY- /
---------------
Seems like @growdiaries did not add Top Bud to the database..So i let you the description below..
Top Bud : is a fattening fertilizer for the flowering stage. It maximum concentration of phosphorus and potassium and its absence of nitrates make it an ideal fertilizer for fatterning, while respecting the good taste of the crop.
It is also rich in amino acids that benefit the development of flowers.
Dilute at the rate of: 0.5-1ml per 1L of water once a week.
Apt to: Its use in hydroponic substrate and coconut fiber.
--------------


@Firepharmer
Follow
Love this strain!! Nutty and meaty spicy terps one one of my favourite to medicate with and grow
Both plants where grown in 1 gallon pots so nothing to big of a yield but was expected with the small pots . One plant was canna nutrients one was remo nutrients


@Robownz_53
Follow
-Soil mix is FFOF with 20% perlite added
-Led light hung 30” over top of seedling set on 4/10 clicks


@Salokin
Follow
Hello Growmies,
Week four of vegetation for our Epic Buzz by Anesia has been marked by remarkable progress and environmental optimization. The uniform growth has continued, with each plant reaching a robust 20 cm in their spacious 12.5-liter air-pots, signaling a very successful vegetative phase.
The integration of the heater and humidifier into the tent's system has been a game-changer, allowing for precise control of the growing conditions. The environmental graphs are showing admirable consistency in temperature and humidity, which is key to maintaining an ideal VPD level for the plants, ensuring optimal transpiration and nutrient uptake.
The Photone app indicates that the light intensity is within the ideal range for this stage, with readings of 150-180 PPFD. The lights, dialed down to 25%, along with the strategic use of IR lighting for 30 minutes at the transitions of the day, support the natural growth cycles of the plants. Concurrently, the UV lighting's midday cameo for 30 minutes is a masterful touch, potentially enhancing plant resilience and future resin production.
Once the connectivity issues are ironed out, the Mars Hydro inline fan will be operational, enhancing nighttime dehumidification, a critical aspect of maintaining plant health by preventing excess moisture and the issues it can bring. This will round out the environmental controls, making them as meticulous during the night as they are throughout the day.
The Epic Buzz plants are set to continue their vegetative journey in an almost perfectly controlled environment, thanks to the thoughtful and precise adjustments made around the garden. The upcoming week is poised to be another step forward in a vegetative phase that's been characterized by attentive care and environmental mastery.
Stay lifted, salokin.
