


Likes
Comments
Share


Likes
3
Share


@OldskoolHed
Follow
Always a huge yielded and a heavy hitter. Name is true to the effect. A little tough to get back ahead if you get deficient so remember she eats a lot. My favorite strain, have had the cut for over 2 years.


Likes
18
Share


@Silverback_Guerilla
Follow
2/14:
Decreased distance between the lights and canopy. Let the maximum swell commence!
2/16:
Fed today..increased sugars/carbs. This was probably the last feeding with Beastie Bloomz..switching to Cha Ching at next feed and cutting back on the One.





Likes
10
Share


@barlobruz
Follow
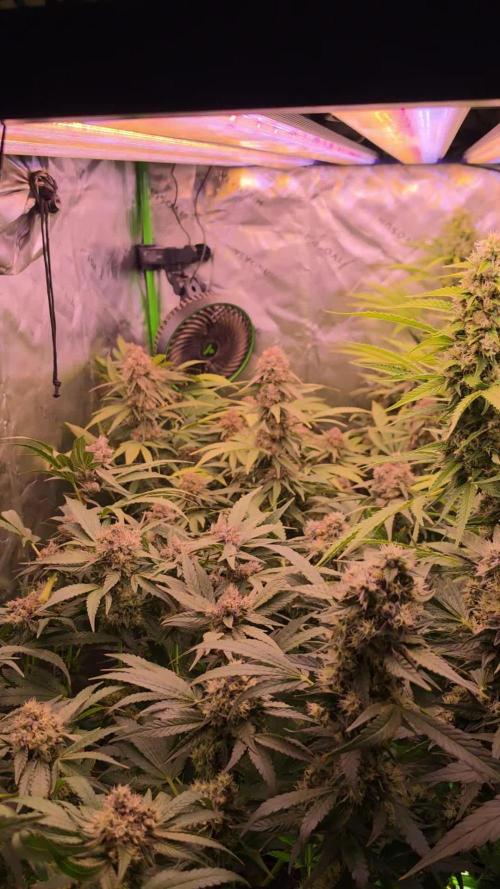
08/04/2021
- I SEE PISTILLS!!! Really didn't think we'd make it this far 😅
08/08/2021
- Top dressed and watered w/ an AAEWCIF tea.
- Continuing to defol as necessary.
- Too lazy to date and re-organize all those photos through the phone.
- Photos taken from 08/02/2021-08/08/2021.




Likes
11
Share

@CannaArchive
Follow
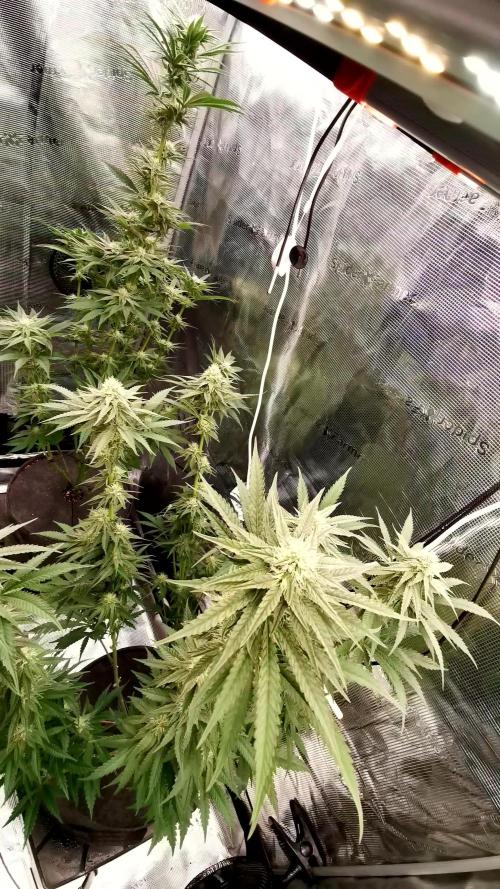
With the stretch now fully completed, the plant shifted all focus toward flower production and resin development 🌸 The overall structure remained unchanged throughout the week, confirming the end of vertical growth.
• Height remained around ~110 cm
• Stretch finished
• Bud sites developing steadily across the canopy
The plant keeps its very characteristic structure, growing compact around the main stem with shorter side branches and long stacked internodal flower sites 🌿
Resin production increased noticeably this week ✨
The sugar leaves are already heavily coated and frost development is progressing quickly for this stage of flower.
Light intensity remained high at:
• ~950–1000 PPFD ☀️
Water demand stayed consistent:
• ~4L every 2 days 💧
Feeding this week matched the Jelly Donutz schedule:
• RO water + BioBizz CalMag
• 1x Greenhouse Bio Enhancer, 1x Biotabs bio PK 5-8
Environmental conditions:
• ~24°C temperature
• 50–55% RH 🌡️
The aroma started developing more noticeably this week 👃
While still not extremely loud, the scent profile is becoming sweeter and shares similarities with the Jelly Donutz, likely due to the shared genetics.
No additional training or major structural work was needed this week, allowing the plant to fully focus on flower and resin production.
Overall the plant looks healthy, stable and very resinous already, with promising flower development going deeper into mid flower ?🔥

Likes
11
Share


@Nutrient_gro
Follow
First sights of trichomes on leafs (sugar leafs)! No issues she’s growing good just a few yellow leaves on gc2. Looked like she needed cal mag, chopped the yellowed leaves and put cal mag 6 ml. Usually give cal mag every other watering but ima give them more often since I’m using dechlorinated tap water.
Likes
11
Share


@sam_doze
Follow
Very satisfied with the race of the weed, i really hope the harvest give me a Lot of grams. A very beautiful smell.
Survive 2 of them, resulting 2/3
First one is green
The other is red by sweetseeds.

Likes
22
Share

@MyLittleGarden
Follow
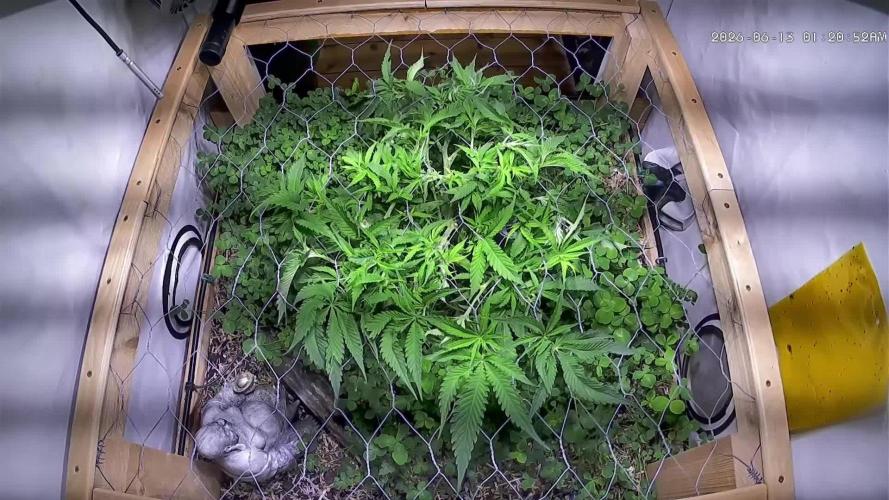
Vegetationswoche 10 - 12.06. – 19.06.2026
Diese Woche lief alles wie gewohnt weiter. Ich habe die Triebe weiter unter dem Netz verteilt, hier und da etwas entlaubt und das Klee-Cover-Crop erneut gestutzt. Ansonsten gab es nichts Besonderes zu tun.
Die Utopia Haze wächst weiterhin gesund und füllt die Fläche langsam immer weiter aus. Im Vergleich zu meinem letzten Grow mit der King Juice fällt mir allerdings auf, dass die Utopia etwas langsamer wächst. Die Triebe sind stärker verzweigt, etwas steifer und lassen sich nicht ganz so leicht über die Fläche ziehen. Dadurch dauert das Füllen des Netzes etwas länger als gewohnt.
Ansonsten sieht die Pflanze weiterhin topfit aus und entwickelt sich genau in die Richtung, die ich mir vorgestellt habe. Jetzt heißt es weiter wachsen lassen und beobachten.

Likes
123
Share


@MrHightimes
Follow
Looks great. Tent is pretty maxxed out! just seeing how much these ladies stretch and seeing if they are ready for this amount of Nuets. This is pretty much the end of the amendments from Bush Doctor.
___________________________________________________________
My friend came over, I'll call him 'The Defoliator'. He bravely jumped in there and chopped through all the madness! The ladys look great with a heavy defoliation and I even jumped in to do a bit of Super Cropping just to try an even out the canopy! I think the feed is exactly where it should be and everything looks PERFECT!!!!! Flowers are popping up all over and the canopy is full and lush!
____________________________________________________________
Plants are kicking ass! Enjoying the grow! Just hoping I have all the nutrients dialed in and life should be good! Seeing some really pretty flower action and I think there should be quiet a yield off this! The PH is coming out a bit high on the drain-off, which means there is a bit of a salt build up.. I might have to use the flush sooner than later.


Likes
4
Share


@I_Identify_As_A_Dan
Follow
Week 9 for Amnesia Zkittlez by fastbuds
Buds really starting to bulk up now really was worried about this strain with how thin she was but now that's changing😎 Shes handling the 35 degrees sun like a boss as well😁
Quite surprising how little water these girls drink... still only got fed once this week with a bit of (WCA) Water Soluble Calcium & (FFJ) Fermented fruit juice for its last few weeks of life now.
Got a few yellow leaves after feeding the WCA wonder if its related...
Likes
28
Share


@GanjaGecko
Follow
Die Woche war schonmal wieder etwas mehr Sonne. Die GorillaAuto ist die letzte der drei Ladys aus dem Report. Ich denke das sie noch 1 - 1½ Wochen stehen wird bis sie auch zum trocknen aufgehangen wird. Die Trichome sind ca 20%milchig, 75%klar und 5%amber.
Die Fanleaves werden auch langsam heller und gehen ins herbstliche.
Gegossen wird nur noch mit Wasser wenn der Topf leichter wird. An heißen Tagen waren es teilweise zwei mal täglich.
Hoffentlich überlebt sie die letzten Tage ohne schlimmere wettereinflüsse🍀
Vielen Dank fürs reinschauen 💚
Likes
10
Share


@DeepRootsGrowTrees
Follow
MIMOSA ZKITTLEZ FF/
GANJA FARMER
WEEK #15 OVERALL
WEEK #5 FLOWER
This lady is a beast 💪 she's c completely taken over the tent she's about 4 inches from the light I mean she's just about as much plant as you can get into a small ⛺️ impressed with the genetics of this strain hearty and a strong 💪 plant she's producing nice looking buds!! Stay Growing!!
Thank you for stopping by and taking a look it's much appreciated!!
THANK YOU GANJA FARMER!!
BUDTRAINER.COM BUD CLIPS
MIMOSA ZKITTLEZ FF /
GANJA FARMER

Processing
Likes
3
Share


@Kushizlez
Follow
Day 33-40 (May 24th-May 31st)
(Day 34) I just found a herm branch on the tight blueberry pheno. It looks like a random pollen sack opened right above a lower branch. I removed the sack but I saw a small amount of dust fall onto one of the lower branches. I’m going to leave it to see if it will pollinate that small branch at all. I spent a good 5 minutes looking closely for bananas or claws but couldn’t find anymore. The main bud is clearly unaffected so I will just leave it unless it is visibly seeding itself. Too bad because I’m really excited for this plant.
(Day 36) Not a lot has happened since I flushed them. Growth actually looks healthy and I don’t see any deficiencies on anything yet.
(Day 37) Both of these badazz cheese phenos are picture perfect and easily hold up against Canadian and California quad grade. I might try to reveg them at the end and take some clones. They have this unique pungent, grassy, sour milk smell that is just wonderful. The density and bud structure is looking great too. This whole plant will probably take 3 minutes to trim if that.
(Day 38) Just found a banana on the shitty blueberry pheno. This pheno is trash and I would honestly throw it away if it didn’t mess up the 3 perfect rows. It has almost no frost, no smell, is airy and has bad structure. I’ve actually never seen a plant with such little frost. Even outdoors.
(Day 39) I think most of this tent will be done by day 60 but I will probably ride it out until day 70+. I don’t think the blueberries or the jacks will fill out very much either way but taking it too day 70 will ensure maximum production from each plant.


Likes
23
Share


@PrairieFrostGrow
Follow
She has fought off all pest and environment issues and is very stable. She was switched to a 20 hour light cycle at mid to end of flower and she took that well and swelled further. Opened her up on the inside to the let the light in and she has rewarded with fat little nugs all the way down her stems!! She liked the LST and would push harder the day after being tied down.
She finished just a beautiful girl and she will be on a screen saver for a few months to come😃😃😃
