The Grow Awards 2026 🏆 


Likes
Comments
Share
@UK420
Follow
No problems to report this week. Gelato smelling amazing. Strong frosty bud growth in all strains. Looking forward to the next couple of weeks of development.


Likes
118
Share
@Grow3rPT
Follow
👉 ( Floração ) 👈
📅 Total de Dias 71 (F 41) - 12/10/2021 / Crescimento normal 😀
📅 Total de Dias 72 (F 42) - 13/10/2021 / 💦 Rega com nutrientes
📅 Total de Dias 73 (F 43) - 14/10/2021
📅 Total de Dias 74 (F 44) - 15/10/2021 / 💦 Rega apenas com agua
📅 Total de Dias 75 (F 45) - 16/10/2021 / 💦 Rega apenas com agua 😀
📅 Total de Dias 76 (F 46) - 17/10/2021
📅 Total de Dias 77 (F 47) - 18/10/2021 / 💦 Rega apenas com agua
👉 MARSHYDRO
👉 CODIGO PORMOCIONAL : Grow3rPT
👉 Em marshydro.eu 3% de desconto em qualquer produto


Likes
12
Share
@Bryankush
Follow
Continuando a preparare la sua forma finale.
Purtroppo nella mia zona le temperature sono molto alte, circa intorno ai 34° ma per fortuna la Mango riesce a resistere un po. Attualmente la annaffio con 10L di acqua a settimana.


Likes
15
Share
@Zellybelly
Follow
Almost there ..... 4 weeks to go... a little strange because I switched my super loud noisy ass metal 4 inch inline fan for a plastic 4 inch VORTEX brand inline fan and its great for being stealth but I noticed I developed a rust spore problem which is an air circulation issue I have my ph perfect and nutes dialed in I even started cleaning my roots with cannazyme its a dead roots nutrient that enhances the breakdown of old roots and keeps things regular. Now I am just dealing with strange orange colored rusty leaves but the bud development is great and stickier and stinkier than ever .... 4 weeks left for these baby's to swell up and puff out looking forward to this dry chop and trim then the final cure.....


Likes
4
Share
@ObloTheGrower
Follow
Well, this week clones are done their root job I gave them 2 more days in their box.
4 different small buds are polinated now. I will give them 4 weeks to make seeds. This is my first try to do it in late period. We will see the result.
Likes
1
Share
@DrBud420
Follow
13.06.
Rainbow Sherbet 1# Day 49#
The plant is at the end of its seventh week today, I moved it a few days ago to a mild shade and now it behaves much better and is progressing nicely.
Rainbow Sherbet 2# Day 47#
I have nothing special to write about this pheno, it is progressing well
5 nights ago there was a strong storm, the morning after the storm when I came to the site, I found some plants crooked, some normal, but there were no broken ones, thank God, but they were very stressed and what you can see in the pictures appeared on the leaves, some leaves were crispy at the edges, but still green, mostly shoots before the newest ones.
I haven't had this problem before, I researched a bit on the internet and came to the conclusion that the wind burned them, and I also turned to GW for an opinion, two characters confirmed my opinion.
Two days later I noticed that the matter was getting worse and that it was spreading, which worried me, so I contacted GW again for an opinion.
Some told me that it was mold, some that it was an infection, disease and so on, mostly guesswork, but no one specifically told me what was certain, so I decided on nim oil, and whatever it is, I guess the problem should be solved.
According to some leaves, I would say that insects might be the problem, but I really don't know, I haven't had similar problems before.
I regulate the ph of the plants, I still don't feed them, there is food in the ground for another week, except for the fact that I added cal-mag after that storm when I watered them.
I want to say that the plants are certainly not locked, and the heat is not yet so high that this would happen from the same, the more the temperatures have dropped and now it is perfect.
Since transplanting, I have watered the plants only 2 times.
Yesterday morning they were topped for the second time, only the main branches, I will do the next topping of the side branches.
Last night I sprayed the plants with neem oil and already today the problem seems to be going away, if I tripped at least it doesn't spread further, that's for sure.
I didn't mix the oil very well, I didn't add any soap or anything like that because I wouldn't really spray the plants with any chemicals, and on some of the leaves on one or two plants there is that thick, brownish liquid, so I hope it won't hurt them, I noticed that today during the day, I couldn't see it at night.
I still don't know what the problem is, but my guess is still that the wind burned them or some insects.
Speaking of insects, I think I noticed thrips on one plant on the underside of the leaf, so in addition to the neem oil I already gave, I also ordered SMC, so I will spray that at least once a week while they are still young.
Happy Growing and Stay High!!!

Likes
22
Share
@medicalhydro
Follow
Flush week
Total system power 230w
Dim %10
UV-IR-FR Dim %100
PH:6.0
PPM 285
Processing
Likes
28
Share
@Elysian_gardens710
Follow
They have settled in good after last weeks transplant. Of the 2 plants #1 might be 1/2" taller. Keep in mind I am very new to this and dont yet have a trained Eye, but I would have to say these to are near identical. Idk the filial generation this crop, but the things ate growing like clones! Really uniform.
One noteworthy item; they aren't really fans of extreme heat. Right now I have them in my seedling tent which is currently running at 85° give or take. Sho the other strains love it. Choc mint OG is showing very mild heat stress tho

Likes
74
Share
@420DeepGrow
Follow
Gracias a @James, Royal Queen Seeds y MarshHydro sin ellos no sería posible hacer este diario.
La Tropical Mirage es la última creación de los maestros de la cría de Royal Queen Seeds. Trabajando mano a mano con el DJ y productor Henry Saiz, nuestro equipo se propuso crear una variedad que sirviera como chispa de inspiración para las personas creativas de cualquier ámbito de la vida. Y ahora, por fin podemos presentar el resultado.
La Tropical Mirage desciende de la todopoderosa Zkittlez, uno de los híbridos más populares del mundo. Es el resultado de un cruce entre un esqueje seleccionado de la Forbidden Zkittlez y la Melonade, y es afrutada, edificante e inspiradora. Sus flores densas, alargadas y resinosas desprenden intensos aromas y ejercen un subidón energizante capaz de impulsar cualquier proyecto creativo, desde la música y las artes visuales hasta la escritura, el baile y mucho más.
En el cuarto de cultivo, la Tropical Mirage es rápida, fiable y muy productiva. Con una serie de cuidados básicos, esta variedad tan resistente te dará suficientes cogollos para mantener tu flujo creativo en acción durante todo el año.
🌻 🚀 Consigue aquí tus semillas:
https://www.royalqueenseeds.es/semillas-feminizadas-de-marihuana/647-tropical-mirage.html
💡 Mars Hydro TS 3000, como la lámpara de cultivo LED más grande de la serie TS, ofrece suficiente cobertura para un área de 4 × 4 pies con un precio asequible y rendimientos de calidad; a cambio, se puede aplicar tanto al cultivo doméstico como al cultivo comercial.
Potencia - 450w
Cobertura Vegetal – 5×5 pies
Cobertura de flores - 4 × 4 pies
La opción abrumadora para la mayoría de los productores que la aplican en tiendas de campaña.
Consigue aqui tu lámpara:
https://marshydro.eu/products/mars-hydro-ts-3000-led-grow-light/
📆 Semana 8:
Creo que va a ser la última semana que aplique nutrientes, los cogollos se han hinchado mucho esta semana. Finalmente quedaron cargadisimas de resina y con unos tonos morados que impresionan, el lavado de raices va a ser facil, estoy deseando cosechar esta variedad 😁⛽
Me hubiera gustado cubrir mas la carpa pero debido a la mudanza y posterior adaptación no ha sido posible.
Likes
7
Share
@Zuppler
Follow
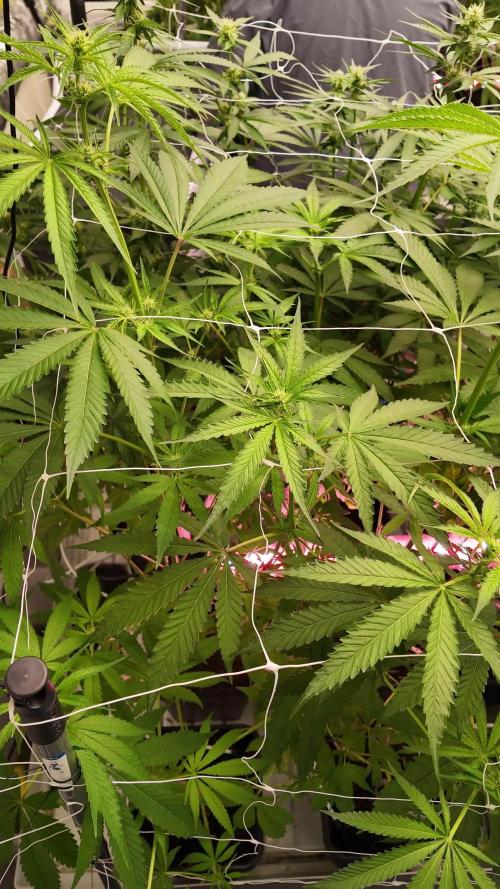
Week 7 - Second Week of Flower
The Donutz squad is deep into the stretch phase, and the tent is buzzing with energy. The plants are loving the Greenhouse Feeding Bloom nutrients, responding with healthy, vibrant growth and an impressive stretch. The SOG canopy is coming together beautifully, and adjustments are being made to keep everything dialed in for maximum light penetration and efficiency.
Key Updates:
Stretch in Full Swing: The plants are stretching aggressively, shooting upwards and making their presence known. The increased height is filling out the tent and setting the stage for a dense canopy of colas.
Strategic Defoliation: Early in the week, I took a close look at the plants and spotted plenty of leaves and lower growth around the net level that would never get sufficient light. Those unnecessary leaves and weak shoots were removed, allowing for significantly better light penetration and airflow. The difference was immediate — the canopy now looks cleaner, and light is reaching the lower sections more effectively.
Nutrients & Care:
Flowering Nutrients: The Greenhouse Feeding Bloom continues to work its magic. The plants are showing no signs of deficiencies or stress, and their growth is vigorous and healthy.
Watering: Still keeping it chill with reverse osmosis (RO) water, ensuring clean and balanced hydration.
Observations:
The canopy is filling out evenly, with strong, uniform growth across all plants.
The lollipopping and defoliation have paid off, creating a clean and efficient canopy where every bud site is getting its share of light.
Looking Ahead:
As the stretch continues, I’ll keep monitoring the plants closely for any additional defoliation needs. The second net is on standby for when the nugs start stacking to provide support and maintain an even canopy. With the light intensity gradually increasing, the plants are poised for explosive bud production in the coming weeks.
The Florida Gang vibes are strong — this tent is on its way to producing some serious heat!

Processing
Likes
2
Share
@TolaMcFly
Follow
Han empezado a tomar ritmo en general esta cepa la he visto y cultivado y siempre se demora en mostrar flores contundentes , va lento pero seguro , lo mejor que tiene es el efecto que verdaderamente se parece al lsd , no se que habrá hecho Barney’s farms con esta cepa pero es un efecto muy fuerte , adjunte unas flores de otro cultivo , esta semana defoliamos otra vez las hojas más nuevas , dándole pelea al frío que ya afuera alcanza temperaturas de 2º C , de noche la temperatura fructua demasiado las plantas están tomando tonos violáceos y se ven muy pero muy parejos todos los cogollos que se vienen.
Likes
5
Share
@CannaBossBizz
Follow
Nothing really Changed. Did a topping today. She's A little taller. Love to See her growing ❤️


Likes
29
Share
@Rounder
Follow
Everything going great Auto daiquiri got healthier and they are climbing good. Made smooth defoliation, trying to keep schedule and humidity and temperature right. I AM happy and they look too.
Likes
2
Share
@PINUFLA
Follow
Día: 78
Riego: 1,5L x Pl.
- Agua
Día: 81
Riego: 1L x Pl.
- FinalFlush 2mlxL
Día: 83
Riego: 1L x Pl.
- Agua


Likes
24
Share
@greenkeepers
Follow
Week 4 – Flowering (Day 22–28) 🌸🌱
At the end of Week 3 (Day 21) we carried out a deeper round of defoliation and some lollipopping. By now the stretch is coming to an end, with the plants settling close to their final height.
We’ve also stopped foliar feeding, since every single plant is now covered in developing buds. To keep everything protected, we refreshed the beneficial insects, better be safe than sorry, how we say in German, sicher ist sicher.
Already in this early stage of flowering, we can clearly spot differences in structure, bud formation and even the first aromas. Some phenos are showing exceptional promise — those will be the ones we’ll highlight more in the coming updates.
🔎 Pheno notes so far:
PG 34 – balanced structure, well-developed branching, consistent stacking.
PG 52 – dense flower set, compact top formation.
Pink Gelato stands out for its sweet candy-like fruit aroma, paired with symmetry and early bud quality.
