


Likes
Comments
Share


@Herbangardener671
Follow
Did some heavy feeding the past few days now getting reading to flush soon, end of week 6 last feeding now flushing for the final weeks.

Likes
21
Share


@Rollex420
Follow
This week flushing the wedding cake i thought that was the problem was an excess of nutrients, but instead the water was quite clean, around 1100ppm at the first drain, after several flushes water is now on 600ppm..
It seems that the others are starting to have the same deficiency that hit wedding # 2 .. now I'm treating them with 0.5ml of cal-mag adding it to the other nutrients for once a week (except wedding # 2)
I will wait for the soil to dry out, to give her only clean water since the final harvest is not long.
⚠️ UPDATE DAY 45 ⚠️
Yesterday flush for dos si dos and today flush for (wedding cake 1) they are having a nutrient lockout too..😪 The (wedding cake 1) is clearly healthier than her sister (wedding cake 2) by looking at her color, but unfortunately she had excessive PPM / EC too.. So i did the same procedure by using only tap water, but this time added only 0,5ml of cal-mag. Water was at 6.5 ph until I got a better runoff, it went from 5.7 to 6.0 PH and from 1800 to 700-600ppm 😬 I have never thought of overdoing nutrients so much.. I will certainly learn a lot from these mistakes 🙌🏻

Likes
Comments
Share


@AlterKiffer
Follow
Ganz zum Ende der 2. Woche nach einsetzen der gekeimten Seeds, nehmen die Kleinen so langsam Fahrt auf, messen aktuell ca.4 cm.
In den letzten 2 Jahren habe ich überwiegend Automatics angebaut, muss mich erstmal wieder an die photoperiodische Geschwindigkeit gewöhnen und aufpassen, daß ich nicht zu ungeduldig werde...😂
Gefunden habe ich die Lasche, an der man ziehen muss, damit es schneller geht noch nicht. Falls jemand weiss, wo sie ist...ich würde mich über jeden Tipp freuen! 😉😄
Das "HolidayGrow" Gel ist scheinbar der Hammer, abgesehen von gelegentlichem anfeuchten der Substratoberfläche habe ich noch nicht gegossen.
Fühle ich ein paar Zentimeter in das Substrat hinein, ist es immer noch locker- fluffig und feucht.
Aber erst zum Schluss wird ein Strich drunter gemacht und dann werde ich einen direkten Vergleich zwischen Produktversprechen und Realität ziehen können, bin aber ziemlich optimistisch.


Likes
Comments
Share

@420DeepGrow
Follow
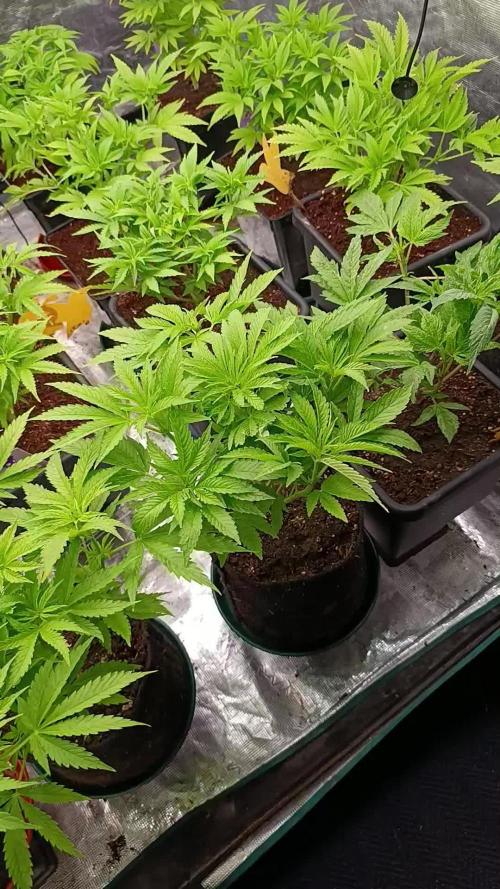
📆 Semana 2
La planta entra en floración activa con un estiramiento controlado y los primeros pistilos claramente visibles. La estructura continúa abriéndose de forma equilibrada y las hojas mantienen un verde sano y uniforme. El tallo principal permanece firme, sosteniendo el ritmo de crecimiento sin signos de estrés.
El desarrollo sigue siendo constante y ordenado, enfocando progresivamente la energía en la formación floral.
Seguimos creciendo fuerte 💪!

Likes
20
Share


@arDub
Follow
Week 3 Flower Update
Germination date : 01/22/2022
Day 1 seed surfacing: 01/24/2022
Current: Day 21 FLOWER 04/04/2022
Lights: Currently 975 PPFD @ 12 Hours = 42 DLI
Strain 1 (Left in Pics) 🍁: Solfire Gardens- Bahama Bussdown
Strain 2 (Right in Pics) 🍁: In House Genetics-Slurricane #7
Light : ChilLED x3 500W
Tent : AC Infinity CLOUDLAB 642, 4'x2'x6'
Air Filter: AC infinity 6inch + Carbon filter
Growing Media : • Reammended Buildasoil 3.0 Living Soil + red wiggler worms in 15 Gallon Grassroots Pots
Nutrients : Lots of Microbes + dry amendments
Water: Purified Water + Tap Water mix to 150ppm; ph is around 6.8-6.9.
Water Method: Hand water first few weeks then turn on blumats
Soil Wetness: Using soil moisture meters, mbar target: 80-130 (Early Veg), 80-150 (Mid-Late Veg), 80-180 (Flower)
Notes 📝
-Another nice week of growth as they near the end of stretch and start putting energy into bud development
-Plants looking hungry (especially slurricane) despite plenty of top dressing + bloom compost tea.
-Defoliated
-Increased lights to around 950 PPFD / 42 DLI


Processing
Likes
11
Share


@Newbie5648
Follow
Last week of flower. Flushing plants this week with 150 to 200ml water ph 7.0 to 8.0each day
Day 76 plants are pretty much ready for harvest. Buds have fattened up a abit.
Day 77. Alot more orange hairs. Buds fattening up still by a little. Plenty of milky trichomes. Harder to spot orange trichomes but can see them.
Likes
27
Share


@Dreamchvser
Follow
Day 63
Today I switched my light cycle from 18/6 to 12/12. I did some minor lollipopping and defoliation on 3 of the 4 ladys.
After I noticed that one of them had very low hp, I flushed her till the run off was 6.5, now I’ll check her daily for needed nutrients after the flush.
I installed a trellis net and will even out the canopy over the next few days.
I appreciate every advice 🙏🏾

Likes
13
Share


@SolitudeCorners
Follow
Last week of flowering (72days from the light switch) Gonna cut soon when the dirt is dry. A quite late harvest. Many buds denser more, and stem can’t longer resist.
This season so satisfy. Thank for all mentor and comment. You all are my inspiration for grows.
Feeding
23/1 Water 13.5L+Flawless 20ml ppm80 ph6.2
MDR 3L 2Lx5
Runoff
MDR 1400 /1155
Zkittle 1600/1300/1150
Pineapp 900/600
Purp 1300 /1200
Sapp 2000/1100
Dozdos 1100/1000
25/1 10.42 6L ppm9 ph6 1L per pot
3L+Flawless6ml ppm116 ph5.9 1.5/1.5 Purp, Zkittle
4.5L+ Flawless7ml ppm119 ph6 1.5/3 Sapp,MDR
Runoff
Purp 1300
Zkittle 1500/1200
Dozdos 1400
Sapp1300
Pineapp850
MDR950
27/1 runoff
Pineapp 500
Purp 900
MDR 600
Zkittle 400
Sapp 300
Dozdos 400

Likes
24
Share


@OutdoorRebelGenetics
Follow
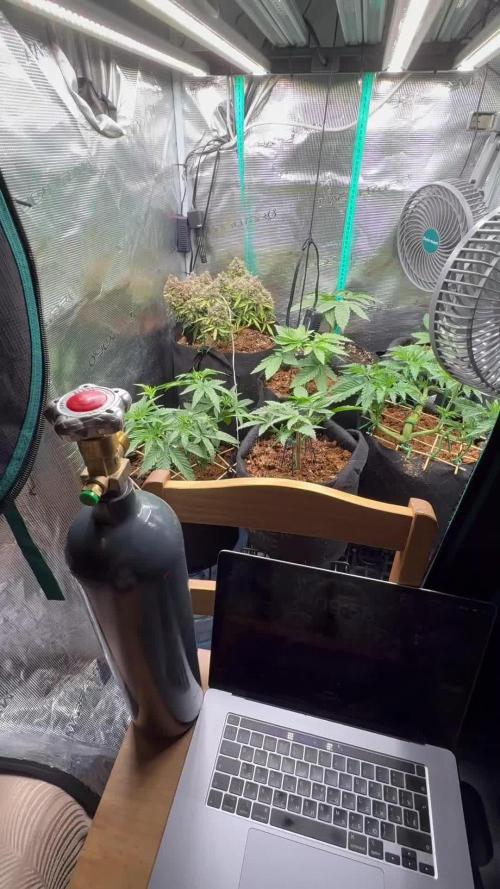
She's going g great lost her smell in a proper set up my mini set up she stunck but any way she's in flower so few more weeks and I can enjoy her smoke peace

Likes
44
Share




Likes
7
Share


@Car1bGrow
Follow
The growth cycle was pretty short, realizing that I planted it late in the year with the sun setting way sooner. Overall great experience
Likes
68
Share


@Ferenc
Follow
Day 44, 30th of October 2020:
Here we go I am back from holiday this girl grew a lot. The first 6 pictures before LST and the rest is after picture.
I switches the light to 12/12 from tomorrow and leave her in darkness for one day from now.
She has got already some smell also... ;)
I have ordered and extraction fan kit so with filter it will be used soon.
Next week starts more intensive fertilization as well :)
Let's start to flower hahaha :)
Happy Smokes ;)

Likes
Comments
Share


@OG_YumYum
Follow
The Strain was quite easy to grow, it is compact and has tight internodal spacing. I would suggest to low stress train to spread the plant a bit. Go low on nutrients, she doesn't like to much.
Likes
220
Share


@CRiSPrGrow
Follow
These had a pretty good life. I actually only fed NPK the one time . Germinated them in a Zambeza propagator, i really recommend getting one of those propagators, they're reusable and really take the heat off those first days when you're sweating. Pooped them into their plugs they sprouted out strong, germinated 5 kept 3. transplanted them no problem. Veged these for 4 weeks, then they shot up. during veg they stretched out a bit early on i should have been giving some specialised micro i had on had but for some reason on the other i didnt. They needed extra support for their first three weeks, so i decided to LST them around week 2. Two camping hooks one anchor for the main stem and one to keep the plant down. Once i dialed in my lamp to plant distance they benefitted by slowing down on the stretch a bit. they all took to LST extremely well, bushing out and creating an nice even canopy. They pushedout these thick indica leaves, one of my plants was a lighter colored leaf pheno, the vertafort one. The Six Shooter genetic really stretches, if just off the top of my head it seems that the plants quadrupled in size over an 8 week period, completely eclipsing their neighbours and creating a thick dense canopy throwing shade down below. Each turned into a bush with three or more mains sticking out the top by week 6. IThe results start to look real pro around week 8. Before that though I hadn't been defoliating. This and simple lack of light means that I had loads of undevellopped colas. If I'm honest I should have tried to harvest in stages but by colas. Anyway these kind of grew like a gorilla glue but with much different and much better flower structure. The plants started pushing out flowers and pistils and preflowers etc early, but then took a while to gear up towards towards getting fat. The flower branch out in a spiral pattern up and down the main and secondary colas evenly, creating this misssile shaped colas, but they branch out once sometimes twice, which means less branch to nug ratio than a gorrilla glue by a full multiple. They started smelling like lemons around the time they were fattening up. Then they started getting buff, really little by little, what did rippen rippened evenly. Some colas was basically waste especially the colas stuck on the sides of the tent and some of the colas where for some reason or another there was no light there due to the dense canopy. Truly a BEAST OF A PLANT, HIGH POTENTIAL, great BRANCHING, if you look carefully each plant has more than a dozen colas,
Timed it so the harvest was on a day the plants were chock full for plain water after ten day's worth of additive aided flushing. hung to dry slowly in the tent, got it around 55RH inside the buds over 12 days then trimmed and jarred in miron glass with boveda 62. The trim was a great experience, took a while but not that long because the flowers were so nice in the way they are. you do have to trim every sugar leaf one by one though if you're doing it by hand, broke these sizzors that @Mrs_Larimar sent me because of the resin lol. so I pull these plants out my tent and I just kinda look at them and they're basically dark green because of all the sugar leafs, i'm thinking to myself "shit i messed up this isnt even that frosty". well, what i found out is every time i clipped one of those trademark long sugar leafs off it revealed absolutely resious white frost. That's what can keep someone motivated. ! Once jared, if there's boveda in your jar, you dont really need to burp it daily, or even weekly i just let it sit there, obviously i've been smoking it and following the cure, let me tell you this one needs longer to cure than you're used to maybe, at least two more weeks of cure after a slow dry. Four weeks after the chop , it's a strong weed !
Didn't smell all that loud, but I have a 1300M3/H exhaust so... i'm not surprised. I will say though that my neihbour said she could smell weed even when I wasnt home and she could smell weed in the corridor, from the times I was trimming and basically every time I open my jar. Gonna need a new carbon filter for the next grow. I retired my lightbulb too. Hard to put my finger on the taste because the smoke is so smooth, and when i saw GD had a tag for Woody, i knew right away this was that taste i felt. I will say this though, cure this correctly, dont rush, dry it real slow, then cure it, citrussy tastes, usually those will evaporate, leaving this distinguished terpene heavy hitter much better tasting. So what can i tell you, this weed is white weed, so frosty. Bag appeal is great too, this strain pushes out pistills like no other, maybe even more than the gorilla glue. that means this is a chill weed right? One of the phenos I grew had more pistils than the other two. Mr. B's did, but i dont know if you can really tell from the close ups, i'll try to put some more pictures up. I got two maybe three phenotypes in terms of taste. Mr. B’s is much pine-ier than the others, and when the joint goes out and you light it again, it’s even more piney … I’m actually really happy about that reminds me of white rhino from the east coast back in the day but way piney-ier than that even. When you smoke the other phenos the smell is incense and the taste is really really smooth & woody. Sometimes I find different after tastes on the exhale like coffee, pepper, and maybe sweet/fruity sometimes too depends on the pheno I'm toking on. It is LOUD THOUGH, always have a spare filter on hand IT’S NOT WORTH IT get it !
Well at the end of my first grow, i'd like to quickly review all of Bulbi's own :
Bulbi"s Own Early VegMicro: Fine green powder with calcium and all the rare metals in it. I didnt use it ! Damn, next time I'll amend my soil with it like i did this time on the FBT1
Bulbi's Own Cal Mag : Organic fine white powder with calcium and magnesium, i used it in the feed and sometimes as a spray. I didnt know how much to put in because these things dont come with instructions so i ended up putting 1/4 doses most of time. The correct amount should have been 2.5G/L.
Bulbi's Own Flower Micro : Organic fine beige powder that I used mixed in with the sulfur. I think this one's a keeper, really helped my plants make it through the stress of bottom feeding and all that heat.
Bulbi's Own Mag Sulfur : Organic fine red powder that I used mixed in with the Flower Micro I used this one in my spray too , to great effect, in my opinion
Bulbi's Own Beneficials Trio : This was the base beneficials mix I had, you need to put 7.5 to 15g/l , watch out for clumps, use at the night fall, or when still dark.
Bulbi's Own Anti Afid : I threw it in there i think just in time to protect my plants when I intentionally overwatered when I went on my trip. There were some white flies that emerged, because... well that's what they do isnt it. but there were just a few of them and they ended up flying around wierdly, and within four days, no more white flies, didnt even use yellow sticky tape ! You mix this one with the trio for even more effect. I used these in a spray I think , also.
Bulbi's own Anti-Worm : This one is more directed against larvae, and can be combined with the base trio. I was weary of using it, but I'm glad i did to give my soil matrix that full spectrum of biological protection.
Bulbi's own Humic Acid : This one i loved, looking back I'm regretful not having used it more. the dry humic acid is a great experience, the quality of it was impressive, clumps would seperated into more clumps ad infitum the feed slowly turning completely ink black. definituely using this once a week from now on
Bulbi's own Amino Acids : this one is just amino acids, maybe next time I'll use it at the same time as the humic acid, but I'm not 100% on that. What i did do was spray the top layer of the soil with amino acids when I accidently ran into some issues from spraying kelp all over the place. So in that sense it's an absolute life saver and a must to have on hand.
Bulbi's Own Kelp Extract Concentrate. Loved this one too haha, so thick, and green, check out the video of when i pour it lol. Worked great, raises the pH some so be careful, i used this one as a sprat aswell to get those plant growth hormones pumping during the seeding and veg stage.
Bulbi's Own CO2 : well part of what I set out to do was to test the CO2 theory. Like roots do absorb CO2 but at a lower efficiency than leaves say 15% vs. 85% the theory being enriching your water or feed with CO2 would ultimately benefit the plant. So i enriched water with these ceramic based co2 tablets, because CO2 is a soluble gas, it stays in water. Then i fed the plants in this manner in the feed and also as a spray. The idea behind that was that co2 enriched water would come in direct contact with the plant allowing for absorption of some quantity of CO2 through the leafs. Someone explained to me that these are actually old school techniques. Well I know i started late and didnt follow a regular schedule like i wished for but the plants didn t die, or show any immediate negative upon innoculation, so what can I say? I'm doing this again, perhaps. Only problem is that these things are really a pain to pH correctly
General Hydroponics Dry pH Down : GREAT PRODUCT, hard to find but amazing – not registed on GD for some reason
I still have to make my bubble hash so any advice welcome ! 🚀


Likes
5
Share


@Lifesgarden420
Follow
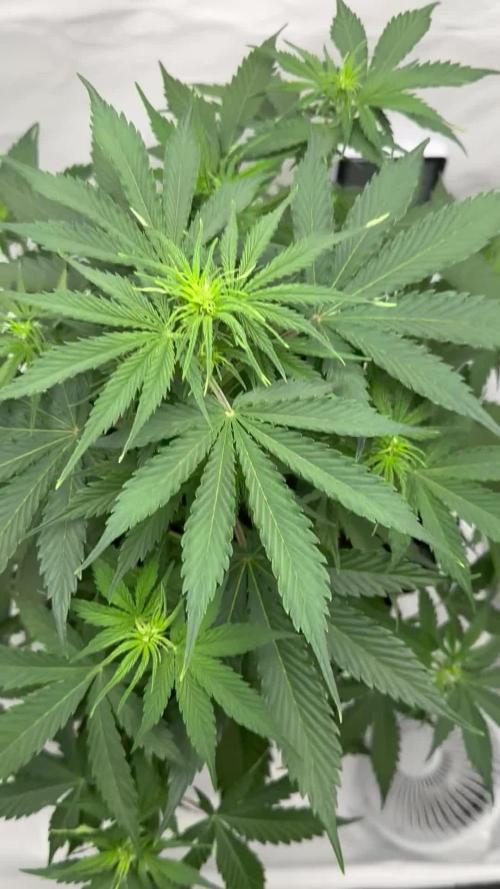
The last week of edge for these beautiful ladies and then we can flip


Likes
9
Share


@Mychakrapong
Follow
during the flowering stage I used bio water from yellow ripe fruit that I made myself that check ppm before water the plants
Likes
11
Share


@Thigh
Follow
Sun is coming out. Cut some leafs off. I removed a few, day after day. Hope she likes it😄👨🏽🌾
Think she is starting to bloom, add her some BioBizz Bloom to the water.