Likes
Comments
Share
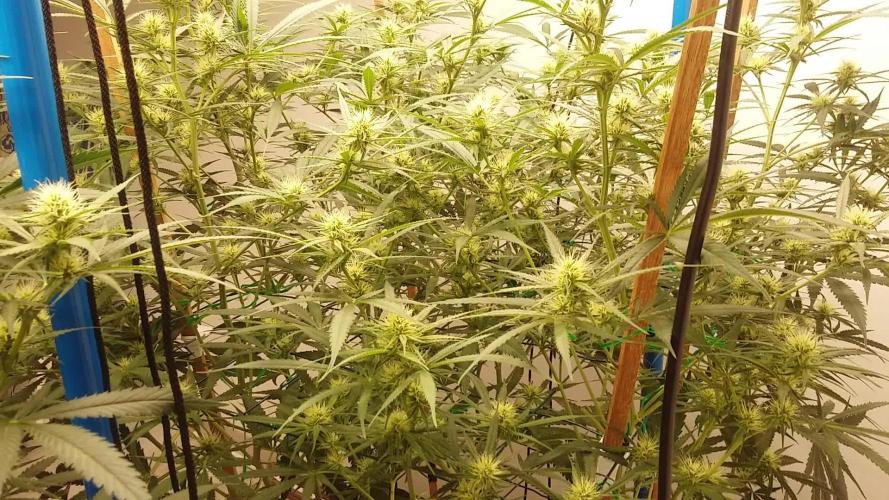
Hallo meine Garten Freunde. Ich hoffe euch geht’s allen gut, leider kommen die Abschluss Berichte jetzt nach und nach, weil einige Strains ein bisschen länger brauchen als andere. Ich bin zufrieden mit diesem Grow wie er verlaufen ist, ich glaube der Ertrag hätte höher ausfallen können, aber das liegt nicht an der Sorte oder an dem Equipment. Es liegt meistens immer an dem Mensch was der draus macht, und da ich noch mein Optimum suche kann einiges gut oder schlecht verlaufen. Aber wie ich erwähnt habe bin ich zufrieden. Die Blüten haben sich zum Schluss richtig schön entwickelt und sind schön kompakt geworden, jetzt wo die Buds getrocknet sind, sind die auch Steinhart, wenn man die Buds auf eine Oberfläche fallen lässt hört man ein richtiges klock Geräusch. Das Blatt zu Blüten Verhältnis ist sehr gut. Diesen Strain würde ich wieder anbauen, dann aber nur mit einer Trainings Methode. Ich denke das war auch das Problem das ich die Pflanzen zu klein gehalten habe. Trotzdem haben die Ladys mir schöne dicke Buds geschenkt, es gab fast keine Popcorn Buds. Wenn ich eine Trainings Methode empfehlen würde dann Fimming oder Topping das haben alle sehr gut weggesteckt. Mit unter Düngung kommt sie gut zurecht aber nach einer Zeit zeigt sie dir was sie möchte. Das entlauben war auch kein Problem. Das einzige was sie nicht so gerne mag ist nasse Füße, aber auch davon erholen sich die Pflanzen relativ schnell wieder. Es ist eine sehr stabile Sorte, der man einiges abverlangen kann bis sie zickt. Da hat Royal Queen Seeds sich selber übertroffen und eine sehr robuste Sorte kreiert. Ein Riesen Respekt und ein Riesen Dankeschön für diese tolle Sorte und das ihr sie mit dem Rest der Welt teilt. Ein Riesen Dankeschön geht an James und RQS vielen Dank für die gute Zusammenarbeit und die Unterstützung.👍🏻✌️🏼 James sie machen eine tolle Arbeit Vielen Dank für alles machen sie weiter so und Royal Queen Seeds. Es werden in der nächsten Zeit noch ein paar schöne Tagebücher hier bei GD geben, ihr dürft alle gespannt sein. Ein großes Dankeschön geht auch an die Community von Growdiaries vielen Dank für eure Hilfe und Unterstützung, ihr seid die besten und das sage ich mit voller Überzeugung bleibt alle so wie ihr seit. Habt Spaß an dem was uns geschenkt wurde, nämlich eine großartige Pflanze die vielen Menschen auf dieser Welt helfen kann. Peace das war’s fürs erste bei diesem Tagebuch von mir bis dann. Wenn ich euer Interesse geweckt hab dann findet ihr hier diese tolle Sorte und noch viele andere mega Genetiken von Royal Queen Seeds. Dazu kommt noch ein fetter Rabatt von20% was will man mehr. Viel Spaß damit: GROWERS20 https://www.royalqueenseeds.de/ Nix verpassen und gleich hin.
Likes
24
Share
@Indoor55
Follow
I started feeding this girls two days ago and they look healthy except one of them, so if someome has seen this brown spots before and knows what this could be It would help a lot. It started yo happen before feeding her. Besides that, all going great, i am going to wait about a week more or so to start training them. It is starting to smell a little bit, seet/citric like tropical juice. I will keep you updated!
Likes
41
Share
High, I'm flushing since FD49. Looks good so far, will be a nice har-fest... I guess it'll be around 600-650g dry buds. 👌 Next Moby clones are allready on their way... 😉 21% THCV is way better than 30% Gorilla's advertising. I smoked some a few days ago...what an overhyped strain that GG is...lol. 😆 Edit: Let's see if Dinafem can change my point of view when it comes to the Gorilla genetic. 😉 Stay green.👽
Likes
2
Share
Gorilla Melon is the two further from the door
Likes
4
Share
Week 6 this is of flower. The trichomes are showing cloudy/ clear so now it’s just a waiting game
Likes
4
Share
@SWITCH420
Follow
Hi folks, I'm coming here to start the process of ending this grow journal. I harvested about three months ago and the weed is definitely cured. Photos are about to come — I'm doing a real studio photo shoot for those buds, they deserve it! While waiting for the shots, I made some pretty damn dank hash temple balls using the iced water extraction method (solvent-free) with my little washing machine. It's a mix of the 8 strains I grew here — never ideal to mix different kinds of resin... but man, this is some serious dedicated work, so I'm making myself happy with that 14g shiny temple ball in the end 😉 Here are a few details about my process for you guys (and don't forget — you can do it with fresh material! Fresh frozen is always tastier. Also, the drying process is much more efficient and faster with a freeze dryer, but... you need the budget for that. I don't, so I go with the air drying method — check it out below): 1. Get your dry trim, then cure it properly for at least a month (I did 3 months). Smell it — mmh, sweet, dried to perfection. ✅ 2. Freeze it, delicately wrapped in a freezer bag. 3. Let a large amount of tap water sit for at least 24h to remove chemicals like chlorine, then use it to make plenty of ice cubes — don't be shy, especially if you're not working in a cool environment. 4. Prep your washing machine: add trim between two layers of ice, fill up with clean water (as much as you can, large vortex is better than a smaller one), then make it seat for 30 min (45 min for thicker buds) the time that the dried green material gets wet again. 5. Prep your filtering tools: catch bag, different mesh bags, spoon, etc. 6. Wash as many times as you can before green contaminants appear, as these lower the quality of your hash — don't hesitate to go up to 8 to 12 washes if the resin still looks clean! Important: each wash has its own specific duration, and they get progressively longer as you advance through the process. Frenchy Cannoli (a true hash legend) provides a detailed timetable for this — from as little as 30 seconds to 1 minute for the first wash, all the way up to around 25 minutes by wash 8. Make sure to follow that schedule rather than using the same duration for every run or running it too long the first wash !! It could breaks to quickly your precious material before you collect all the trich's and the quality would be lower in the end. 7. Collect the wet resin in the mesh bags with a frozen metal spoon, make patties with the resin, and let them sit over some towels in order to drain as much water as possible (place a tissue made for hash collecting over the towel). 8. When the patties are a little dry to the touch, wrap them as they are in the tissue and place them in the freezer for 48h or more. 9. With an iron strainer, microplane your patties over the biggest flat surface you can get! It's important that your micro pieces of hash dry widely and don't get too compacted. Any failure in the air drying process will nucleate rot, ruining your hash in the end and making it a poor product — eventually something to throw away. Sad when you think about all the phases of the process to get to this point! 10. So, in order to air dry properly, you must — it's not optional — lower the RH of your dry room to 35% or slightly below, never above and let it dry as long as needed until the material feels like dry sand. For myself, I found 10 to 15 days is ideal. The room must be very lightly ventilated (not directly on your resin!) and in complete darkness — the goal is to preserve all those delicious terpenes! Ideally, temps around 60°F or 16°C 11. Now that it's dry, collect your resin with a large thin spatula! Make a little mound between two layers of PaperHash, boil some water, and fill up a wine bottle with it! ⚠️ From this point on, to avoid exposing your carefully dried resin to a more humid environment — which could ruin all your hard work — everything must happen in the same drying room. Keep working at 35% RH until your temple ball is tightly and airtight wrapped in PaperHash. (And don't forget to drink water — it's dry in there! 💧) 12. Start to slowly press your resin. Magical moment. Finally.... 13. Press 3 times for 10 to 15 minutes in order to really decarb your hash — because that's what it's all about! Between each press, try as best you can to shape a patty... until the final press, when you'll be able to form that magical shiny temple ball (it only shines with gloves on, guys 😄) 14. You are now allowed to try it — for quality control purposes only, of course! 15. Because you want to age your hash for the sweetest 5-star smoking experience: wrap your temple ball in a large piece of PaperHash — if you can get that brand it's ideal, or another kind (check https://thepressclub.co) as long as it's organic! 16. Place the wrapped temple ball in a glass jar and store it in a dark, cool place. 17. Wait a minimum of 3 months before opening it. 18. Open, smell, touch — you'll be amazed. Roll it up with some weed or tobacco or both (I do both) / Or get a Hooka... you are smoking some true primo aged hash made by yourself! Taste the difference and realize all the path from choosing the seeds online until this first amazing puff ... 🙏 I want to credit my inspiration for making this kind of hash to the great Frenchy Cannoli, who has shared all his knowledge through amazingly rich tutorial content that you can find online with a bit of searching. 😉 Peace Frenchy 🕊️☮️
Likes
11
Share
@B4niTa
Follow
On day 32 big runoff On day 34, a little defoliation
Likes
2
Share
@Swanberg
Follow
Holy smokes first time washing a full plant and it sure paid off on some unbelievable quality rosin. Pressed70-160 My some of my 160 melt pressed straight thru 25u and 37 u rolled over 2 times tightly. Great surface area maintained in my press and 90% yeild. Excited to dabble in the rosin game. That was my small dinker plant yielded 300 wet grams for the record. 13 grams return for bubble hash. Larger plants processed I’m hoping for better yield. Let the juicing begin
Likes
9
Share
26/09/22 - W09 - D57-63 - I Increased EC to 1,3 and pushed down pH to 6 (advanced nutrients are not so ph perfect..). I'm still making LST, because some buds have flower too far and I'm trying to keep the buds as lower as possible.
Likes
10
Share
Blueberry Muffin Week2 F14. After switching to 12/12 , they are still stretching and have already 2x in size. The plants smell strong already. Feeding 3x a week. 2x with grow,bloom,topmax and 1x with calmag and Alg a mic.
Likes
64
Share
@Natrona
Follow
8/31 I harvested Auto Opium today. This is 7-10 days early. I intended to grow her inside the tent, but when she stretched quickly i had to take her outside. This did not give her time to harden off before going fully into flower. Then my area went into extreme heat over 110 for extended weeks. High heat and humidity. She couldn't handle this. Then Hurricane Debby whipped her back and bent her main stem in several places. Repaired with chopsticks and electrical tape. Her limbs were thin and spindly, I tried to support with garden hoops but many stems just bent regardless. One bent and cut off its water & nutrients and died. All in all Auto Opium did not transition well from tent to outside. If I had understood her structure before her grow was underway, I would have done some topping or mainlining. I'm watching several growers demonstrate training techniques that I will try. You know you you are. Many thanks to you. We had some cooler nights in the last week or so which allowed leaf color changes from lime green💚 to purples💜 and some reds. I see some lavender in her buds. Trichomes are mostly milky white, so a bit early. Harvest shows, many long, hollow stems which couldn't support her own weight. To be eco-friendly, you could use these for beverage straws 😅. Thank you for sharing this journey with me. I appreciate your comments and advice 🙏🌱💚 . I'm learning as I'm growing, and growing as im meeting many friends here. Thank you @DivineSeeds for generously sharing your exciting seeds with me and the opportunity to participate in your contests. My friends as always sending you good vibes, plant love and healing 💫Natrona 💫
Likes
22
Share
@LSDMan
Follow
Une très grande plante (environ 350 centimètres) avec des tres gros buds. Une grosse production de résine, j’ai pu en extraire du tres bon hashish.
Processing
Likes
154
Share
@FAST_BUDS, Hi all the happy people here in GrowDiaries. This is my second cultivation ever and it will be fun to try a bigger space than my closet grow. First, I'm just going to say I'm done with the construction of my new growroom. I put some pictures on the construction here in week one. The room is 2.14 meters by 1.7 meters and has a ceiling height of 2 meters. It provides a floor area of ​​3.6 square meters. I use a 54 Watt Lightwawe T5 for germination and 2 Pcs 400 Watt HPS lamps. I have a channel fan that replaces the room air about 40 times an hour to get a comfortable environment in the room, the air enters a fresh air intake from the outside. The air is purified through a carbon filter to then leave the room to the rest of the basement. Then I use that heat to heat the rest of the basement. I will use 8 pcs 15 liter Autopots to grow with and a 100 liter water tank that supplies the pots of water and nutrition. I will grow completely organically in soil and will watercure my buds to get the best possible medicine for me. But there are no cultivation rooms to be displayed here, so I continue with what is most important. Today I have put my seeds in my moisture dome and hope the seeds have germinated within a few days. I am very excited to see how the new growroom will work and how this new secret CBD plant from @FAST_BUDS, will turn out. .............................................................................................................................................................................................................................................................................................................................................. Update 2017-08-15. Both seeds have germinated and planted in small pots inside the humidity dome. I'm so glad it worked so well and now it's just hoping they'll start growing and become 2 big healthy girls :) ............................................................................................................................................................................................................................................................................................................................................... Update 2017-08-16. I have mixed my own soil today. Its 40% sieved peat harrow H2-H4 0-30 mm, 45% sieved peat harrow H4-H6 0-30 mm. 5% sand and 10% of compost soil. And i use 15% of perlite and mix it all together. .................................................................................................................................................................................................................................................................................................................................................... 2017-08-21 The 2 sisters are doing great, Nr2 is a bit after Nr1 . Some new pics. ............................................................................................................................................................................................................................................................................................................................................................................ 2017-08-23. Transplanted from humidity dome and the small germinating pots to 15 liter autopots. ................................................................................................................................................................................................................................................................................................................................................................................ 2017-08-27. The girls have settled in to there new home of the 15 liters autopot after a little transplant chock. Now the real week 1 starts for me and the girls. 4 new pics. --------------------------------------------------------------------------------------------------------------------------------------------------------------------------------------------------------- 2017-08-29. New movie of the girls. Its no water for 3 days now so the roots develop more and match the plant above the soil. The temp controlled fan is awesome, its easy to set what temp you like to have in the room. Right now its 28 celcius. And humidity is 56%. -------------------------------------------------------------------------------------------------------------------------------------------------------------------------------------------------------------------------------------------------- 2017-08-29. Hello to you who read my diary, I just want to say that I am pleased that you have chosen to check in with me and in my diary. I just want to say that I do this for myself and for a steady flow of my medicine. Everything you read and see in my diary is 100% honest and I will never distort or beautify anything here. I document my crops so that I can learn from my mistakes and also to look back at those different crops. I try to update with pictures every day and with text if something special has happened in the garden. This is my strainhunt for the best medicine and the beginning of my journey with cannabis and the cultivation of it. ----------------------------------------------------------------------------------------------------------------------------------------------------------------------- 2017-08-30. Cleaned the room this morning, just vacuuming and cleaning with chlorine solution. Im testing the fan to control temp and humidity, it works great. Added some pics with measurements and a movie. Everything is looking great right now. ----------------------------------------------------------------------------------------------------------------------------------------------------------------------------- 2017-08-31. New video of the girls. ------------------------------------------------------------------------------------------------------------------------------------------------------------------------------- 2017-09-01. New pics and videos. Gave each of the girls with 2 ml Alg-A-Mic, 4ml Bio-Grow, 4ml Bio-Heaven and 10 ml Formulex mixed in 2 liters of water. I hope they like it :) ------------------------------------------------------------------------------------------------------------------------------------------------------------------------------------------------------------------------------------------- 2017-09-02. New pics and the girls liked the water and nutrients yesterday. ----------------------------------------------------------------------------------------- 2017-09-03. Video of the girls this morning. Kl 16.00. Did some defoliation on the girls. Videos added. KL. 23.00. New video. ---------------------------------------------------------------------------------- 2017-09-04. The start of week 3. New pics. Im trying to LST the girls. KL 23.00. Added new video. -------------------------------------------------------------------------------------------- 2017-09-05. KL 08.00. Cleaned the room this morning, just vacuuming and cleaning with chlorine solution. KL 12.00. The girls got 2 liters of water each with nutes in it, added a video. ----------------------------------------------------------------------------------------------------------------------------------- 2017-09-06. KL 08.00. The girls woke up after their beauty sleep, the leaves are always a bit down after 6 h of darkness, but they will stretch now when the HPS lamp starts. Everything looks good and I keep trying to tuck the leaves so they get the maximum amount of light where needed. Added pics and video. KL 23.30. Did some LST and leaftucking. -------------------------------------------------------------------------------------------------------------------------------------------- 2017-09-07. This is day 21 from sprouting. I have never tested PH in my grows, when growing organic in soil iv learned that it adapt PH by it self. But im curious by nature so i had to test. Kl 10.00 Tested PH in the soil, it was 6.9 and tested my tap water and it was 6.8. Added video/pics of the girls, its 10 H after defoliation, LST and leaftucking. I think its looking good. Kl 22.30. New pics ------------------------------------------------------------------------------------------------------------------------------------------------------------------------- 2017-09-08 KL 08.00. Good morning, added new video. 2017-09-08. Kl 23.50. Gave every girl 3 liters of water and nutes, added new video. ----------------------------------------------------------------------------------------- 2017-09-09. Kl 21.00. Defoliated a lot today, new pics. --------------------------------------------------------------------------------- 2017-09-10. Kl 08.00. Last day of week 3. New video. 2017-09-10. Kl 23.00. 3 New videos. ---------------------------------------------------------------------------------------------
Likes
82
Share
Heeeey all! Sorry for the extremely slow update! The past few weeks have been crazy for me! 😱 This week I made a lot of defoliation and decided to be somewhat greedy. I'll let the plants grow a bit more so they'll stretch well during flower! So while I defoliate I'll allow the plants to recover properly! 💪 Near the end of the week I also made another mistake with Roko (poor baby! 😭). I broke another of the stems (the one that divided the plant in two, right in the middle) and I feared the worst! But so far the plant kept growing without any problems. I'm still thinking a name for my 4th baby, she has surprised me greatly and I didn't notice how many new branches had grown until I defoliated her and I'm sure she'll deliver some great buds! 😍 Anyway everyone, this is all for now. Thanks for reading this journal and soon I'll update the next week! 😃
Likes
85
Share
Been on 12/12 for a week and this girl is getting stretchy. Starting to look like preflower. Did some defoliation and spread her branches out a little. I moved her to the middle of the back row because I am trying to pair similar sized plants up for even light height. Nutrients per gallon .5 tsp maxigro .25 tsp maxibloom .25 tsp armor si .5 tsp calimagic .1 tsp 90/10 humic/fulvic acid Ph to 6.0 Pumping nutrients 24 hours
Likes
6
Share
@taikonaut
Follow
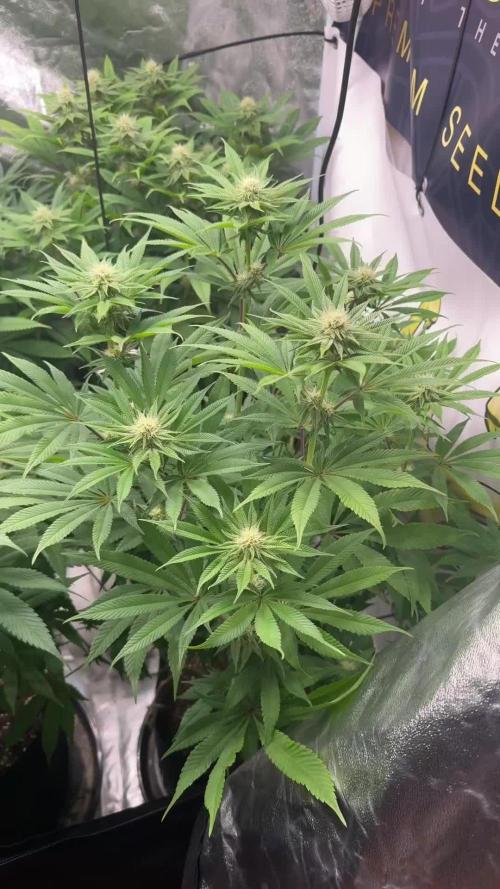
Week 4 She feels good after Topping and some defoliation. I think after 1 week I will change light schedule so she will enter flowering stage.