
Likes
Comments
Share


@Pungolian
Follow
Stretching has ended finally and budding and stacking has started, yay


Likes
2
Share

@Jardin33ro
Follow
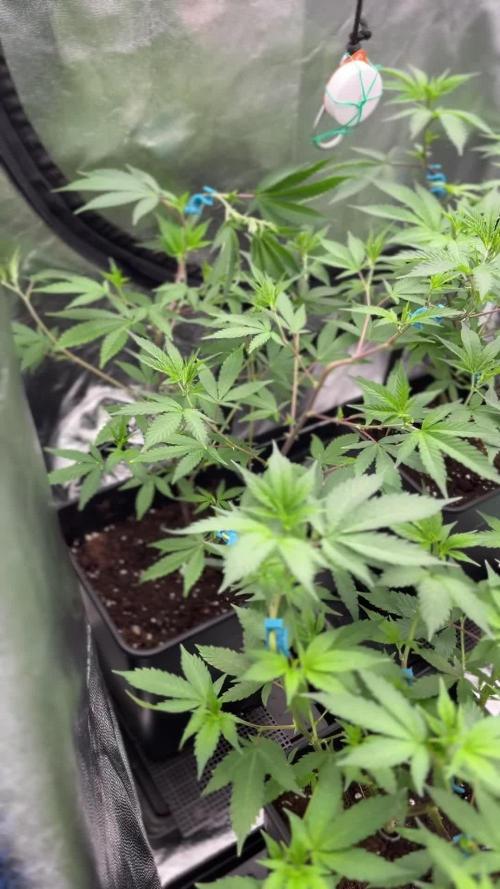
Buenas! En esta semana toco trasplante y primeros preventivos foliares, IPW de athena para preventivo 1 vez a la semana. El trasplante lo hicimos a maceta de 7L, quiero ver si puedo tener mas control de los riegos. Seguimos mateniendo humedad y de a poco suben las temperaturas, ya que no tengo aire acondicionado para un mayor control. Pero se hace lo que se puede y vienen hermosas. Ya largan ese olor característico de la cepa, un buen citrico mandarino

Likes
47
Share


Processing
Likes
32
Share


@Platinouuu
Follow
Saludos amigos, muchas bendiciones y feliz navidad. Pues como podemos ver, las niñas van super bien, alegres, olorosas y sobre todo saludables. Vemos que se estan tornando las hojas color vino, el olor que se puede apreciar es dulce y suave, claro está, se ven potentes, ya sus terpernos estan saliendo y dando de que hablar jajaja. Estopy muy contento como las veo. Hemos estado regandolas solo con agua y Té cada 20 días aproximadamente, solo depende como las vea. Solo trabajamos un poco de defoliación y un ajuste que otro a las tirillas colocadas. Deseandoles una navidad abundante, me despido amigos. Gracias por los mensajes y sugerencias. Dios los guarde y protejha! Buenos Humos

Likes
61
Share


@Dunk_Junk
Follow
She's over doubled her height this week!!!!!!!!!!
Looks like she's going great!
An educated guess says she is just about to enter flowering in the coming week.

Likes
17
Share


@Chucky324
Follow
Hello. This is the end of week 7 and the beginning of week 8 of flowering.
I'm a bit bummed about this grow. I've read that you just need to force a plant to flower, that's 12 hours of light and 12 hours of dark for the first 3 weeks (I had a tent inside the greenhouse) and then put it outside and it will continue to flower. I thought that was amazing, so I wanted to give it a try. Well, here we are at the end of the 7th week and it looks like the plants are going back into veg. Last year I didn't do up the tent for the last 2 weeks and everything was fine so I thought I would give this keeping it open after the 3rd week a try. Now I know. I can always turn it into hash, maybe dry ice hash.
Here's another reason I'm bummed about this grow. I've got spider mites. I'm doing my best to knock them down with my hypochlorous acid. I'm spraying twice a week, but had some yellowish looking leaves, I reread the article (I put up a pic of it a few of weeks ago) and found I had to rinse the indoor plants. So after I sprayed the 1/2 strength acid I waited 10 minutes and rinsed with water. Today I can see more mites than when I sprayed before. So next time I'll wait till the 1/2 acid mix is dry before I rinse the leaves and see if that knocks them down more.
If you don't try new things you don't learn. That's what this grow is about, to see if the plants can still keep flowering at my latitude and now that I have mites, to see if the hypochlorous acid will work without killing the plants. Yes, I'm 60 something and still learning. 😃
Be Great.
Chuck.

Likes
1
Share


@PositiveEnergy
Follow
Gorilla zkittles at 18’ and the wedding cake around 14’ they are starting to strech


Likes
16
Share


@jahredi
Follow
Had some severe drooping on one side of the plant. It was kind of weird, but most likely nothing.
I was under watering quite a bit in an attempt to make sure I didn’t flush out the benes and nutrients of the super soil. Ironically, I might have killed all the benes. Lol.
Either way, they’re getting about 2.5 gal every other day now. Growing strong.
Untied the LST ties to move them and rearrange the greenhouse but then plot the dang trunk putting them back on, so i taped out up and left them untied. I’m sure it’ll be fine.
Just did another spinosad treatment. Haven’t seen any more thrips since the first treatment 10 or so days ago. Saw a leaf hopper in there though 😡

Likes
7
Share

@Franci5
Follow
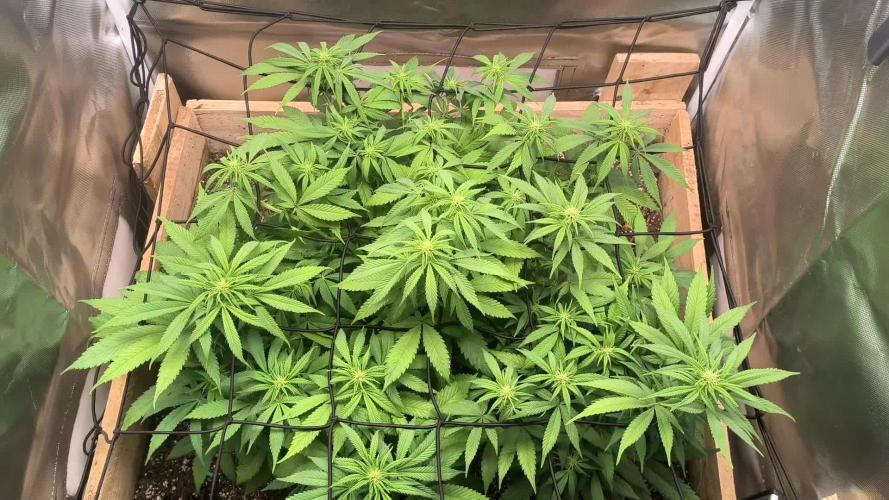
This week everything was pretty normal. I increased the light intensity a little without necessarily lowering the LED. The plants have adapted very well and have a very good structure. I'm very happy with how everything has gone. They need watering more constantly, but I keep an eye on the weight of the mesh under the growing bed so that it doesn't dry out too much. With the care I've given them, the three plants have shown that they have a very high production capacity. Let's see how I do, haha 😅😅

Likes
8
Share


@Chris42081
Follow
Well this is getting out of control pretty fast as they are now in preflower. And holy crap big with a lot of time left.
Likes
30
Share


@XperencdGmanXG
Follow
more liquid seaweed foliar spray and Silica. Pre flower has not started on this plant yet, prob due to the fact it was put out 2 week later than the rest which are in full pre flower. plant has grown a whopping 18" this week. Amazing!
Likes
5
Share


@kush3
Follow
Super, genial día 59😎, ya faltan 2 semanas y a cortar próxima semana lavado de raices


Likes
5
Share

@BasedBuds_89
Follow
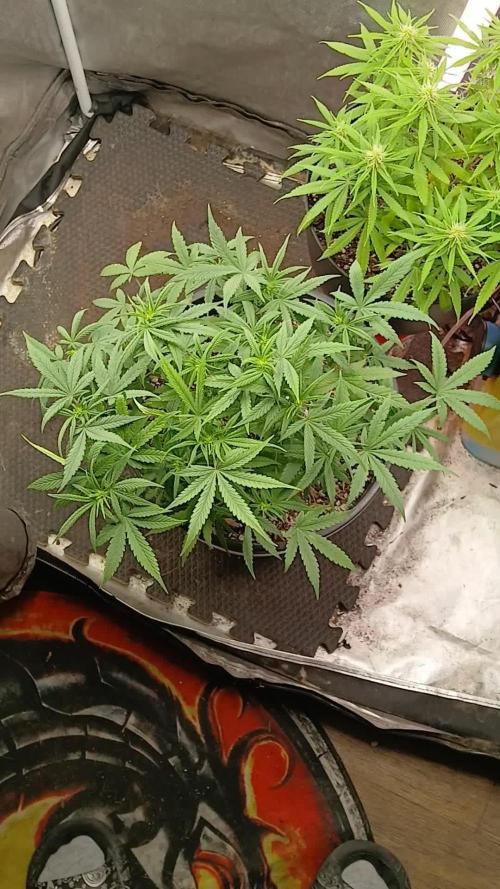
Had a good week, the plant got pressed against the side of my tent a bit, going to do some LST to spread the canopy back out.

Likes
21
Share


@PrairieFrostGrow
Follow
********Week 9 Vegetation- Sept 12 to 18, 2020*******
This will be the last veg week. Flipped to flower cycle at the end of the week:)
These girls are pushing out branch Baby!!!! Getting long and keeping them tied down for now. They want to flower and almost aren’t waiting for the lights to switch😃
LST this week on these girls. Getting them ready to put in a SCROG I think. Pull them down for now to start pulling them wider and make it easier to fill in the canopy’s net. Actually, they were only tied down for this week. At the end of the week I removed the ties.
There were 4 feed days this week and Advanced Nutrients Bud Ignitor was introduced this week.......getting ready for flower👍 Switch to Bloom nutes next week. Going to finish these girls with Advance Nutrients line this run. I may have to use a supplemental from Green Planet to get through to harvest. This lines bottles are getting closer to a year and a half old now........use em uip👌😃 Not buying more Bud Factor X for example (still have a couple of syringes worth) but rather will add Terpinator and Rezin instead.
Little more detail:
Sept 12/20
- CalMag @ 2ml, VeloKelp, Vitrathrive @ 1.5ml, AN Sensi Grow A&B @ 1ml
- 610ppm and 5.9pH
- Each girl given 2L
- Pulled out and cleaned up to get ready for netting
- Canopy height fairly even today.....little more time to fill in though.
Sept 14/20
- Giving them a hearty feeding today with lots of ml’s to rinse off the roots a little more
- Sensi CalMag @ 2ml, B52, Microbial Mass @ 1.5ml, Sensi Grow @ 1ml
- 880ppm and 5.4pH
- Each girl given 4L and they had a nice amount of runoff - maybe 30% this time.
Sept 15/20
- Add some sweetener to feed the microbes today,.
- Sensi CalMag @ 2ml, Bud Candy, B52 @ 1.5ml
- 625ppm and 5.2pH
- 2L each for the girls
- Leaf colour is a little light so getting the Magnesium up and Nitrogen......that’s why using the heigh nitrogen Advance Nutrients Cal Mag.
- pH is a little low but I am cool with it and working on not letting the pH drift too much yet in their run.
- They are ready.........they want to flower😃
Sept 17/20
- Bud Ignitor introduced today as we get ready for Flower phase next week.
- Sensi CalMag, Sensi Grow A&B, Bud Ignitor, all @ 1ml/L
- 485 ppm and 5.7pH
- Each girl given 2L
- Swtich the light cycle tonight to 12/12 and get the party started👊👍
That takes us to the end of Veg for these two girls.
Cheers Growmies and have a great week🙏


Likes
29
Share


@Smokwiri
Follow
Welcome to my Runtz gum diary by Original sensible seeds
Almost finished, i think a week or two.
Waiting for the fruits to mature...
Viparspectra discount:
Amazon: http://url-9.cn/0y9i
Amazon US: https://amzn.to/3e0P2bk
Amazon CA: https://amzn.to/3bTnEJC
Amazon discount Code:
it10smokwiri XS1000 10%
XSsmokwiri XS1500 8%
it20smokwiri XS2000 5%
it40smokwiri XS4000 5%
Music is with authors permission. All rights reserved

Likes
2
Share


@Ninjabuds
Follow
My little skunk apple runtz lady man I am disappointed so far with this plant not much can be expected from a pollen chuck seed I made myself but I think it will have nice smoke in the end just not alot most likely
The day has come and it's time to flip these ladies to flower. I was planning on letting them go untill Friday and let the smaller ones grow just a bit more but they will be fine. I have the eternity cup contest in mind and I'm thinking timing so I need to get these lady done and out my tent lol. This past week I turned the light up alot getting them ready to flower they have grown a bunch inhavendone lst maybe 5 it 6 times on the branchs and they arw nit bendy anymore that will help durring flower.