The Grow Awards 2026 🏆 


Processing
Likes
12
Share
@BloodBath
Follow
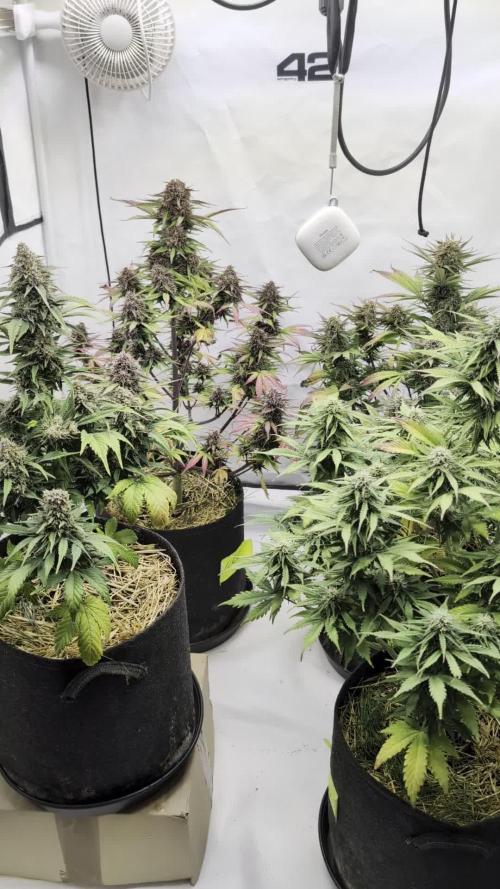
I will be focusing this diary on the smoothie strain but you’ll be seeing some other plants in the tent that are not the same strain. I only have room in this tent so bare with me. There are 2 Smoothie, 1 CNC, and 1 Stardawg (dog). The smoothie are the two bigger ones in the back of the tent.
Now, the Smoothie from FastBuds is just killin it right now. Since I popped the beans they have done nothing but show signs of greatness. I don’t think this one is gonna slow down much either.
I’m going to push these plants harder than my last harvest. I had a really really amazing harvest last time. I was even able to pull sap out of all 4 plants. 2 Zkittles and 2 LSD-25. This was all done by feeding at the right times and keeping a “moist” soil. Also I want add that I ran pretty much the entire line of Nectar for the Gods at a little less then the recommended ratios. This time I plan on going a tiny bit over the recommended ratios just to see what these plants will do. Trust me, if the plants have a bad response I will go back to the recommended ratios.
The reason I want to do this is because I really think these auto strains can handle a lot more than a regular flowering cycle plant would. They can handle more stress, that’s for sure.
When do you think I should add a compost tea into my regimen? Soon or wait till the plant is a little larger?


Likes
122
Share
@Mr_Di
Follow
Starts VIII week of veg!
During VII week:
1 ecrased amount of water to 400 ml per day - autowarering system open flow 3 times a day for totally 400 ml/day
2 during DAy 48 i defoliated some fan leaves and added 1 35w led on top on her canopy
——
During this week:
1 Start lollipop
2 Added potassium silicate (rhino skin)
3 Removed Bvitamin complex (b52) for a lighten nut. Solution
4 Added phitobscillus (vodoo juice)
—
Soon I will see sprout come up to net, when canopy will be 50-60 cm I finish lollipop under net and then start flipping, i’m Planning that for 10th week of veg.
_
Update
Day 50: some sprouts are over the net
day 51 : added 2 oscillating fan - Secret Jardin 20watt - 1 turned on with light, 1 tuned on h24


Likes
Comments
Share
@BenandLippisfinest
Follow
Die terps werden immer intensiver, vor allem die FrostBanger kommt so süß daher. Alle buds sind ordentlich fest und haben eine sehr schöne Größe. Zwei bis drei Wochen werden sie noch brauchen, die Apple-Fritter vorne rechts braucht eher noch 4-5 Wochen, ist halt keine Fastbuds, der Unterschied ist schon sehr deutlich zu erkennen.
The terpenes are getting more and more intense, especially the FrostBanger, which is so sweet. All the buds are nice and firm and a great size. They'll need another two to three weeks, the Apple Fritter in the front right probably needs four to five weeks – it's not a Fastbuds, after all; the difference is already very noticeable.

Likes
34
Share
@ClubRiot
Follow
BCN Power Plant
Week 14
11L Pot
LED: SP250 (245W) for Flow. Stage
Canna COCO
Mineral Nutrients:
👇
Sensi Cal-Mag Xtra: 1 ml/L
Power House Part A: 1.5 ml/L
Calcium Plus Part B: 1.5 ml/L
Stimulus: 1.5 ml/L
Bud Explosion: 1.5 ml/L

Likes
8
Share


Likes
144
Share
@roro_204
Follow
Nothing much going on here. No LST. Didn’t really takeoff many new leaves.
I didn’t check up on the plants for a whole 24 hours. I didn’t notice when I last watered that I had missed a plant as you see in the first video.
It went back up in about 6 hours like nothing ever happened to her.
When growing many plants it’s very easy to forget to water one or two.
That’s why it’s important to water all single file from row to row , starting from the top plant to the bottom plant, all the way though the last sections. Learned the hard way lol
Likes
32
Share
@Fatnastyz
Follow
Week 8
10-14 Day 50
She looks, smells and grows well!
Little studdered on drinking.
What else but pics and videos!
10-16
Just water and pictures. Letting her do her thang!
Around 500-700ml water a day.
10-19
Some burn, so I ran some runoff, yep burn!
1200 ppm now 400.
😱 Well 2 weeks from here 🤣 or so.
10-20
Nothing changed.
.
Likes
Comments
Share
@Liberty420blaz
Follow
Day 42
pistils showing up here and there,
tucked a few leaves away from bud sites
looking healthy, i expect her to enter bloom in a few days.
recieved her nutes today
4L dechlorinated water
12ml bloom A-B
rhinoskin,bud candy 8ML

Likes
5
Share
@RastaRick
Follow
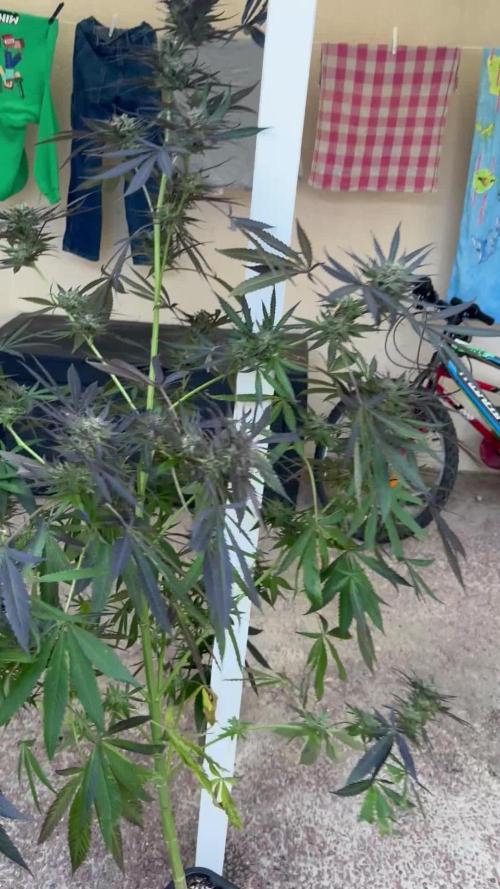
Tok off large fan leaves on day 24. Seeing preflower starting. Decided to try out a natural shape instead of doing LST. I hope this doesn't backfire... The blackberry gum on the right is getting big. I like how autopotamus has natural shape... But he also has much more light haha
Likes
105
Share
@Schnabeldino
Follow
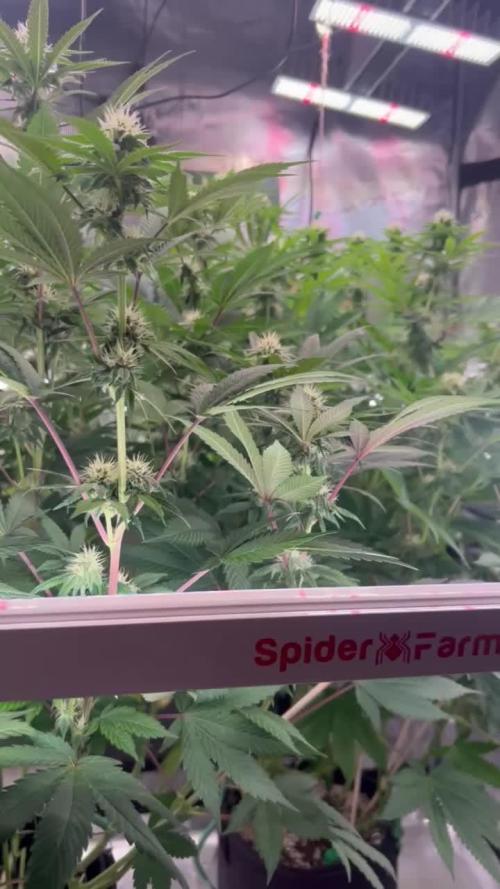
📅 Week 10 | 🗓️ Day 64–70
Day 70 – Lemon Cherry Runtz 🍋🍒 (2nd week flower)
🔸The second week of flowering has really picked up momentum. Densely packed flower clusters with long, ivory-colored stigmas; the calyxes are neatly stacked and the first sugar leaves are visibly “powdered.” The canopy is closed, the shoots are growing evenly – the lollipopping work at the bottom and the clean training are paying off. The stretch is noticeably slowing down, and the energy is now going fully into the flowers.
🔸The SANlight remains at 90% and ~30 cm distance (approx. 900 PPFD at the canopy). The leaves appear relaxed, without claws or lightening – so no indication of light stress. I keep the climate rather moderate, with good air circulation through the foliage so that the fresh resin heads remain dry. It's a bit cold at the moment, so I can't quite reach the VPD, but I'm not going to put a heater in, hehe.
🔸I watered as planned with BIO PK from BioTabs – carefully following the manufacturer's instructions. Otherwise, only water. The goal: to push flower formation without compromising leaf health.
So far, everything looks great.
📈 Current Conditions
🌡️🔆 = 24°C
🌡️🌜 = 17°C
💨 Humidity = 69%
🔦 PPFD = 900 µmol (12/12)
🛠️ Setup (unchanged)
💡 2 x SANlight Evo 4-120 @90%
⛺ 120 x120 x 180 Spiderfarmer
🍯 Pots: 18 liter fabric pots
🌱 Soil: Bio-Bizz light mix
💊 Nutrients: BIO Tabs
🌱 “Easy, organic, only-water method. Save 15% with GDBT420. biotabs.nl/en/shop/”
Likes
14
Share
@GoldenWeedGrower
Follow
D64/F20 - 03/06/23 - The situation is under control now. I'm going to change water asap (maybe tonight)
D65/F21 - 04/06/23 - 👉 Water changed, some hours without nutes...
D66/F22 - 05/06/23 - EC 0.8 ph 7.0
D67/F23 - 06/06/23 - EC 0.8 ph 7.3 - added pH-
D68/F24 - 07/06/23 - Added water and nutes EC 0.9 and pH 6.3
D69/F25 - 08/06/23 - EC 0.9 and pH 6.3
D70/F26 - 09/06/23 - Added water and Calmag, Connoisseur Bloom A-B. Added pH-. EC 1.0 and pH 5.5
Likes
73
Share
@Roberts
Follow
Deep Forest Auto is still bulking. Lots of frost, and a strong citrus aroma is coming from her. She is putting on weight and looks like she will be great. Thank you Doctor's Choice, Medic Grow, and Gen1:11
Thank you grow diaries community for the 👇likes👇, follows, comments, and subscriptions on my YouTube channel👇.
❄️🌱🍻 Happy Growing 🌱🌱🌱
https://youtube.com/channel/UCAhN7yRzWLpcaRHhMIQ7X4g

Likes
6
Share


Likes
21
Share
@CBTreee
Follow
This grow for a lot of attention on IG and I appreciate everyone’s support so much!!!


Likes
80
Share
@Hawkbo
Follow
One of these is killin it, the tallest plant in the video is #3 it's almost 4 feet. The other ones are doing good too but the big one is impressive. I kept a cut of each I'll prob run them before these even finish. Added some tnb co2 for a boost.