Processing
Likes
Comments
Share


@Elysian_gardens710
Follow
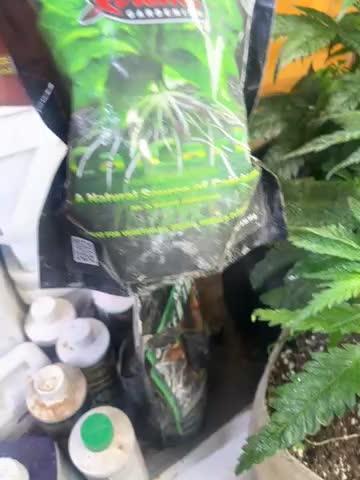
Hello again and welcome to week 5, the beginning of true flower! Ahsoka (her star wars name) is doing awesome with LST. Last week we tied down her main cola but this week her branches were long enough to Tie most of them down to. I will leaf tuck everyday to keep light on the budsites.
Ashoka has finally hardened off properly and I moved her to the big tent since she is also in flower. She is under The Optic 8+ we still haven't had to feed any nutrients yet 🤞 but are giving real growers recharge as a microbial. As you can see her roots have just exploded with growth. Love this opaque container deal!
The Optic 8+ is turned up full blast as well since we hardened her off by gradually bringing her into the tent
Stats:
Ohahu(not reccomended)4x4 tent
1gal water pitcher
Fox farms happy frog soil
Optic 8+ LED
Durabreeze carbon filter
4" inline fan


Likes
16
Share


@PigBearMan
Follow
Hey there,
as the clones are almost ready and I will transplant them in the aeroponic system tomorrow, I allowed myself to get the pH and EC ready and stabilize it over a night. 😏
August, 20th:
23 of the 30 clones made it to the system and are now growing fine. Guess those 7 clones that didn‘t make it were old ones from below the mother plant.
SanLights at 40%. ☀️

Likes
9
Share


@Rizik86
Follow
Day 36 - Checked PPM 400. Plant is wide and bushy.
Day 37 - Plant is 28 inches tall and 10 inches from the light.
Day 38 - Plant is 29 inches tall. Root system is almost maxed out for 5 gallon bucket. Checked PPM 700. Built a new light stand/grow area. Now bigger then 4 by 4 foot area.
Day 39 - Started a new bucket of water and nutes. Added 20 mL of CalMag Micro Grow and Bloom. Added 10 mL of each additive. I didnt add the rooting additives Tarantula Piranha and Voodoo Juice. PPM is 1,600. Plant is 32 inches tall. Different looking growth forming.
Day 42 - Checked PPM 1,520. Added RO water. PPM is 640. Added 10 mL of CalMag Micro Grow and Bloom. Added 5 mL of each additive. PPM is 1,300. Plant is 34 inches tall. Noticeable bud development started.

Likes
63
Share


@Ferenc
Follow
Day 88, 30th of October 2020:
I am just back from my holiday my friend looked after her really nice the 4th week already and buds are coming nicely along....
Great to see this beautiful lady very stinky by the way.... Smell is strong...🤪
She is very nice.... ;)
I removed some leaves getting pointless to be as she focuses more on the buds....
Those leaves were removed from the top mostly....
Now she gets one day extra darkness and but previously she had more dark hours than 12 hours because she was removed in the morning and back in the evening because she is in the tent with other plants and they are in veg now....🤪🤣🤣
I just started changing the schedule for those as well so from tomorrow no need to remove her and putting back.... ;)

Likes
18
Share


@xtchill
Follow
Done a bit of defoliating and pulled them down a little.
Bit of a mess bit she will bounce back.
Hopefully.haha


Likes
3
Share


@HighOhioAn
Follow
She is growing vigorous every day. Seems like she has new growth. Super stoked to see how she turns out first time using Athena.🤞🤞🤞🔥💯
Likes
16
Share


@Nookandplant42o
Follow
watering Water ph 6.5 growth and height are great results that are visible a resistant plant full of easy maintenance. quiet week just waited for their growth without stressing them
Likes
30
Share


@BudXs
Follow
Oh it was a special week. Day 21 of flower marks the Silver Back Guerilla defoliation day!!!!
I left one be. For him. To prove me wrong. BUT!!! That one had some dead leaves at the bottom that needed removal, not the defoliated plants!!
Time will tell as to if what Im doing is right. I stick to my guns that this works for my room. Even though I read differently, removal of foliage has lowered my rh. Could very well be outside environment, however.
By day 21F the room was a bush again. In my opinion, it needed the heavy defo to breathe. As for light penetration, I am extremely happy with the amount of heads receiving direct light. Im a pig in shit
Thanks for looking, I dont want to hear your opinion on defo or schawazze, unless youre SBG

Likes
25
Share


@Mr2toke
Follow
Day 42 - 17/01/24
All plants are looking vigorous today! Tent is very green, LST did it's job, and bud sites are all upwards!
Keeping a close eye on P2 and P3 for any yellowing as they're coming up to the 6 weeks in the medium. P1 is making some headway with 3 of the sprouts. one is still weak looking.
18/6 Light cycle in place, all at 100% intensity. Temps are around 26-28C in the day time and around 20C at night. Lights off temps hover between 16-19C
Negative pressure in the tent, all is looking well. We're pushing close to flowering!!
Day 45 - 20/01/24
Whilst doing some checks, I found a little buddy growing next to Plant 1. I must have been sloppy when I topped the plant and dropped a piece into the pot!!
I don't know what, if anything, will come out of the little thing, but im gonna leave her in the pot, see how she goes!!
P2 is looking pretty good. Bud sites all exposed to light, did some slight clean up on the branches.
Pre flower signs are all over this big plant. same with P3 as well.
Gave all 3 first bit of extra nutrients this grow. Used some Plagron Products.
Let's see how they take to it!
1ml/L Plagron PowerBuds, Green Sensation and Sugar Royal as well as 1ml/L of CalMag.
Day 47 - 22/01/24
All Plants are looking great! vigorous and lush, responding well to the extra nutrients!!
P3 is getting the major LST treatment this time. Got all branches stretched out, all bud sites in direct light.
I also folded down the lip of the fabric pots to expose more of the lower half to air and light.
Looking good so far, flowering fast approaching!!

Likes
9
Share


@GrowPassionItalyChris
Follow
Bellissime,abbondanti e cariche di infiorescenze resinose e profumate! Dimensioni grandi e qualità altissima! È stata una settimana bella e calda e ormai siamo in estate quindi continuano a riempirsi di infiorescenze molto resinose e dure. Ogni varietà è una vera soddisfazione! Grazie a tutte le banche dei semi che hanno creato queste varietà magnifiche! Per alcune manca poco alla raccolta mentre altre ci vuole più di una settimana di attesa anche due settimane. Sono felice, bravissimi tutti.


Likes
9
Share


@Franco123
Follow
the sprouted seedling and a seed that they had given me some time ago and a cross of black Domina x NY diesel o super skunk? I don't remember however I selted it to make a mini jar grower than a peanut butter jar


Likes
5
Share

@ChitownCannaChica
Follow
So this should be the last week of veg as I have room opening up in the flower tent soon. 2/3 are bushy and one of the 3 is nice and tall. Hopefully they stretch a bit in flower. 🏻💚


Likes
3
Share


@DankStationUK
Follow
Day 10: The LED I ordered should have been here a few days ago and I still don't have it which means for the past few days she has been sitting on the windowsill trying to find the source of light while growing really tall and spindly. Sad times!
Day 13: Today I have been out and bought a nice big 6 litre pot for her to spend the rest of her life in. I have transplanted her in and she seems pretty happy.
Day 14: Today my LED light finally arrived in the post! I feel like time has been wasted now but I've still re-potted her into a 6 litre pot filled with already watered soil and put her in my wardrobe until my tent turns up.
Likes
17
Share


@Canna96
Follow
Hey now, hope everyone is having a great weekend. This week went great for the 5 mainlines. I got the final toppings completed for all the ladies, I got them done on the Sundae Driver and Red Hot Cookies on day 38, and the Durban Nights, Green Crack, and the Bubble Runtz topped on day 40 for the final time. At this point there is not much more training left to do, just some minor LST to try and keep all 8 tops per plant level, and some minor defoliation along the way. I am planning to Veg them for 1-2 weeks and flip to flower probably sometime in week 8 depending on how fast they grow. I do have them all on milk crates which are 10" each so I will place them on the floor and adjust the light power probably about the time I flip to flower to accommodate the stretch.
I am still feeding GH nutrients, silica, cal mag, and maxi grow. I will transition to flower nutrients approximately one week after flipping to flower. I have found that it is important to continue feeding plenty of Nitrogen through the stretch. The only way I would transition sooner is if I was running out of vertical space.
Still very pleased with the Spectrum X from Medic Grow. I am running her at 69% and the plants seem very happy and healthy. The heat and humidity are finally letting up in my region so it is nice to be able to open some windows and drop the temp outside the grow tent.
I hope everyone has a great weekend, Thanks for stopping by, Stay Safe and Blaze On!!! 💪
Website: https://medicgrow.com/
https://growdiaries.com/grower/medicgrowled
Likes
14
Share


@SkunkyDog
Follow
Hallo zusammen 🤙. Sie wächst nicht so gut aber egal , schicke sie jetzt in die Blüte
Likes
Comments
Share