The Grow Awards 2026 🏆 


Likes
5
Share
@BB_UK
Follow
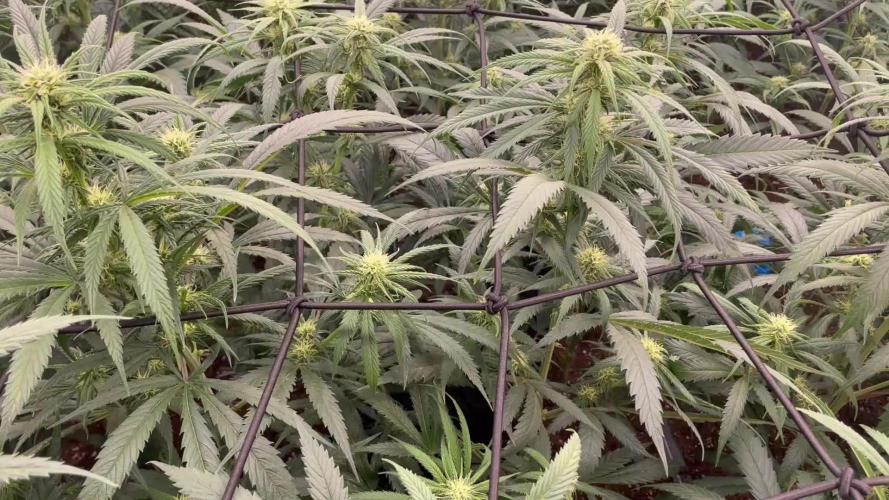
Well these beauties are stood at a whopping 42" and are now working on their flowers in full effect! I'm quite sure at this point all these clones are the same strain of sugar bomb punch 😁 so ending up with the favourite in their! She reminds me of runtz muffin because of the orange punch in her genetics!

Likes
6
Share
@GEREMY_EN
Follow
las manchas que presentaban en las hojas inferiores han quedado solo en las primeras pares de hojas, las superiores crecen sin ningún problema.
tiene buen desarrollo y color.


Likes
4
Share
@PolezGardn
Follow
fifth week flower, the ladies are getting really tasty and developing well!!


Likes
28
Share
@SooSan
Follow
Les hautes températures ont vraiment tout ruiné, seul la Red Hot Cookies à resisté
Vraiment un run de merde


Likes
10
Share
@carlitoshaze44
Follow
Otra semana más
Creo esta semana hoy día 27
Anunciando así el próximo día 28 inicio de esta quinta semana de floración del calendario de mis niñas,semana en la que comienzo subiendo la cantidad de comida y con ello de agua para mis niñas.
En los últimos riegos de la cuarta semana fui subiendo hasta alcanzar los 1700.
Las plantas mayoritariamente lo aceptaron,así que con ello subiré esta semana hasta alcanzar los 2000.
No defoliaré ninguna planta
Hoy ajuste la luminaria a una altura de 30cm con respecto a los 45 de la anterior semana.
Esta semana pegarán un buen apretón con la subida de PK,y la ayuda de los azúcares.
Seguimos con muchas lluvias y una humedad muy alta que dentro del armario se combate entre ventiladores extractor y desumificadores pasivos de sales de silicio.
Que me mantienen un 35% menos de la que tengo en el exterior llegando muchos días a los 45/50% de humedad.
Tengo que añadir que vivo a un kilómetro de la playa.

Likes
16
Share
@Sur_cannabico
Follow
La tercera semana de floración se hace presente en nuestro jardín para las green gelato de RQS.
Continuamos con las dosis de fertilizantes correspondientes a su tiempo de cultivo. Notamos ya la correcta formación de las flores lo que nos asegura unos resultados realmente esperanzadores!
#Surcannabico #heavengrowligths #Royalqueenseeds #nutrientesquemanta


Likes
20
Share
@eldruida_lamota
Follow
Bueno ya tenemos limpita la raices de esta farm cheese y pronto tocará matarile , unas semanas más que aguante y pronto se podrá consumir.
Vaya ejemplar en serio muy recomendado todo lo que gira entorno a la genética cheese, y es que los olores son increíbles , y laplanta es brutal solo hay que ver que planta y que flores que saco ...
Ph regulado 6,5 quitamos productos ,procuramos no aumentar la humedad más de 45% , temperatura media de 26 grados .
Pronto nos vemos buenos humos fumetillas

Likes
2
Share
@Cornfed
Follow
This week I added a new controller to handle up to 8 functions. I installed a new heater, my old humidifier and some LED strips to the controller. Targeting a VPD at 1.0 day and night.
Trying to keep the nutrient ppm under 900 and ph at 6.0 in the reservoirs. Ordered a second ph pen because I don’t trust my readings. Will be here by Thursday.
Friday:
Checked the ppm in the reservoirs and it’s at 1,000. Added more RO water with extra nitrogen to bring the ppm level down to 925.
Saturday: I installed an updated AC Infinity controller 69 Pro Plus (controls 8 pieces of equipment) which allowed me to add a humidifier, corner LEDs and a heater to the controller. Overall I’m extremely impressed with this AC Infinity equipment. My VPD is within the range I want to achieve (.8-1.1). I programmed it to maintain 78 degrees and 67% humidity during the day, 73 degrees and 63% humidity at night. Charts posted also show the impact of an open tent compared to the closed environment. The heater is constantly pushing fresh air into the tent, so I don’t need to cycle the exhaust fan often.
Rewired the tent again and moved the controller later that night. I mounted the controller on the wall. Added Mars Hydro UV/IR lighting to fill out all 8 slots on the controller.
Sunday: I checked the ph in the reservoirs (6.8….i had filled it with 6.0 ph) and the ppm (1200 ppm…I had filled it with 900). So evaporation and possibly a mismeasurement of ph. I topped ff reservoirs with slightly stronger nutes and adjusted ph to 5.8 in the reservoirs. Poor magnesium absorption could be driving some leaf yellowing. Effective tomorrow, I’m switching over to Heads Formula which consistently feeds GH Flora series nutes at Micro (6ml/g), Bloom (9ml/g) and cal mag (3ml/g). Turned on the UV/IR lights for 3 minutes every 8 hours. I’m easing the plants up to 5 minutes every 6 hours which will provide the recommended 20 minutes of IR per day. This will help the plants stretch a little more.
Monday: checked ph and ppm in reservoirs. 6.1ph and 880ppm. VPD remains stable except when I open the tent.
Tuesday: checked ph (6.4) and ppm (880) in reservoirs. Added .5ml of ph down to two reservoirs. Still see slight yellowing between the veins but it’s not getting worse (might be improving). Adjusting ph down to 6.0 target might have solved this. The plants grew by 1-2” last night…..is the infrared light working already?
Decided to mix up fresh nutes for the reservoirs following Heads formula. 6ml Micro and 9ml Bloom per gallon of RO water. Added 5 ml of CalMag too. Ending ppm was 1080 which is too high, so I diluted down to 880 with RO water. 6.0 ph.
Wednesday: plants grew another .75 inches last night. I topped above the 5th node.
Thursday: added RO water with heavy cal mag to reservoirs to increase amount of CalMag available.


Likes
17
Share
@Elpakkio
Follow
Hi guys this circle was a perfect one mix of auto and regular plant lucky everything run good and on time whit my program I will keep you informed about the harvest! I will cut next week the trichomes is half way between milk and Ambra color

Likes
20
Share
@gr3g4l
Follow
Empezó la semana con lluvia y las plantas en algun momento de la pasada se mojaron por lo que de nutrientes bién poco.

Likes
13
Share
@GrowZex
Follow
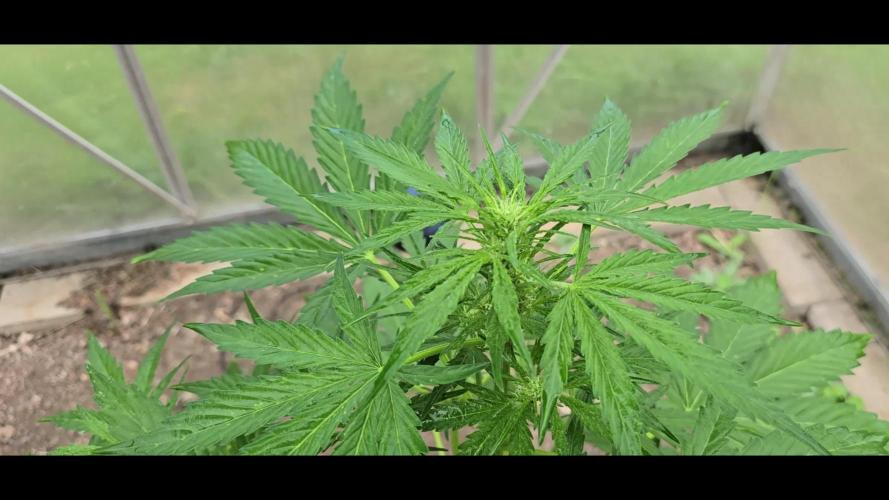
Started the diary late...
Basically vegged 4 plants for 4 weeks in airpots.
i prefer to used LED for veg. I get shorter internodes. I didnt feed the plants any additional nutrients so far, only water.
I did some low stress training and some topping so far.
Im looking to switch to 600w hps but its rly hot rn.
Likes
39
Share
@King_Green21
Follow
Not really much to say this week all 10 are growing fine with no problems at all
I Will keep removing the larger fan leaves as I go along, I do this in order to try and get as much light to the bottom branches as I can before I switch them to 12/12. This will hopefully keep the canopy as even as it can be without having to do to much training or topping.
Day 34 - Looking abit skinny and after the defoliation, but had to remove the middle growth and large fan leaves to get light to them bottom branches and new growth tips. I’m aiming to keep them small and bushy

Likes
13
Share
@NSABND
Follow
Let´s start a new week 😎👌
Day36 very sunny and warm... "Hilde 2.0" goes well 😎👍🙏


Processing
Likes
10
Share
@HisHope
Follow
After dry
Maddie dry weight 126 grams, Tammy now in dry wet weight 815 grams
Tammy yield dry 153 grams

Likes
3
Share
@Mimbra
Follow
Bueno ahí van arrastrando la defizcencia de potasio ya veremos a ver qué sale

Likes
20
Share
@victor_lion
Follow
This is a strain that is very easy to grow and resistant, after the fourth week it sticks a lug, and does not need a lot of vitamins, it grew with only 13 and 12 hours of light and went through cloudy days and a lot of humidity