


Likes
Comments
Share


@800peace
Follow
Scored some solution grade organic fertilizers and blasted my plants. I fed solution grade langbeinite (0-0-21.5) and loaded with sulfur and magnesium. I found some liquid bone meal (0-12-0) and loaded with calcium. Another new nute is solution grade azomite, aka the a-z of minerals... it is the ash from an ancient volcano mixed with an ancient ocean water in Utah. I’ll feed those new nutes once per week as they’re kinda hot. Otherwise everything is the same as previous weeks.


Likes
Comments
Share

@Earthsower
Follow
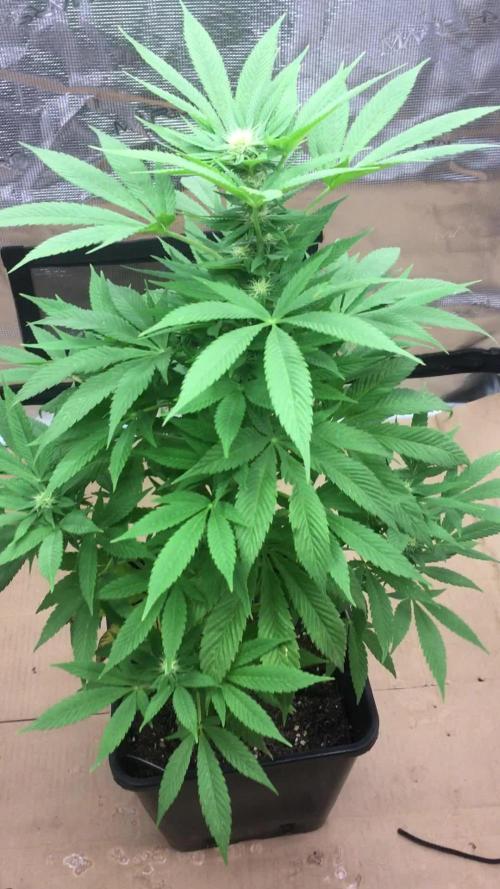
At the end of the 3rd week of bloom the Dough Boy feminised is coming along with pistols appearing all over the plant. The leaves are stable green and the stem is a healthy green. The growth spurt has slowed down with the Dough Boy only gaining 2cm growth this week. The lady will be fed only as required. I will check the E.C level with the next feeding. She stands at approximately 62cm tall
Likes
6
Share


@ThinkDankGenetics
Follow
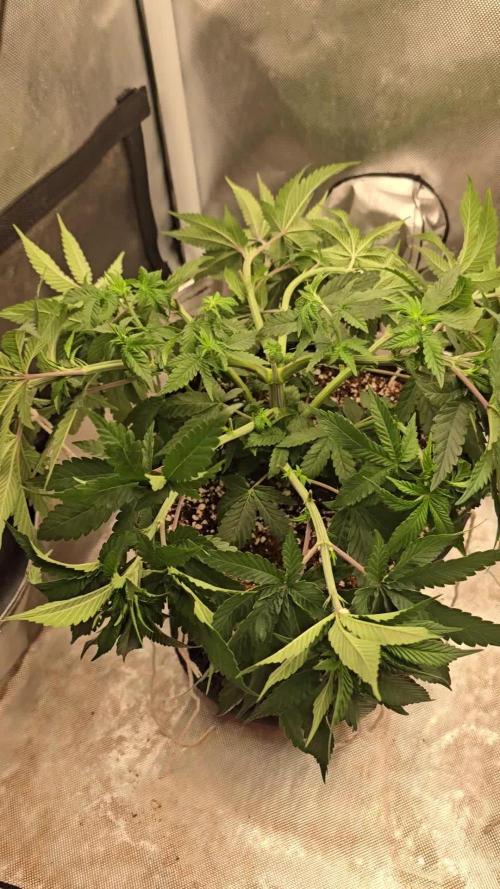
Started lst this week that's about it just cruzing. I do hate pics maybe it's my phone but they much greener in person.

Likes
9
Share


@Garamantes
Follow
After 4 days of heavy rain, the first mold appeared...
So I spent about 18 hours searching for plants and picking out mold with tweezers
After last year's experience with another seed bank, I expected the plants to be very affected by mold, but I have to say that Fast Buds genetics coped very well! Mold appear mainly on blisters to which the stem of the leaf leads water, which then collects between the stem and the blister
I trimmed the plants more so that the air flows better and that water does not stick to them
The plants look healthy and the flowers are gaining strength
Especially the dark purple phenotypes look very dense and hard. it also looks very resistant to mold
Very pleasant sweet fruity scent
I haven't seen my children for 3 days, it's raining extremely ... the last time I was chased out by swarms of ants in the early evening, I've never experienced this before, there were maybe a million of them and they sat on me and on the plants
I'm finally going to visit them tomorrow, I expect I'll have a lot of work to do with mold and I hope the swarms of ants haven't harmed them in any way

Likes
112
Share


@Dunk_Junk
Follow
Day 100 - (yes I know it's late) She is getting near the end now. Loosing a few leaves. Trichomes milky but not amber yet. Pistils still white in places.
I added a 500ml Monster can for scale 😂 hope it's allowed............ 😋
Likes
39
Share


@High_And_Hydro
Follow
I proudly announce: 🙌" Day 1 " 🙌
Sie haben ihren Tag 1 am 22.12.2024 um 04.20 Uhr gestartet. Das kann doch nur geil werden !!!
Die Systeme sind mittlerweile gut eingestellt und auch das etwas laute Gluggern habe ich in den Griff bekommen. Jetzt sind die Systeme vom Geräuschpegel nahezu gleichwertig.
Die Nährlösung ist dieses mal von Anfang an stabil, da ich die Eimer, den Blähton und die Steinwollwürfel alle vorher in vollwertiger Nährlösung eingeweicht hatte. Ich habe sie dann über 2 Tage noch nachregeln müssen und ab dann war der PH-Wert soweit stabil und ich konnte die vorgekeimten Seeds in die Würfel werfen. Mit dieser Methode fühle ich mich dieses mal irgendwie etwas "sicherer", aber mal schauen, ob sie dieses mal anfangs trotzdem wieder etwas durchgemangelt aussehen. War ja leider bisher immer der Fall.
Links die Black Orchid, in der Mitte die Junge Lava und rechts dann noch die Black Dog, so ist der Lageplan.
Viel Spaß beim lesen und Bilder schauen. Frohe Weihnachten und einen guten Rutsch euch allen 👋

Likes
3
Share


@B_AECH
Follow
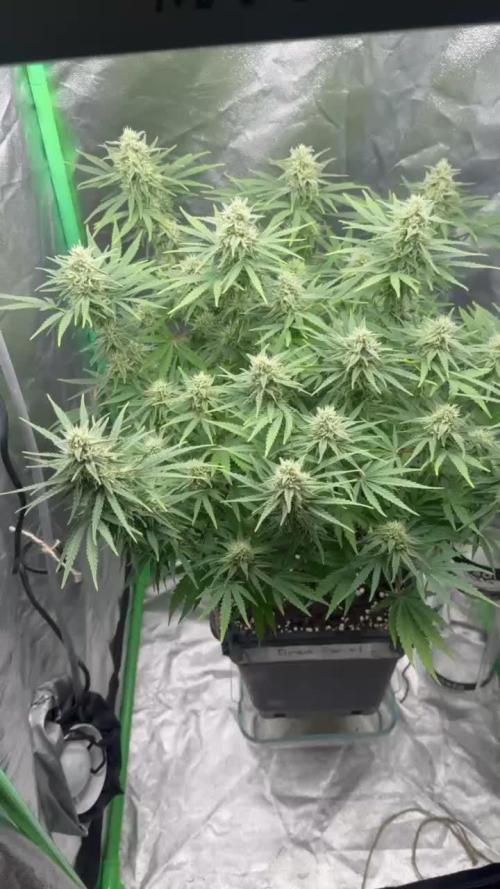
Had a PH issue which almost spoiled the entire plant.
But fantastically I noticed the issue right from the start, so even though she became very yellow she's pushing through till the end and is back to absorbing nutes.
+Day 61 started flushing
SHE'S A TRUE FIGHTER <3
I'm happy that I managed to learn the importance of pH.

Likes
Comments
Share


Likes
20
Share


@ukterpdoc
Follow
Hey my friends and teachers I have had some minor light bleaching so I have raised the led lights as high as they go please tell me if that's cool or if I need to do more thanks guys

Likes
24
Share


@nonick123
Follow
Día 21 (27/05) Lento crecimiento...
Día 22 (28/05) Se estiran mínimamente
Purple Lemonade Auto muestra las preflores...
Día 23 (29/05) Riego con 500 ml H2O
Día 24 (30/05) Stretch. Tendremos unas nenas chiquitas!
Día 25 (31/05) Empieza el stretch! Se van a quedar pequeñas, pero voy a dejarlas experimentalmente
Día 26 (01/06) Preparo Té de Compost de Floración! Healthy Harvest 8 ml/L + Insect Frass 16 ml/l + Melaza 1 ml/L + 24 horas oxigenándose!
Día 27 (02/06) Riego con 500 ml de Té de Compost de Floración
💦Nutrients by Lurpe Solutions - www.lurpenaturalsolutions.com
🌱Substrate PRO-MIX HP BACILLUS + MYCORRHIZAE - www.pthorticulture.com/en/products/pro-mix-hp-biostimulant-plus-mycorrhizae
Likes
9
Share


@Esoteric_growing
Follow
Canopy is very crowded, I am going to defoliate quite harshly on day 21. Apart from it being a little packed the plants are growing at a fantastic rate.
Likes
14
Share

@GERGrowDesigns
Follow
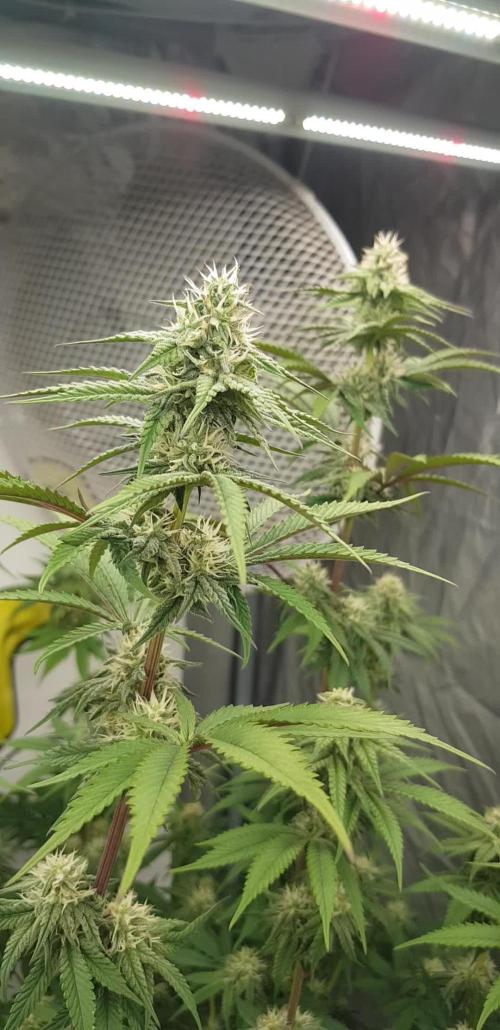
Welcome to Flower Week 4 of Sensi Seeds Purple Berry Muffinz
I'm excited to share my grow journey with you from my
Sensi Seeds Project . It's going to be an incredible ride, full of learning, growing, and connecting with fellow growers from all around the world!
For this Project , I’ve chosen the Feminized Photo Strain Purple Berry Muffinz:
Here’s what I’m working with:
• 🌱 Tent: 120x60x80
• 🧑🌾 Breeder Company: Sensi Seeds
• 💧Strain Info : 26%
• ⏳ Flowering Time: 6-7weeks
Likes
21
Share

@ThatsmyGrow
Follow
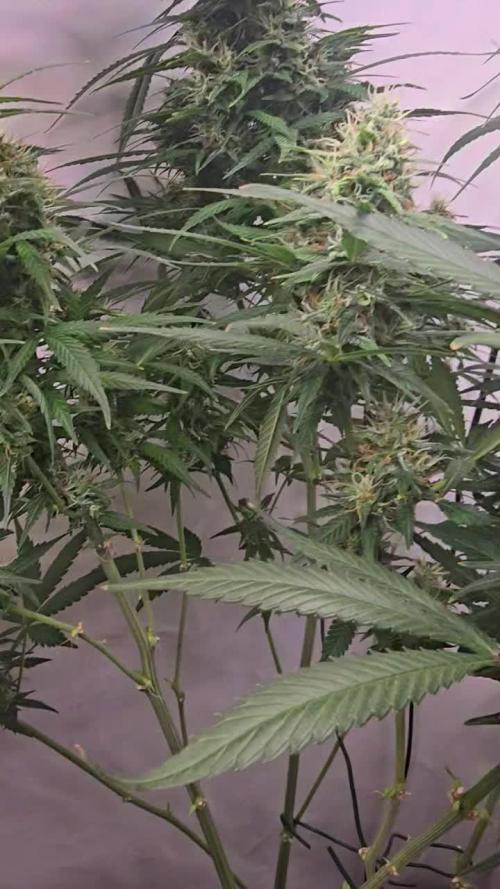
🌸 Week 11 – Gorilla Cookies Auto Pheno Hunt
Another week is in the books, and now all the phenos have officially entered the bulking phase. 🔥🌸
The flowers are swelling rapidly, and it's amazing to see how differently each phenotype is stacking and filling out. Every week brings more weight, stronger aromas, and denser buds.
📈 Current observations:
All phenos are now focusing entirely on bulking up their flowers.
Pheno #1 and #2 are producing massive buds, with some already reaching the size of soft drink cans. 🥤🔥
Pheno #6 has made incredible progress over the last two weeks. Although it had the slowest start, it has developed beautifully and is building flowers surprisingly well. It will most likely need around two extra weeks after the others and will probably finish the grow on its own.
Pheno #3 unfortunately never fully recovered after I had to remove several main colas because they were growing into the SANlight fixture. While it's still producing nice flowers, it clearly lost some of its potential.
Pheno #4 continues to be my personal favorite. The aroma is absolutely incredible, with a sweet Kush profile, and the buds are becoming rock hard already. 💎
📊 Current environment:
Temperature: 31°C
Relative Humidity: 63%
VPD: ~1.66 kPa
SANlight fixture at maximum height
Light intensity: 90%
⏳ Looking ahead:
If everything continues as expected, I think the first phenos will be ready for harvest in about two weeks. The final stage is always my favorite—watching the buds swell even more, the trichomes mature, and the terpene profiles reach their peak.
I'm excited to see which phenotype finishes on top, but right now Pheno #4 is definitely leading the pack. 👑🔥
💬 Which pheno would you harvest first based on these updates?

Likes
9
Share


@MG2009
Follow
01/012022
A little to aggressive on super cropping,but it will make a great clone.Should be last week of veg. Gonna reppot and amend with 5-2-4 for transition to flowering. She's taking on forbidden fruit smell most definitely. Hopefully she's A girl!
Two clones taken, and as soon as clones are rooted she will go to flower room.
Likes
3
Share


@BubatzSherrif
Follow
Grow Diaries Report: Flower Week 1 – Stretch Madness & Heavy Grooming 🌿🚀
Week 9 – Flower Week 1 Update
The flowering phase has officially kicked off, and wow, this plant is on a mission to touch the sky! The stretch this week has been intense, with the plant shooting up significantly. To manage her vigor and focus her energy on bud production, I’ve had to step in with defoliation and additional lollipopping.
This Week’s Highlights
Massive Stretch: The plant stretched dramatically this week, filling up the vertical space in the tent.
Defoliation: I removed a significant amount of fan leaves to improve light penetration to the lower branches.
Lollipopping Redux: Further cleaned up the lower parts of the plant, focusing her resources on the top colas.
What I Did
Lollipopping: Removed more of the lower branches and leaves that were unlikely to contribute to bud production.
Defoliation: Took off some large fan leaves to improve airflow and light exposure throughout the canopy.
Nutrients: Continued with the bloom feeding schedule, ensuring a balance of phosphorus and potassium for flower development.
Environment Management: Adjusted the light height to prevent light burn and tweaked the fan placement to improve airflow in the now more open canopy.
Observations
The plant’s stretch has been both impressive and challenging, but the defoliation and lollipopping seem to be working. The top canopy looks well-lit and primed for flower development. No signs of stress from the grooming, which is always a relief during such an aggressive stretch.
Challenges
The rapid vertical growth is pushing the limits of the grow tent. I’ll need to monitor her closely to prevent overcrowding or light burn.
Next Steps
Keep monitoring the stretch over the next week—potential supercropping if necessary to control height.
Fine-tune the nutrient schedule to ensure the plant has everything it needs as bud sites develop.
Maintain low humidity to reduce the risk of mold or mildew during early flowering.
Conclusion
The first week of flowering has been an explosive start! The stretch is real, but with proper management, she’s looking set to develop some fantastic buds in the weeks ahead. 🌟
Any tips for managing a stretch-happy plant in a tight grow tent? Drop your advice below! 😊

Likes
8
Share


@HowtoBubatz
Follow
The plants are now putting all their energy into bud production, and it’s really starting to show!🌱
Both are developing bigger and bigger buds, and the smell is becoming more intense every day.
#2 has an insanely large main bud, completely covered in trichomes.
The aroma is very hazy, deep, and complex. it’s going to be interesting to see how it develops in the coming weeks.
#1, on the other hand, continues to impress with its tropical, sweet, and pineapple-like scent, and its buds are also swelling up beautifully!
Everything is going exactly as it should—excited to see how much more they’ll bulk up in the next weeks!💚
Likes
8
Share


@804GrowTent
Follow
3 clones from the diesels and 2 of the trop cherry. All have been Transplanted into new pots and rooted successfully and one of the cloned diesels I have on my new hydroponic set up. Trying to learn hydro for the future when I convert one or all of my tents 😉
2 gal reservoir bin filled with fresh decholrinated water.
Seperate 1gal container I mixed 18ml of canna vega (Yes I know this isn't the hydroponic version of nutrients they offer) with 6ml of photosynthesis plus.
I added this into the resevoir until i hit 600ppms and ph'd to 5.6 water temp was 21°C at time of feed and has risen and is constant at 21-22°C

Likes
24
Share


@TerpTurtle
Follow
Plants on left are nearing harvest, flipping the Slurricane. Cleaning up under canopy and light defoliation/leaf tucking as needed for light penetration


Likes
25
Share


@Master_weeda
Follow
Stretch 10 centimètres
Jour52 légère defolliation et arrosage avec deux litres d'eau ph6.3
Petit rappel sur le meilleur cycle de lumière pour les autofloraisons
QUEL EST LE PLANNING LUMINEUX OPTIMAL ?
Le cannabis à autofloraison peut survivre avec à peine 5 heures de lumière du soleil par jour. Mais si vous voulez que vos plants s’épanouissent, atteignent le pic de leur puissance et produisent une lourde récolte, ils ont besoin d’au moins 18 heures de lumière par jour. Le planning optimal de lumière pour la culture en intérieur du cannabis à autofloraison est un 20-4 constant pendant tout le cycle de vie. Bien entendu, des plannings de 18-6, 20-2 et 24 heures non-stop ont tous leurs avantages, mais nous avons obtenu les meilleurs résultats avec le planning 20-4.
Les cultivateurs en extérieur peuvent potentiellement lancer la culture dès le printemps. Cependant, nous recommandons toujours de faire germer les graines et de cultiver les jeunes pousses en intérieur sous des lampes artificielles pendant une semaine ou deux pour obtenir les meilleurs résultats. Nous parlerons des options en extérieur plus en détail un peu plus bas.
LE CYCLE DE VIE DU CANNABIS À AUTOFLORAISON
La plus grande différence entre le cannabis à photopériode et à autofloraison est que l’horloge tourne pour une auto dès le moment où la coque de la graine s’ouvre. Le cycle de vie post-germination de la grande majorité des variétés à autofloraison modernes est de 8-12 semaines au total. Au contraire des variétés à photopériode, les autos n’ont pas besoin du planning lumineux courant 12-12 pour faire la transition vers la floraison. Une variété à autofloraison progressera dans son cycle de vie indifféremment du cycle jour-nuit.
CROISSANCE VÉGÉTATIVE ACCÉLÉRÉE
Il est presque impossible de délimiter la phase de la jeune pousse de la croissance végétale avec les variétés à autofloraison de nos jours. De plus, en 30 jours, la plupart exploseront soudainement en phase de floraison. Donner aux autos un bon départ, solide et sain est un facteur critique pour une culture réussie. Beaucoup de choses peuvent se passer pendant une semaine avec un hybride à autofloraison vigoureux en culture. Il n’y a pas non plus beaucoup de temps pour la transplantation. Nous recommandons d’utiliser notre kit de germination ou de planter directement dans les premiers et derniers récipients dès le début. Des pots/récipients en plastique de 10-20 L avec de nombreux trous de drainage au fond sont parfaits. Les Air-Pots sont encore mieux. Beaucoup de cultivateur découvrent à leurs dépens que les petits pots ne sont pas durables pour les hybrides autos modernes plus grands.
Préparez-vous à devoir ajuster quotidiennement votre lampe de culture pour éviter de brûler le feuillage. De plus, tout comme les variétés à photopériode, les conditions environnementales optimales pour les jeunes plants à autofloraison sont des températures entre 20 et 25 °C et une HR dans une fourchette de 50-70 %. En outre, les besoins en nutriments seront considérablement plus faibles que les variétés à photopériode. Il n’y a donc aucune bonne raison de ne pas cultiver bio. Généralement, les autos préfèrent avoir un milieu de culture légèrement fertilisé et bien aéré. Les terreaux légers et/ou le coco sont des substrats fortement recommandés.
La plupart des cultivateurs préfèrent des lampes CFL blanc chaud, LED et MH pour la courte période végétative. Cependant, les lampes HPS à double spectre sont tout aussi efficaces et probablement plus pratiques à utiliser.
FLORAISON RAPIDE ET FÉROCE
Dès que vous pouvez voir les pistils pousser à partir des premières fleurs, vous pouvez vous dire qu’en 45-60 jours, les plants finiront le cycle de floraison et seront prêts à la récolte. Que vous soyez prêt ou non. Mais vous serez prêt, car vous aurez fait les ajustements nécessaires en temps et en heure.
Les apports en engrais de croissance végétative à un dosage faible à moyen seront remplacés par des nutriments pour la floraison et des doses appropriés de compléments et boosters de floraison. Une fois de plus, un régime alimentaire spartiate est recommandé. Pas besoin de changer le planning des lampes, car vous allez suivre votre planning originel jusqu’à la récolte. Mais il faudra vous assurer que les températures ne dépassent pas les 28 °C et vous devez réduire votre HR vers une fourchette plus basse de 40-60 %. Les plants vont s’étirer à des degrés divers. Quoi qu’il en soit, vous devez faire attention et toujours maintenir une distance optimale entre la lampe et la canopée. Un ensemble de cordages ou de crochets réglables rendront la tâche bien plus aisée.
Ne vous imaginez pas que toutes les autos développeront une structure courte de buisson, à moins que le sélectionneur ne donne des données qui le suggèrent.
Naturellement, les deux dernières semaines de floraison devraient être réservées à un rinçage en profondeur du milieu. De l’eau pure, ou une solution de rinçage légère fonctionneront très bien. Quand la majorité des poils ou pistils sur les fleurs auront changé du blanc à l’orange/rouge, vous devriez passer au rinçage. Ne sautez pas cette étape finale critique. Vous méritez les fleurs les plus savoureuses, sans contamination.
COMMENT LES AUTOS RÉPONDRONT AUX TECHNIQUES DE TAILLE ET DE PALISSAGE ?
La réponse courte : très bien ! La plupart des variétés à autofloraison de nouvelle génération répondront très positivement au LST. Et tant que vous taillez tôt, l’étêtage et le fimming peuvent multiplier les tiges de têtes et en plus booster les rendements. De plus, la méthode ScrOG peut être combinée avec toutes ces techniques pour un rendement maximum. Cependant, la culture à grand volume utilisant la méthode SOG est probablement le style de culture le plus populaire à présent. Un nombre croissant de cultivateurs d’autos expérimentent avec les mêmes pratiques courantes de taille et de palissage à haut rendement que les cultivateurs de cannabis à photopériode utilisent.
Les cultivateurs débutants ne devraient probablement pas se lancer dans une taille ou un palissage intensif ou excessif avant d’avoir de l’expérience.
Cependant, plier un peu les pointes de croissance pour créer une canopée plus plate ne peut pas nuire aux rendements. De même, une défoliation minimale pour augmenter la pénétration lumineuse ne stressera probablement pas des plants en bonne santé, tant que vous vous limitez à l’élimination des grosses feuilles nourricières qui font de l’ombre aux sites de floraison.
May the force be with you 💪

Likes
Comments
Share


@OrganicBuds030
Follow
Forbidos wächst klein und buschig, eigentlich genau was ich suche. Bin gespannt ob sie das Topping genauso gut wie Jelly Breath annehmen werden.