


Likes
Comments
Share


@valiotoro
Follow
Hello everyone 😎
Week 2 for my girl it’s time for Topping & some LST
She is doing very well,growing at fast pace and with a beautiful green colour on the leaves.
Have a nice day 😎

Likes
18
Share


@Growbabie
Follow
demorou mas está ai a primeira semente da 24k Gold auto da Cannabiorganics!
Dia 29/11/2021 - Para minha surpresa essa manhã outra semente da 24k gold auto germinou, ela aparentemente veio das profundezas do vaso de 7 litros ehehehehe essa vai ser forte. Falta somente uma delas germinar para 100% de sucesso. Estou molhando um pouco varias vezes ao dia.
Dia 30/11 - tudo normal, crescendo no seu tempo.
Dia 01/12/2021 - dia normal
Dia 02/12/2021 - dia normal, estou achando elas bem lenta mas é isso.
03/12/2021 - A 24kGold#1 parece estar adorando a luz, ehehe, reguei elas com 250ml de agua hoje e somente.
04/12/2021 - tudo ok
05/12/2021 - tudo certo tirando o fato da 24kgold#2 nao estar se desenvolvendo
iniciando a primeira semana oficialmente, vambora 🚀

Likes
299
Share


@Metatronix
Follow
Hallo to You all my familly and usual visitors. Thank you for stopping by and all the likes and comments....You make my day!
Everything runs smooth, the trichomes are mostly milky right now, normally i would wait a week or so to get some amber color trichomes at the winter is already here and the only heating source in my grow room is the Mars Hydro TS 1000 with is at 80% of power right now and 30 cm. from the top of the canopy.
That makes the temperature is most of the time 15 degrees Celsius. So I decided to start flushing on 7th of December. With all that going on I'm tempted to dark her on 15th...we will see.
The TS 1000 gives a full spectrum of light and is energy efficient (which is quite a big deal these days ;)) The plant grows many dense buds under this lamp as you can see, Mars Hydro did a very good job producing this lamp.
Thanks to Mars Hydro for supplying the necessary equipment for this grow.
That's it for this week folks, have a wonderful week and please come beck visit in a week we are almost at the finish line with this girl you don't want to miss the finale ;)


Processing
Likes
42
Share


@Skunk_Life85
Follow
She is still going well. She hasn't really bulked up a lot. She started a nother run on stigma production. That means more bud production/ density. She is still getting nutes for this week and then I'm going to start my flush next week. I need at least 27 grams to enter in to the harvest cup and I think that's all she might produce. I broke out the microscope, her trichromes are still predominantly clear so she still has some time. I'm going for a 20-30 amber percentage.


Likes
29
Share


@SolitudeCorners
Follow
Can't wait to blazeeee
Feeding💪
10/17 Water30L+Cleanse80ml+calmag@190ppm
Ph6.3
Ebb 10.42/11.32/12.26/13
Clone 11.35/12.21/13.05/14
Average runoff ec1.5
Keeper 300ml per pot
10/18 Water26L+Flawless90ml+calmag@300ppm
Ph6.3
Ebb 11.38/12.24/13.17
Average runoff ec1.2 ph6.5
Clone 12.38/13.56/15.20/16.10
Average runoff ec1.5 ppm750
10/19 Water26L+Cleanse80ml+calmag@200ppm
Ph6.3
Ebb 11.12/11.48/12.24
Average runoff ec1.4
Clone 11.50/12.12/12.37/13.37/14.40
Average runoff ec1.3 ph6.6
10/20 Water30L+Cleanse30ml+Calmag@190ppm
Ph6.4
Ebb11.42/12.22/13.20/14
Clone 12.40/13.20/14.20/14.45/15.15
Average runoff 1.2ec ph6.4-6.7
10/22 last light day
10/23 2 Pm Cut and hang
Plan 21day at 23temp 55rh

Likes
4
Share


@BMGenetix
Follow
Last week of the grow. Checking deep in the plant, it has around 20-25% amber trichomes. I decided it was time to cut it and free up the rest of the tent to get ready to flower.

Likes
7
Share

@CampaCavallo
Follow
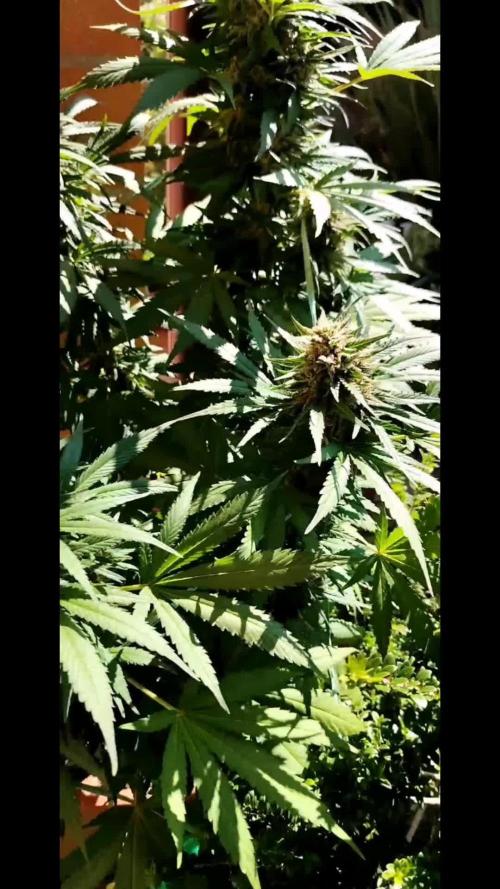
8ª Settimana di Fioritura 💐💐💐💐💐💐💐💐
Che bello vedere i suoi bud esplodere di cristalli 🤩🎇💚

Likes
Comments
Share

@Gardens_of_Of
Follow
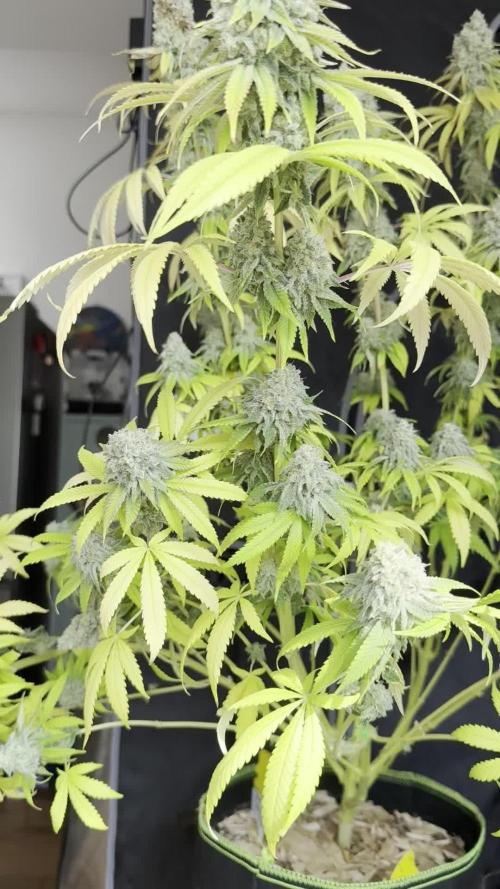
It was a smooth and easy grow overall. Happy with initial results. Excited about the end results...😁


Likes
102
Share


@love_2_grow
Follow
D35 - The first day in the first week of flower. She was getting thirsty, so I gave her 1.2-liters of water @ pH 6.2 and, as always, she drooped after.
My old humidifier died on me, so today, I got a new one. It's a smaller version of the one in my other tent, and it is the cutest little thing, but hey, it doesn't need to be mighty for that tiny tent.
I also got a new Inkbird to keep the RH constant. I already use one of those in my other tent, but I opted for the WiFi version this time. I shouldn't have bothered, though, as all it does is display the RH but doesn't allow the app to control the Inkbird. Pointless as I already have remote temp/RH monitoring.
D40 - Today, I did some more LST and light defoliation to ensure proper airflow. The canopy shadowed the leaves I removed, so they weren't contributing much anyway.
I've increased how much light she is getting since she is in flower, but I have to be careful due to the younger Chocodope girl in the same tent. Currently, I'm reading around 650 PPFD at canopy level but will increase that over time until I hit about 900 PPFD.
Finally, I gave her about 0.6-liters of water @ pH 6.5.
D41 - The end of the first week of flower, and all is well.

Likes
4
Share


@The_Projexx
Follow
Welcome to week 3 of flower for these fine ladies! As the stretching period comes to and end in about a week or so I'm excited to see the plant's develop their flowers. Some of the plants have already developed quited the frost for their age and as the cycle continues its just going to get more pronounced. Some of the plants are giving off a faint smell now mostly the Banana Smoothie smelling of cream and bananas so far. Overall I'm really pleased with what's going on so far and can't wait for further development of the flowers!
Huge shout out to both Hidden Vault Genetics as well as @MarsHydroLED for all the work they put in to make growing a breeze
Extra special shout out goes to all my followers and people who stop into the diary alike. Keep inspiring to grow!
-The Projexx
Day#15F Ladies continue their stretching, will be looking to remove some leaves to open the plants up soon.
Day#16F Watered ladies 4L each at 550PPM. Things are moving along as the plants keep stretching like crazy
Day#17F Ladies are producing more and more size on their cotton balls while stretching up and stacking hard.
Day#18F Ladies are producing quite the frost levels for their age. Watered 4L each at 550PPM.
Day#19F Pictures N/A. Plants continue to stretch and stack.
Day#20F Ladies look like their slowing down on their stretch hopefully haha. Watered ladies 4L each at 550PPM.
Day#21F The plants are still stretching abit while putting mass on their flowers slowly. Wont be long till we see some giant flowers covered in trichomes!
Recap: Things went very well this week, some of the plants are starting to put out a smell and everyone's pumping trichomes like crazy! With about a week or so left on the stretching period I will be looking to place my secondary nets very very soon. I'm looking forward to seeing
what the plants smell like and how they continue to develop their flowers!
Likes
49
Share


@FoTwenny
Follow
Fo' Twenny here with another update on our Blue Dream lady bred by Humboldt Seed Organization!
Any advice, suggestions, or constructive criticisms are always welcome. Now on to the details!
9/13 - Day 35: Premixed soil to prepare for upcoming transplanting.
SOIL MIX DETAILS:
Mixed into a 50 gallon container that will be kept in a warm environment to help innocculate to promote a vast and diverse microbial life in the rhizosphere.
2 Part - Royal Gold Tupur
INGREDIENTS: Coco fiber, aged forest materials, perlite, and basalt
1 Part - Fox Farms Ocean Forest
INGREDIENTS: Aged forest products, sphagnum peat moss, earthworm castings, bat guano, fish emulsion, and crab meal.
1 Part - Roots Organics
INGREDIENTS: Perlite, Coco Fiber, Peat Moss, Composted Forest Material, Pumice, Worm Castings, Bat Guano, Soybean Meal, Alfalfa Meal, Fishbone Meal, Kelp Meal, and Greensand. Also contains beneficial mycorrhizal fungi: Funneliformis mosseae, Rhizophagus intraradices, Septoglomus desertícola
.5 Part - Wiggle Worm Soil Builder Pure Earthworm Castings
.5 Part - Ancient Forest Humus
.5 Part - Coarse Grade Perlite
Inocculated by mixing 1 cup of Extreme Gardening Mycos
Watered with pH 6.5 h2O
1 Tsp/gal Real Grower's Recharge
1 tsp/gal Hi-Brix Molasses
2 tsp/gal Fox Farms Kangaroots
9/16 - Day 38: This cultivar is looking really good! She's one of the bushiest in the garden! She may end up being a challenge to keep in her own lane, especially in flower. I will probably end up havingbto do quite a bit of pruning with her. I did notice some white blotches on a few leaves as well as several other plants in the garden. I'm not sure if it's just water spots from my helper's carelessly watering causing water spots from the Nutrient solution or the start of a PM infection. Never really dealt with PM, but decided to spray them with some serenade. I also sprinkled with a little more White Dutch Clover seed on top soil.
9/17 - Day 39: I installed the new 320w GeekLight in the 24" x 48" veg tent.
GOOD NEWS:
I upgraded the 24"x48" tent to Samsung LM301H boards. I ordered a 320w straight single piece heatsink with 3 boards from Geeklight. I went with the 3k spectrum and switchable UV/IR since all my autoflowers bloom under this light. $306 USD after all is said and done. It took 9 calendar days to ship from China.
https://app.alibaba.com/dynamiclink?touchId=1600101815945&type=product&schema=enalibaba%3A%2F%2Fdetail%3Fid%3D1600101815945%26ck%3Dshare_detail&ck=share_detail&shareScene=buyer
NUTRITION:
⬇️Mixing Rundown⬇️
Foliar Feed & Nutrient Solution
2 gal tap h2O run through x2 KDF filters
Start ppm 630
Start ph 7.8
2.5 ml/gal Gold Shield Silica Supplement
.5 tsp/gal Fox Farm Gringo Rasta Cal-Mag
I always adjust pH prior to adding any microbial innocclants.
pH @ 8.1
.33 tsp/gal ph down
pH: 6.5
PPM: 730
Serenade 3 tsp/gal
Filled Spray bottle with 32 oz of the 2 gal mixed solution.
Add 2 tsp/gal of Fox Farm Flower Kiss (.5 tsp 32oz)
6 tsp/gal Optic Foliar Transport
PPM: 749
pH: 6.4
Added 1 tsp Recharge to the remainder of feed solution (to 1.75 gal) in the sprayer.
______________________________
9/20 - Day 42 (Technically the last day of week 6): Feed! 🚿 She has 4 main tops and they're all pretty even in height. I defoliate earlier/heavier on taller tops to help the shorties to catch up.
👩🔬NUTRIENT SOLUTION👩🔬
⬇️Mixing Rundown⬇️
12 oz tap H2O run through x2 KDF filters
Start pH: 7.9
Start PPM: 630
3 ml/gal - Blue Planet Gold Shield Silica Supplement
.5 tsp/gal - Fox Farm Gringo Rasta Cal-Mag
3 tsp/gal - Fox Farm Big Bloom
1.5 tsp/gal - Fox Farm Grow BIG
.5 tsp/gal - Fox Farm Boomerang
.25 tsp/gal - Fox Farm Wholly Mackerel
.25 tsp/gal - Fox Farm Kelp Me Kelp You
.125 tsp/gal - Fox Farm Open Sesame
pH: 6.3
PPM: 1350
I always make sure pH is in the range of 6.0- 6.6 prior to adding any microbial innocclants. pH already in range, no adjustments needed.
1 tsp/gal - Grower's Choice Recharge
.6 ml/gal - Mammoth P.
.5 tsp/gal - Kangaroots
pH 6.4
PPM: 1420
________________________
Thank you for stopping by my garden!
This girl is just one of 16 strains in my photoperiod SOG with 2 additional wildcards in the mix.
Want to see all the strains I have running?
Please check out my other diaries & give me a follow!
Happy growing my friends! ☺️🌱
Peace, ☮️✌️
Love, 💚🤟
& Frosty Nugs! ❄️🌲
- Fo' Twenny

Likes
21
Share


@JohnnyBlaz3
Follow
Flower time! Cant wait to see how she comes out. I have bent the main stem over a couple squares to keep her a little lower and spread out to be part of the scrog without topping her. Seems to have worked great and all the main colas are above the canopy but not too tall the are gonna block the surrounding ladies. She nice and snug in there making herself at home. I am expecting some nice and plump flowers from her as she looks very healthy. The root supplement and the folair feeding does seem to have helped a bit but i'm always cautious for placebo. The weights at the end will tell the tale. I already have quality down so I'm looking to raise the weight without sacrificing quality. I would also like to improve on my smell and flavors, have been steadily improving crop to crop and hopefully will keep that trend going for a long long time. Just a little better each crop with small techniques that add up to fat flowers!! She kinda blends in this week but the next week or two she will stand out again with her unique flowers
Processing
Likes
15
Share


@FishTankGrow
Follow
Everything going strong.
Baby Yoda spreading his ears.
One leaf started to curl a bit. Maybe too much water?
Starting nutes tomorrow.
The more leaves. Wanted to start nutes but soil is too moist.
Will hold off for another day. Just misting the surface.
Started with Fox Farm at 1/3 dosage as my soil had organic nutes in it already. Starting slowly.
Saw a gnat running around. Stopped water and misting. Put some packing tape in. Should be ok. 😁
Temperature is creeping up as I add more light. Maybe increase distance soon.
Increased the light distance. Leaves were looking a little baked. Maybe too hot as well.

Likes
1
Share
@Trinidad
Follow
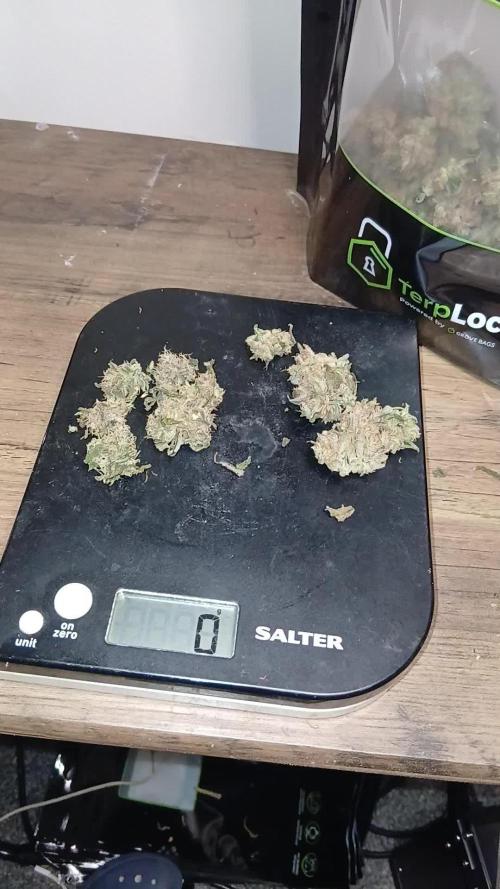
2 different Frostbangers plants. Same grow. 1 came in at 52g and the other at 6. Easy grow and easy trim
Likes
38
Share


@Cariboo_OG
Follow
Utopia Haze is a rare heavily sativa dominant hybrid (90% sativa/10% indica) strain created through back crossing Brazilian Sativa strains. This tasty little bud took home 1st Place for Best Sativa in the 2008 High Times’ Cannabis Cup and for good reason – with its potent 18-22% average THC level and long lasting cerebral effects, Utopia Haze is one powerhouse smoke. The Utopia Haze high comes on soon after you finish your first toke, hitting you with a strong cerebral lift that infuses you with a sense of hazy relaxation.
Type: Feminised/Photoperiod
Cultivation: Indoor/Outdoor
Flowering Time (days): 70-75
Indoor Yield (g): Up to 650
Feminised Outdoor Harvest Month: October
Feminised Outdoor Harvest Month Week: 3rd-4th week
Aroma: Citrus, Woody, Pungent, Mint
Effect: Cerebral Lift, Hazy Relaxation, Sleepy
Welcome Everyone to the Final Entry of my Utopia Haze Grow !
There is so much to discuss ! I have been extremely busy as of late trying to get this Harvest together, but i am happy to have it here for you now !
I Seriously under estimated the amount of time, help from others, and my own necessary skills to pull this off.. and i still kind of screwed it up lol !
But its worth noting i have never actually done this before and trying to document it during....was extremely hard.
It is next to impossible to work an iPhone with rubber gloves on !
First I want to discuss everything step by step so before you jump straight into the comments on how the end product is so small in "quantity"
Rest assured i am happy with its"quality"...and thats all that matters to me because Life is a journey not a destination! and i have learned so much from this grow that I couldn't be any happy even if i messed some things up :)
But at the very least I hope you read through this entry in its entirety with an open mind and focus more on the process, rather than just the outcome!
I ran out of Ice & i was only able to wash three times..(normally I've heard you should go sometimes 5-6 washes)
Preparation is Key & things will be much better next round :)
Photos 1-22
These are pretty self explanatory but for those of you just tuning in now.. this is what happens to a very happy plant when you don't have the necessary tools to monitor key components of growing cannabis.. Ph, as well as EC levels play a very key role in the outcome of your grow lol that being said I was just able to save this plant by purchasing both tools but that doesn't mean the plant didn't suffer because of the prior events.. This was a Huge reason behind me choosing to turn this harvest into what i would consider
"Solventless Hash Rosin" from "Ice water extracted Bubble hash".
Pictures 23
The idea here is the process of using "fresh Frozen Cannabis" this has been discussed many a time online on such sites as instagram and here on grow diaries as well.. I personally have Never tried the process so i decided to try it out and make a judgement for myself..
Video 24
The Cannabis has now been in the freezer for 72 hours making it very well frozen.. as you can tell i struggled getting it all into the 25u Screen Wash Bag. One thing of note i would do differently is i will de-stem my next batch as i also believe this played a part in the amount of plant matter that escaped through the sieves.
Photo/Video's 25-28
The idea here is "ice water Seiving" & especially with the bags that I am using here that are only have screen material on the bottom portion of the bag it is very important to have spaces in-between the screens to allow the water to pass directly through the screens into the bottom bucket with the least amount of resistance.. because the hash is so extremely temperature dependant if it gets warm on the side of the bag.. it will stick there and not make it to the bottom to become use able product..
29
You do not need to use as much Ice as i used here lol... the idea is to keep everything very cold..i certainly achieved that but at the sacrifice of using so much that i ended up grinding product and producing "contaminants" but in the end they are just plant matter that i would be smoking when i rolled up my joint either way so.. I'm not super disappointed..
But it should be noted that what you want to achieve here is a Layering effect where you have the wash bag between two small layers of ice while the "water current" washes the Trichomes away allowing them to be separated by the screens setup below :)
Before Starting the machine you should allow some time (i.e.;10-12minutes pre soak to allow the product to become saturated) before the first cycle.
By video 32 I have just ran out of ice lol..
Video 33-34
Here I have a tip for you.. to separate the screens that you sieve through.. cut 5 gallon buckets to stretch them across nice and tight.. it'll make scooping your Bubble that much easier ! i learned this from the many "Frenchy" videos I have watched :)
Picture 35
Here in lays the problem for most people.. drying your hash without loosing vast amounts of "Terpenes" whilst also stay ever vigilant against mold !
Thanks to all those videos I've watched on youtube.. id like to think this was one of my most successful parts of this process..
Things to Note; Terpenes start to seriously evaporate at temperatures 68F or 20C
you need to stay as cold as possible whilst bringing the Relative Humidity in the space down into the 40-30% to stay away from that nasty mold !
I used my cold storage room in the basement.. with a dehumidifier running to keep the space at 45% RH & staying at a constant 15c.
All while spreading the hash as thin as possible across parchment paper, on top of the white screens with a fan moving air across both sides of the paper.
Pictures 36-38
These are some macros i took in the middle of my drying session I fell in love with the colour.
Yes i know the black spots are plant material but they will get caught when i bag the hash & squish the oil out.
Thing to Note; at this stage it is important to ensure you 'micro plane" the hash down as fine as you can whilst staying weary of the temperature... any "chunks" will hold pockets of moisture.. that lead to potential problems..ie; mold ...
Picture/Video 39-41
Successfully planed bubble hash ready to be bagged and Squished !
Picture 42
Ive decided to follow Pedro.. from Pedros Grow Room and double bag to be on the safe side so i don't have any blow outs.
So thats One 25u bag inside one 160u bag ! :)
Pictures 43
This is almost 3 grams of the bubble hash from above, already melting in the bag.. this is where i ran into trouble again lol things started getting to warm in the house and i was only able to get one of the three squish's i did on video :( things started getting sticky.
Picture 44
This is basically just a photo of the equipment I'm using; 3x5 LowTemp Cage in the frame I built myself, with a 20Ton bottle jack.
Something to note here is this is an older Lowtemp model with only a single heating zone which is which i have it closed here heating Both sides of the press :)
As well as the importance of having adequate pressure on your plates.. my rig is very overkill for the size of hash bags..lol
Video 45
Here is the lovely press video.. its didn't quite work the way i wanted either lol my directional folding wasn't quite tight enough for a big "drip" :)
&the Press was set to 65°c
Photo's 46-50 are pretty self explanatory :) I had a blow out.. but still managed to pull an 80% return from the hash once squished...& yes it tasted amazing :)
Was it worth it in the end... that could be debated.. for some..i understand..its not your thing, but for those of us that are interested in making our own concentrates.. free from Solvents...
I wouldn't make it any other way :)
If even ONE of you reading this diary finds it helpful to reference for ANYTHING.....even if its "what not to do" ill consider it a success !
Thanks again for tagging along on this garden adventure.. its been one heck of a journey !
Much Love from B.C. Canada,
Until Next time,
Cariboo

Likes
43
Share


@MistaOC
Follow
11.02.: So far everything is well under control. temperature and humidity are well adjusted. We will see how it goes on.
The gold juice is intended as food (sugar) for the microorganisms.
Light intensity: 25%
——————————————————————
12.02.: Day 9!
water values checked:
RO Water
Temp. 18,1 degrees
015 ppm
5,7 PH
water value After adding 0,5ml/1L CalMag (BioBizz)
Temp. 18,1 degrees
054 ppm
6,3 PH
fertilized with BioGrow for the first time. (3g/1L substrate)
——————————————————————
15.02.: Day 12!
Today I drop the humidifier from 85% to 80%
The plants now use the water relatively quickly. now has to water every two days.
Before watering the pots had 125g and after watering 180g.
Poured with RO water and 0.3ml/1L CalMag
values:
water:
028 ppm
19 degrees
drain:
765 ppm
19 degrees
The roots looking perfect!
Soon the little ladies will be in their 19 liter fabric pots!
——————————————————————
16.02.: Day 13!
Today I changed the light intensity to 37%.
Everythig looking great.
——————————————————————
17.02.: Day 14!
Today I repotted the ladies into their 19 liter
fabric pots.
Composition per pot:
- 19 liters of BioBizz light mix
- 55g BioGrow - Greenhouse Feeding
- The roots were powdered with Rootmax and Bactrex.
- 3 liters RO water (017ppm) (15% of pot)
- 0.9ml Calmag - BioBizz (029ppm)
- 3g BioEnhancer - GH Feeding (154ppm)
Light intensity increased to 42%
Room temperature 25 degrees
75% humidity
——————————————————————
Likes
17
Share


@BLAZED
Follow
Week 11 (10-4 to 16-4)
10-4
Temperature: 24.4 degrees (lights on) 21.1 degrees (lights off)
Humidity: 60% (highest) 52% (lowest)
No pictures.
Added 10L to the reservoir, and turned it on for a couple of minutes.
11-4
Temperature: 24.4 degrees (lights on) 21 degrees (lights off)
Humidity: 61% (highest) 52% (lowest)
12-4
Temperature: 25.5 degrees (lights on) 22 degrees (lights off)
Humidity: 65% (highest) 57% (lowest)
Turned the reservoir on for a couple of minutes.
13-4
Temperature: 26.5 degrees (lights on) 23 degrees (lights off)
Humidity: 65% (highest) 56% (lowest)
14-4
Temperature: 26.4 degrees (lights on) 22.1 degrees (lights off)
Humidity: 64% (highest) 45% (lowest)
Turned the reservoir on for a couple of minutes.
The reservoir is almost empty, there is 850 ml left.
15-4
Temperature: 24.4 degrees (lights on) 20 degrees (lights off)
Humidity: 59% (highest) 49% (lowest)
No pictures.
16-4
Temperature: 23.5 degrees (lights on) 19.5 degrees (lights off)
Humidity: 60% (highest) 53% (lowest)
Today i defoliated both plants heavily for the last time, you can say i did a method called: schwazzing.
Dont know why but while i was defoliating the Chemdog smelled a little bit like soap haha.
Turned on the reservoir for a couple of minutes. (Till the AutoPots are full and the valve closes)
Rised the pots aswell, so the canopy is very even.
I let them recover from the heavy defoliation i did, and next week i will slowly increase the light's strength. (Now still at 50% 50cm)
Likes
12
Share


@Donbehzad
Follow
The LST i did in the past few weeks is starting to pay off. The plants are spreading nice and even, not bad for a first timer but it can be better.
In this week, i’ll try to water more to boost their growth because in the past few weeks i only water them once a week for the reason that I always wait until the top soil goes dry and it took almost a week for that to happen. I read in an article that you should carry your pot after a day of watering the plants to able to know that is the weight of the pot when it has water, so you can determine if the pot is light that means you can water them even the top soil is still wet. I’ll try this method lets see if i’ll end up overfeeding my plants or not.
In this week will be doing same routine like last week, always monitor humidity and temperature. Spread the fan leaves so the leaves underneath can receive enough light.
