
Likes
Comments
Share


@DontStopBelievn
Follow
01/26 No pictures this week because I'm doing multiple days of time lapse photos. Next week should have some yummy vids and photos.
Plants have been doing well. Topped all of the plants between 01/20-01/23, except Berry, which will get topped tonight. Berry has had a very strong rebound. Still very pale in comparison, but is showing strong vertical growth. Vigorous growth of lateral shoots in most plants except for one of the WW. (iirc, it's WW 3) The tallest WW with the widest node spacing has had extremely poor lateral growth, even at the topping site. Likely another 2-4 weeks before mothers will be a clone-ready, based on observed growth.
I prefer DWC and haven't done soil for a very long time. It's shocking how much slower growth rate is in soil. A good thing in the long run, because pruning a mother plant in hydro is a PITA. At the same time, I want these plants to hurry up so I can toss clones into a SOG test. My plan is to take 2 clones of 4 plants and flower them all in one 14-gallon tote.
01/28 I had some issues with the timelapse because I didn't set the intervalometer correctly and it eventually went weird after running for over 36 hours and started taking pics every 5 minutes. Things have been fixed and I have add a video from 01/24.
I am going to trim some fan leaves tonight and decided to flower 2 cuttings each from the two Bananas.


Likes
43
Share


@FreezingIslandBoi
Follow
I grew Tangerine Dream under HLG Rspec 240W for the whole grow except the last 2 weeks. I am very impressed by the size and density of the colas. Tangerine Dream has the biggest colas out of the 3 strain grown. The final space occupied by tangerine dream 2ftx2ft. Downside is long flowering time and heavy colas that needs support. This strain responds well to mainlining, needs lots of space and uneven height main branches will result in uneven canopy. The colas are not homogeneous. The yield was very satisfying and turned out more that I expected. Thanks for the support everybody 🙏🏽👍🏽 Keep growing

Likes
44
Share


@Vegetoo420
Follow
both of this clones has the same mother and grow together with same nuts water ect
The only difference is pot size ( first in 4L smartpot second in a 6)
And buds are different don’t know why

Likes
29
Share


@Edenganj
Follow
These girls seem to be doing well so far. How much water should I be giving them now? What nutrients should I be adding now? (I am using sohum super soil as the medium)


Likes
1
Share

@JibbyJack
Follow
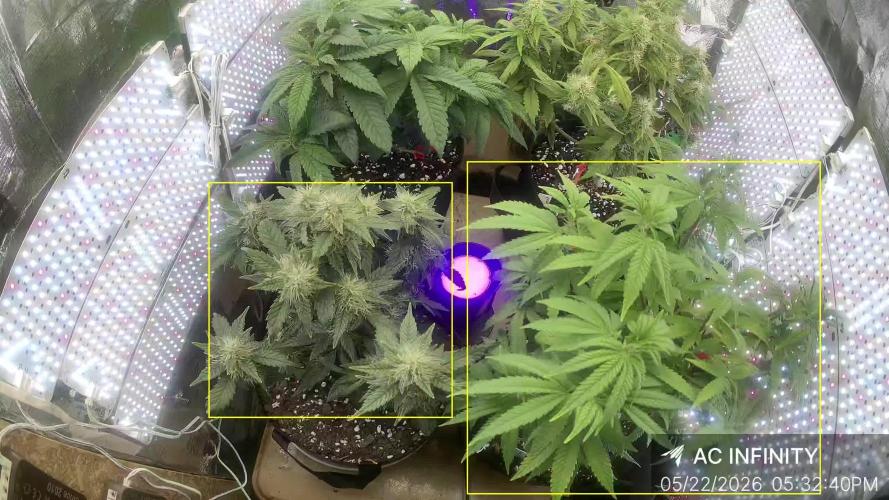
This week the girls are looking strong, I will continue exactly the same regime. The buds are developing well. They are very sticky. The 2 non budding plants are showing signs of pre bud. Growing different strains is challenging. The timelines are very different. The 2 budding strains are Anethesia Auto from FB420 and Purple Haze from Zamnesia. I installed the Infinity AC Spectrum 3 camera this week, so far it has been awesome.


Likes
5
Share


@NewLevelHydroponic
Follow
Everything going great in this new tent spaces is helping alot supper cropping this has really helped alot that and lst with these auto i think there gonna look amazing when there donr tell me what you think
Likes
12
Share


@Sammuray
Follow
Exelente creciendo y engordando, muy buena altura y producción, con rapidez y aroma a mango muy fuerte, resistente y fácil de cultivar, muy recomendable.

Likes
14
Share


@Ozeola
Follow
She bounced back from last week. Temps are up and down in the outside environment. Not too much problem here. Trying to sweeten her up a bit with the bud candy.

Likes
4
Share


@Smokiebear_og
Follow
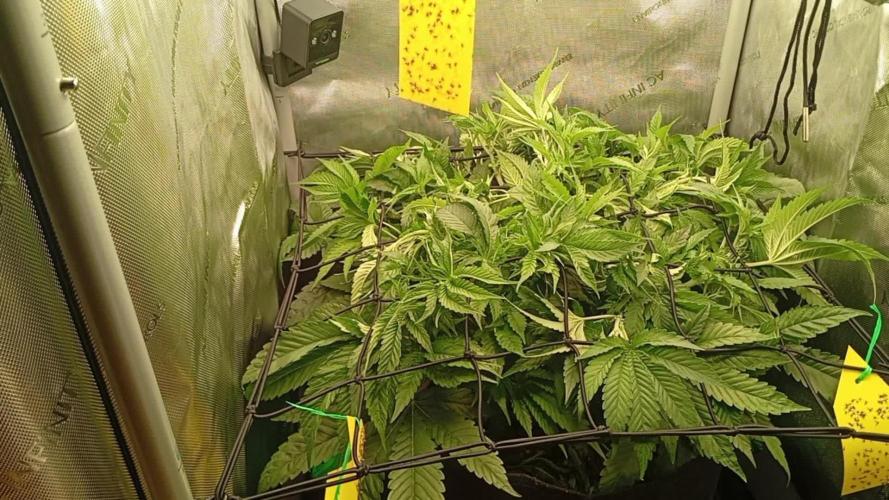
Hello people, we are here with another update day 34 for all these lady's. We currently have two shorty's and 2 tall girls. I'll be doing plain water with carboload from from now till the end of flowering
Peace and love ✌️✌️


Likes
Comments
Share

@Walachiangrowindiary
Follow
Flipped to 12/12. At start of flowering im using GHF Bio Bloom top dress 3g/l of substrate mixed with wormhumus by biobizz and watered by compost Tea with bioenhancer

Likes
13
Share


@Livinit2019
Follow
So, seemingly sudden drop in the health of plant #1. She was bigger than plant #2, but now she's looking dreadful. Lots of spotting and leaf curling. There's some of that on the health(ier) one, but not near as much and it seems to be healing -- and growing!
I topped plant #1 because I knew it was risky, but wanted to see what would happen and took a chance with a plant that was already looking a bit unhealthy. From what I can tell, I would definitely believe that it is burn considering that my 1000w LED was just 16 indes away from them for 8 days, since sprouting. I moved em up to 48 inches on day 9 and plant #2 reacted well but plant #1 is only getting worse. It could also be a PH issue, causing a calcium deficiency, but I've been giving them 6.0-6.5 PH treated water for 4 days now...
I want to do LST on the health(ier) one, but not sure if it's too early. What do y'all think based on the stem growth?


Likes
3
Share


@MarihuAchA
Follow
Por ser maceta de 8 litros estoy muy contento con el resultado. 49 gramos en seco de puro sabor y color.


Likes
23
Share


@Chubbs
Follow
420 Fastbuds Week 4
Gorilla Zkittlez Auto
What up what up. Hope all is well with everyone's grows. This week's update is exciting especially being that the girls transitioned into flower. Showing preflower sites all over. It's a beautiful site. I did add a little GH Calimagic to the feeding to stop the rust spots from getting any worse. Seemed to do the trick. All in all Happy Growing


Likes
Comments
Share


@kissrubb
Follow
esta sera la ultima fertilizancion antes de hacer lavado de raices
esta ultima fertilizacion le damos comida para que resine todavia mas y acaba de aumentar de peso sus flores sacando el maximo rendmiento
This will be the last fertilization before washing the roots.
This last fertilization we give it food so that it resins even more and it has just gained weight in its flowers, getting the maximum yield.

Likes
7
Share


@Gardengobblin
Follow
La semaine de athena et bloom est terminer . Je passe à l'eau pure pour la semaine peut être un peut plus . Les trichome son bien laiteux et devrai commencer à ambré .
Présence de seed dans les fleur due au perte d'électricité très fréquente durant la floraison.
5 fois dans une distance de 7-8 jour et 2 semaine plus tard encore 3 fois dans la même semaine ,donc 8 jour qui on subit des perturbation de lumière et environement
Likes
5
Share


@PhinolaGreen
Follow
Nähere Informationen und Bilder folgen im Laufe des Prozesses. Die Ladys hängen jetzt zum Trocknen.