Likes
Comments
Share
Processing
Likes
39
Share
@G4NJAG4NG
Follow
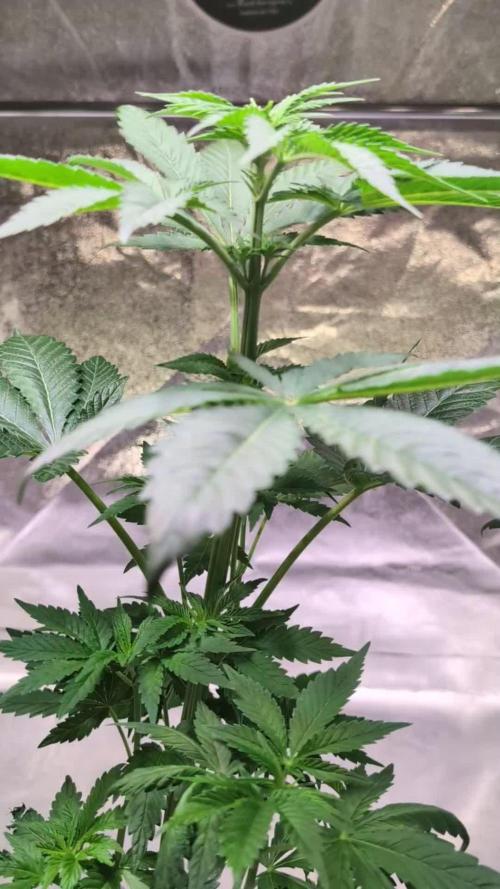
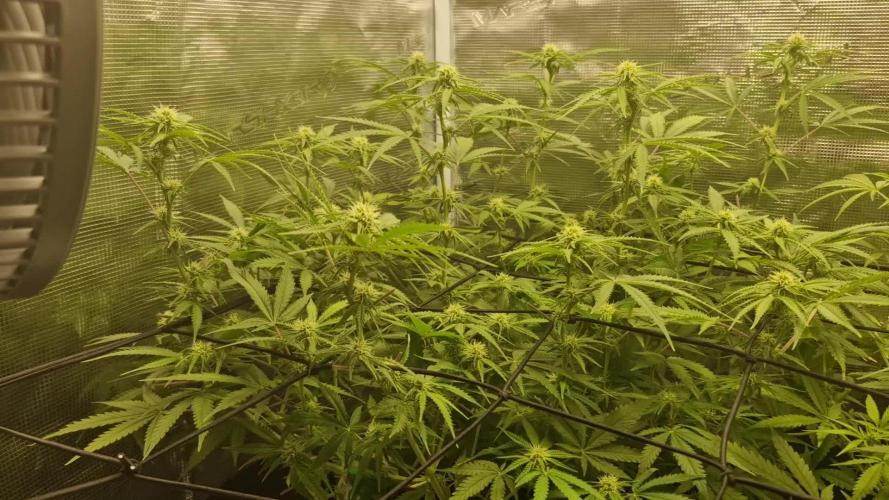
100419Day 70 flower 28 - switched fully to bloom nutes now and they are all starting to slowly fatten up, they are all turning lovely and frosty and the size of laughing Buddha on the middle is crazy, she is my monster 👌😁 140419 - changed feed to 2.5ml/l bloom 1.5ml/l bud candy and 1ml/l Calmag, half way through flowering and leaves are starting to turn yellow, don't think I have added enough bloom therefore lack of nitrogen in the soil. Buds are increasing in size however. 150419 - I think zkilltez of will be ready soon, trichomes are cloudy with a few amber , began 10 day flush today feeding 4 litres of 7.0 pH water every day now till the 25th which will be harvest day 😎
Likes
13
Share
@Lazuli
Follow
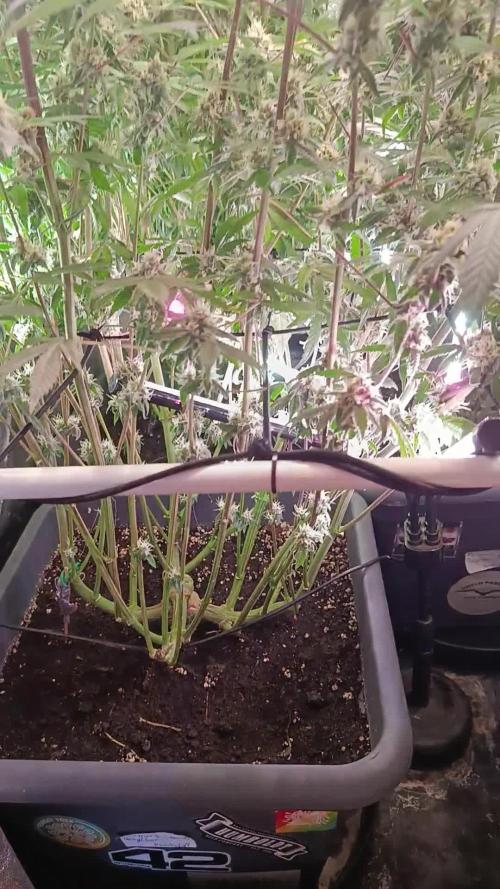
I dont like how heavy the branches were, i had to spend 2€ on ropes
Processing
Likes
53
Share
@Beans
Follow
Day 1- watered Day 2- 😴 Day 3- 😴 Day 4- I need to feed tent 1 tomorrow. Gonna up the nutes from last week since they dont seem to be getting caught up. Can see 1st signs of flowering so I'm gonna experiment a bit with additives and see if I can see a noticeable winner or possibly no difference at all. Day 5- Fed tent#1 14ml advanced trio, 1ml floralicous +, .6ml mammoth p. 1/8tsp flower fuel per/gal. Tent#2 got 2.5ml armor si, 5ml tiger bloom, .6ml mammoth p/gal. Pulled each plant out and cleaned up the bottoms and middles, washed trays and gave a very light dusting diatomaceous earth on underside of leaves. Hoping that will keep any spider mites that think fucking with me again this year will be fun, dead as shit and disappointed. Got a bunch of cuts for clones now too. That's gonna be tomorrow me's problem though lol. Day 6- 🚫 Day 7- well I'll be a son of a bitch...guess what I found? Spider mites. Got to try out my new eradication method I thought up months ago using diatomaceous earth and an air compressor. (Almost a week later and I cant find a mite anywhere 😁) STEP 1- Turn off your carbon filter so u dont plug it up then dust the hell out of everything with diatomaceous earth. I wanted it to look like a thick fog and let the fans blow it all around. I'd go fog it back up every 10-15 minutes for an hr or so. STEP 2- Starting with the worst, pull each plant out of the tent and blow off with 60psi (4bar) compressed air(see video) STEP 3- Inspect the plant and blow off any mites u find with the air gun. I used a LED flashlight to make it easy to see them. STEP 4- After the plant appears mite free give another dusting of diatomaceous earth.(see video) STEP 5- clean tent. Vacuum up all the DE and blow dust out of lights. STEP 6- Put plants back in the tent and start your carbon filter if u have 1. In theory this should take care of current mites and any eggs that hatch. Check daily and repeat steps 2-4 as necessary.
Likes
6
Share
113 days from seed in tiny pot 1 lt, the best smelling in my tent floral and diesel ⛽
Likes
49
Share
@smzzz
Follow
Its beginning to be realy interesting out here ! the two on the back are like twin sisters, and the other one is more short. Its realy hard to take pictures now, so i try to take at least one video at the end of every weeks. feeded them with 1ml biogrow/biobloom/topmax /L see ya !
Likes
4
Share
Mikromachine Auto Brand Kannabia Genetics Northern Lights x (AK-47 x Critical) x Ruderalis Flowering Type Autoflowering Flowering Time 10-11 weeks from seed to harvest THC 15% CBD Low Height (Indoor) 60-70cm Height (Outdoor) 85-150cm Yield (Indoor) Up to 600 gr/m² Yield (outdoor)Up to 600 gr/m² Sex Feminized 📆 23.04-25 (Day 1 ) 💬 just borned 💦 6.5 🍼 0.5L 📏 0.5cm 🌡️ 25c° 📆 24.04-25 (Day 2 ) 💬 👽 💦 6.5 🍼 0L 📏 1cm 🌡️ 25c° 📆 25.04-25 (Day 3 ) 💬 👽 💦 6.5 🍼 0.5L 📏 1cm 🌡️ 25c° 📆 26.04-25 (Day 4 ) 💬 👽 💦 6.5 🍼 0L 📏 1.5cm 🌡️ 25c° 📆 27.04-25 (Day 5 ) 💬 👽 💦 6.5 🍼 0.5L 📏 2cm 🌡️ 25c° 📆 28.04-25 (Day 6 ) 💬 👽 💦 6.5 🍼 0L 📏 2.5cm 🌡️ 25c° 📆 29.04-25 (Day 7 ) 💬 end of firstweek... Amazing💪👽 💦 6.5 🍼 0.5L 📏 3cm 🌡️ 25c° Equipment: Unbeliveble Masterseeds 100W (veg-bloom) Masterseeds growbox 0.25x0.25 Plagron (Veg & Flower)
Processing
Likes
27
Share
the second week off 12/12 plants are totally bond down with copper wire for the lst method there growing fine thanks to team Plagron the seeds are good stabile seeds thanks to team Zamnesia i build my own lightmodule 450 watt dob chips 4 x 3500K 4x 6000K 1x full spec the plants are looking healthy en happy with their new sun shining up to a fantastic harvest greetz from me Dr.Greenthumbz420 a.k.a Boris Groen
Likes
8
Share
@Kirsten
Follow
14.1.25: I've been readjusting the LST. I just took all the pegs out and reshaped her. I got some new LST equipment in the mail today, have been glad to have more pegs. I got some clips too, but they don't seem to stay on 😕 I'm currently only using the pegs, I have some thicker soft wire, but I forgot I don't have pliers to cut it! Also I'm running very low on Biobizz nutrients, so that could be bad 🤞 18.1.25: I have done another large defoliation on PPP1 and PPP2. Also, moderate defoliation on all other plants today. All LST ties and pegs are readjusted. I have turned up the light to 90%. Same distance of between 24-28 inches, depending on height of specific plant. I have increased the dosage of Biobizz Bio-Grow and Fish Mix to give an extra boost of Nitrogen as several plants were showing yellowing. They have responded very well to this. Unfortunately I ran out of my Biobizz nutrients and PH UP. I'm currently using Bicarbonate of Soda to increase the PH after the nutes PH comes out to about 4.1. Obviously, that uses a lot and I only had a 250ml bottle, which I used last run too. This run I have 9 plants. The only thing I'm worried about is the salt build up. Have you used it before? Or any other natural way to increase PH? Please let me know! I've also added Biobizz Fish Mix to help with the extra Nitrogen needed. Watering with 1ltr of dechlorinated water PH'd to 6.3 with the following nutrients;- ♡ 4ml Biobizz Fish Mix ♡ 4ml Biobizz Bio-Grow ♡ 2ml Biobizz Bloom ♡ 2ml Biobizz Top Max ♡ 2ml Cal-Mag ♡ 2ml Ecothrive Flourish. I water with this every 3 days. I did order some more Biobizz Bio-Grow and Bio Bloom. I found some at a reasonable price on Amazon. I still have about 800 ml of Biobizz Fish Mix left, too. It is fairly expensive this time as the plants are hungrier this run. I also got a new bag of Canna coco, which I may use to add a top dress with some dry amendments. Which hopefully will save some cash on the bottled nutrients and stretch out until the end of this run without having to buy anymore. I have purchased a funnel to pour the water. It is difficult, due to the shape of my LST, to water precisely. I have spilt it all over the tent several times 🙄 I've also ordered a 2 litre jug. Currently, I'm mixing water for 9 plants individually in a 1 litre jug. It's tideous. Hopefully, this will solve the issues. Cleaning the tent after watering every time isn't my idea of efficiency 😅 Thanks for checking out my diary 🍃 ✌️
Likes
3
Share
The plant is doing well overall this week! 💪 To handle a few fungus gnats that started showing up, I introduced nematodes into the soil and placed some yellow sticky traps, seems to be keeping things under control so far. She's growing quite tall now, definitely stretching up nicely, but not really filling out much in width. A true lemony skyscraper in the tent!😂💚
Likes
82
Share
Hello growmies! Welcome to week four of An Epsilon Adventure! The girls are already transitioning into flower, I will get some photos of that later in the week. Massive thanks to both Shogun and Royal Queen Seeds for sponsoring this grow. Daily Updates: ### Week 4 Day 1 11:00 16/7 Removed some lower growth. ### Week 4 Day 2 23:00 17/7 Tallest plants were showing signs of heat stress so I have raised the light about 30cm more. Unfortunately this now means the lower plants aren't getting as much light as they could, so I have put the cycle back to 20h (I may even increase it). ### Week 4 Day 3 14:00 18/7 Photographed. ### Week 4 Day 3 19:00 18/7 Fertigated 2l. Okay these girls are now starting to concern me a little on the basis that they are supposed to grow to "50-70cm". At just over 3 weeks old the shortest of these girls is 53cm, the tallest (plant 3) is now 76cm tall. The worrying thing is they do not at all look like they are slowing down and as they are just pre-flowering now, the flowering stretch hasn't even started. So I need some genuine advice here now: Do I keep the faith and hope that they don't exceed the space I have? Do I top or super crop them now? These ladies are beastly, at the end of the week I am going to take some individual videos and more photos to really try and capture how magnificently well these girls are doing. I think I may be in the process of growing the biggest Epsilon F1's so far? Exciting to find out! ### Week 4 Day 4 21:00 19/7 James has assured me they wont go much more than 85 so I am not going to mess with them. They are due a defoliation at the end of this week though. Measured each plant as follows: Plant 1: 81cm Plant 2: 75cm Plant 3: 80cm Plant 4: 67cm Plant 5: 59cm Plant 6: 58cm Might photograph later or leave until tomorrow. ### Week 4 Day 5 10:00 20/7 Photographed and measured. Plant 1: 85cm Plant 2: 79cm Plant 3: 81cm Plant 4: 71cm Plant 5: 63cm Plant 6: 63cm So they've all grown about 4cm in about 13 hours, except plant 3 - which seems to have slowed down a lot. The top of plant 3 is also the most advanced looking in terms of pistils. I forgot to take close ups of the preflowers I will do that tomorrow. I have had to raise the light again today and it is now much further away than the younger plants than I would like. So I am thinking about adding a 300w LED into my 4x4. I have another 3 inches I can raise the light on the hangers, after that I can removed the adjustable handers and tie it to the top of the tent... that'll gain me another 4 or 5 inches. If I need to go higher my only option would be to set them up without the tent which is not an option right now. Hopefully they all just stop getting taller now and focus on flowering... but my gut tells me there's more growth to come. Watch this space! ### Week 4 Day 6 15:00 21/7 Measured. Average 10cm growth 29 hours. 😳😳😲 Plant 1: 96cm Plant 2: 89cm Plant 3: 88cm Plant 4: 81cm Plant 5: 73cm Plant 6: 72cm ### Week 4 Day 6 23:00 21/7 Defoliated. Only photographed plants 1 and 2 individually as I was short on time. Some lovely pics though! ### Week 4 Day 7 15:00 22/7 Fertigated. 2l Will photograph and measure later when they've had 24h since training. ### Week 4 Day 7 23:00 22/7 Photographed and measured: Plant 1: 102cm Plant 2: 93cm Plant 3: 89cm Plant 4: 85cm Plant 5: 76cm Plant 6: 75cm Well here we are at the end of week 4 and I am quite shocked by the growth of these girls. This strain averages 50-70cm in height. We have six plants here and every one of them is taller than the average... but would you just look at plant 1? She is a giant! 102cm!! Where will she stop? Next week will see the full transition to flower and we will start to see the bud sites developing. I have no idea at this point what the heights will look like at the end of next week. This is sort of new territory really, they weren't meant to get this big! --- Thanks for reading growmies! 👊 ========== Tent: 120cm x 120cm x 180cm Light: 600w HID Elite Dual Spectrum HPS + Angel Wing Reflector Air: 5" duct fan system with carbon filter ~300 m3/hour + RAM 9" floor fan + 4" intake fan Pots: Air Pruner Fabric Pots 30l - UGro XL Coco + horticultural grade perlite (~20%) Seeds supplied by Royal Queen Seeds https://www.royalqueenseeds.com Nutrients supplied by Shogun Fertilisers https://www.shogunfertilisers.com/en ==========
Likes
41
Share
day 7 Flowering: Hi all . It has been the start of their flowering this week and the initial stages of their stretch period. Time to exploit the burst of growth and set them in position for full light absorbing relaxation. The less stress to get light , the more focus on creating the beauty in flowering hopefully. I took some time to do a clear out of the small scrappy growth low down the stems to focus on the happy growing bud sites higher up. With their shape and size , the flowers would have been within the ball shapes and unable to develop properly. The shape of the plants from the tip spreading is very helpful now. I am able to tuck the really big powerhouse fans , underneath the developing lowers. This supports the lower growth to head higher but also keeps the main stem powered by the very important big fans. As these are autoflowers and able to use the available light through the huge fans , it can only be beneficial to keep them as long as possible while they are not blocking anything. The difference between the strains is noticable more now with the Strawberry Pie wanting to spread her branching more . Tip spreading has kept them smaller but their nature still has them wanting the long node lengths and cluster bud structures as opposed to long donkey di#ks. The other strains have benefited more from it and in particular, the #2 Six Shooter has an amazing amount of hopeful mains all fighting for focus so should be a good example of how tip spreading really works to create productive , squat beasts. Fingers crossed.lol They are still being fed just water with no additional boosts beside the last top dressings. I will be watering again with the biosys tea but they look so happy and green that I wont be adding any other products unless I notice a need. Cal.mag being the exception as I want to avoid the expected deficits from using l.e.d , before it can slow anything down in repair/recovery. The light is covering them all perfectly and with the height still to be lowered after the stretch is done , I know from previous Mars lights, the big solid nugs will appear.... I have used a video to show the past weeks growth rather than the usual pics and hope this will be more interesting than having to scroll pics. I also noticed a few leaf miners among the other plants and suspect we have some migration here too. Not too serious as yet but before it gets too bad , I used a store bought spray ( organic) to hopefully get to grips before they do. Failing this , a good smoke bomb might be used. Until the next time , be well and loved.
Likes
2
Share
Flowering began and I really didn’t do much. A little bit of trimming…just wanted her to survive after my tough first weeks haha Soil was dry after every 2 days. So gave her 1l when dry. On day 6 she went to the window again as I’m not in my apartment
Likes
12
Share
@Bud_vista
Follow
Welcome to week 13 of my white truffle grow ? At the end of last week week I started a little defoliation of unnecessary or sunlig blocking leafs. No stress reaction at all, she continues to bulk up and the first trichomes turning into amber. Also some leafs are turning "purple" or "dark" at their corners. I think the autumn has begun :) She still looks vivid and frosty af.
Likes
10
Share
@Shefman93
Follow
5 more weeks left on the schedule for the veg cycle, growth has been amazing with no signs of stress. I am also using recharge at every watering at (1/4) strength.
Likes
54
Share
@BudXs
Follow
"Chugging" along this week. Weather is hot, girls are loving the all time drip system. Forgot that my nutes and hot sun dont mix well and created a bad case of algae. Will monitor more often and maybe increase the drip flow
Likes
7
Share
@Suchy329
Follow
so weit alles schick hat ein guten Sprung gemach hoffe bleibt so und das sie weiter so gut kommt
Likes
9
Share
@SgtDoofy
Follow
Jun 10: Watered less than half gallon of Ph 6.7 water. Jun 12: That watering really gave a growth spurt! Bumping the humidity up to a max of 81% til early flower. Jun 13: Plant is tall enough to tie down the main stem to the side. Once the other stems get longer, I'll tie them down to the rim of the bucket as well, to maximize light exposure. Jun 15: Buckets are getting lighter, but the soil is moist, meaning my humidity was too high. That lead to some mold and algae that I will treat with spray Neem oil. Smells terrible, but should do the trick. Lowering humidity to 65% for a bit, then will probably get closer to 75% over the next few days. Decided to top, since the plant is getting big enough to support it!