


Likes
14
Share


@Professor_Chaos
Follow
Beginning of week...
This plant has been growing for over a month now. I didnt expect it to come out this amazing.. So now I am creating the grow diary lol. I flipped it to 12/12 this week. She was just going to be LST'd but the top had broke off while making adjustments to the LST one day earlier on.. Damnit.. She's still gonna make some dank ass nugs tho! After 3 - 4 days of 12/12 she has already begun her stretching!
End of week...
She has stretched some this week.. Not very much in my opinion.. But some for sure.. Not many pistils yet.. Some but no nugs building yet. When you cruch the leaves you have defoliated from this girl.. They have a more danky smell.. Its crazy.. Different than other strains I have grown.. I didnt expect leaves to carry different smells also!

Likes
13
Share


@Naujas
Follow
Day 70!!! This week was very hot, when the sun was shining, the thermometer showed 40°. I think her roots don't like it very much, the girl needs to be watered every day, sometimes even 2 times a day :) it was very windy, so I had to cover the girl a little so that the branches wouldn't break :) Tomorrow I'm leaving for a short 5-day vacation, then these days while I'm away I'll ask them to come and water her once every 2 days, I hope that's enough for her :) Although it was supposed to be a tropicana cookies auto, but she hasn't started to bloom yet :D :D :D could it be the seller's fault? and did the auto mix up or photo?:) good luck to everyone:)

Likes
12
Share


@BB_UK
Follow
been such a great week, temps perfect, humidity is low enough (could be lower) but is what it is! i am going to start flush next week for my girls that are ready! I've introduced calmag at this stage too as they all needed it! this sugar bomb punch looks like shell go 9-10 week flower! i have also worked on my own co2 and it works wanders so ill never go back to old products, all an expense! hope you enjoy the video too, confident you all will :} #skills

Likes
7
Share


@Sunstonedgrows
Follow
A tad late, but on Dec 20th we started flower! The pics and video are all from dec 20.
To kick it off we did a small feed (1tbsp) of veg nutrients and over the next few weeks will transition to flower blend.
So far she's taken well to the training and looks very strong overall.
Cheers til next time
-Dj Sunstone

Likes
1
Share


@Zero0
Follow
Question 1 there’s a bit of purple on the stem I kinda did a nasty job on transplanting I believe it’s that but I’d still like some input if possible
Question 2 theres a bit of yellowing I was wondering if that’s perhaps due to nutrient deficiency I do have my lights pretty far away and have them pretty low
Lastly the nutrients I added were like at the same time I transplanted I heard Gaia green takes up to two weeks for the nutrients to be available I forgot to add warm casting so should I top dress with some worm casting?

Likes
2
Share


@CuriosityWebster
Follow
The plants are really throwing lots of hairs
Some of the buds almost look white ⚪️
Rqs sweet skunk is starting to fatten up
A little more stretch out of fast buds mystery #2 gonna do a heavier defoliation on it soon
Gonna give sweet skunk about 3-4 more weeks, maybe more, just gonna play it by ear


Likes
1
Share

@Skipi007_CZ
Follow
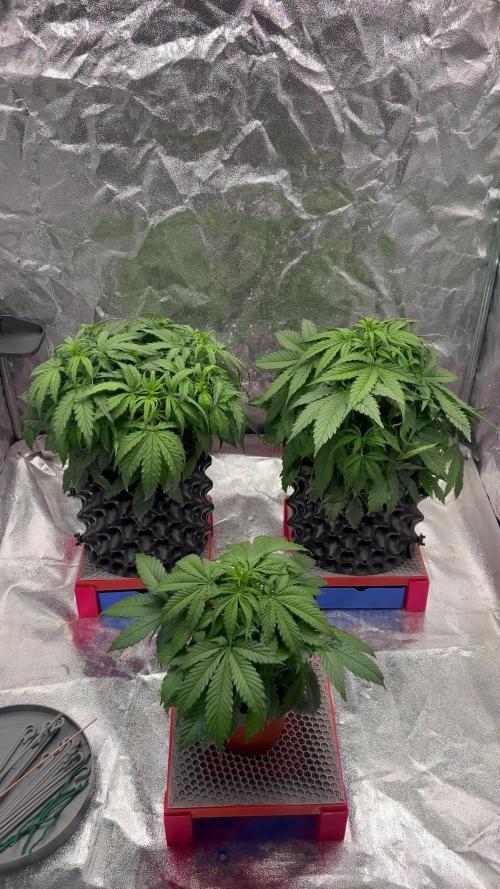
The girls are already starting to bloom, I think they have doubled in size, they look really nice and healthy, they have started to drink a lot, plant no. 1 - 0.9 l, plant no. 2 - 0.7 l, and no. 3 - 0.4 l, about 0.150 ml will flow out of 1 and 2, 3 - 50 ml. I hope they will grow nicely like this in the coming weeks.
Likes
6
Share


@girlsgrowguide
Follow
This week I switched up the lights. I had been using 6500k T5 bulbs that a friend gave me for free. I planned on changing two of the bulbs to 3500k when she went into flower but I could not find the right length in the 3500k. I decided to purchase a Parfactworks led. I installed the light on day 32 and transitioned her to the new spectrum. She is LOVING it! :D


Likes
10
Share


@greenAF
Follow
MW6Bar Controller Level 8(520w)
UVA Bars 365-370nm (54w) 10min on 50min off and 10min at the beginning of the night.
IR 730nm (26w) 10min at start of night.
Front Left Koosh The Magic Dragon #4
Front Right Tricho Jordan #5
Back Left Tricho Jordan #5
PPFD 1025-1275
6.5 pH
Feed EC
Tricho 1EC (Fade formula) Taper down to 0 by day 62
KMD 3 Switching to fade around D60
Sub EC
0-3 TJ
5-5.5 KMD
Dryback Target: 60-70%
Likes
60
Share


@SooSan
Follow
50x50x100
2x TS1000 Mars Hydro 150w (dimmé a max 40w)
2x QBmini lm301b 3000k 50w (dimmé a max 40w)
Jai donc 400w de disponible, mais à cause de la petite taille de ma box je ne dépasserait pas 150w au total.
J'utiliserais sûrement même moins...
10 plantes iront dans la box 50x50x100
10 autres iront dans la 60x40x60
1x Amnesia Lemon / PEV Seeds
1x Mango Cream / Exotic Seeds
2x Quick Sherbet / Exotic Seeds
1x Kalini Asia / Zamnesia
1x Banana Frosting / Sensi Seeds
1x Hindu Kush / Sensi Seed
1x Black Bomb / Philosopher Seed
1x Wappa / Paradise Seed
1x Blueberry / 00 Seeds


Likes
26
Share


@Rock_n_Roll_Randy
Follow
FINALLY STARTING ANOTHER GROW. MY BACK HAS BEEN FUCKED FOR MONTHS. CANT WAIT!!!! IM DOING 24 AUTOFLOWERS FOR THIS GROW AND IN 5 WEEKS IM STARTING ABOUT 20 FEMINISED PHOTOPERIODS IN MY 5X5 WITH A TSW2000 SO THEY CAN BE READY TO MOVE INTO THE 8X8 TENT AFTER THE AUTOFLOWERS ARE FINISHED. HOPE MY TIMING IS GOOD🤞🤞🤞🤞 LOL


Processing
Likes
5
Share


Just like me a lot of people would have given up on this little girl but like an Energizer Bunny she still going