
Likes
Comments
Share


@Abendkraut
Follow
Following the same nutrient plan as the previous week. Nothing out of the expected worth mentioning.
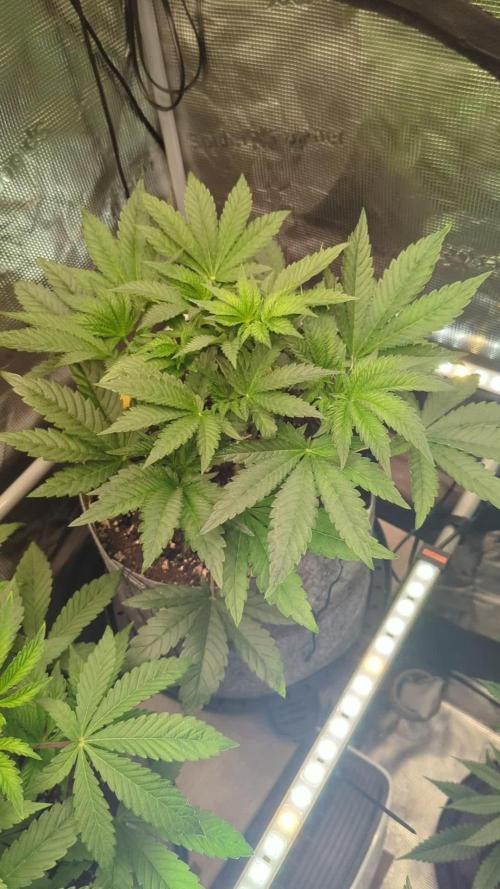
Exodus is growing wide and high using the whole surface.
13 March Update:
I have been watering everyday the plants were requiring it. Every 2nd day I gave them 1 Liter Water +( Terra Bloom 3ml/L , Sugar Royal 1ml/L), between the feeding days I provided 0,5L of clean water.
Nice flowers are popping up everywhere so it’s time to add Green Sensation to the feeding plan. I plan on using 1ml/L every other day.

Likes
31
Share


@Ghost2022
Follow
It's been a big growth spurt in the last 2 weeks. Check out my VIDEO! The lights have been moved up so they are about 12 inch from the grow. The lower wattage light has not performed aswell as the cr600 1000w. Its big brother has made much thicker, stronger and taller plants. The LST has worked miracles with this plant. So has the Voodoo juice. Will use again!

Likes
Comments
Share

@PapaTerps
Follow
British Delight - Wizard Trees
Day 41 - I've watered her with 2L of RO tap water with nutrients, mixed individually, in order, and finally pH'd to 6.3. This week, she has been moved from the veg tent, to the flowering tent, so she is now on a 12 hour light schedule. Much like the Wizard Fuel, she has already started the stretching phase of flower and has nearly doubled her size in 48 hours 👏🏻 So far, these girls have blown me away with their genetics, so impressive compared to other brands that I've grown 👍🏻 because she is stretching, I dont want to stress her too much, so I'll be keeping the training and defoliation to a minimum until she finishes her stretch and moves on to the bulking phase 🙏🏻 so far, really good!!

Likes
40
Share


@iLoveGoodWeed
Follow
Week 10 - she stop stretching finally and the high is 93cm and I can see that the buds are stretching instead which is good. Looking forward to see how fat she will be, I think another. 3-4 weeks and flush time.

Likes
51
Share


@Chumpkilla
Follow
2/17/24 - Day 103 - The flush starts today! By Thursday I'll be giving her the chop.
2/19/24 - Day 105 - Flush is going well. Buds are still plumping up nicely.
2/21/24 - Day 107 - Ok this is the last day shes at the end of the Flush. Ill start a new week tomorrow, when I open the box up at 9am its chop time! I spent the day preparing, cleaning my workspace. Gathering all my tools, gloves, drying racks, etc. Here are the last pictures you guys are going to see of her growing. Enjoy!
Processing
Likes
13
Share


@Green_Blood
Follow
On the final few days of a 10 day flush.
Will be chopping down this week to harvest and hang dry.
Really excited to try this one. The smells in the room are unreal.

Likes
57
Share


@LockDownGrow
Follow
Ok so this week I did a defoliation and a tigh down too the netting , I really was not planning on doing such a big defoliation but the leafs became thick and dense and there was almost no light penitration down too the lower branches of the plant , so she is opened right up now and the humidity and temperature has dropped loads and the air is moving alot better around the leaves and branches , I will not take anything more off her now , I have also added Cal mag too the nutrients for this week only , she is well into pre flower now but the stretch has not yet started so I figured it's no or never too defoliate and tigh them down , this grill really has grown right out this week and is unrecognisable from the plant just a few days ago ,
I am very happy with them so far and being new too all this it's all very exciting ,
Thanks for looking :)
Likes
6
Share


@CalGonJim
Follow
11/10 12AM MONDAY
11/11 626AM how about a WWII German Hero Grow?
11/11 255PM great news neck bleeding so no plant work today...how am I not dead yet??, this is bullshit.
11/12 440AM THE DEMON REVEALED ITS SELF TONIGHT. BIG MISTAKE!!!! GREAT NIGHT FOR ME.....DARK DEVIL AUTO IS IN MY LUNGS AND BLOOD RIGHT NOW AND ITS ALL HAPPY!!! GOOD LUCK FOR ME, DEMON HUNTERS PARADISE!!!
11/12 501AM. DDA is PERFECT RIGHT OFF THE TREE. SOMETHING AUTOFLOWERS ARE GREAT AT IS SMOKING WITHOUT HAVING TO CURE AND DRY. ITS 100 TIMES BETTER WHEN I DO, BUT ITS GOOD FOR MEDICAL USE AND NOT OVERLY STRONG WITH ALL THE FLAVORS OF BERRY AND VANILLA!!!!!
11/13 944am....holdy flushing shirt that was hard....major flushes...but my neck not hurting so GREAT!! Ordered wound care, Bactine, medical supplies....doing ok.
11/14 1258AM DARK DEVIL AUTO.....I CAN NOT BELIVE I CAN GET SEEDS FROM SPAIN, AND THEY ALL GROW LIKE THEY WERE TAKEN RIGHT FRM THE MOUNTAINS, SO STRONG AND NICE FLAVOR EVERY TIME.!!! 106AM DDA DRIED OVERNIGHT AND ITS ALRADY STRONGER THAN I AM USED TO!!!!!! I NEED TO MIX THIS WITH CBDK. THIS IS WHY I GROW MY OWN, STORE BOUGHT WEED IS WEED...ITS JUNK. THIS CAN CURE ALMOST ANYTHING AND THE ACT OF GARDENING WILL BE BETTER THAN ANYITNG ELSE THAT WILL PREPARE YOU FOR YODR TIME TO DIE. I KNOW WHEN TO HARVEST AND IM GOOD WITH IT.
11/14. using the vaporizer as a hot oil air machine... everything smells like vanilla basil cedar lemon and WEED LOT AND LOTS OF WEED!!!!! GREATEDST DAY OF MY NIGHT.
11/14 237AM A RAINBOW OF DARKENSS not the gay one losers HAS DECENDED UPON MY LEAVES OF DISPARE!!!! PURPLE, RED...GETTING THE COLOR FADE NOW!!! AMINOS WILL LINGER LIKE DEATH UPON THE LEAVES PUMPINNG NITROGEN INTO THE PLANT CAUSING LEAFY BUDS.....A DEMONIC CURS ONLY GOD, OR MAYBE DEMI-GOD BUT SOMETHING REALLLY HIGH UP THERE..... I forgot what I was talking so drastically about!!!!
11/14 2:53 AM I think my advanced nutrients connoisseur bloom might’ve expired or gone bad or evaporated or cross contaminated. It’s pretty old. I’m getting tip burns on leaves when I use it even at low EC so I think I will buy some new stuff and I might try their powders. It goes a long way 1 L can last me two years sometimes even longer for the grow.👍 but I think it expired so I’m gonna have to try something else and maybe in a smaller container. 🚨
11/14 NosfurGardenertu......Vampire gardener..... maybe I need more caffeine and ultra methyl blue...
11/15 dressed as a 1 cent coin went shopping at the deli, got lots of hugs.
11/15 917pm. FORGOT CAL/MAG....ALL THE AMINOS AND LOW DOES NUTES MADE FOR SOME CAL/MAG PROBLEMS. CORRECTING FOR THEM NOW. BPP smells not so good...there are soil bugs now


Likes
5
Share


@Rizza78
Follow
Good week of growth. NeXT defoliation on the 11th. Will strip near 75% of the leaves. Can’t wait for the new growth! Going to start adding Bud Candy and Carboload on my next feedings.


Processing
Likes
6
Share


@Jack_Greenstalk
Follow
in veg to allow humidity to be high I had plants on risers and left water in the bottom tray of tent after feeding. I cleaned the tent and reintroduced drip trays under pot risers and now I shop-vacuum all water out of drip tray to keep rh lower for flower. also increased exhaust from low to high and added a 4 inch booster fan to bottom of tent as intake to draw dry air in.
sour 76 #5 (fastest largest grower) was male got pulled out of tent but later eaten by my cats :( rip didnt get any pollen collected
Likes
3
Share


@spacetimeman
Follow
At the and of the week all lST supporting thenfs were removed: canopy is formed and all the stems are hardened.
The progress is very slow, but I like how the plant looks, it seems to be healthy and has more flowering points than I've seen on any autos I grew before.
I also adjusted the fertilizers ratios to get more optimal for flowering stage and added pH-down to improve the solution assimilation.

Likes
2
Share


@Cavusesco
Follow
Block 1: Ali
i will do nothing with this plant. He is the Boss the highest
Block 2: Abbas
Topping at 5.node
Week 4
Block 3: Latif
Topping at 6. node
Week 4
Block 4: Vince
Removed 8 big leafs which are made shadows to the buds


Likes
3
Share


@MadBumbleBee
Follow
1 OG kush Shows Sings of Nitrogen Toxicity (cut most leafs off)
Soil PH: 5.7 - 6.8 (lowest and highest reading)
Flushed all plants with microrayza fungi
Watering with organic bio activated tea every 3 days (potassium = algae, bokashi = nitrogen, worm hummus and molasses)
Day 28 to 35
Day 32: Accidently cut off main stem of a very healthy OG kush plant, let´s see how it bounces back in a few days. Perhaps I just HST´d by accident
Day: 32: Some of my autoflower GSC already started to flower
Day 32: 3 OG kush plants are weak, one has a weak stem, second one had a problem since seedling (grew into the ground), third one i cut off main stem by accident
Day 34: OG kush plant was removed after many tries of getting it back to its feet

Processing
Likes
3
Share


@Fergie
Follow
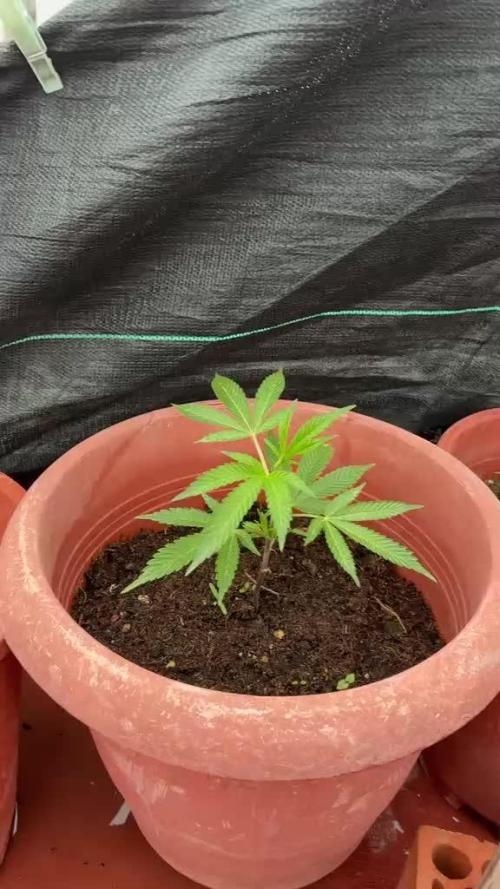
Hey guys so here is my blue cheese mutant . Finally bushing right out and the pre flower is well under way . Really looking forward seeing how the lady turns out as I have always had good results mutants in past .
Likes
51
Share


@MadeInGermany
Follow
Info:
Unfortunately, I had to find out that my account is used for fake pages in social media.
I am only active here on growdiaries.
I am not on facebook instagram twitter etc All accounts except this one are fake.
Flowering day 1
since time change
to 12/12 h.
Hi guys :-) .
The time has finally come 👍
You have been switched to 12/12 hrs and are ready to flower.
Of course, cuttings were cut beforehand to keep the genetics.
For 4 days now she has also been getting Fast Buds from GreenBuzzLiquids.
They were also sprayed again with GBL Fast Plant spray.
She is very healthy and I am excited to see how she gets going again in bloom :-).
This week it was poured twice with 1.2 l each time (for nutrients, see nutrient table above).
Then I filled canisters with fresh osmosis water for the next few weeks 👍.
The tent was cleaned and every plant was checked for health.
At the moment I am tinkering with the ventilation because there are currently 4 fans with 4 activated carbon filters running, which I want to make more efficient by putting a hose through 2 tents.
These are the things about which you desperately at the beginning but learned from them in the end.
I wish you all a nice week.
Stay healthy 🙏🏻
You can buy this Nutrients at :
https://greenbuzzliquids.com/en/shop/
With the discount code: Made_in_Germany you get a discount of 15% on all products from an order value of 100 euros.
You can buy this Strain at :
https://www.exoticseed.eu/
Type:
Herz Og
☝️🏼
Genetics:
Larry OG X Kosher Kush
Indica 60 % / Sativa 40 %
👍
Vega lamp:
2 x Todogrow Led
Quantum Board 100 W
💡
Bloom Lamp :
2 x Todogrow Led
Cxb 3590 COB 3500 K 205W
💡💡☝️🏼
Soil :
Canna Coco Professional +
☝️🏼
Nutrients :
Green Buzz Liquids :
Organic Grow Liquid
Organic Bloom Liquid
Organic more PK
More Roots
Fast Buds
Humic Acid Plus
Growzyme Big Fruits
Clean Fruits
Cal / Mag
Organic Ph - Pulver
☝️🏼🌱
Water: Osmosis water mixed with normal water (24 hours stale that the chlorine evaporates) to 0.2 EC. Add Cal / Mag to 0.4 Ec Ph with Organic Ph - to 5.8

Likes
Comments
Share

Likes
119
Share


@Roberts
Follow
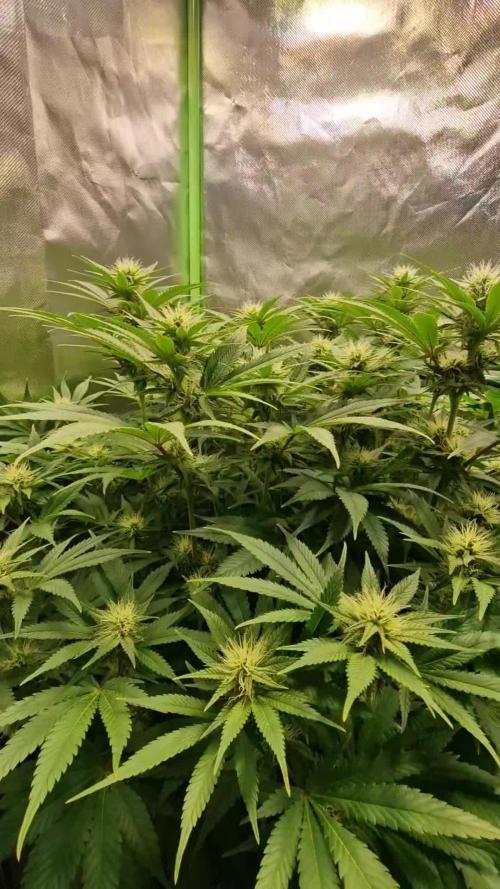
Divine indica has grown really well. Her trichromes were just first starting to get cloudy yesterday. About a half and half of clear and cloudy. I figure she has abour 10 to 12 days left. I will be switching her to ph water in a few days during ripening. She has a good aroma and is looking excellent. She has been loosing a few leaves on the bottom due to a slight nitrogen deficiency. Which is okay during flowering. Nitrogen can hinder bud development. So low does in flowering is ideal. Thank you Divine Seeds, and Spider Farmer. 🤜🏻🤛🏻🌱❄️
Thank you grow diaries community for the 👇likes👇, follows, comments, and subscriptions on my YouTube channel👇.
❄️🌱🍻 Happy Growing 🌱🌱🌱
https://youtube.com/channel/UCAhN7yRzWLpcaRHhMIQ7X4g
