
Likes
Comments
Share


@gottagrowsometime
Follow
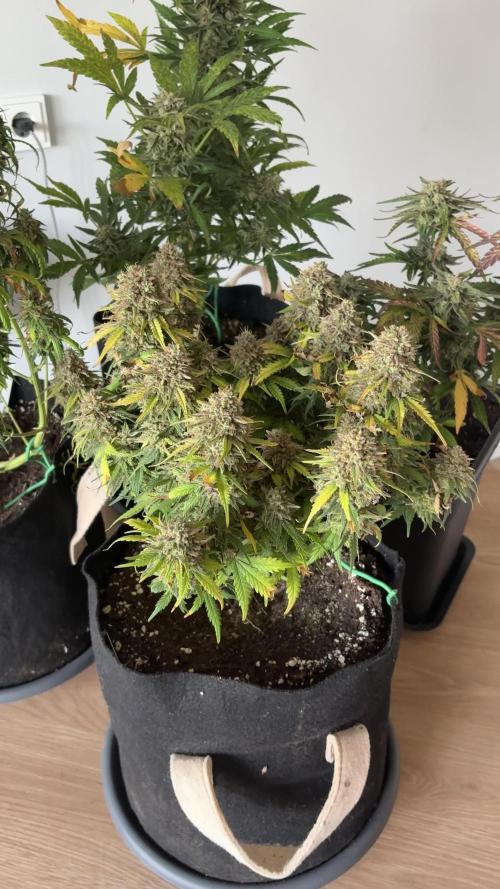
Welcome to my Black Jack b sponsored by Sweet Seeds 2 yrs ago nearly.
Veg Weeks & Pre/Post Pre Flower
Weeks 7-9
She was really healthy during her entire veg period. Moving into pre flower she didn't do any excess stretching. Plant was doing very well moving into pre flower it took a good few weeks for her to flip but it was building up a good base up and down the nodes. I used plagron right through half of flowering possibly more. For the last 4 weeks I moved all my plants to Xpert Nutrients.
MAINTENANCE
I carried out a good bit of work making sure all parts of her was getting light (as much as she didn't get, it was more then enough to get A grade bud just like it was done under a 100w). I stripped a lot of shoots coming into & during pre fower. So when coming in to fattening all her energy went into making buds that were brought to harvest. Knowing light would be an Issue (lack off) i made sure to use all my skills to move energy through a plant. After pre fower was over (plants nodes stop growing up) and I left her a few days for the leaves to take in energy building stigmata. Then I done 10-15% defoliations for mid wk into fattening and beyond until I felt was enough removed (3-4 stages). Now on her last few days I took loads of leaves off to help ripening. She's 95% cloudy and 15% or so Amber. I had to give 10l of water to flush the nutes I had given her. 4l was given and ppm was 650. So I had to give another 6L to get the ppm down to 250 area. 3 days its been under light for 11hrs with 30m of UV-A doses from 65cm away (they are attached to my light IR/UV45)
FLOWERING/RIPENING WEEKS
Plant moved very nicely through fattening. Buds are lots but whets there is pretty darn good for been at the side of a FC3000 300w light in a 1m2 tent doing many other plants. And this been by far been under the best part of it. It sat on the outskirts as this fem is one of my 1st 5 I started together with 7 autos in phase 1 of my 6 phase crop with 10-15 plants per phase. Took (NUMBER 4 this 1 is). 14 weeks from seed. And she's been through a hard flush. As the last 4.5 weeks she's been on Xpert Nutrients.
NUTRIENT GIVEN
So I know tats a large list. But as I updated my a lot of weeks into 1. I left on the list what was given. All of plagron was given through most of the grow right through to the middle of fattening and then I switched it (all my plants to Xpert Nutrients bloom nutes). And even then, I normally give more than 2-3 nutrients in 1 feeding 2-3 day window. Its important tat a plant take up these as individual so I typically leave a few days or at least 1-2 water feeds (or low ec feeds such as an enzyme, or calmag to help break down any excess nutrients left behind from last feed)
I added my SE5000 and have this 60+cm away just finish off the ripening process. Pant has a good amount of bud. And really like this breeder. What have I been missing out on
Sweet Seeds both plants are dreams to grow.
Thanks to my sponsors. Xpert Nutrients have given me a gift for you guys.
!!DISCOUNT CODE FOR XPERT NUTRIENTS!!
CODE FOR 15% OFF & FREE SHIPPING IN EU:GGST
!!DISCOUNT CODE FOR XPERT NUTRIENTS!!
Much appreciation to Sweet Seeds. Seeds are nearly 2yrs old. I've had them for nearly all that time. They were packaged within a month of me getting them. Shout out to Mars-Hydro for their FC3000 & IR/UC45. Had to break out my SE5000 as nice as this plant is its needs fell short been in a tent with 15 other plants. My se5000 is giving 55k lux (that's the lowest level BTW in my corners I just about got that mid field using my 300w.)

Likes
9
Share


@Kayotic
Follow
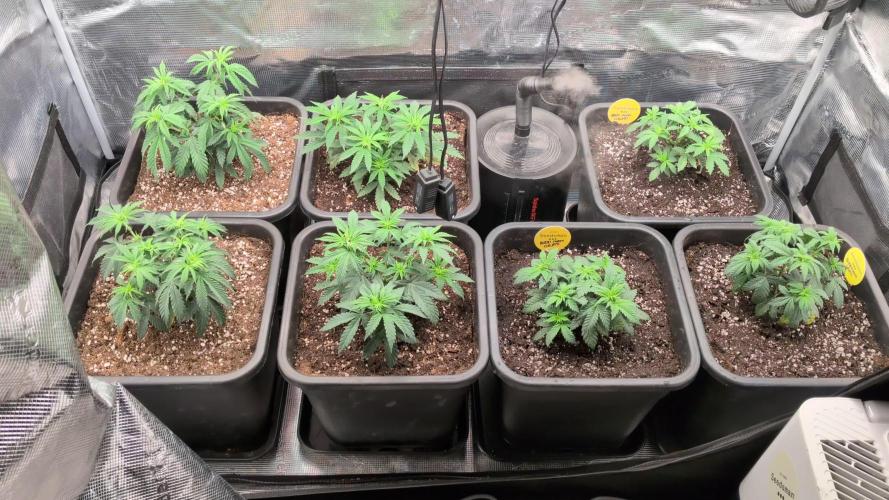
* Day 46
* 3 out of 5 are flowering
* Moved #1 to the 3x3 with SE3000
* Grow Big and Tiger Bloom
* Smelling fruity and sweet
Likes
6
Share

@ojulhao
Follow
The Jack Herer is dense and frosty colas, covered in trichomes with a nice mix of cloudy heads. Compared to the Northern Lights, it clearly had more weight and resin, making the harvest very satisfying.
For the last days, I only gave CalMag and plain water adjusted to pH 6.3

Likes
93
Share


@MadeInGermany
Follow
Welcome to the
Zamnesia Spring Cup 🏆.
Day 62 since time change to 12 / 12h
The last week before the harvest has come 🎊.
Hey everyone 🤗.
The time has come.
The last days and hours have struck for this great lady 😃.
In the coming days she will move to the darkroom and spend another 48 hours there in complete darkness 😋.
Of course, there will be an update before the big update after fermentation 👌.
In the last update there is again a detailed description of the individual strain. I'm really looking forward to finally being able to try the strain 😄.
It looks beautiful and smells extremely tasty 😍.
I wish you all a lot of fun with the last update before the harvest, stay healthy 🙏🏻, and let it grow 🌱🍀
You can buy this Strain and Nutrients at :
www.Zamnesia.com
Typ:
Sour Diesel (Zamnesia)
Zamnesia Spring Cup 🏆🏆🏆
Type:
Runtz
☝️🏼
Genetics:
Zkittlez x Gelato
👍
Vega lamp: 2 x Todogrow Led
Quantum Board 100 W
💡
Bloom Lamp : 2 x Todogrow Led
Cxb 3590 COB 3500 K 205 W
💡💡☝️🏼
Soil : Canna Bio
☝️🏼
Nutrients : Monster Bud Mix
☝️🏼🌱
Water: Osmosis water mixed with normal water (24 hours stale that the chlorine evaporates) to 0.2 EC. Add Cal / Mag to 0.4 Ec Ph with Organic Ph - to 6.0 - 6.3
💦💧
Processing
Likes
11
Share


@growsmoke420
Follow
Rolling through another Week I've noticed Probable Nitrogen Toxicity in My Blackberry and slight Nutrient Burn on the Blackberry n LSD-25 in this Grow. She's Growing BEAUTIFULLY with no Issues to Note but I want to be on the Safe Side so She'll get ONLY Liquid KoolBloom to Help Her Bud Development. I'll consider further Nute use as I see how the Week goes.


Likes
1
Share

@CalGonJim
Follow
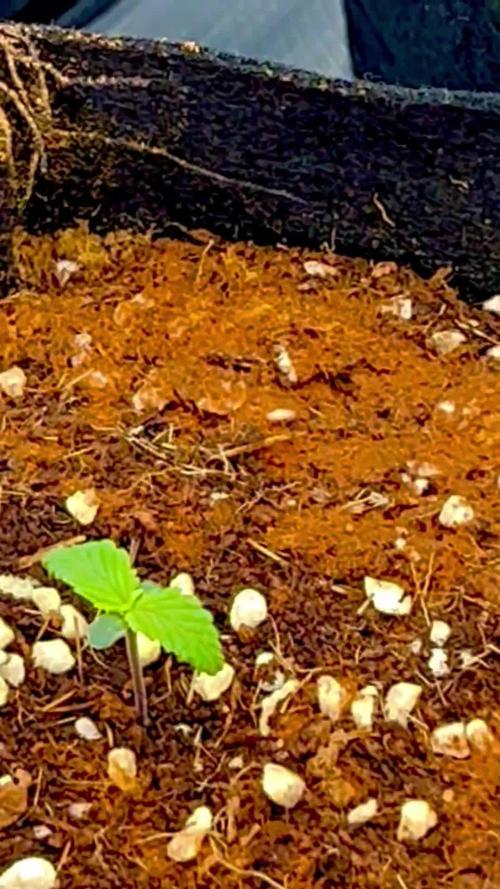
7/13 1:16 AM Monday I managed to kill Mendo Frost. I don’t know what happened. I tried to bring in some slaves to help me with the garden, but I found out they don’t allow that anymore. I don’t know when that law was passed, but it’s gonna be a lot of work for me now🤬
7/14 8am When to add Cal-Mag (and other nutes) Wait until the plants are noticeably bigger (2–4 true leaf sets, stronger stems, active growth) — usually 7–14 days from now depending on conditions.
Then start with a very light dose: ¼ strength Cal-Mag (e.g., ¼–½ tsp per gallon) + a very mild grow nutrient.
Coco growers often run 0.5–1.0 mL/gal Cal-Mag early on once feeding starts.
Keep an eye on pH after adding anything — Cal-Mag can shift it.
7/15 Sow Right Lavender Seeds???....more like Sow WRONG Seeds bitches...haha...Its a Lavender seed Joke!!! The only one of it's kind in the WORLD. Serene seeds and Oregano Republic Seeds for Lavender, the rest are about the same... Also Jar Jar is into Reva wearing Santa Hats now....total freak show!!!
7/16 8:36AM These 2 are just getting freaky deeky, i dont even want to know. .....1PM Mycorrhizae — Yes, add it now while they’re still young and before nutes ramp up. It’ll help the surviving plants build resilience without adding much (if any) burn risk. Mix it gently into a low-EC or plain pH’d water feed and apply carefully.
7/18 1:59 AM I put cinnamon down yesterday to keep bugs down. I just like the way it smells really they’re all doing pretty good now.


Likes
5
Share

@TrickzGrowz
Follow
Servus Moin!
Die Bluzcotti wurde heute getoppt da ich 4 schöne Triebe gesehen habe, und mich jetzt auf diese konzentrieren werde.
Likes
14
Share


@Cultivatelove21
Follow
Happy ladies this week! Slacked a bit on my defol this week so we are looking a bit like a jungle! Happy growing friends! ✌️🏻😊
Likes
3
Share


@Eauderay
Follow
This week went fast, she is flowering at a nice rate, leaves not too damaged, just the tip drying of under hot super hps and fans, so just removed all the old damaged fan leaves, cut in half those shading under growth and tucked those healthy one when possible. She looks greyish in strong light compare to the other strains, a true grey back gorilla lol, trichomes all over buds, smell is so interesting, pine, lavenders and citrus with some other terpines blend I cannot identify yet. Fed her some Epsom salt only this week.

Likes
31
Share


@XperencdGmanXG
Follow
well we are through the stretch and fully into the flower now. They look really nice, I hope I have enough P and K in the soil, I may need a Banana tea halfway through but only time will tell.

Likes
35
Share


@eldruida_lamota
Follow
Vamos familia que ya actualizamos la cosecha de estas Frosted Guava de Zamnesia.
Vaya flores que se han marcado repletas de tricomas, parecen escarcha y las flores se marcan aromas muy tropicales, la verdad que únicos.
Es una variedad bastante fácil de cultivar pero al tener un periodo de floración algo más largo, hay que estar pendiente de alimentarlas bien, gracias Agrobeta en mi sala es posible.
Temperaturas máximas en 24 y mínimas en 20 y una humedad estable en torno al 36%.
Las mantuve 10 semanas pero facilmente si se quedan 11 tampoco estaría mal, yo las vi bien maduras y ya tenía tricomas ambar así que les di matarile.
Os comento que tengo un descuento y para que compréis en la web de Zamnesia de un 20%, el código es ZAMMIGD2023
The discount 20% and the code is ZAMMIGD2023
https://www.zamnesia.com/
Agrobeta:
https://www.agrobeta.com/agrobetatiendaonline/36-abonos-canamo
Mars hydro:
Code discount: EL420
https://www.mars-hydro.com/
Espero que disfruteis este diario, buenos humos 💨💨💨
Likes
25
Share


@Brebzzz
Follow
I top one to see What happened, i gave her 8 liter per week to respect the cycle dry/wet hôpe all its good
4/12 end of the 4 week
Begin of a good and weak smel
Likes
6
Share


@Krissci
Follow
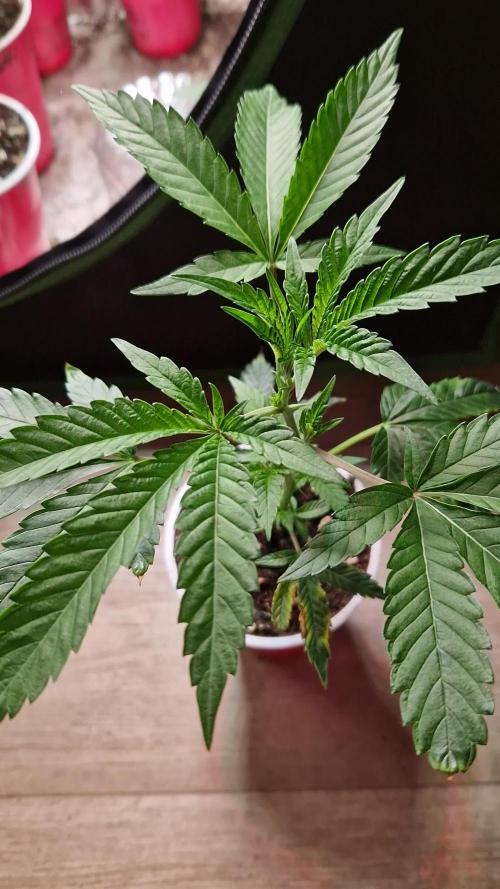
Day 1 ....add additional soil, water and 1st topping
Day 3 - checked for 2nd topping
Day 5- watering....strong stems already
Likes
27
Share


@CannbellFarms
Follow
I’m overjoyed with the phenos this strain is producing, strong vibrant purples with some serious flavour profiles!
Scent Profiles we have:
Candy Lemon Sherbet 🍬🍋
Sweet & Piney Diesel 🍭🌲⛽️
Sweet & Tangy Tropical Punch 🏝️🥊
Alongside this, these beauties are the frostiest and the most insanely dense koala looking nugs I’ve ever produced!


Likes
12
Share


@Kenpowarrior
Follow
●heavy defoliation done and 2 days drying out they were to wet. Then i got some brown tip leaves.😔😟
●got drinks and food again.(24/1) hope the rest will not do the same.
●honeys still weak🤔
●wrong settings of nutriens on diarie. All set to 2,5L before. Changed it to 1L
●when white is your new favo color!🤤😎👍❄️😁
Likes
10
Share


@Ktims420
Follow
One is really budding faster than the rest but all the girls are doing well. Next to no training on these girls due to limited space but they all are filling in nicely. Very happy with the west coast ✌️🏻💚