The Grow Awards 2026 🏆 


Likes
Comments
Share


@Joah420
Follow
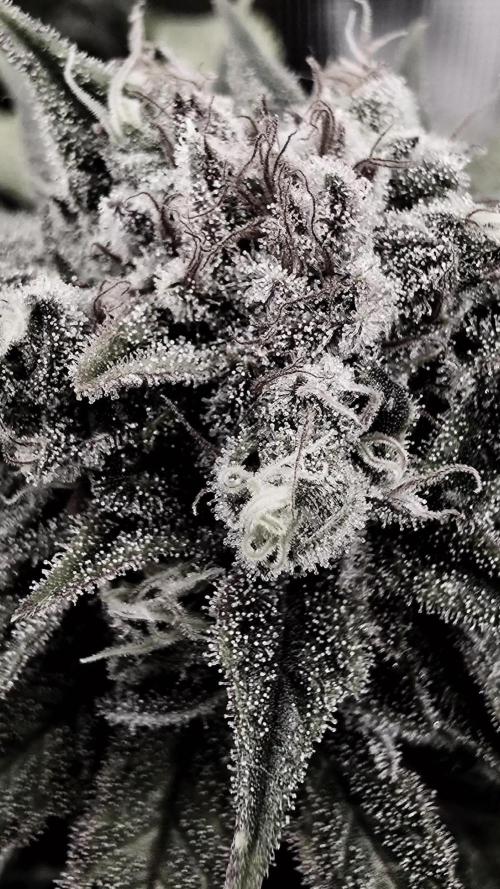
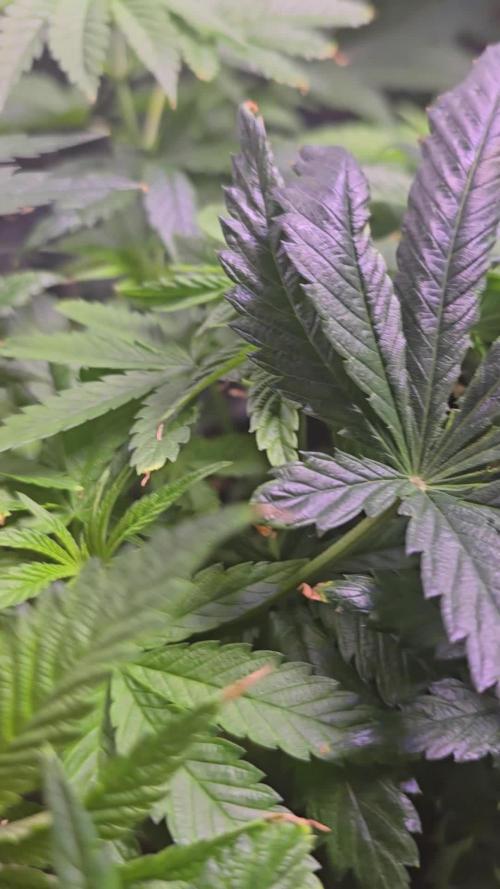
Day 70 in soil 😁😁😁 I never thought I'd make it this far tbh! I stopped giving the ladies nutes and have just started feeding phed water, and they seem to have all really taken well to it, some last week showing signs of problems which I think was due to the last feed, minor flush and all seem to be okay I think.
The smell now is very strong when the tents open a lovely fruity aroma, touching the buds leaves the hands covered and stinking of a fruity lemon/citrus smell (could live with the smell, unreal).
The buds have all started to fatten up massively over the last 14 days, some plants producing some amazing colours, all plants have their own difference however all producing equally as good bud sits and growth. I have no past growing experience but im glad I went for dinafem critical 2.0 after some research prior they have been forgiving throughout my learning stages and have been easy maintenance so far!
Will get a few close ups with the jewlers glass tomorrow, thinking off letting them run another 7 days until harvest what's everyone's opinions?
Thanks for looking, have a great weekend :)!!
*updated new photos today day 74 in soil*
Likes
8
Share


@DeepRootsGrowTrees
Follow
Week#5 Baby Boom By Kannabia Nov. 25th- Dec.2nd.
Baby Boom has grown at a rapid rate this week growing to 15 inches and also growing side branches with multiple tops and has started to flower this week.
Likes
3
Share


@Organic473
Follow
Transplanted her to a 5 gallon pot. Gave her some root stimulator, fed her some nitrogen and just look how lovely they are taking off, my plans are to veg her for a very long time.
Likes
10
Share


@SkunkyDog
Follow
Hallo zusammen 🤙.
Sie wächst sehr schön und macht keine Probleme.
Das ist die letzte Woche in der Vegi am Montag geht es in die Blüte.
Rabattcode für den BIOTABS-Webshop https://biotabs.nl/en/shop/ GDBT420, damit erhalten Sie 15 Prozent
Processing
Likes
5
Share


@blendmedmedman
Follow
she is still up and kind of in limbo. she is under the big led 800 watt and has been getting blasted with the uvb light for around an hour a day. waiting for the explosion to happen, so has been a week in 12/12 cycle not much stretching yet she is 22 inches. I have been pinching the top Shute so the sides keep up so I will see. other wise healthy grow so far but only time will tell with the final product.
Likes
17
Share


@CanadianFillmore
Follow
Howdy growfessors! Welcome to week 7F in the 4x8 theatre. The ladies are hungry, I've been increasing their feeding and they still want more!
Defoliation performed, removed a lot of small dead or dying leaves from the lower branches.
Not much else to say, thanks for stopping by growfessors 👽🌳💚
Likes
3
Share


@KushHunter
Follow
Kleines CalMag problem.. und Zeitschaltuhr für eine Nacht ausgefallen. 🙄😅🍀 mal abwarten...🚀
Likes
8
Share


@Dendegrow
Follow
🎭 Monster Marker – Week 5 🌱
She fully recovered from the neem oil burns 🌿🔥 (caused by the timer accident ⏱️😅).
Now she’s growing strong again, smelling absolutely delicious 🤤💜.
The Solix clearly boosted the roots once more 🚀🌱, and in the next 1–2 weeks she’ll be ready to enter bloom 🌸✨.
Follow for more updates 🙌📸.
---
🎭 Monster Marker – Woche 5 🌱
Sie hat sich komplett von den Neemöl-Verbrennungen erholt 🌿🔥 (durch den dauerhaft eingeschalteten Zeitschalter ⏱️😅).
Jetzt wächst sie wieder kräftig und riecht absolut genial 🤤💜.
Das Solix hat die Wurzeln wieder extrem geboostet 🚀🌱, und in den nächsten 1–2 Wochen wird sie in die Blüte geschickt 🌸✨.
Folgt mir für weitere Updates 🙌📸.
Likes
56
Share


@Wicked_Stix
Follow
I had to kill one of my photoperiod plants because it was hermie so I decided to move the FBTO1 and FBTO13 into the room with them since I had space in there. So now they are on 12 hour light and they seem to be much happier with the environment. This will be my first time flowering autos on 12 hours so curious to see how they do.
Nutrients per gallon
.5 tsp maxigro
.25 tsp armor si
.25 tsp calimagic
.1 tsp 90/10 humic/fulvic acid
Likes
10
Share


@AsNoriu
Follow
Day 15. Girls got dried up again, but i transplanted them !!! Now in one day they stretched, happy and all will go as diamond ! Think i lost one week at the end of grow with all those hiccups ...
Pots 30 liters, were topped up with Biobizz All mix soil 80% and Biobizz Worm Castings 20% , each girl got 600 ml of water.
Big pots sorted low humidity too , now i have too high even, but exhaust is sorting excess..
Light is working well, but ... coverage for 3 plants is impossible, so for veg i still with help of pot rotation will manage, later ill plug one of my quantum boards as extra.
For two plants TS1000 would be perfect in veg, for flower still its one plants light.
Money wise its a huge grab ! Less than 100£ for 150W with dimmer ... Honestly impressed with it , maybe next week i wont mention it , but .... ;)))
Tent is doing her job too, perfect size for 2-3 plants, even 6 inch fan fitted perfectly !
Strawberry looks tallest from all, will need some LST soon.
Happy Growing !!!
Likes
5
Share


@Mrg7667
Follow
Final week! I am starting the flush process at week 8 so going to do quarter nuts for 2days then half then 1/3 and then finish with 2-3 days water
Tricombs where about 75% milk rest where clear maybe a few random turning amber
She really must have put on weigh this last week because she is sagging hard now!
Likes
7
Share


@eldruida_lamota
Follow
Que pasa familia, vamos con la segunda semana de vida de estas Black muffin F1 de Sweetseeds.
Vamos al lío , las 4 semillas que germinaron con éxito se colocaron en macetas de 0.6 litros y asomaron 4, 100% ratio germinado.
Realmente necesitaré 3 plantas por variedad fast, así que retiraré la más pocha.
El ph se controla en 6.2 , la temperatura la tenemos entre 20/22 grados y la humedad ronda el 50%.
Hasta aquí todo, Buenos humos 💨💨💨
Likes
8
Share


@skaterblasted
Follow
Days 99 - 105 (from sprout)
8/30/24 - 9/5/24
Raised light above canopy of The Good Shit - PAR on main tops is 800-700+ while remaining lowers are seeing closer to 450-500
Loompa's Headband x TK fading to a close this week - trichome check starting to show amber on the bracts
Sweet 16 S1 now starting senescence and a little fading on some fan leaves
The Good Shit showed signs of some overwatering, so a newly made FPE was added to feed schedule to assist the microbiology
Light schedule lowered to 10 hrs this week
IPM: Applied enzymes (tweetmint) at a rate of 0.5 fl oz to 1/2 gallon and sprayed on cover crops + mulch throughout the week. Significant decrease in pest population, now needs a high quality compost top dressing for long term correction
Processing
Likes
1
Share


@Teddy01500
Follow
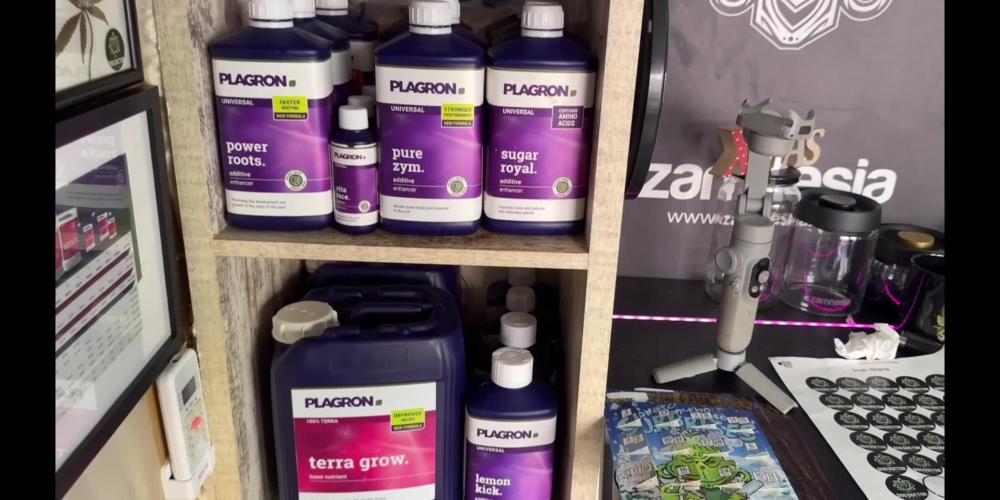
Bonjour à tous, ces derniers jours ce sont bien passé pour mes petit bébés elles grandissent doucement mais sûrement.C’est la première fois que je travail avec cette gamme de produits (je vous est mis des photos des produits 😉) pour l’instant j’en suis satisfait après, il faut voir le résultat final ce qui est moins facile 😂. Mes petit bébés commence leurs 5ème semaine (je me suis trompé d’une semaine 😕 désolé 😉) trop pressé!!! 😂 de mettre de nouvelles photos 😜. Je vous dis à là semaine prochaine vivement 😉 bonne journée à tous. Je vous remercie 😉.
Likes
12
Share


@garden_of_iain
Follow
Really starting to look good!! Seeing some Calcium issues, probably some lockout because I've been diligent about dosing Cal-Mag. Performed a 6 gallon flush with Bush Doctor Sledgehammer PH'd to 5.8. Excited to see these buds plump up!
Processing
Likes
21
Share


@LittleBigTrees
Follow
Plucked a few more leaves but other than that just feed them this week including bloom.
Also gave them some rice starch (from boiled rice water collection) on day 42 as a boost for the microbes 👍
Turned the IR off now and turned up to 34000lux
Likes
4
Share


@DogDoctorOfficial
Follow
LSD × Zamnesia — Week 6 From Seed
(Week 2 of Flower / Early Pre-Flower)
Quick recap for anyone just joining
We’re at Week 6 from seed, which we’re counting as Week 2 of flower. Plants were grown 12/12 from seed, with only leaf tucking and very light bending, no topping, no hard training, no defoliation so far. The goal with this run is maximum natural expression of the genetics, not shape enforcement.
This week marks the transition into pre-flower: stretch is active, structure is being decided, and the plants are still very much setting their architecture.
⸻
Room & Environmental Conditions (Stabilized This Week)
After some fluctuations earlier, conditions are now much more stable, and the plants are clearly responding well.
• Temperature: ~27.5 °C
• Humidity: ~65%
• CO₂: ~900 ppm
• PPFD: ~600–850
• Smaller plants: ~600–700
• Taller plants: up to ~800–850
• Plants are managing light by growing into the photons naturally
• Nutrients:
• Switched from Plagron Terra Grow → Terra Bloom
• Following the Plagron feeding schedule
• This was the only change made
• Watering:
• pH: 6.5
• EC: 2.4
• Root / Reservoir Temperature:
• ~17 °C (a bit on the cold side, acknowledged)
• Plants are adapting well and showing no negative response so far
⸻
Plant Observations — LSD × Zamnesia
Honestly… these girls look outstanding.
Even though LSD is often described as a more indica-leaning hybrid, these plants are expressing a strong sativa-style structure:
• Tall, upright growth
• Dominant central main stem
• Side branches present, but clearly secondary
• Very uniform behavior across all plants → strong genetic consistency
Each plant is showing roughly 12–14 nodes, with:
• Lower branches well developed
• Side branches about half the size of the main stem
• No signs that side branches want to overtake the main cola
This is important:
👉 this is not a training issue and not a phenotype split
All seeds are behaving the same way, which tells us this is genetic expression, not grower influence.
⸻
Training & Defoliation — Why We’re Doing Nothing
There has been:
• ❌ No topping
• ❌ No hard training
• ❌ No defoliation
Only:
• ✔️ Leaf tucking
• ✔️ Very light bending when needed
Why?
Because at this stage, we want to:
• Let the plants decide their final structure
• Observe whether this genetic wants:
• One dominant main cola
• With several secondary colas supported by under-canopy lighting
This run is about listening, not forcing.
And with under-canopy lights active, even those secondary branches are getting meaningful light, which should pay off later.
⸻
Where We Are Right Now
• Plants are still in pre-flower
• Stretch is ongoing
• Bud sites are forming, but structure is not finished
• Each plant is moving at its own rhythm, which is exactly what we want to see
This week is about stability, not intervention.
⸻
What to Expect Next Week (Week 3 Flower)
Here’s what’s likely coming:
• Stretch will continue, possibly peak
• Clearer confirmation of:
• Dominant main cola behavior
• Final spacing between nodes
• Pre-flowers will become more defined
• Still no rush to defoliate unless airflow becomes an issue
• Feeding stays consistent—no chasing, no stacking products
Next week is about watching, not reacting.
⸻
Final Thoughts
This marks a clean, confident Week 6 / Week 2 Flower checkpoint.
Environment is stable, nutrition is dialed, and the plants are clearly happy expressing themselves.
FOR DISCOUNT CODES AND MORE JUST FOLLOW THE LINK https://website.beacons.ai/dogdoctorofficial
📲 Don’t forget to Subscribe and follow me on Instagram and YouTube @DogDoctorOfficial for exclusive content, real-time updates, and behind-the-scenes magic. We’ve got so much more coming, including transplanting and all the amazing techniques that go along with it. You won’t want to miss it.GrowDiaries Journal: https://growdiaries.com/grower/dogdoctorofficial
Instagram: https://www.instagram.com/dogdoctorofficial/
YouTube: https://www.youtube.com/@dogdoctorofficial
⸻
Explore the Gear that Powers My Grow
If you’re curious about the tech I’m using, check out these links:
🔆 Lighting & Environmental Control
• Future of Grow — Advanced LED lighting technology
https://www.futureofgrow.com/
DISCOUNT CODE: DOG20
• Lumiflora — Under-canopy LED lighting
https://lumiflorade.com/
• TrollMaster — Environmental controllers and automation gear (past collaboration)
⸻
Genetics
• Zamnesia Seeds — Genetics used in this project
https://www.zamnesia.com/
⸻
🌱 Soil, Substrates, Boosters & Root Support
• Plagron — Substrates, bio mixes, and supportive products
https://plagron.com/en/
⸻
🎒 Storage, Curing & Preservation
• Grove Bags — Curing and storage solutions
https://grovebags.com/
⸻
📸 Photography Equipment & Tools
(Not sponsors, but part of my creative toolkit)
• Sony A6700
• Sony full-frame macro lens + few more
• Stacking photography workflow - learning
• iPhone (for behind-the-scenes shots)
We’ve got much more coming as we move through the grow cycles. Trust me, you won’t want to miss the next steps, let’s push the boundaries of indoor horticulture together!
As always, this is shared for educational purposes, aiming to spread understanding and appreciation for this plant. Let’s celebrate it responsibly and continue to learn and grow together.
With true love comes happiness. Always believe in yourself, and always do things expecting nothing and with an open heart. Be a giver, and the universe will give back in ways you could never imagine.
💚 Growers love to all 💚
📸 P.S. – The Eye Behind the Lens
All photos in this diary (for now — except for the ones showing the camera, which I took with an iPhone) are taken with a Sony A6700 paired with a Sony full-frame macro lens and a few more.
Photography is part of the story — it’s how we share the fine textures, the glow, and the quiet details that words can’t always capture.
I’ve also started experimenting with photo stacking — a technique where multiple images, each taken at a slightly different focus point, are layered together to create one perfectly sharp image from front to back.
It’s not digital enhancement or AI; it’s pure photography — a way to reveal the plant’s beauty in microscopic depth, from trichome to petal.
You’ll even see a few shots of "ghost me" capturing the shots — camera, lens, setup — because every grow deserves not just to be cultivated, but documented like art.
FOR DISCOUNT CODES AND MORE JUST FOLLOW THE LINK https://website.beacons.ai/dogdoctorofficial
NEW DISCORD - Official Server Invite Link : https://discord.gg/ksjAkA5T74


