
Likes
Comments
Share


@Ctrellis90
Follow
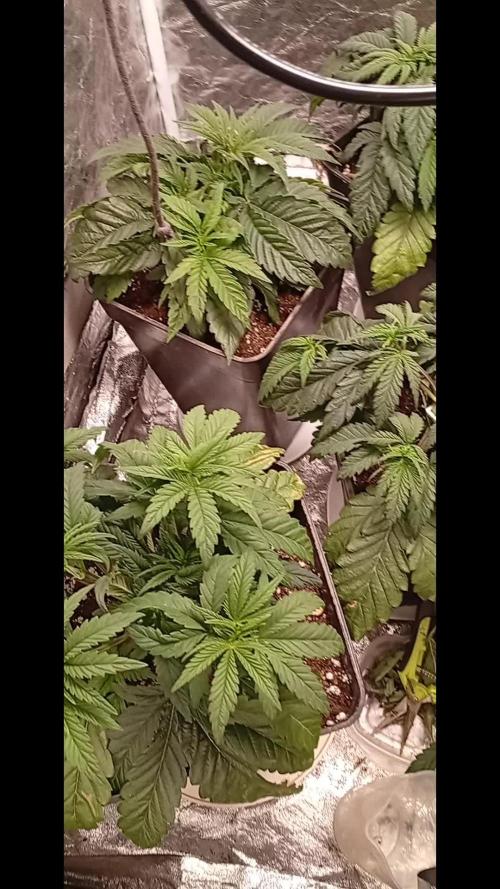
Alright so we're moving along as best we can with some weird looking growth but it's still growth lol.
We started the Athena blended line this week but it's still early so we'll see how they look after this week.
I'm hoping they grow out of this weird looking foliage. I believe it's from too much Alfalfa Ferment so I dropped it when we switched over to synthetic.
Other than that we're doing great and in a couple more weeks we'll transplant the photos and put them in flower.

Likes
2
Share

@pareto
Follow
What a roller coaster of emotions. Was a litle early to harvest but since I also got some pollen thats totally fine!
Total Runtime: 88 days


Likes
53
Share


@Almora
Follow
I give 8 liters of water per pot.
I was giving a 2-nutrient callmag, but the water coming out from the bottom has high ppm, so I will give empty watering.
Day 97-Bloom 38= sugar leaves and immature buds were cuted


Likes
18
Share


@Master058
Follow
Fiets time growing Indoor, and with 2 x mars hydro t’s 1000 im supprised about the final result. Tent 1.20x2,00 3 plants iguess 200 g dry 1 week until drying

Likes
73
Share


@Rwein93
Follow
Ciao ragazzi e bentornati qui con me e la Mimorange 🍊
Le ragazze sono fantastiche nessun segno di stress apprte qualche puntino strano sulle foglie dovuto sicuramente a dei piccoli acari che non riesco a vedere. Ho comunque provveduto a spruzzare loro con una soluzione apposta a base di olio di Neem.🤞
La numero 3 ha raggiunto la sorella numero 2 mentre la pianta numero 1 ha superato loro di almeno 15 cm. Infatti è lei la bestia da 140 cm, con 4 belle apicali da almeno 80 cm.💪🔝
Ho defogliato loro nel giorno 58 e mantengo i nuts costanti fino alla fine👍
Eh niente ragazzi! Siamo giunti al termine della settimana 9 e siamo CAMPIONI D' EUROPA!!!🏆🥇
GRANDI AZZURRI💙
🇮🇹FORZA ITALIA🇮🇹
Grazie a tutti per aver guardato e restate sintonizzati per nuovi aggiornamenti🙏
Buona settimana e felice crescita 🌱 🌱 🌱

Likes
49
Share


@Smoking_Joe_Frazier
Follow
Vegetation Week 16: Heatwave Endurance & Growth Surge
Update: 03.07.2025 | Day 118
Hey Growmies,
Week 16 tested limits with scorching temps, but the ladies laughed at 37°C. Growth went into hyperdrive – here’s the breakdown:
Heat Response
- Survived 37°C peaks without stress signs (no wilting, no leaf curl).
- Vertical explosion: ~20cm growth across both plants this week.
New feeding mix:
- 1 Biotab dissolved in 1.5L water → 50ml of this concentrate per 10L water + Bokashi juice. Result: Deep green vigor, zero deficiencies.
Strain-Specific Updates
Durban Poison:
- Now towering with explosive branching (new shoots from every main stem).
- Still vegging – no flowers yet. Easily clearing 170cm, on track for 2m+.
- Low odor (neighbor-friendly for now). Bud potential looks massive.
Blueberry:
- Healthy at 170cm but less dense than Durban.
- No pistils yet, no heat stress. Hopes high for autumn purples.
- Structure balanced and robust.
Pest & Health Check
- Zero issues. Leaves pristine top to bottom.
Next Steps
- Monitor flowering triggers (daylight still 15 hours).
- Continue Biotab/Bokashi mix weekly.
- Prepare taller supports for Durban’s final stretch.
Week 16 Takeaway
Genetics + adaptiveness = unstoppable growth. Durban’s a jungle queen, Blueberry a steady grower. Some rain would be good te rehydrate the soil.
Catch ya next week my friends.
– Smoking_Joe_Frazier


Likes
16
Share


@m0use
Follow
This #40 and #42 plants from Ganja Farmer Seeds where the best out of them all, this is a bias review though as they where not all grown in the same bucket system as these two and thus could not grow to their true potential. The bugs where solid rock hard and crystaly They are true keepers if your wanted a good performing auto for shits and giggle outdoors. The major downside is how easily they got pests and how the pests preferred them over the other weed plants. this is a bit concerning to me and makes me wonder why. More to come.
@GanjaFarmerSeeds, If you like the images or videos I can send you raw files that have not been shrunk and contain no watermarks, if you feel I am in the top 3 of your BDOTY Contest that is :D

Likes
6
Share

@Jardineiro_Br
Follow
Agora sem aplicações de técnicas, apenas fertilizantes e água, para que a energia da planta seja usada nos botões, quero ver lindos botões, densos e resinados . Por enquanto estou bem satisfeito com o resultado, essas próximas 3 semanas , acredito, serão decisivas para definir um boa produção.
Likes
50
Share


@CapitanKush
Follow
flushed the girls out for a week and a half then cut them down yesterday, all done now just wait for them to dry and cure ill update with weights and review.
Been a easy grow with few issues thanks for checking it out. Happy Growing till next time 👍👍👍

Likes
4
Share


@Ryno1990
Follow
Week 6 is flush week for this amazing girl Snow Panda she is very frosty an dense and super sticky smelling amazing an looking just as good this is one of my favorite girls so far
Likes
5
Share


@Major
Follow
I made a big mistake when editing my new week I erased my first weeks 😤😤 but I don't have to complain about everything is fine for my plants 🤗😂😂


Likes
31
Share


@Dunk_Junk
Follow
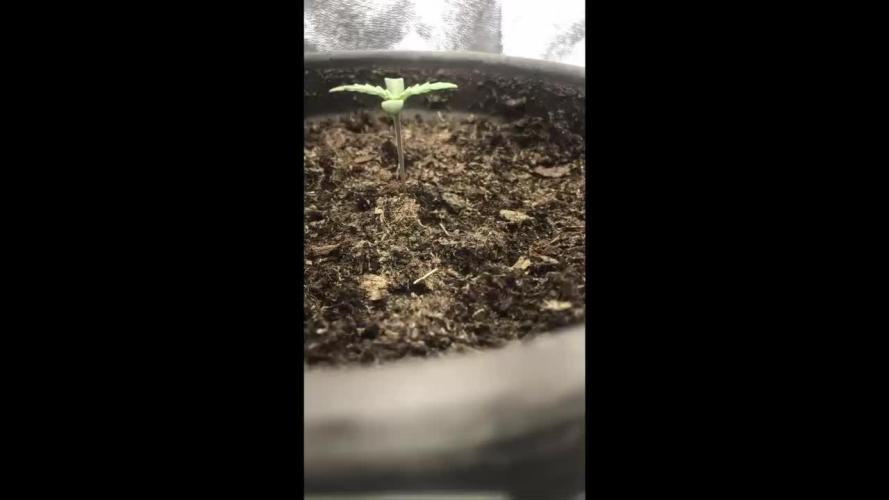
Nice growth this week. Making roots. Making leaves. She will shoot up in a couple of weeks.
Likes
Comments
Share


@Nickeluring
Follow
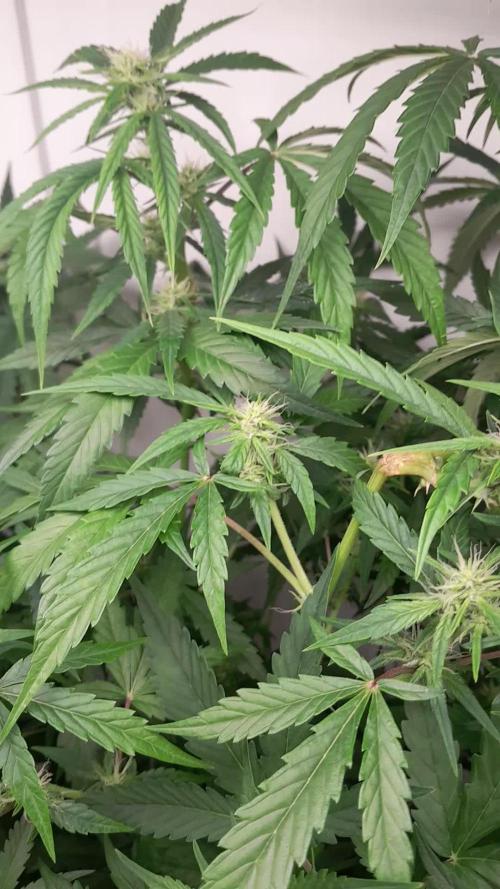
We start to see some beautiful flowers being created. She is taking a nice shape. It is a bit hot at the moment and I hope the plants can cope...
Likes
3
Share

@ohcibi
Follow
Update May, 20
Another 1.5l with week 4 dose.
Takti recovered from topping. He grew massive leaves as well which wasn’t so obvious while he drooped.
I also added training clips and wire to Samy as he grows „longer“. Takti is still too short for that. The clip would be too long.
Update May, 18
Watered 1.5L each today. Used week 4 of the feeding schedule, so I skipped week 3. I also inserted a first scrog net to help with LST. I wanted to try using two nets this time, so this will be the lower one. The reason I hadn’t put it in yet was to not cast shade on the plants, so I placed it below everything. It has a nice side use: you can put lower hanging leaves up to make space for the water spray. Can only recommend putting the scrog net in as early as possible, in case you didn’t know that already. 😆😆
Update May 17
Another week, another progress update.
Had a bit of a stressful situation a few days ago when Takti started drooping. Must be because he had a little root damage during transplantation. You can see it in the pictures from last week. Every other parameter was the same for Samy and he didn’t droop. I still set the light timer back to 20 hours, and he fully recovered. I’ve since increased it back to 21 hours and will go back to 22 in steps of 30 minutes.
They are massive chuggers. I give them more than double the water I gave Ryu and Ken in my last grow, and they still handle it like it’s nothing.
This week is also topping time. Started the week by topping both of them, as well as defoliating their single-finger leaves and the shoots coming from there. They should be fully recovered by the end of the week. Fingers double-u'd.
Last but not least, I uploaded the timelapse, enjoy! I now need something to hold my iPhone in place facing the plants in their larger pots to continue it, and right now I don’t have the money for that. But I’ll see what I can do, maybe I’ll find something and can keep it going. On the upside: before, I was dependent on my gaming PC running to record the lapses. Now my iPhone can record for days without me having to babysit anything, so as soon as I have something to hold it in place, I can keep those going till the end of the grow, no problem.
Stay tuned and happy growing!
Likes
174
Share


@Stony_German
Follow
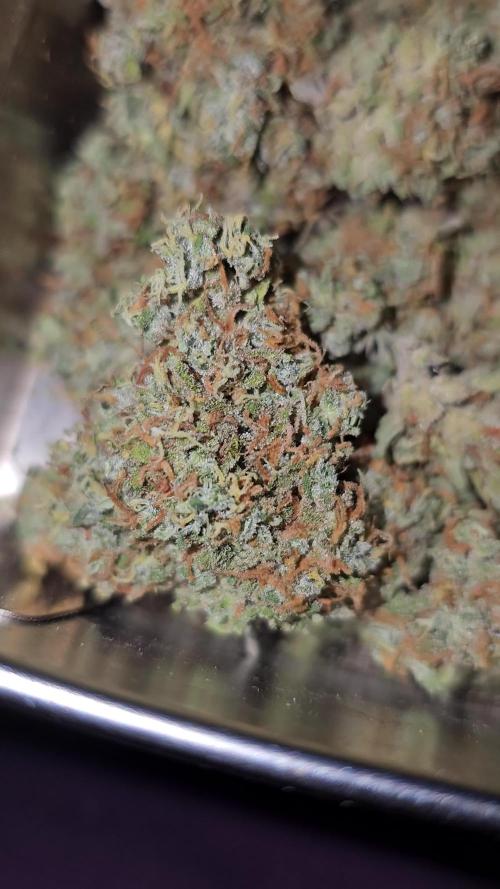
Tag 63 Blüte:
Die Trichome sind immer noch zu viele Klar und brauchen noch einige Tage. Geruch wird immer intensiver. In 4-5 Tagen fallen die Temperaturen auf 16-18 das wäre perfekt wenn ich da ernten könnte und die Trocknung so verlägert wird. Momentan sind wir bei 28 also viel zu warm ohne Klimaanlage. Der nächste Report wird dann der Tag der Erte wann auch immer. Ich habe nach den vielen Kommentaren euch eine volle Runde Budporn Fotografiert. Ich hoffe es gefällt euch.


Likes
82
Share


@Streptokok
Follow
Purple Buds are amazing.I could not be happier with their color, buds are chunky and frosty, the smell is indescribable. It reminds me a certain sweet from the childhood :) and I bet it will taste even better. Later, I will show some more pictures for Industrial CBD which is doing fine. I will move Purple Buds tomorrow out of my tent for two days in the darkness and then - harvest time :) CBD has got one more week to go I think. Happy growing to everyone.


