Likes
Comments
Share
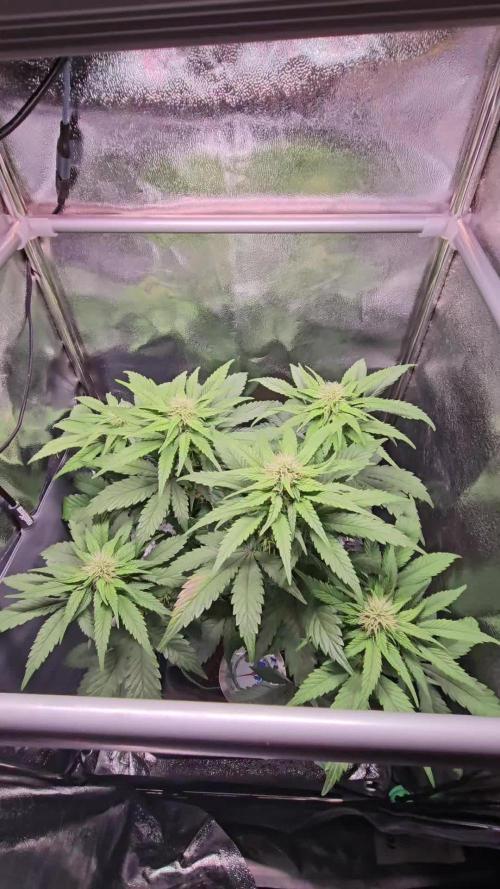
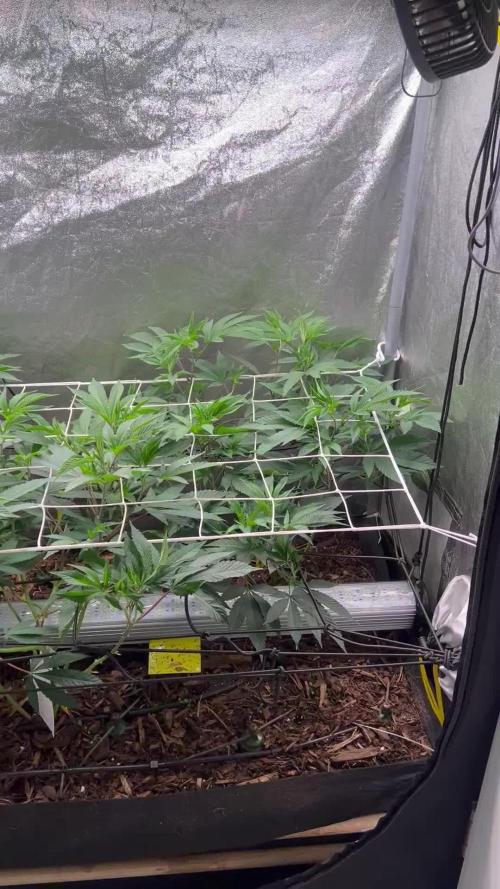
Vamos familia quinta de vida de estás apollo black cherry de SeedStockers. Que ganas tengo de ver el progreso de esta variedad, las plantas están sanas, se ven con buen color. La cantidad de agua cada 48h entre riegos. Esta semana añadimos nutrientes de la gama Agrobeta. Tuve problemas de trips en un indoor y tengo todas plagadas pero ya las e tratado con aceite de neem y un insecticida genéricoy jabón potásico también añadí tiras azules, trataré esta semana. Estas próximas semanas veremos cómo avanzan. Mars hydro: Code discount: EL420 https://www.mars-hydro.com/ Agrobeta: https://www.agrobeta.com/agrobetatiendaonline/36-abonos-canamo Hasta aquí todo, Buenos humos 💨💨.
Likes
6
Share
@Xpie77
Follow
From the leftovers and plant cutting Ive managed to make some bubble hash. Its easy and fun to do. Thnx Seeds Genetics Co for the nice genetics and see you next time
Processing
Likes
33
Share
Started the flush with her last feed! She looks amazing can't wait to see her fill out!
Processing
Likes
6
Share
Topped em ✂️ They look happy to me 🤷‍♂️🏽 Gonna try to bush these out some in the weeks to come. 🌱
Likes
62
Share
@Reyden
Follow
🔸Davvero una grande notizia! Una nuova collaborazione con @Spiderfarmer è iniziata e sono felice di poter creare dei contenuti per una azienda seria come la loro!!! Questa mattina è stata montata questa bellissima #SF2000 nella tenda da coltivazione più grande dove dovrà lavorare per far fiorire tutte le signorine che passeranno di qui prossimamente 😁😎🔥 Voglio fare i complimenti perché siete riusciti a creare veramente una luce bellissima con materiali super leggeri ed esteticamente geniali ❤️‍🔥oltre che consumare veramente poco (2.7 Umol/J)per il raggio di copertura ( 4x3 in crescita )(4x2 in fioritura ) e intensità uniforme in PPFD Mi piace molto anche il fatto che monta anche diodi IR utili per accelerare la fase di fioritura e aumentare la resa 💡 Ci saranno diversi aggiornamenti rimanete connessi e grazie ancora per essere passati a trovarmi 😃 https://www.instagram.com/reel/Cl_EEAbu_vQ/?igshid=YmMyMTA2M2Y= Funzionalità principali 2022 NUOVA VERSIONE COSTI DI ESERCIZIO INFERIORI E RENDIMENTI DI QUALITÀ SUPERIORE: Le luci progressive a LED SPIDER FARMER SF2000 utilizzano la più recente tecnologia LED ad alto rendimento oggi: diodi Samsung LM301B, alta efficienza energetica con 2,7 umol/J, creano la migliore penetrazione della luce del baldacchino. Copertura vegetale 3 x 4 piedi, fiore 2 x 4 piedi. Potenza estremamente elevata ma consuma solo 200 W di elettricità, rendendola più efficiente delle tradizionali lampade HID e di altre lampade per piante sul mercato. NUOVO DISPOSIZIONE DEI DIODI E DESIGN DIMMERANTE: Luci crescenti SF2000 aggiornate. Più perline leggere ai bordi, meno al centro. Aiuta a ottenere una PPFD più uniforme. e la manopola di regolazione della luminosità regola liberamente l'intensità della luce. Connessione multi-luce con regolazione unificata particolarmente vantaggiosa per un'ampia area di coltivazione indoor e piantagione commerciale. IDEALE PER TUTTE LE FASI DI CRESCITA: Eccellente spettro completo: bianco, blu, rosso e IR (3000K, 5000K, 660nm e IR 760nm). Diodi 3000K che forniscono più luce rossastra e 5000K che forniscono più luce bluastra. La luce rossa e IR da 660 nm è particolarmente utile durante la fioritura, dove accelera i tempi di fioritura e aumenta i raccolti. Trasforma i tuoi semi nella tua scorta. E la luce sembra abbastanza naturale, quindi è utile per monitorare accuratamente la salute delle piante. COSTRUZIONE BEN FATTA E SOLIDA: nessuna ventola senza rumore. Il driver ad alta efficienza, affidabile e staccabile ha un'ottima dissipazione del calore. Il dissipatore di calore in alluminio è spesso e robusto, coperture protettive per i cavi; Imballaggio intuitivo. Componenti di qualità significano che la luce dura più a lungo, SF Light si prende cura di te con un design più attento, puoi facilmente risparmiare denaro senza acquistare frequentemente luci. In qualità di produttore professionale di luci di coltivazione a LED da oltre 10 anni. Spider Farmer ha sempre insistito per creare attrezzature per la semina domestica più efficienti, adatte e di alta qualità per la crescita delle piante e si impegna a diventare un partner fidato per ogni coltivatore! Riceverai una lampada da coltivazione Spider Farmer SF2000, un manuale di istruzioni, un paio di ganci d'argento, un paio di ganci neri.
Likes
29
Share
@Prilyfe13
Follow
February 15, 2024 Welcome back to another season of Insane Autoflowers. I have 11 weeks to finish these ladies up before 4/20. Then I have a competition to join. That being said, let's go over the setup. This setup is an AC Infinity 3x3 automated grow system. I'm running a 4" exhaust fan with carbon filter. 2 fans. Both are 6" with one being oscillating. The germination kit is also AC Infinity. With the new AC Infinity supplemental lighting, a small computer fan for air exchange and a nice shot glass to germinate these little babies. I'll be using root riot plugs and 3 gallon AC Infinity fabric pots with the AC Infinity bottomed feed watering basins. There will be a total of 4 plants in the tent. These ladies will be sharing the space with a pair of Banana Purple Punch Autos. For the seedling stage, I have the light around 250 PPFD and will bump it up to 350 PPFD in the last couple days in the germination center. I'll be reusing Sohum Living Soil. This is the second time using it, but it should be fine. I reused the same soil brand with my last grow and the Gorilla Cookies in that grow gave me 21.25 oz dried and trimmed. So, it should be fine. I also have advanced nutrients just in case. I may give a weekly dose of recharge and the base nutrients just to keep everything from getting drained completely. This strain is 8 to 9 weeks to harvest. Let's hope it doesn't go any further than that. I'll be using a couple training techniques. LST to start. If need be, I'll use a SCroG net as well. I may end up topping. So far I have noticed every single plant I've grown does better when topped. However, I have a feeling that slows the plants down and goes beyond the suggested life span. So hopefully I won't need to top them and they do just a well as my last grow. Let's hope for 10 oz per plant. One last thing, I have the new little square hydrometer from AC Infinity in the germination center. I plan to keep the temp between 75° and 80° and RH at 75% to 80%. That should be everything for today. February 16, 2024 Day 1: Both ladies popped last night and had taproots this morning. Just peeking out. Perfect time to plant them in the plugs. They will be in the Germination Center for just a couple of days. I like to ant in the final containers just before the roots break out of the plug. That way there is no stress whatsoever. I may add a bit of my seed starter soil in the top part of the pot. Just to keep the seedling from burning. However, I haven't had a burn issue yet, so there may be no point. Honestly, the seed starter soil is really for the Photoperiod plants. The ones that last about a week or two in the Germination Center. That should be all for the day. Ladies are planted. Germination Center Environment: Temp: 77.6° RH: 82.9% VPD: 0.55 kPa February 17, 2024 Both ladies are showing some green coming out of the plugs. I feel like they will pop the surface later today. I'm having a bit of an issue keeping the temp above 75°. I'm sure it will adjust once the lights go on, but for now it's just below 75°. The humidity is a bit bouncy as I can't find the correct spot for the "exhaust fan" yet. It won't really matter until the lights go on and both ladies have popped. I didn't end up filling the pots up yet. I have to wash the basins out first. I'll do that today and prep the pots tomorrow. Quick Update: I turned the light on now that I'm seeing green but not quite popped yet. It should help with keeping the heat up. Germination Center Environment: Temp: 76.5° RH: 82.1% VPD: 0.56 kPa February 18, 2024 We have some little green babies! They're perfect and it's only been 2 days. I expect these 2 to be super vigorous with how that look now. As long as I don't screw anything up. For starters, the light is 18/6 as of today. The Germination Center Lights are set to 60% power with an intensity level of 250 PPFD. Hopefully that will keep the stalks thick and short. I don't like lanky seedlings. Much harder to work with. Today, I decided to fill the 3 gallon AC Infinity Fabric Containers with reused Sohum Living Soil. This is the first time being reused so everything will be perfectly fine. My last grow had a monster plant grown in the same used soil. So it's all good. The goal is to plant the babies in the pots before the roots start to show too much. Normally I'd use a couple of nursery bags, but this time around I don't need to. I pan to use the tent environment this time. No domes, no extra bags. Just plug to soil. I plan on having the light around 18" with a humidifier. It should do the trick. I'll also be keeping the light around 300 PPFD for the first couple of days. Power should be around 20% after they establish a root system, I'll move the light up to 24" and increase the intensity to around 450 PPFD. Normally I'd work with DLI, but I don't need to yet. I will once the light is raised. So that should be an excellent transition from dome to tent life. If all goes as planned, these 2 should live up to their full potential. Quick Update: I decided to drop the light power down to 30% and gradually turn it up over the next couple of days until they need to come out of the dome. So 2 days max. Then I can turn the big light on and work from there. Germination Center Environment: Temp: 76.5° RH: 76.4% VPD: 0.74 kPa February 19, 2024 Today is a new day and a new stage. Both ladies were planted in their final containers. I watered them in with 250 ml of plain water PHed to 6.2. I didn't concentrate all of the water at the base. I made sure to start with 100 ml around the base and the rest covering the whole top soil. Their tap roots were poking out from the plugs already. I was kind of hoping for one more day in the Germination Center, but then I would have had to set up the nursery bags and that wasn't the plan for this run. Hopefully my calculations are correct with the 250 ml. I'm using the 3.4 gallon fabric pots from AC Infinity I already mentioned. They are also used from 2 runs ago and washed thoroughly. Domes were added and the main grow light is now on at 20% power. The light height is around 30" and the intensity is at 290 PPFD. It's a bit high, but the domes block out a bit of the light, dropping the intensity down to 200 PPFD. The tent isn't all that warm currently due to cold weather, but I'm hoping the heat of the main grow light will increase the temp in the domes. Currently the tent temp is 72° and the temp under the domes is around 68°. I'm hoping over the next few hours, the temp will raise up and the environment will stabilize. I can't keep the domes off either as the RH is hovering at 43% in the tent itself. I have a humidifier, but that dropped the temp down even more, hence the domes. Kind of a pickle I'm in. I'll keep trying different things until I get it right. I hope it won't take me more than a day or 2. If not the next few hours. Grow System Environment: Temp: 68° RH: 79% VPD: 0.49 kPa February 20, 2024 It's day 4 since seeds and these ladies are doing perfectly fine. Right on cue as well. I expect them both to hit the Veg stage in just a few days. Should be by the end of this first week. Maybe a day or 2 after. The domes are doing their job perfectly. Just a little bit of dew and the temps are finally leveling out at a reasonable number. 75° by the end of the morning, the environment should be spot on. That's all for the day. No watering. I'll water tomorrow another 250 ml for each baby. Grow System Environment: Temp: 75° RH: 75% VPD: ? (I'm taking readings from 2 different hydrometers. One of the main tent for temp and the one for the Germination Center for RH) February 21, 2024 Both ladies got another 250 ml of filtered water PHed to 5.8, spread around the entire pot surface. I was thinking about doing another 250 ml around the outside of the pot. It may be a good idea to start moistening the rest of the soil. So when they start the veg stage, they can take off immediately. I'll probably wait until this afternoon and then decide. I did notice that A had drier soil than B. B is in the front and A is in the rear. I wonder why that is. They look absolutely wonderful. Slightly praying and they both have really nice steady growth. The leaves are a beautiful dark green. So healthy and ready to go. The baby fan leaves have some really pronounced, serrated edges. As for lighting, I've been paying attention over the past day and I think the domes will come off tomorrow or the next day. The light may also need to be lowered when the domes come off. Currently the intensity is 200 PPFD. I think 300 PPFD should be a good starting point starting week 2. I've also been researching and I think I have a good light schedule for the whole grow. At 18/6 Week 1: 200 PPFD DLI: 13 Week 2: 250 PPFD DLI: 16.2 Week 3: 350 PPFD DLI: 22.7 Week 4: 640 PPFD DLI: 41.5 Week 5: 700 PPFD DLI: 45.4 Week 6: 725 PPFD DLI: 46.7 Week 7: 725 PPFD DLI: 46.7 Week 8: 600 PPFD DLI: 38.9 Week 9: 550 PPFD DLI: 32.4 This is based on a 3 week veg time and 5 week flower time. Update: Domes Removed. I was researching as to when to remove a humidity dome from a seedling and everything I've read is to remove them a day or 2 after sprouting. So I removed them. The tent has been sitting nicely around 68% and 77°. So everything should be fine. I'll have to keep an eye on the light. Without the domes, they are getting the full intensity. However, I'm not all that worried. They are both praying, so a bit more light won't hurt. Grow System Environment: Temp: 73.6° too low RH: 77.5% spot on VPD: 0.95 kPa estimate February 22, 2024 Not much to do today. I filled the humidifier, cranked the heat and spritzed the babies with a mist of PHed water. Took some photos and that's all. No adjustments needed. Both plants look absolutely perfect. Their leaves are flat, so I know the light is right where it needs to be. Grow System Environment: Temp: 75.9° RH: 80.9% VPD: 0.93 kPa
Processing
Likes
4
Share
Noticed some slight yellowing and the white blemishes on a couple of the older plant's leaves were getting bigger. I believed the white blemishes were do to a cal-mag deficiency and added that to my feed. Also was using 1/4 nute strength and now bumped up to full to counter the yellowing. Started LST this week too.
Likes
Comments
Share
@GanjOS_OG
Follow
now making shots is so much fun at that lady
Likes
8
Share
@Rko41
Follow
Pas très grande faible stretch mais large aussi haute que large début de Flo seulement !
Likes
11
Share
@plant
Follow
Germinated using a glass of water. After 12 hours into a bag with tissue paper. Then I hung the bag up so gravity could make the tap root grow straight down.
Likes
7
Share
Greetings and salutations GD peeps. Let the peaceful transition of flower begin! It is the first week of flower and the scrog is filling out nicely. I had some issues with a GFI popping and my lights would miss a few hours in the 18/6 light shedule over the last week. Rather than stress them any more than they already have been with the mini blackouts I flipped them to flower this week. I also changed the circuit the Tent was on and it seems to be consistent. A massive feeding this week for early flower, I bumped the bloom by 2 ml/gal on top of the normal feeding chart. My rational is I have topped these ladies and there are far more bud sites than before, will see if it has any effect + or - I have also done some selective defoliation to promote light pentation to the lower bud sites that have branched out from the topping 2 weeks ago. I have a small number of LEDs on one of my lights that have stopped working. The light an older amazon Chinese cheap O has 85% of the lights working. My footprint of the tent to the w/sqft is with in range. I have read and heard 35-50 watts per square foot of area as a general rule is good. now you can get in to PAR and lumens etc. but that's a whole different conversation. The light might be why the GFI was popping? I will figure that out after the grow. for now its all about FLOWER POWER and the scrog fulfilling its destiny. peace ya'll be kind to your fellow humans and hybrids.
Likes
71
Share
Hoi leuk dat je een kijkje neemt. Week 9 is begonnen en ze gaat onverstoord verder.( ik maak een telfout 🤦‍♂️🏽 eigenlijk begint week 9 over 2 dagen 😆) Prachtige kleuren bladeren en de toppen worden dikker en dikker. Ze is eigenlijk te groot voor de tent, de hoofdtop staat 15 cm van de lamp verwijderd. Veel te dichtbij eigenlijk. Heb niet al te veel bladeren weggeknipt (defoliation). Minimaal. Ze drinkt wel zeer veel. Bijna anderhalf liter per dag. Laten we kijken hoe zij zich deze week weet te ontwikkelen. 🧐 Ik zal gedurende de week nog verse foto's updaten, dus hou het in de gaten. To be continued.... Day 59 begonnen met toevoegen van sugar royal
Likes
11
Share
This week I present the HARVEST of GODFATHER OG Autoflowering #1. The second plant is another monster, and I'll introduce it to you shortly. The plant has a slender appearance, due, as mentioned, to a longer-than-average transition period between vegetative growth and flowering. It almost seemed like it wouldn't flower, but then, perhaps due to genetics or the addition of Power Buds to stimulate initial growth, the plant produced beautiful flowers, nice height, and a good overall result. This plant's flower is a bit airy, but not bad at all. Pot and Soil - This plant was grown in a 20-liter airpot with Plagron BiloLight Mix organic soil. Lighting - A Zamnesia Phytonaut 480W LED lamp, used from mid-flowering onward, allowed fruiting. We achieved a PPFD (photosynthetically active photon flux density) between 800 and 1200 μmol/m²/s, with cycles of 24, 23, 20, and finally 18 hours. Z https://www.zamnesia.io/it/14526-lampada-led-per-coltivazione-phytonaut-480.html (National link in case Google doesn't work) Growing system: Zamnesia Ecosystem, fan, extractor, and grow box, all made by Zamnesia. Trichhomes: We let the plant mature longer than usual to bring out its indica characteristics; this time, there are numerous amber trichomes and beautiful red-tipped trichomes. Feeding: Grown with Plagron Official, a 100% organic base fertilizer, and all recommended additives. Visit www.plagron.com for grow cycle calculations, product selection, and general information. All nutrients are available on the Zamnesia website. Also check out the live substrate and the fantastic new Zammi product line. You can find this excellent strain here: https://www.zamnesia.io/en/11102-blueberry-crumble-auto-zamnesia-seeds-feminized.html (Google it if the link doesn't work; it's a national link) You can find this excellent strain here: https://www.zamnesia.io/it/14330-godfather-og-auto-zamnesia-seeds-femminizzata.html (Google it if the link doesn't work; it's a national link) Terpene // Caryophyllene, Myrcene, Limonene Parents // Alpha OG x XXX OG x Ruderalis Genetics // 60% Indica / 40% Sativa THC // 26% CBD // 0-1% Climate // Mediterranean Resistance // Mold Resistant Taste // Aroma // Sweet, Fruity, Spicy Pine Diesel Effect // Relaxing, long-lasting, body high, calming Zamnesia Description - Godfather OG Automatic by Zamnesia Seeds is the autoflowering version of one of the most potent OG strains on the market. With 26% THC, a rich terpene profile, and a full flowering cycle of 9-10 weeks, this indica-dominant hybrid is ideal for growers seeking fast, aromatic, and intense results without compromise. Godfather OG Auto is the result of a cross between Alpha OG, XXX OG, and Ruderalis. This blend retains the potency of the original OG while incorporating the speed and autoflowering potential of Ruderalis. The 60/40 indica-sativa balance ensures fast and reliable yields. Every hit delivers the classic OG bouquet: sweet fruity notes, fresh pine, wood, and a subtle diesel aftertaste. The smoke is dense, aromatic, and satisfying, perfect for lovers of bold, complex flavors. Compact and discreet, Godfather OG Automatic is perfect for small spaces, balconies, or grow tents. Indoors, it can reach a height of 100 cm with yields of up to 450 g/m², while outdoors, it reaches 120 cm with a potential yield of 150 g/plant. All this in just 9-10 weeks from seed to harvest, with feminized seeds for maximum reliability. "The best that nature has to offer" www.zamnesia.com
Likes
6
Share
@Elmike
Follow
Généralement satisfait de mon setup et de la gamme de nutriment que j'utilise. Mon donner des résultats a la hauteur de mes attente.
Likes
11
Share
@Coughy
Follow
Good stretch this week, I haven’t lollipopped at all, not even in veg. It’s fairly leafy everywhere and I want to get in there and defoliate bottom 1/3 soon. A lot of dead leaves I imagine, just been so busy and been neglecting the grow. Funny, how when you first start out and you’re overly micro-managing and then as the months go by, it starts to become a chore. I ordered a light from China, a Meijiu (HLG)550 V3. HLG Canada didn’t want to give me a decent discount so, unfortunately had to ship my money outside the country. Saved 50% for a quality light though. Might take a bit to get here, been processing in Hong Kong for 4 days. So far the leaves are healthy but last run they started to turn deficient after the stretch. In my defence, with the last grow, I was just starting on the dry nutrient regimen and made mistakes. Hopefully it stays healthy throughout bloom cycle with new changes and knowledge. New reservoir this week as follows: Partial drain, most of it gone, but 100mL RO added and; 40 gram cal nit 30 jacks 30 mag sulph. 100mL mighty bloom enhancer 100mL head masta 300 mL h2o2 25 mL Fulvic 40mL Humic pH ended up high with addition of bloom enhancer, added pH down to 5.8. PPM 1360. Wednesday-Day 10 Added water and some nutes. PPM 1200 pH 6.0 Started a small section of lower 1/3 defoliation Day 11 Did some more defoliation, added a video to show progress. Day 12 Finished lollipop on right plant. Moved some branches around. Added 20 liters and 20g cal nit, 10g of both jacks and magnesium sulphate.
Likes
13
Share
Putting this down as the 1st week of flower despite it probably being closer to 2 weeks. Makes no odds because I plan on pushing these until they die on the vine. Added Canna Boost along with Nutrifield Bud Burst. My local grow shop have asked me to test the bud burst along with the boost to see what (if any) difference it makes. This strain is well established locally and has been grown by a few of my friends so I'm hoping I can match or better their efforts. EC now up at around 1.6 with the additional nutes. Lots of sparkles and early trichomes showing. Res is due a change which I will do at the end of the week.