
Likes
Comments
Share


@Bread_n_Buds
Follow
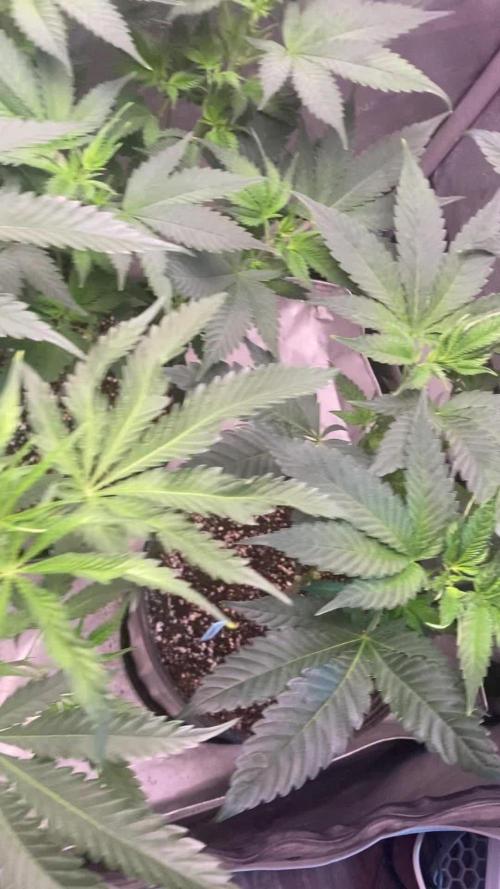
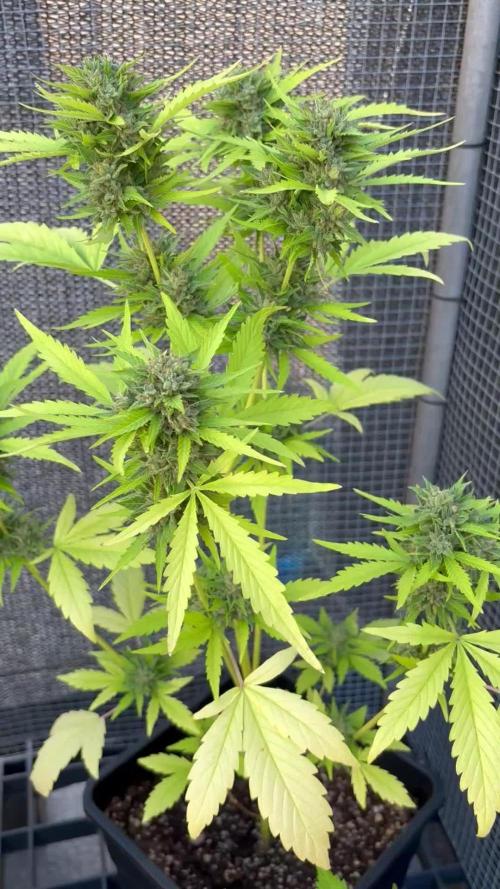
Now we've reached day 41
Our Watermelon Candy, as we expected, has become the queen of the growbox full of F1 Hybrids. Large, vigorous, grows quickly and fills the flowers very quickly along the entire length of the arm, in my opinion once filled they will be very beautiful and full.
The appearance is really important, you can see that it is a healthy plant that grows at a great rate and allows us to enjoy a wonderful view.
The situation becomes very interesting from here on out we will see some good things.
Site Description
ZAMNESIA SEEDS - WATERMELON CANDY F1 HYBRID AUTOMATIC: BUDS BURSTING WITH FLAVOR
If you've been looking for a flavorful strain with superb genetics that's effortless to cultivate, the hunt is over. Thanks to reliable F1 hybrid genetics, Watermelon Candy F1 Automatic showcases the highest degree of productivity and efficiency. This strain takes everything you know and love about the original, and packages it in a plant with even greater potential.
GROWING WATERMELON CANDY F1 HYBRID AUTOMATIC
Derived from Watermelon, Candy Kush, and ruderalis, Watermelon Candy F1 Automatic is a finely tuned medley of genetics. This cultivar is fast to flourish and reliable to grow, no matter where you choose to grow. Taking just 9–10 weeks from germination to harvest, she provides a uniform growing experience culminating in a huge haul of buds for her size.
Reaching heights of 65–80cm, Watermelon Candy F1 Automatic stays pretty grounded, making her perfect for smaller growing areas where space is a commodity. It also means you can fit more plants in if you have the room! Once ready to yield, growers will see a return of 400–450g/m² indoors and up to 100g/plant outdoors. Moreover, Watermelon Candy F1 Automatic is highly resistant to pests and disease, making it an ideal strain for newcomers and fans of low-maintenance cultivation.
AROMAS, FLAVORS, AND EFFECTS OF WATERMELON CANDY F1 HYBRID AUTOMATIC
If we haven't already sold you on the power of F1 hybrid genetics, the proof is in the pudding. Watermelon Candy F1 Automatic is teaming with terpenes and cannabinoids, making for a lively high coupled with huge flavors. Just one hit is all it takes to sample rich fruitiness mixed with sweet candies and a slight earthiness to back it up. And with an average THC content of 23%, the effects are euphoric at the start but settle into deep relaxation soon after. Whether you're chilling alone or with friends, Watermelon Candy F1 Automatic will see you right.
So seeds of all brands, in addition to these great F1 Hybrids and the entire Zamnesia line, fertilizers and everything related to the world of cannabis, you should buy them from the best online store in the sector
www.zamnesia.io

Likes
53
Share


@xbrico
Follow
D92/FD64 - Now the humidity down from the cull, showing no real signs of the rot...did take 1 or 2 more smaller buds and a few from the drying box that was getting the "Grey Beard" but <touch wood>, seems to have settled.
The Lower buds appear to be ripening now and are a deep purple. This plant looks soo amazing, pity it was just not so strong against the rot (again, it was done no favours by out of whack temps [i let it get a bit low at night for colour] and humidity). Have bought a Hotbox Sulfume now for a preventative going forward so would risk this strain again now that I know it needs that bit more protection; 'cause it smells so different and looks so different, its a winner - as long as I can get it over the line safely!!! May hit this a blast with the sulfur for a couple of 2 hour sessions over the next week to ensure it remains without mold!!!!
Apart from that, nothing else to report. Happy growing all!!! 💪


Likes
1
Share


Likes
2
Share

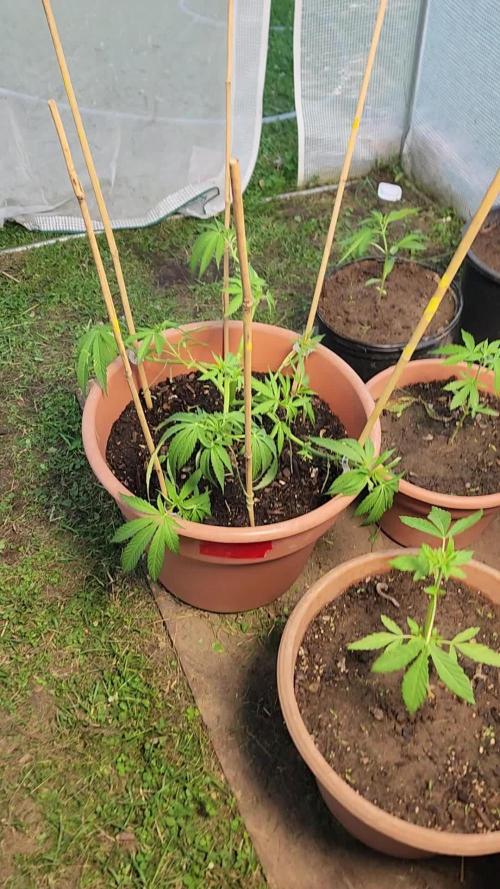
@TowersD
Follow
I put the plants under the Electric Sky 180 V2
I kept only 4 plants because one was growing really slow compare to the others and another turned out to be a automatic plant so i took it away as well.
I am keeping 2 phenos of the Nanaz x BBC and 2 ot the Humboldt Headband.

Likes
6
Share


@Simba732
Follow
On this day beautiful Sunday I hope you all are doing amazing!
Its Day 64 for Buddy, you can see from the Pics she's going crazy now 😌
This week the buds started taking shape 🥦, I'm not really sure but I think she's done with her stretch and started putting the focus on the good stuff. Maybe she'll be done with it this week we'll see.
In the meantime, some Pistils started turning orange but I know she still has a few weeks to go. We'll see with how she develops, imma start getting my loupe ready 🔎 👀
I added Advance Nutrients Overdrive to the feed 🔥
I'm happy with SeedStockers, I'm thinking of running more phenos from them in the coming months 💐👌🏾
Time to change my Co2 packs and mess with the humidity.
I read 40 to 60 % humidity is advised during flowering but I think it's all about keeping the humidity below 70 especially if you live somewhere hot like me. That includes keeping your growth area super clean and avoid watering when not needed too 👍🏾
I decided to never hit 40 because the dehumidifier it self produces heat + the Ligth's heat that all adds up to 40°C real quick. I almost had a heart attack when I read that on my temperature monitor 😂
We humans don't function properly at such temperatures and I'm sure as hell these plants won't either
Take care Y'all and I just wish to say I'm really grateful to grow in these times. I live in one of the nations still on lockdown, it's been going on for months now so yeah
Peace ✌️🏾

Likes
9
Share


@LoSBigBlue
Follow
Week 2 Day 1 - She was ready for some water this morning, 500mL pH?, Week 2 BioBizz sched @ .25%. Yeah the question mark after the pH is not a typo, hung over from a going away party last night I totally spaced checking the pH. Oh well should be alright, I hear that with organics it is not that big of an issue but I still want to be in the 6.2 ballpark, I know my tap water runs about 7.4ish so thats what she got plus or minus whatever the BBzz contributed.
So 3 hours after lights on she is looking just fine, a bit droopy but she always is after her 4 hour dark period. 6th set is on its way and plenty of growth is popping out in the lower branches. If there is an issue with the pH blunder I think it would of shown by now, 12 hours later.
Week 2 Day 2 - doing fine, she will be ready for transplant tomorrow into the 7 gal.
Will be hanging the insulation today which will be a huge help to the electric bill, currently able to maintain 25C° in the tent, 21C° for the room with the AC set to 18C°, RH running 55%, lights 500µmol / 36DLI
Week 2 Day 2 PM - Decided to transplant this evening, she was in need of a drink. Into the 7G she goes, 1000mL 6.2pH. Her rootball looked very healthy so I am very pleased with the results of transplanting an autoflower, now twice.
Day 3 - Looking good this morning, a bit droopy perhaps from her new home and that she is a bit dry so 1000mL 6.2pH water she got. 28C° 60%RH 565µmol 40DLI.
Her lime essence is really putting out now, smells awesome!
Week 2 Day 4- She is really doing well, taking in 1L per 24hrs at the moment. Started LST today.
Day 5 - She had another LST session today and the usual 1000mL she has been taking daily lately, this time another round on BioBizz WK2 @.25%, 6.3pH
Week 2 Day 6-7
Day 6 was a rest day for her, been through a lot this week and her vigor was slowing a bit. She got transplanted, started LST, and got 2 doses of BioBizz WK2 @.25% this past week.
Day 7 the new growth as a result of the LST is coming along nice.

Likes
12
Share


@Fleetwood
Follow
I got a few seeds from the hermie Purple Maroc, but most of the buds seem dense but small. I planned on smushing a bunch of the lower buds, but it didnt work, so I have a bunch of poorly trimmed buds to give to friends :)


Likes
24
Share


Likes
9
Share


@Mr_nugs_lover_David
Follow
Very sweet smell, super flowery, I cannot wait to smoke her buds, hope I get a very energetic high from this girl, but I'm loving her terp production so far! 👨🌾💚🧡
Likes
Comments
Share

@deseed_uy
Follow
Otra vez lluviaaa , van subiendo las temperaturas pero de repente se vienen unas lluvias con tremendo frio asiq ahi van luchando. A las think different q son las mas cercanas a la cosecha las tuve q entrar para las tormentas porq no quiero arriesgar los cocos

Likes
15
Share


@DRO420
Follow
Flowers are really starting to get big. The Lotus boost nutrients have helped amazingly.


Likes
26
Share


@Manis
Follow
Hell guys 👋 ☘️❤️🔥😊
- 1st day of flowering for Lava Cake (26/8)
- Expect Critical all the other flowers show their genders with the first white hairs.
- New pot 10lt for Ak
- Day 24 and LLST (Lazy Low Stress Training)
- No nutrients Biobizz at all so far.
- 1st day of flowering for Frosted Guava (31/8)
Cheers everyone ☘️❤️🔥😊
Likes
1
Share

@Hitthejuan
Follow
6-14-2026 Velvet Moon
Plants doing really well after topping. The first time i topping the plant didnt get stress out. Im going to top one more time this week. Hopefully it doesn't get shocked or stressed out this time. took the bottom two stims of and clone them. Might take a couple more clones and then letting it go. Plants over a foot tall now and about a little over a foot wide. Getting about 3 to 4 cups of water per day depending on the soil. Around 15 to 16 hr of sunlight. has a nice strong smell to it now and getting stronger.
Likes
10
Share


@hholmesgrows
Follow
We're now at week 10 and about a week or so left until I decide to chop this bush down and begin drying and curing. I haven't really been doing much this week besides trimming one or two leaves off, the week prior I have removed only 4 during the whole week and the plant in whole has still been developing rapidly. This is supposedly the last week from the breeders description that the plant should be mature enough but with the transplant in the beginning stunting it for a week has probably been enough reason why growth was unstable during the whole time, I sort of felt it as well when it started flowering at such a small size. I've learn my mistake have redeemed myself with the care i gave it after the stunting. The lower bud sites are still deep green as if they haven't received enough light and I tried to fix that by lowering the light but the taller colas were getting too close (at least 5-8" close) so I decided to leave it at around 10-13" away so I don't disrupt the growing environment too much. I don't want to open the tent too much too now that it stinks up my small room in seconds and sometimes creeps through the doors out to the other rooms and outside the house if my window is open so I'll be looking into the tent when i need to water, fix something with the irrigation system, fix the height of the light, or get ready to harvest. I don't think I will be defoliating anymore since all bud sites are exposed to an extent and I just overall don't want to bother her and watch her naturally do the rest. I will be giving it another week or so to catch up making it around 75-80 days in total. I will be flushing it by now since i've looked at the trichomes on the most and least developed to find that it's starting to amber already with about a quarter turning white so purging the nutes now will be essential towards the end, i'm pretty excited and hope you guys are too.
Likes
13
Share


@SgtDoofy
Follow
March 18
Sherbet has the tent to themselves now. I've flipped to a 12/12 flowering light schedule for Sherbet. You're supposed to imagine what the current plant looks like doubled in size, and flip to flowering according to what you think your tent could handle. The other tent is larger than this one, but it's in a much colder room, so having 12 hours without the heat from the lights could have been harsh for the plant. This room can hover around 50-60F on cold nights, so Sherbet will just stay in this tent to grow.
Temps have lowered 5+ degrees by removing the other plant and it's light.
Processing
Likes
6
Share


@ganjaman24
Follow
She grows nice and quick if you Treat her well! I transplanted and made a couple mistakes so she didn’t reach 100% imo but it’s still a nice turn out! Hadn’t she not gotten pollinated I think the yield would’ve been more! Oh well still not a bad turnout will compare her to my other cut of this strain I have finishing up! Check it out, thanks for reading


Likes
29
Share


@gottagrowsometime
Follow
Welcome to my Slurircane Diary sponsored by MSNL.
SD 8-9
She's growing as a seedling should. Gonna keep her in the 1.7L pot for a few more days and then I'll uppot to her final veg pot 11L. And then into an 18L for the whole flowering phase.
VD1 10th Day.
She's on her way, healthy and into veg with no issues, as of yet, as there rarely is with seedlings.
Veg Day 1-3 Was going so well. Then, my veg tent, out of 7 of them. I gave 6 (ages from 7wks to 6 days) Mystical Green From Terra Power and look at the damage it cost me in my video. Bad Enzyme Reaction. Nothing I can do but ride it out. All Terra Power products have been Ditched and replaced with Plagron. Its not that, they're bad. I just don't have any of their base nutrients. And I've the full Agla Grow, bloom & other Plagron Products I'll be using for this grow. I've flushed the plant. Added Silic Rock, Power Roots, Alga Grow and sprayed the Leafs With Vita Race "once a wk for VR, and every water for the rest as is suggested. I'm using their pro mix, it's specifically goes best with the Alga Products. If you're using their light mix, I suggest their Terra range. I've also taken Plagron Zyme from the Terra Grow list, as it's an Enzyne for the whole process. And also I added Silic Rock for issues like The Mystical Green Caused, my entire crop, even the baby, so, I know 100% it was MG, and it's meant to be able to be given for the entire grow. I've had it for over a yr. But, she shelf life should of been well in date. Very disappointed. I flushed the 2 1.7L pots. And restarted them on Plagron power Zyme/Roots, Alga Grow & Terpinator "The OG"
Diet:
Been keeping it on the light side a 3:1:3 ratio. Grow, Bloom, Micro 630-670ppm 5.8-6.1ph. Artios Touch was given. I'm thinking of putting her on a Full Plagron Alga Diet with their light mix..also I'll be getting Terpinator. Something I badly need to improve the taste/terpine profile.
I'll also be using Green Sensation/ pure Zyme/ root stim/ Terra Grow&bloom. And mega worm humus. Edited Day 12. Sadly Mystical Green, has caused a nasty reaction in all my girls, I know looks like a def, "it's not, it's in all the girls I gave MG to, even my 6 day old seedling and my girl that just entered Veg Day 3 Day 12, in the video was affected. Everything that got a dose of it did. Except the Frosted Guava, she was given another Enzyme, and was just gonna add it today, so glad I held off. So annoyed. Only the next days will tell if Plagron can save my crop. Decided to start pushing Terpinator, as she's not getting any worse, crisis averted. Vita Race "must be used as foliar spray once a wk" was applied and will be until 3rd week of Flowering.
Lights
P/SF 1000(s) are been used. For flowering I'll be using an FC4800 "hopefully" along with the IR/UV 45.

Likes
13
Share


@Esiking
Follow
Hi guys i am wondering with this fastbuds strain.West coast og will yield much and its dense and potent.next week i will start to flush with advanced nutrition flawless finish.
Thank you all.