




Likes
4
Share

@GREENPHOENIX6262
Follow
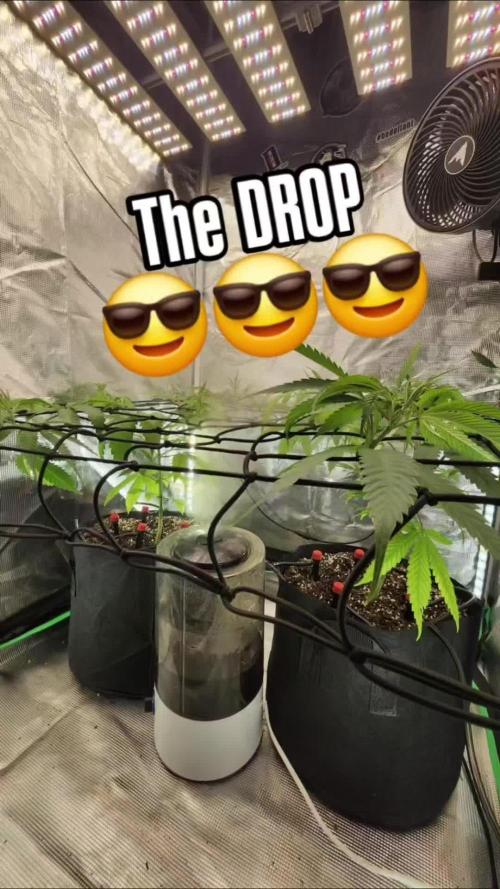
05/24 - Both have been transplanted into 5 gallon pots - Both are hooked up to the Vivosun smart drip emitter system - I have introduced three new components to their feeds (Silica,Horti Grow and Kelp) - They have been moved into the 3x3 tent from more room under a bigger light - I have dropped the net on them for maximum light exposure - Running the AC infinity supplement for added light exposure to underneath canopy and mid level grow.
😎😎😎😎😎😎😎😎😎😎😎 - Check my IG grow family - IG @GREENPHOENIX6262

Likes
72
Share

@squalino
Follow
Journal de Culture : Frost 1 -
Babouch (Semaine 8)
Génétique : Frostbanger (F2 Perso) | Système : Autopot 20L
📣 Remerciements
Un immense merci à toutes les personnes qui suivent ce journal depuis le début ! Un grand merci en particulier à@MIA_BIOTABSet à Mrs_Larimar pour leurs précieux conseils toujours aussi utiles. Merci à tous pour votre soutien !
🛠️ Configuration Technique
Éclairage :
Lumatek ATS 300W Pro (réglé à 75%)
Distance lampe/canopée : 50 cm
Climat :
Jour : 25°C / Nuit : 21°C
Humidité (HR) :
50% (gérée par le déshumidificateur)
Tente :
1m80 de hauteur
📅 Évolution & Floraison :
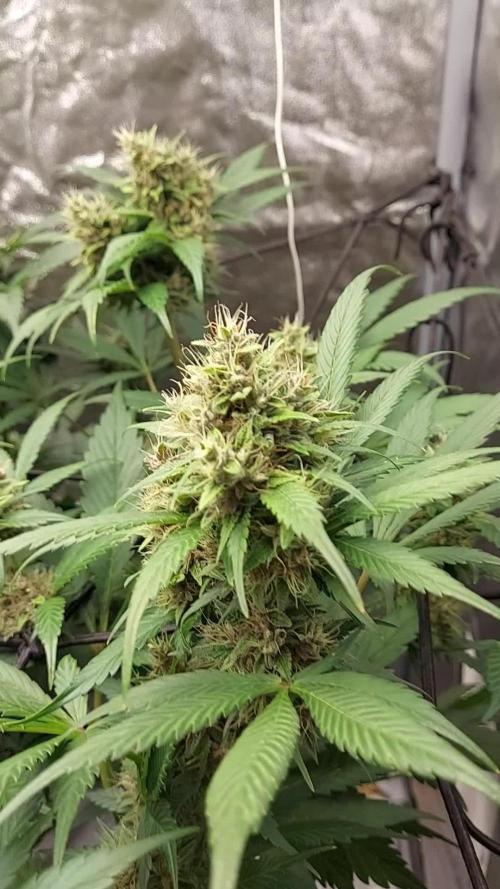
Des buds en "cornes", odeur puissante et retour de vacances
L'anecdote du retour de vacances (Alerte pH !) :
En rentrant de mes 4 jours à Rimini, j'ai analysé ma soupe et j'ai eu une surprise : le pH de mon réservoir Autopot était monté à 8 !
La cause :
Le bulleur installé dans le réservoir. J'ai appris à mes dépens que l'action du bulleur fait grimper le pH de l'eau à une vitesse folle. La plante a donc tournée avec un pH inadapté pendant presque 1 mois sans que je ne m'en rende compte.. (on apprend de ses erreurs 🤣)
Correction :
J'ai immédiatement retiré le bulleur. Pour stabilisateur ma cuve sur le long terme, je change de stratégie et passe sur le pH Down de Plagron (spécial hydro), réputé bien plus stable en réservoir passif.
État de la plante & Morphologie :
Malgré cette histoire de pH, Babouch montre une résistance incroyable. Les Biotabs font un travail de tamponnage exceptionnel en sous-sol.
Hauteur actuelle : 84 cm (+ 1 cm, le stretch est définitivement bloqué).
Développement des bourgeons :
Les têtes grossissent vraiment à vue d'œil et sont déjà particulièrement fermes au toucher.
Un phénomène marquant et très sympa : Babouch développe des "mini-têtes" sur les têtes principales, ce qui leur donne une forme originale en forme de cornes !
Couleurs & Odeurs :
Les fleurs commencent à arborer une magnifique nuance rosée. Quant à l'odeur, elle est déjà extrêmement forte, je suis vraiment étonné par sa puissance à ce stade.
Feuillage :
Toutes les feuilles montrent encore un vert bien profond et vigoureux, il n'y a absolument aucune trace de sénescence pour le moment. J'ai simplement quelques petites brûlures localisées sur certaines feuilles, mais rien de grave : c'est simplement dû à de la transpiration accumulée lorsque je manipulais la plante.
Nutrition (La demoiselle a faim) :
J'ai l'impression qu'elle est particulièrement gourmande en ce moment. Aujourd'hui, je lui ai préparé un bon repas manuel :
Apport de 5 ml de PK 5-8 Biotabs dans 1 litre d'eau (pH 6,3).
Elle devrait adorer ce boost pour accompagner le gonflement de ses "cornes". Le reste du temps, l'Autopot tourne à l'eau claire (et maintenant au bon pH !).
Résumé :
Une semaine riche en enseignements. La structure de Babouch est hyper solide, ses têtes sont denses, résineuses et commencent à prendre des teintes magnifiques. Maintenant que le problème de pH est corrigé et que le PK 5-8 est assimilé, la suite de la floraison s'annonce massive.
08/06
apport nutriments
dernier apport de nutriments
5 ml pk 5-8 biotabs dans 1 litres d'eau
stop autopots . passe en mode manuel pour le rinçage 14 jours
j pense que la fin est proche
À bientôt pour la suite !❤️

Likes
28
Share


@Bongman
Follow
Into week three of flowering:
- Need to up CalMg this week cause all my last grows with this strain the plants were stressing and showing signs of Mg deficiency I think.
- The buds are stacking up pretty tight.
- The top of the plant is showing some red veins AGAIN, don't know if it is genetics? Or is it too much light? ANY SUGGESTIONS?
- Usually what happens is that after week three top of plant will show red veins and some leaves will turn light green yellow. What type of deficiency is this?
Thanks in advance for the help.
Happy growing,
BM
4TwenTee
*****Update on LIGHT STRESS:*****
Okay I think I got this figured out. Since my plant is showing the following symptoms:
- Slow yellowing of top of cannopy
- Fan leaves pointing up in a steep angle
- Leaves are tacoing up a bit with sharp pointy serrated leaves pointing up
- Veins are turning purple and some leaves are showing green veins and yellowing of outer part of the leaf
REASONS FOR THE SYMPTOMS:
- Since the light is too close to the top of the canopy, although my light is running at around 60% and it is at least a meter away from the light. I think because this was a mother and basically she is accustomed to top canopy PAR of around 180-220 and she was measuring around 600PAR so that is just too much for the plant to handle. So I've lowered the light output so the top canopy is around 420 PAR.
- Also my humidity is pretty high at around 72% so I lowered it to around 65%
- The reason why the leaves are tacoing up to the light is because the canopy cannot take the high PAR, the temp at the top of the canopy is only 76F so that is acceptable, but the plant is trying the sweat due to the high PAR, but because the humidity was also too high it was not sweating as much as it should.
- The reason why a light stressed plant shows different deficiencies eg. magnesium and phosphate is due to the "extra sweating" that takes place, cannabis plants don't choose what they intake, if they need more water to sweat, extra nutrients will be absorbed and this will lockout some of the other nutrients in the solution.
**End of week update:
Tried multiple changes but still no luck on getting rid of red leaf stem.
- Added a 1 hour sunrise and sundown light regiment
- Decreased Humidity to 65% from low 70's
- Top of canopy PAR decreased from 600 to 350.
Leaves red stems still not going away and top of canopy still trying to get rid of moisture with fan leaves pointing up.
If anyone can chime in that would be great thanks.

Likes
Comments
Share

@Grow4ever
Follow
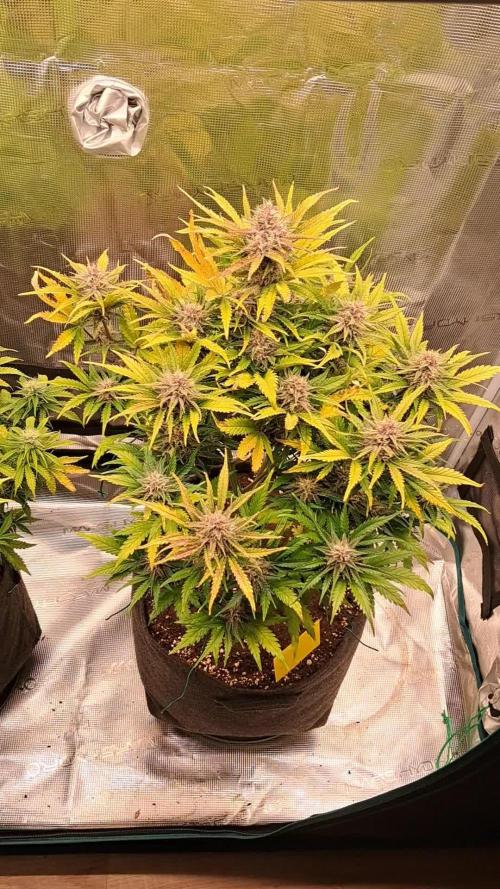
Die PH Probleme machten sich bei allen Pflanzen deutlich bemerkbar. Trotzdem war Sie wirklich vom Geruch ein wahrer Traum. Süßliche, fruchtige Note mit einem gassigen Aromer.
Likes
2
Share

@420Junglist
Follow
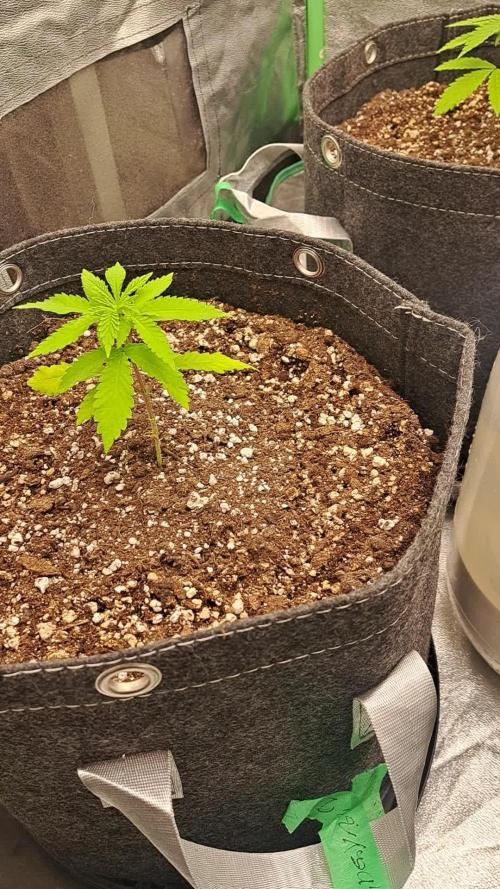
So far so good they didn't even notice being transplanted. Go into dragley and grow out a bit before I start my main line , which is really exciting as they will give me a nice evening , canopy with far colaamaà9880
Likes
15
Share


@moritz
Follow
Temp & Humidity still controlled by my Mycodo System. VPD range still set to 0.4 - 0.8 for now.
08.04. Week 2 of Veg begins and the plants really start to grow like crazy. Especially the Strawberry Lemonade and Fullgas seem to be bigger every day! I had a little PH issue on the last watering, but it should not be too worrysome.
10.04. I‘ve noticed some yellow tint starting to form on the newer leaves of the Strawberry Lemonade. For now I will stay on the lookout, but I hope it‘s nothing too dramatic. I also switched the VPD to be around 0.8 - 1.2 which it doesn‘t completely hit for the moment as i do not have a dehumidification option but the additional humidification was stopped.
13.04. Week 2 is nearing it‘s end and things are going great. The discoloration has vanished and the plants are growing steadily. VPD at around 0.7 kPa.


Likes
2
Share

@FPVGROWCZ
Follow
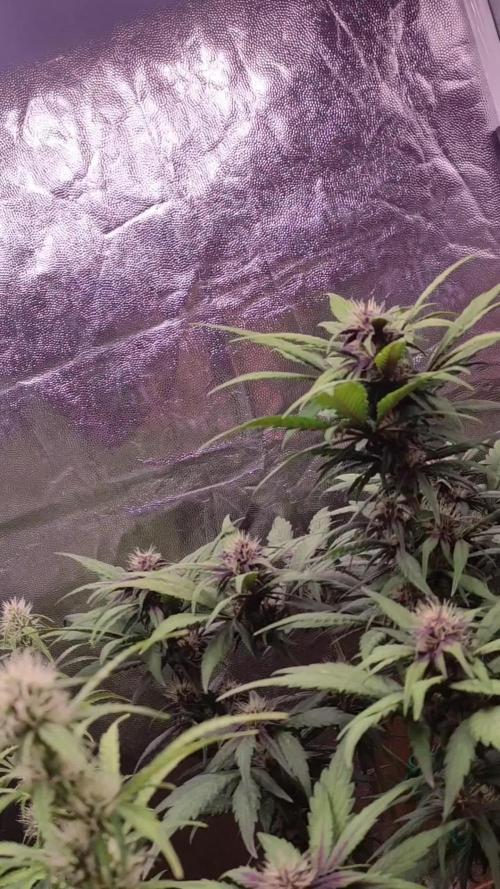
Všechno OK
Začínám pomalu lehce přidávat PK13/14. Holky nabírají a každý den jde vidět jak obě více houstnou.
Ať to roste Growers !
Likes
12
Share


@YoungNu
Follow
So the last cups I had them in had no drainage, and i think they were damping off or dying. So I did a pretty rough transplant to new soil and cups I probably stunted them but let’s see what happens.
Day 10: So wow a lot can happen in a few days, they grew a bit one of the NL seems like it’s the same size, 2nd NL is not doing too bad. The lemon Larry is going through it right now, might’ve been heat stress I can’t think of anything else that can cause that
Likes
5
Share

@GrowPro3500
Follow
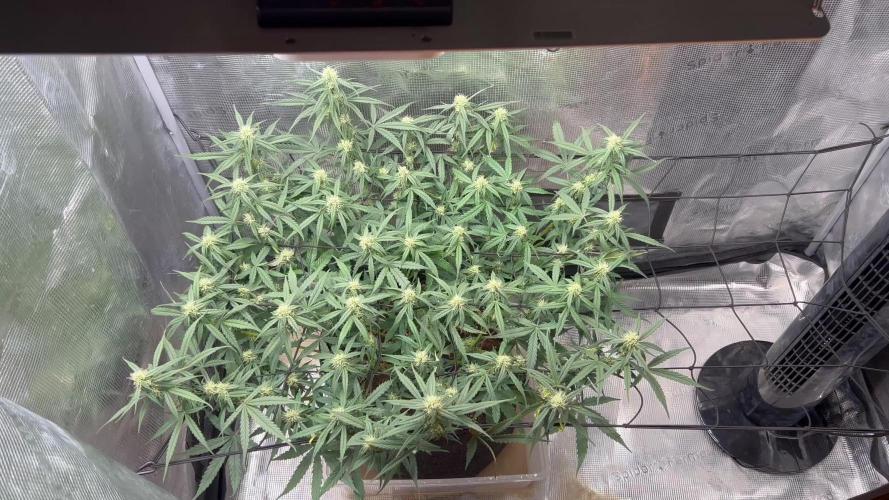
She stretchin’ hard and throwin’ out sites 🔥
Got her topped, light defol + lollipopped — airflow’s clean.
Might strip a bit more soon if she bulks up.
Stackin’ up nice so far… let’s see what she doin’ next 💪🌿


Likes
Comments
Share


@madlangs
Follow
They are plodding along in the 2x4 tent, waiting for space in the drying tent. The tent should be free in about 7 days then I can up the ppfd and give them a better environment. Cant control the high humidity in this small tent
10.2.25
Ppfd 800ish
Dli 34
15.2.25
Jelly 44cm
Jelly 74
Slurricane 75cm

Likes
9
Share


@kapai
Follow
Into week 4 now and I'm starting to pour the coal to these girls. I did a nutrient change and increased the solution PPM to 950. At the same time I replaced the air pump for a more powerful one as the other one I had was fairly weak.
Still seem healthy and they are getting very bushy. I did a little LST mid last week and they seem to be responding well to that. This is my first grow and I'm not sure if I should defoliate a little so I can expose more tops to light or if I should just let them do their thing. I will see how they go this week.

Likes
8
Share


@Artyparty
Follow
This week I started flushing the ice cream cake. I'm looking to flush it for a total of five to six days. The purple punch still looks like it has another week or maybe even two. I'm quite sure my temps are too high for this strain.
Likes
19
Share


@Jokerdab13
Follow
Muy contento con los resultados unas flores con un aroma sorprendente y una genetics bastante productiva
Likes
29
Share


@Seldom_Seen
Follow
Captain’s Log (I know that’s a different show)
Today was my first day on earth and Willie got me straight to work mixing and digging preparing the soil. I would add 2ltrs of Plagron lightmix, 0.5ltrs of perlite, then 6grms of RQS Easy Boost, 1grm of Mycorrhiza mix, 0.5grms of Rhizobacter, mix it up and then keep repeating these steps until the pot was full. I feel like I could sleep for a whole light year. Seed was soaked in ph’d water for 24hrs before planting. I’ve got a lot of thinking and soul searching to do before I can decide how much Lightside and Darkside I want in my strain, or Sativa and Indica as they call it here on earth. I think I may need to try contact the ghost of Obi Wan for some advice on this one.
Likes
10
Share

@carlitoshaze44
Follow
Otra semana más
Creo esta semana hoy día 27
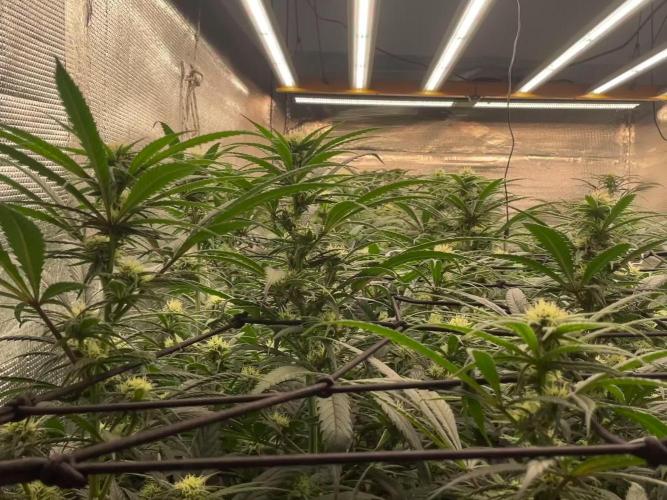
Anunciando así el próximo día 28 inicio de esta quinta semana de floración del calendario de mis niñas,semana en la que comienzo subiendo la cantidad de comida y con ello de agua para mis niñas.
En los últimos riegos de la cuarta semana fui subiendo hasta alcanzar los 1700.
Las plantas mayoritariamente lo aceptaron,así que con ello subiré esta semana hasta alcanzar los 2000.
No defoliaré ninguna planta
Hoy ajuste la luminaria a una altura de 30cm con respecto a los 45 de la anterior semana.
Esta semana pegarán un buen apretón con la subida de PK,y la ayuda de los azúcares.
Seguimos con muchas lluvias y una humedad muy alta que dentro del armario se combate entre ventiladores extractor y desumificadores pasivos de sales de silicio.
Que me mantienen un 35% menos de la que tengo en el exterior llegando muchos días a los 45/50% de humedad.
Tengo que añadir que vivo a un kilómetro de la playa.
Día 28
Di un pequeño fumigado, de agua con ajo y jabón potásico en la entrada al cuarto de cultivo.
Como preventivo ante cualquier insecto que quiera acercarse atraído por el aroma.
Hoy e podido ver que el último riego de 1700EC,no causó ningúna sobre fertilización apreciable en el cultivo casi nula,viendo esto en el siguiente riego subiremos a 1900Ec.
Día 29
Primera impresión al abrir el armario es que había una humedad alta dentro del almario.
Un 72% que una vez encendí el pequeño desumificador de 8l de casa,a mejorado a 53%
Hoy compré la gama de completa de aptus.
Iré añadiendo alguno de estos componentes de la fase de floración,para ver qué tal se combinan con la gama de plagron.
Hoy le metí un riego de 55litros,una Ec de 1900
Sin carga de pk,desorbitada.
Este riego me centro en los azúcares junto con algunos aditivos como silicio,aminoácidos,azúcares,encinas,sulfatos y manteniendo el nitrógeno en pequeña parte el potasio y el fósforo,calcio y magnesio que nunca falte en cada riego!,las lámparas están bajas y a toda potencia.
Quiero en estos días conseguir mejorar con grandes empujones .
Saludos compañeros!
Día 30
Todo bien,todo correcto y me alegro!,buenas tardes,buenas noches.
El cultivo aceptó muy bien la subida de EC 1900,esta variedad come de buena manera!.
De esta manera seguiremos subiendo para ver,hasta donde llegan.
Obviamente no vamos a sobrecargarlas,pero vamos a ver hasta donde llegan.
El siguiente riego lo haré trabajando con pk,mineral y algunos aditivos más orgánicos-minerales.
Tengo que decir que el aporte del té frío de plátano junto a la melaza le habrán venido fantástico también a las lombrices!
Día 31
Todo perfecto dentro del cultivo ,veo que las 9 semanas de floración son fijas..
Un gran punto a favor,es que el clima empieza a ser más favorable a partir de este fin de semana..
Subirán más las temperaturas y las lluvias van a detenerse por unos días.
Espero contar con una humedad ambiental más baja para poder seguir tranquilo con el desarrollo de las flores.
Dia 1
Lo comentado en el día anterior,bajo la humedad ambiental,tenemos buenos parámetros!
Una temperatura con luz de 21 grados y una nocturna de 16.
Va aumentando mucho la resina!,eso me gusta!
Hoy le metimos una EC2100 en el riego.
Mañana veremos qué tal lo reciben las niñas.
Va aumentando de buena manera el engorde,no me puedo quejar!
A ver si llegamos al 1,7g/w que es el rendimiento que se está obteniendo con esta configuración en los cuartos de los compañeros! Sin Co2 obviamente.


Likes
13
Share


@StickyThumbz94
Follow
Unfortunately I had to harvest early due to personal reasons. I am proud of my harvest though. The buds could have gone another week but that’s fine. The trichomes were to my liking. They’ve been drying for about 5 days now. All in all it was a pretty easy grow, just water every couple days and top dress every 3 to 4 weeks. I did make some very potent canabutter from the trim 😋

Likes
31
Share


@DutchFarmer
Follow
Transplanted Them to 2litre Solid Pot
Decided to use the LST Clips
Ive 3d printed these my self!
Check out my Cannabis Community, please👇like👇, follow, comment, and subscribe to my YouTube channel👇. ❄️🌱🍻
https://www.youtube.com/@DutchF4rmer
Join our cannabis community community for weekly giveaways 👌
(Discord Server)
https://discord.gg/VMu6rH4a7V
It will be appreciated! ❤️
Happy Growing 🌱🌱🌱

Likes
3
Share


@Krautbauern
Follow
The plants are growing fast and soon I will have to repot them in 14 l Pots with the Allmix Soil from Bio bizz.
Bruce Banner 3 Seeds tobe ahead in the race 🏎️
All pics are from Day 11