
Likes
Comments
Share


@AestheticGenetix
Follow
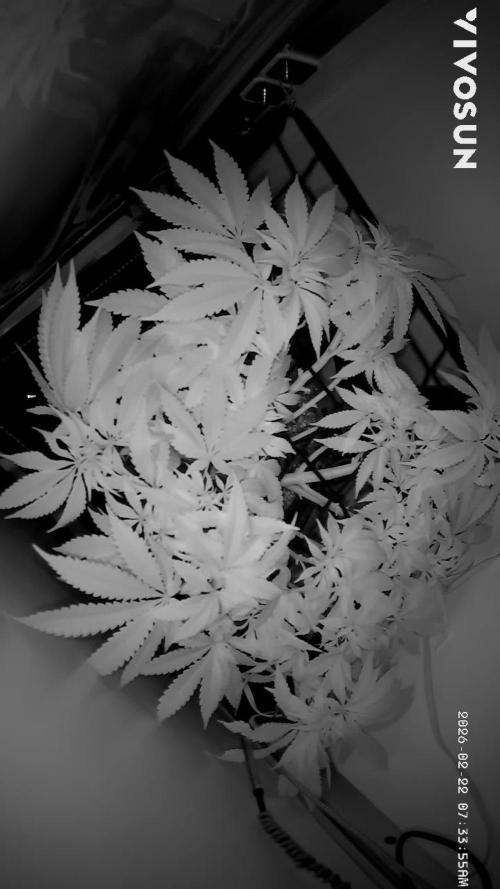
5/26 this plant is super fucking frosty and is starting to chunk up a bit.

Likes
Comments
Share

@grimm420
Follow
Will begin to lst next week, about what week does frostbanger begin to flower? Will also need to give blooming nutes a little early to get the magic going.


Likes
8
Share


@earthstarza
Follow
High humidity organic outdoor grow, keeping a watch on any mold. sprayed Magret Roberts for mildew and keeping and eye out for any worms Triple cheese is going to be finished soon

Processing
Likes
43
Share


@Jack_Greenstalk
Follow
week 2 of flower, been able to line up compost teas with feeds so they get nutes, nutes, RO+TEA, Repeat. foliar last times this week, I stop spraying anything on week 3! showed how i like to shake them up with the scrog a bit in last vid. I do that to essentially simulate a wind storm, strengthen stalks and roots, also helps reorganizing the canopy as you sorta shake things into place that were bunched up next to neighboring leaves. next week will do a fairly heavy defoliation to allow better airflow around colas

Likes
33
Share

@BabaHase
Follow
Nach 55 Vegetationstage wird nun endlich die blüte eingeleitet. Habe heute am 01.03.2026 das licht auf 12/12 umgestellt und somit hat der 1. Blütetag begonnen.
Habe ihr 1,5 wochen ruhe gegeben um gelassen in die blüte zu starten. Sie hat in den 10 tagen ca 10cm zugelegt auf allen 16 trieben. Die untersten hab ich bereits an Vegetationstag 49 entfernt. Jetzt heißt es erstmal beobachten und schauen was wird. Wir hören uns nächste woche gemeinde 🍀🍀

Likes
22
Share


@MaxGrowCanada
Follow
The yellow lid make for some really bad pictures.
Playing around with things, as usual
I gave in and added a filter pump to my reservoir as the water temp can peak near 23c during the day. I dont have my ambient chiller inline this time.
The filter also oxygenates the water so this wouldnt be a pure fog run, oh well.
Half fog, half dwc🤷♂️

Processing
Likes
3
Share


@macrocefalo
Follow
Now that the plant has started flowering, I defoliated the excess leaf, focusing on apical buds. But unfortunately after defoliation and pressing the lst unfortunately plant b5 breaks the stem in its main apical bud. I was very sad but in life we have to learn from mistakes and stop complaining since the other 4 plants show good growth and vigor we will move on trying to minimize the errors.
Likes
18
Share


@ButterfliesLittleFarm
Follow
Hello Diary.
The second week of flowering is behind me. I did a little defoliation this week, I honestly didn’t dare remove more leaves and branches, I didn’t know how they would react to it. Maybe I needed more?
The temperature is still high, sometimes rising to 29, 30 degrees, but mostly around 28. Humidity in the air is an average of about 55% but sometimes rises to 60%. The problem is frequent rains this summer which creates high humidity in the air and this affects the humidity in the box as well. But plants tolerate these conditions very well.
The flowers are developing nicely, and they have started to smell as well, but let the pictures speak for themselves.
Green Gelato is twice as small compared to her roommates, but there is still a big crowd in the box. Gelato grew with very dense branches and spread more than it grew in height. The 120 x 60 box size is perhaps too small for three plants (two Hulkberries and one Green Gelato), so the real jungle is in the box.
Due to the height of the Hulkberry in the box, and the spreading branches, it has become difficult to take them out every week for photography, but I am extremely careful with them.
The Green Gelato has grown to 48 cm and does not look like it will grow much in height. Probably due to the excessive distance from the light, which I had to raise because of the Hulkberry which reached a height of 1m.
18/07/2020. - Day 30.
Defoliation. I removed the leaves at the very bottom of the plant to make it easier for me to water them, after that I watered the plants but this time I didn’t put BioBizz, I just watered them with clean water.
21/07/2020. - Day 33.
Watering. This time I gave them BioBizz, on schedule for the second week of flowering. I also added CalMag 1.5ml / L, preventively. While they don’t show they’re missing anything, I’ll keep adding CalMag.
23/07/2020. - Day 35.
Photography and height measurement.
Green Gelato Auto - Day 35. - 48cm
That’s all for this week, see you soon.

Likes
58
Share

@GERGrowDesigns
Follow
A Special Project from Germany and Welcome to Flower Week 8 of GoodTimesGenetix Blue Cream Haze
I'm excited to share my grow journey with you from my
GoodTimeGenetix Seeds .Im the First Person outside my Friends Company who got hands on this Strain .
He Managed over a long time to Cross these Strains:
-Blue Dream (Blueberry x Super Silver Haze - Female)
-Ice Cream Haze (Gelato x Wedding Cake x Crockets Haze - Male)
They Done a lot of Tests for a Nearly Perfect Stabilisation of this Genetic and Feminized them aswell .
This one is Professionell Created In Germany , Growed in Germany and presented To the World on Grow Diaries.
Here’s what I’m working with:
• 🌱 Tent: 120x60x80
• 🧑🌾 Breeder Company: GoodTimesGenetix
• 💧 Humidity Range: 45
• ⏳ Flowering Time: 8-9 Weeks
• Strain Info: 23%THC
• 🌡️ Temperature: 26
• 🍵 Pot Size: 20
• Nutrient Brand: Hy-Pro
• ⚡ Lights : 600W x 2
I would truly appreciate every bit of feedback, help, questions, or discussions – and of course, your likes and interactions mean the world to me as I try to stand out in this exciting competition!
Let’s grow together – and don’t forget to stop by again to see the latest updates!
Happy growing!
Stay lifted and stay curious!
Peace & Buds!
Likes
15
Share


@DreamIT
Follow
Sponsored by:
🦎THE HIGH CHAMELEON🦎-💡VIPARSPECTRA💡-💐GREEN BUZZ LIQUIDS💐-🛠️WEDRYER🛠️
🏁 10/8 New sponsor at DreamIT. I am delighted to warmly welcome The High Chameleon to my journals and growboxes. The shipping was fast and the package was nimble. Instead of the usual plastic to keep the seeds in place, I found a nice bag of chopped hemp, a smart and ecological choice. In addition, a very practical grass holder with attached grinder, really practical and comfortable. I will open a diary for each seed that I will try to grow with different types of training techniques, I will decide which ones along the way. So off you go !!
12/8 does not yet know which way to orient but it has popped up and is beautiful green. yeah!
18/8 everything is going well
__________________________________________
Personal advertising (contains affiliate links)
__________________________________________
🦄 Check out The High Chamaleon website, their first selection criterion is the strong signature of terpenes by taking rare strains while being 100% organic and respecting nature. Safe anonymous shipping!
✅ https://bit.ly/TheHighChameleon
__________________________________________
Did you know that Green Buzz nutrients are 100% vegan? A complete line of products ready to give the best to each of your plants! Visit the site and see my journals to see how they work 🦄
🤯 And with the code "dreamit" you will immediately receive a 15% discount on your purchases
✅https: //bit.ly/GreenBuzzLiquidsPro
__________________________________________
👀 Are you looking for a good lamp to start with? 👀
🌞Viparspectra has something more than the others, take a look at their site.
⏩ Use "GDVIP" for an extra discount or "DREAMIT3" for an extra 5 %% discount
👀 Search for it on Amazon
✅Amazon USA: https://amzn.to/30xSTVq
✅Amazon Canada: https://amzn.to/38udUVe
✅Viparspectra UE: bit.ly/ViparspectraUE
✅Viparspectra USA: bit.ly/ViparspectraUS
______________________________________________
🌈 Tired of blowing on your weed hoping it dries quickly? Check out the Wedryer website! You will find a well-made accessory that will help your weed dry in just 8-10 days without the annoying risk of finding mold or other annoyances! (no affiliate links)
✅https: //bit.ly/Wedryer_
______________________________________________
📷🥇Follow the best photos on Instagram 🥇📷
https://www.instagram.com/dreamit420/
Backup
https://www.instagram.com/dreamit4200/
🔻🔻Leave a comment with your opinion if you pass by here🔻🔻
🤟🦄💚 Thank you and good growth 💚🦄🤟

Likes
5
Share


@LittleBigTrees
Follow
I've defoliated a little as I go.
One of the watermelon candy has a flat stem (Fasciation) I've been trimming the leaves as they are growing in abundance on the affected branches.
The black orchid smells so good it's very pungent and captivating, I'm really looking forward to trying it now.
Likes
10
Share


@SnoopyShaggy
Follow
What a week it was, experimented with my 2 AK47 hermie seeds and the happiness seeing a jungle in my 2x4 tent. They overtook the lights and pistils are coming out however no pistils are forming and the nice looking hairy structure was not visible instead the plant overstretched. I was informed to flip them lights in which i may attempt once harvested all of my 3 autoflowers. It is no doubt that this hermie can produce great flowers once i flip the switch, i have completely defo the plant to reveg it once Purple Punch, Outlaw Amnesia and strawberry cough is chop-chop.
Other 3 autoflowers are looking great.
Likes
62
Share


@Roberts
Follow
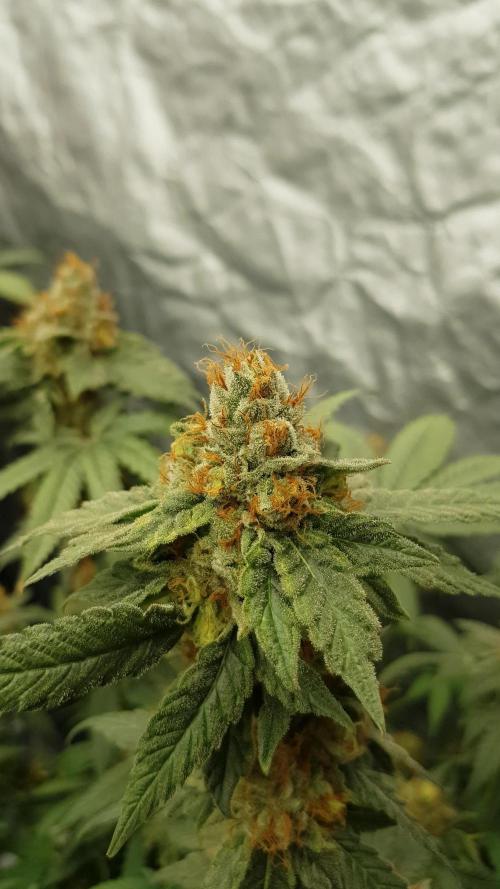
Do-Si-dos auto has grew well. She has a strong fruity, citrus aroma. Smells really good. The colas didn't get super big, but looked to be very frosty and dense. This is my first time trying this famous strain. It looks like it will be really good. I never had any huge issues during the grow. I also didn't juice her with nutes like I normally do to others in flowering. I am curious to test the results once I get her processed. Thank you Zamnesia seeds, Athena, and Medic Grow. 🤜🏻🤛🏻🌱❄️
Thank you grow diaries community for the 👇likes👇, follows, comments, and subscriptions on my YouTube channel👇.
❄️🌱🍻 Happy Growing 🌱🌱🌱
https://youtube.com/channel/UCAhN7yRzWLpcaRHhMIQ7X4g
Likes
144
Share


@TOTEM
Follow
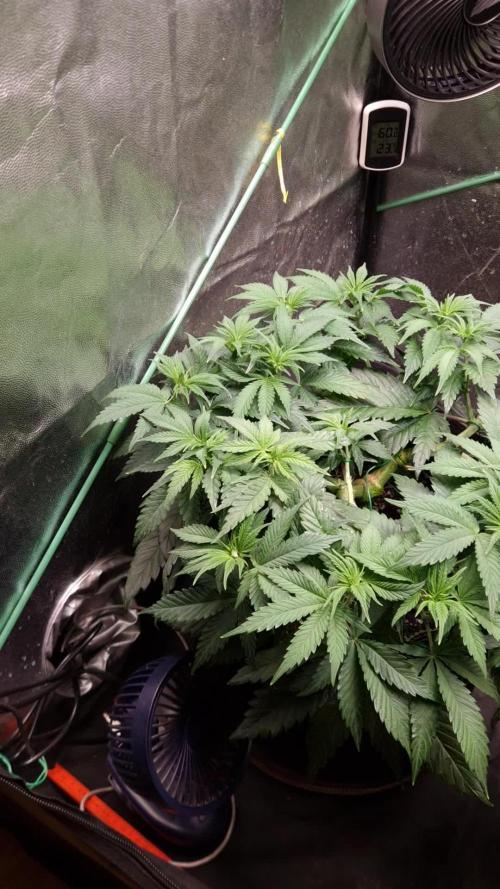
She’s still stretching!
This week I removed Voodoo Juice, Tarantula and Piranha, and added B-52 and Bud Factor X (never tried this one before). Since the princess loves this 2ml/L dosage for NPK nutes, I’ll not be touching that for the moment. That seems to be the optimal dosage for a sativa like this. Very nice!


Likes
25
Share


@Highone420
Follow
hello fellow growers!
it's the last couple weeks of this run and i couldn't be happier with the results, it's been a learning curve that shoots to the sky,
amazing genetics that helps a lot, resistant and sturdy plants with a lot of terps and easy to grow, it's not hard to get to know them and they will tell you what the issues is and quick!
they will let you know if sum wrong!
they don't like PH flux and high EC (a lot of nutes).
i'd say any of the fast buds line is a great starting plant for beginners but you still have the possibility to really cream these babies out and maximize yields n quality. i'm really happy and can't wait until next run!✅❤️
bless!!
//Highone420
Likes
120
Share


@CBD_Sweden
Follow
Hi all the happy people here in GrowDiaries.
This is my second cultivation ever and it will be fun to try a bigger space than my closet grows
First, I'm just going to say I'm done with the construction of my new growroom.
I put some pictures on the construction here in week one.
The room is 2.14 meters by 1.7 meters and has a ceiling height of 2 meters.
It provides a floor area of 3.6 square meters.
I use a 54 Watt Lightwawe T5 for germination and 2 Pcs 400 Watt HPS lamps.
I have a channel fan that replaces the room air about 40 times an hour to get a comfortable theme in the room, the air enters a fresh air intake from the outside.
The air is purified through a carbon filter to then leave the room to the rest of the basement.
Then I use that heat to heat the rest of the basement.
I will use 8 pcs 15 liter Autopots to grow with and a 100 liter water tank that supplies the pots of water and nutrition.
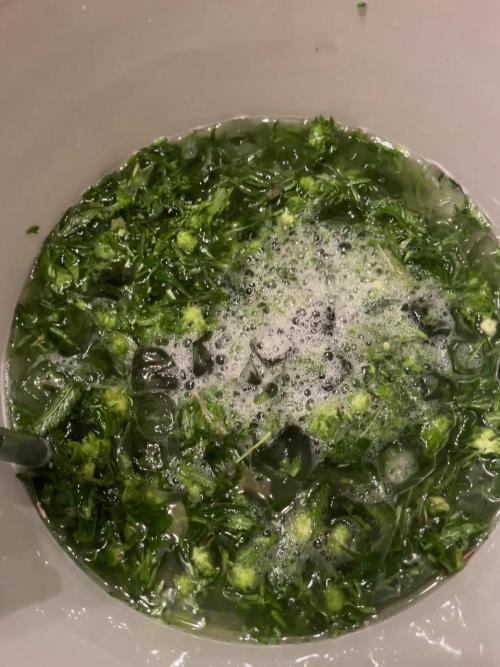
I will grow completely organically in soil and will watercure my buds to get the best possible medicine for me.
But there are no cultivation rooms to be displayed here, so I continue with what is most important.
I am very excited to see how the new growroom will work and how this CBD Fast Eddy plant from Royal queen seeds will turn out.
CBD Fast Eddy Automatic is combining Cheese x Juanita la Lagrimosa x Ruderalis, Fast Eddy is a rapid growing, flavourful, and CBD-rich auto strain that goes from seed to harvest in 8-9 weeks, produce generous yields, and induce a clear, mellow, and most importantly, functional high.
THC: 9%
CBD: High
Yield Indoor : 400 - 450 gr/m2
Yield Outdoor: 80 - 130 gr/plant
Height Indoor: 60 - 100 cm
Height Outdoor: 80 - 120 cm
Flowering: 6 - 7 weeks
Harvest month: 8-9 weeks after sprouting
Genetic Background: Cheese x Juanita la Lagrimosa x Ruderalis
Type: Sa 50% In 40% Ru 10%
Effect: Clear, Painrelief
Climate: Mild
-----------------------------------------------------------------------------------
2017-09-18. Week 4 starts and she is in flower. She is 36 cm high and looking really healthy.
---------------------------------------------------------------------------------------------------------------------------------------------------------
2017-09-19. 2 new fans is installed in the grow room. Added pic and video.
---------------------------------------------------------------------------------------------
2017-09-20. Kl 10.00. New video. The girl is 38 cm high and doing great.
Kl 23.00. Did some massive defoliation, added video and pics
------------------------------------------------------------------------------------------------
2017-09-22. The girl have recovered well after my massive defoliation. She is 39 cm high now and have received 2 liters of water and nutrition today.
Likes
8
Share

@Bud_vista
Follow
Welcome to Week 9 of my white truffle grow!
In week 8 she stretched a little and the buds starting to develop and slowly bulk up.
I have to defoliate here and there but in general the plant looks healthy.
In this week you can tell that she's starting to develop her smell. A nice cannabis smell just like you walk into a coffeeshop. Buds bulking up continuously and the stretch seems to reduce in week 9.
Likes
48
Share


@Nvchods3
Follow
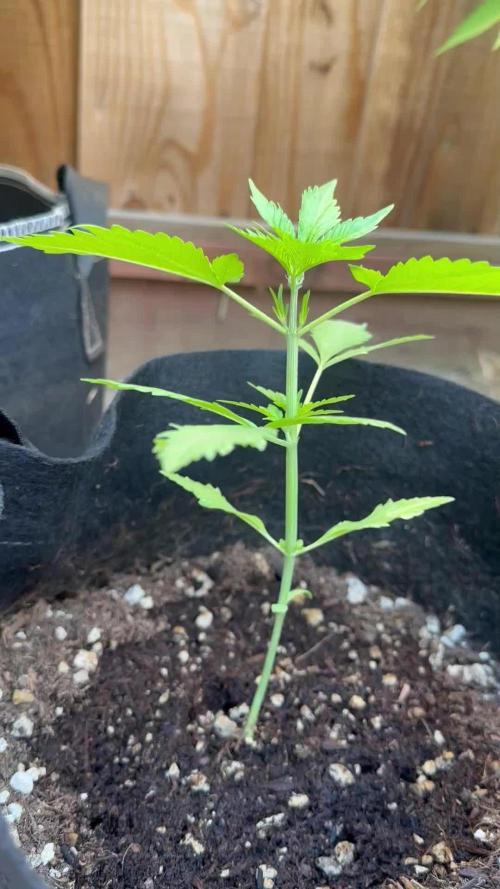
se le realizo transplante de 5 a 11 lt definitiva, le dare 1 -2 semanas mas antes de hacer el cambio de fotoperiodo.


