
Likes
Comments
Share


@Appoldro420
Follow
This week in my grow room has been full of developments. First, I added additional lights because I couldn't get the relative humidity (RH) under control. I ordered a dehumidifier, but it will take a few weeks to arrive, so I had to find a temporary solution. I also emptied the reservoir and refilled it with fresh water and nutrients. I secured the net to ensure it stays in place under tension. In two days, I plan to switch the light schedule to 12/12, hoping the plants will stretch a bit during the switch to avoid having overly large buds that aren't evenly spread.
Seventeen hours later, I decided to keep the lights on a 16/8 schedule for a few more days. The plants are starting to show signs of something happening, so I want to see how they develop. I will keep you updated on the progress. Then, I received a message from my supplier that the dehumidifier would arrive today. Great news—time to spice things up!
On June 2nd, the dehumidifier arrived, and I managed to get my Vapor Pressure Deficit (VPD) to 1.17! This is fantastic news, and I'm very curious how this will affect water usage. The dehumidifier seems pretty powerful, with water literally dripping out of the hose, so I'm no longer worried about high humidity levels. It's a shame it doesn't have a range setting, but I couldn't expect more for the price. I'm considering ordering the Dimlux Auxbox to set a working range and separate day/night settings. Thankfully, the dehumidifier has an auto-restart function after a power loss.
On June 3rd, the night is over, and while my values are now more stable, I haven't noticed any significant differences in water absorption. What I do notice is that the pots seem much drier. The difference in leaf temperature compared to the room temperature has increased slightly, now about a 2˚C difference, indicating that evaporation has increased somewhat. Despite the dehumidifier cooling the air, the room temperature has risen. This is explainable since dry air heats up faster than humid air. The CO2 heater is also running significantly longer. So, although there are no immediately visible differences, there are indeed some changes.
Today is the last short night of 8 hours, and tomorrow will be the first night of 12 hours. I am contemplating doing a 10-hour night first and will decide later tonight. After closely reviewing the video footage, I noticed some divergent colors on the leaves. My pH is currently 6.4, which I had adjusted to compensate for the low pH last week—a foolish decision in coco, I know. I plan to make videos of each individual plant for my records to investigate further. The light is too intense to inspect them up close, so the videos will help me get a better look.


Likes
20
Share


@DabbertGlobberfield
Follow
For the Herbies contest - https://growdiaries.com/diaries/157348-grow-journal-by-dabbertglobberfield#gallery=6777378 - Grandmommy Purple is guilty multiple noise violations for being too loud and for stanky funk.
Harvest - 169 days / 66 days in flower
Well, we did it. I made it to the end. All I can think is...WOW that was A LOT of work. But I think I had very good results for a first time grower. I
For harvest, we took Plant B and D and prepared them for immediate freezing. Altogether, I ended up with 1212g wet on plant B and 1089g wet on plant D. I ended up freezing 1816g of this. There was some from each of these plants that was set aside from freezing because, for whatever reason, I thought they were not worthy of washing because of how progressed the leaf damage was from the root rot battle. So that was cut up and dried as nuggets instead of hanging like the rest. Sawtooth and Plant C were both harvested and hung in the tent to dry for 12-13 days. I think I overdried by 1-2 days because when I jarred them they struggled to raise up to 55%. So I am using rh% packs.
After drying Sawtooth and plant C, I ended up at 459.8g for dried flower and 170.8g in dried trim. So just over 1lbs between the 2 plants and 4.15lbs wet between the other 2 plants that was washed for hash.
So... are you for real with the effort involved with washing bud for bubble hash? I don't think I would do this in the warmth. I only pursued doing bubble hash cause it's cold right now and I figured that would really help. Even in the 30s(fahrenheit) stuff would stick. It's hilarious how sticky of a process this is. I hope you have a bunch of gloves, water, and ice to burn through. I went through over 60 gallons of distilled water and 80lbs of ice to wash the 4 lbs. I am envious of people in videos using a hose to collect, clean, and refill. Also, doing this as a 1 person show is the definition of insanity.
I broke the washings up into 3 parts. The first part was was the tester wash. I broke off 420g of plant D's 848gs available. I used 7 bags to see where I would end up. I used 220, 160, 120, 90, 73, 45, 25. What I determined was that if I was hunting a specific micron with a lot of material this would help find what you can get. But for the next washing I reduced the amount of bags to 4; 220, 160, 45, 25. The time, with the 4 bags, I washed with 809g. I had a much more favorable experience and return this second time but I had green fast and probably used too much ice. The 3rd wash was the remaining 631g and I found an extra 137g I added of sugar leaves and trim, brining the 3rd wash to 768g. I used 5 bags this time; 220, 160, 73, 45, 25.
By the 3rd wash I have become an expert in collection but also never want to do it again. lol.
2 of the 3 washes have dried and I have 43.4g of bubble and 2.8g of dry sift. 37.4g of that bubble is able to be pressed into rosin. I will probably press that dry sift as well. The other stuff is 25u or 160u that I will experiment with or cook with. The other stuff is drying so I can't add it all in.
I pressed a bunch of trim and some flower. The trim presses nice and the dab is decent. I am working out a good temp for the flower. But the problem with all these tests to find the sweet spot is that I have all these testers to go through but want to keep pressing and trying that! I think I will need to work on a better storage solution.
I can't wait for the fresh frozen bubble hash rosin pressing... I have over 20gs of bubble to put in one bag. I am really looking forward to this. But I will need to work up to that pressing since I have never pressed hash/kief/bubble before in my rosin press. So this should be really fun.
I will 100% post an update of the hash pressing once I do that and also after the 3rd wash session is done drying.
In closing, saying I learned a lot from this grow would be an understatement. I fully expect to start it back up in a few weeks after some R&R then some R&D. There's some things I will need to work on before I start again, such as: having a single external reservoir that feeds multiple plants, hard to clog and easy to use ebb and flow system, miscellaneous final run stuff like space for drying. So thanks everyone for hanging out and perusing the photos and or reading all my huge rambling updates and thanks to those for the help along the way.

Processing
Likes
7
Share


@Mr_nugs_lover_David
Follow
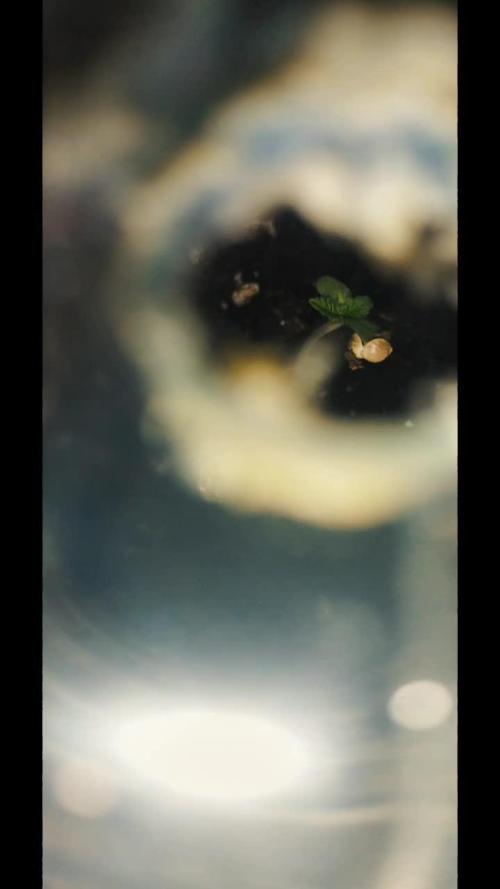
Beautiful looking seedling, very healthy and developing at a fair pace, let's see what awaits us in this diary!! She's developing super fast each day just like her sisters in this run, let's see how she keeps developing! I only use pure water and watch them grow thanks to the amazing living soil blend that I'm working with called FLO Living soil blend, very recomended to all the organic gardeners out there!! I have Transplanted this big girl after just 17 days since she was planted, she is very well developed and so ai took the decision to transplant her and all her sisters in this run, let's see how she performs! 💚❤️💛👨🌾🔝

Likes
16
Share


@TechDCo
Follow
10 /11 Weeks Flower¬¬ It's going to be a long flowering phase!
18/01/2024
Performed a mid-day clean using hydrogen peroxide
Moved Spicy Temp to the flower tent
Noted that the temperatures are a little high
Searching for a new, large heatsink for the CropMaster Pro 1000 to resemble the SK600. Considering modifications to the CropMaster's heatsink as it is currently equipped with a 12-watt fan driver, PC fans, and connected to the LED mains power. It still works well, but planning to replace some LEDs once this grow is completed.
Fed 200ml of organic random feed to 5 plants
Discovered a sprouted seedling beneath the Forgotten Haze and relocated it to the veg tent
19/01/2024
Noted the arrival of the flowers
20/01/2024
Conducted a mid-day photoshoot
Started using natural fertilizer as flowering has commenced, applied 150ml for every 5 liters of water
20-01-2024
Recorded a video of the pre-flowering stage, indicating anticipation of a substantial yield
20/01/2024
Performed defoliation before the onset of substantial flowering and cleaned up the lower growth
Implemented SCROG (Screen of Green)
22/01/2024
Recorded a video of the pre-flowering stage
23/01/2024
No major changes, just observing more leaves and flowers
23/01/2024
Trimmed off the small undergrowth shoots
Missed a few of the lower growth shoots
24/01/2024
Gently stretched the plant within the SCROG setup
I'm aware that I need to reposition the pot more to the left to ensure the plants stretch evenly from both sides, but honestly, I'm feeling a bit lazy to do it tonight. I'll tackle it first thing in the morning, I promise! Originally, my plan was to have two plants in the set-up, but it turns out that Freaky Pablo is male.
And now for a plant-related joke: Why did the Forgotten Haze Cakes go to therapy? Because she had too many hang-ups!
_____________________________________
#IT WAS A RIDDLE YA DIDDLE SEE IT-
"I was so stoned & baked last night and a little bit pebbled and tripped over a rake and then I finally had a ''eureka moment'' of what, ''Banana Shrimps are symbolic of! haha, my innocence is now ruined! The question I'm asking is; will I ever grow up? and leave Mushroom Town"
_____________________________________.
REAL CONCLUSION: The Skunk Of Trutn.
Answer: Not for another 3-4 Weeks, then you get to leave Mushroom city.
"But it's about Forgotten Haze Cake maturity in to woman hood begins. But she still stays in mushroom land, the land of the Forgotten, she's lost amongst the Haze and Cake strains of the cold damp soil where mushrroms grow.
This is a Kind symbolic gesture reminder here, to keep the top soil clean during these colder times. We don't want mould or bud rot.
Some hazes like to see 3 days of dropped temps to change her colours like a psychedelic trip during the start of maturity"
"Shes always tripping over rakes, I have a little baby rake I use to freshen up her top soils"
Allso she was living next door to Freaky Pablo that turned out to be male to where Bananas come from and shes the shrimp. This riddle is told by the perspective of the Plant realising she's a woman going through the stages womanhood"
So, in conclusion, my fellow thinkers and growers, let's embrace the absurdity, cherish our innocence, and ponder the enigma of find a rake to trip over and lead us to that illuminating "eureka moment," no matter how stoned, baked, or pebbled we may be. Cheers to growth, both in the mind and the garden!
_____________________________________
At mid-day on January 25th, 2024, I accidentally placed the light too close to the plants for a couple of hours, resulting in burnt leaves and pistils. It can't be a calcium deficiency since I have been feeding 6ml of calcium to 5 liters of water. The only difference was the proximity of the light.


Likes
8
Share

@1recw33d
Follow
*Week 4 - Cream Caramel*
Explosive growth in the 50L bed! 🌿 Top Roots is now fully integrated, turbocharging root development. This week's highlight: strategic training! One plant got apical pruning (topped) to boost lateral branching, while another is under gentle LST – bending stems for a perfectly even canopy. Sunlight penetration is maximized, and girls are loving their organic living soil setup! #CreamCaramel #OutdoorGrow #LST #Topping #TopRoots #LivingSoil #Week4 #GrowDiaries
*Semana 4 - Cream Caramel*
¡Crecimiento explosivo en la cama de 50L! 🌿 Top Roots ya está integrado, potenciando el desarrollo radicular. Lo destacado: ¡entrenamiento estratégico! A un ejemplar le hice poda apical (topping) para estimular ramas laterales, y otro está con LST suave – doblando tallos para una copa uniforme. ¡Máxima penetración de luz y las chicas aman su sustrato orgánico! #CreamCaramel #CultivoExterior #LST #PodaApical #TopRoots #LivingSoil #Semana4 #GrowDiaries

Processing
Likes
18
Share


@Silverback_Guerilla
Follow
11/30:
I harvested the first 6 today, flushed 5 more for the second time, and fed everybody else for the last time.
I washed all the branches using the 4-step method ascribed by Doc Bud at High Times/420magazine and many other notable cannabis connoisseurs, with slight modifications:
4 x big plastic totes/bins
8 x ounces of 12% hydrogen peroxide (or 32 ounces of 3%)
2 x cups of concentrated lemon juice
2 x cups of baking soda
10 x gallons of water in each bin
Unless your tap water stinks, you're safe to use tap water for the procedure, but I used an inline carbon hose filter to fill my buckets.
Bin #1 - 10 gallons of water mixed with the hydrogen peroxide
Bin #2 - 10 gallons of water mixed with the lemon juice and baking soda
Bin #3 - 10 gallons of water as hot tap water
Bin #4 - 10 gallons of cold tap water
I was mainly concerned about removing as much lint and cat/dog hair as possible, but also rinsing off any residue left from all the various foliar applications of humic/fulvic acid, kelp, axiom, big bloom, and tiger bloom I did. First, I put my leaf blower on low speed and blasted my plants thoroughly, one at a time, replicating 50-60mph winds for about 10 seconds and watched as a whirlwind of debris and hair flew out the back door.
Bud-washing:
Pluck any necrotic plant material and any old fan leaves off while they're still on the plant. Then, take a handful of branches and submerge them in Bin #1 for about 30 seconds, agitating it, removing from water, submerging again, agitating, etc...then remove it and let it drip out for a few seconds...then repeat the process with Bins #2-4. Let it drip dry overnight with a little bit of airflow, then dry as you normally would...baskets, boxes, etc..
I hadn't watered these plants in a few days, so they were almost in draught, but after doing this procedure, they were fully hydrated(turgid) and seemed to have brighter colors than before. Nice!😍
12/1:
The bottom part of the closet seems empty with only 9 plants in there.. 😟
I cut the harvested plants up and put them into drying baskets in the top of my closet with a small oscillating fan on. I've got the temperature fluctuating between 68f and 75f and the RH is staying between 48% and 52%.
To do that, I had to take down the small light in the top of the closet to fit the drying baskets up there. So, I moved the 3 shorter plants still up there down to the bottom and put them on top of buckets. Now the bottom of the closet looks full again!😃
I'm anxious to finish up this grow so I can get busy growing the Fastbuds Fast Flowering Photo Testers!!! When I harvest the next 5, I'll flush the remaining plants really well and that will be all the flushing they'll get..I'll let them dry back out for a few days and harvest them. I've got to make some minor improvements to the garden (adding UV, blue and red/far red booster panels and intake fans) That should put me on track to start germinating them by mid-December if all goes well.
12/3:
...early a.m...
The harvested plants are already dry!?!?? And have excellent texture??? Wow..bud washing is for real..roughly 48 hours after I hung them to drip dry, and 40 hours after I put them in baskets in 50% RH/70f conditions with moderate airflow...usually takes 4 or 5 days to get a good slow-dry in the same conditions, so I'm convinced that this must be attributed to the bud-washing procedure. I'm sold!
Here's the talley so far:
plant #1 - 115g (plus 13g larf) - Candy Cane [F2]
plant #2 - 108g (plus 18g larf) - Candy Cane [F2]
plant #3 - 119g (plus 15g larf) - C4ndycaine [Candy Cane x C4]
plant #4 - 92g (plus 6g larf) - Candy Cane [F2] - the smallest plant in the main area
plant #5 - 112g (plus 22g larf) - Candesia [Candy Cane x Amnesia]
plant #6 - 75g (no larf) - Candesia [Candy Cane x Amnesia] - grown in upper area under 200w
...afternoon:
I flushed 6 of the last 7 plants for the first time today and harvested 4 more of them. I washed them and hung them to dry.....my dripping wet bathing beauties!😍


Likes
12
Share


@BeHappyNtoke
Follow
Day one of flower will start tonight 11/15/22 not really any growth for the small pot the beach ball was y’all responding well I guess it’s not as restricted as far as soil wise


Likes
22
Share

@Kirsten
Follow
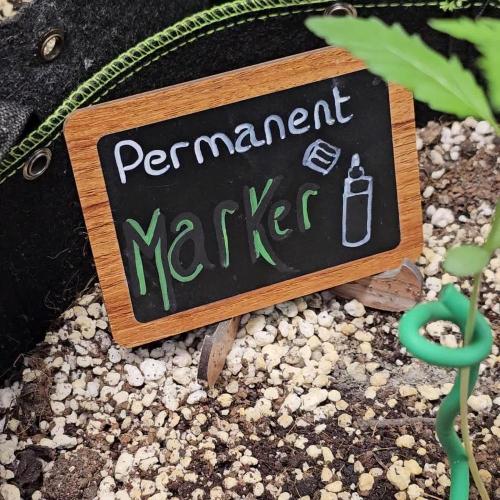
Permanent marker has shown some really nice growth this week.
The leaves are a nice, healthy green colour and overall. I'm very pleased with how she's getting on.
Here is what I did this week.
20.8.25:
I watered with 1.5ltrs of dechlorinated water PH'd to 6.0 with;
💜 2ml Trace
PH: 6.0
PPM: 340
Thanks for stopping by this week and hanging out in the comments 😁💚✌️🌱🤞

Processing
Likes
15
Share


@vibealive
Follow
So this week went great... Things are going super well, and the plant leaves are getting larger - I'm trying my BEST NOT to pull or pinch any leaves that are in the way, as to not stress out the plant!
She's drinking well, and I'm making sure not to over water... We're going to be able to start LSTing soon!


Likes
11
Share


@Chow_13
Follow
Not many fan leaves to chop. She grew nice and uniform. Buds look great, Lots of crystal and the purple makes them stand out!!!

Likes
26
Share


@CapeGrows
Follow
We are nearing the end of this grow and so far everything is taking shape very nicely. I did a quick 2 day flush with some florakleen from GHE and then got back to the bloom nutrients. I did this just to clean the roots a little and get rid of any unwanted salt build up. This will hopefully set us up for a strong finish. Really impressed with the marshydro fc3000 thus far. For next week i will push the EC levels quite a bit, remove any unwanted popcorn nugs and try set it up for a strong finish.


Likes
14
Share


@Uglys_buds
Follow
Tuesday February 28th I dropped 5 Exotic Genetix “Yikes” in ph’d to 6 water. After 8 hours they’ll go into paper towels. Eventually ending up in rockwool. This is my first time running a RDWC system. I have to thank @budz_alot for helping me get this all together!!!

Likes
33
Share


@Prof_Weed
Follow
Heute startet die 9. Woche,nicht wie hier vermerkt die 12. Woche.
In so 2,5 Wochen starte ich dann mit Final Part von Terra Aquatica und Flash Clean um zu flushen.
Die Buds werden fetter und die Pflanze ist super gesund.
Ec Wert des Wassers steigt von anfänglich 1.5 immer auf 2.5 sobald der Wasserstand runtergeht. Muss nach 2,3 Tagen immer ein wenig Wasser dazugeben.
Die Temperaturen sind für Indoor immer noch zu hoch,die Luftfeuchtigkeit ebenfalls.
Werde das nächste Mal Indoor erst im Oktober starten, wollte aber mal sehen wie das im Sommer funktioniert.

Likes
36
Share


@BudXs
Follow
Gonna be growing out some mothers this year! Transplanted the Slurricane mother into a 5 gallon to be put on the floor and grown tall. Looking to see how lanky this girl can get.
Happy growing, all


