
Likes
Comments
Share


@cookingwithninja
Follow
Plants are currently drying
2+ months later. And next project au79

Likes
40
Share


@valiotoro
Follow
easy trim✂️
The buds are Absolutely perfect,exactly what i was looking for🤩
Green pheno : cookie,diesel & gelato🍪⛽️🍦
Purple pheno : flower,sweet & honey🌸🍯
After 7 days on the dry rack she was ready for the jar to start the curing process.😋


Likes
170
Share


@Tropicannibis_Todd
Follow
👉Alrighty Then👈
77 days in flipped at 28 days
👉Went on Vacation 👈Came back to few that are top heavy 👌 had to do some tie ups and downs .....
It's been a great week all plants are killing it ......... 👉we are now in full flowering 👈
👉So I topped all but Babba Kush and Slurricane they didn't require it ... 👌 Got some nice level tops 👌
I've now started lowering there full flowering nutrients program , so we are set to go ...... up to the flush 😳
Persian Pie from Greenhouseseeds
Full Gas from Greenhouseseeds
Babba Kush from Greenhouseseeds
Rainbow Melon from Fastbuds
Papaya Sherbet from Fastbuds
Weddingcheesecake FF From Fastbuds
Purple Oreoz F1 From Seedsman
Slurricane From Premium Cultivars
Soil by Promix
Nutrients by Cronks
Well this should be fun 🙃
Thanks to all my growmies out there for stopping by its much appreciated 👈
👉Happy Growing👈


Likes
Comments
Share


Likes
13
Share

@masterofsmeagol
Follow
7/20 Went over this morning to plants soaking wet and heavy rain. Went back around 4pm and plants actually look really good. The rain has stopped for a bit and the girls looked great. Apart from some septoria leaves I needed to defoliate on the first plant I treated. I also noticed a few others on other plants so it's spreading albeit slowly. I treated the three in the middle with their second dose of Plant Doctor at 3tsp/1gal. One gallon administered to each plant via root drench. I think I may treat the other plant showing signs with a diy Dr. Zymes using citric acid as the active ingredient. That way I Gould start treatment right away without having to rely fully on plant doctor. Plus it would kill any pests. Ive seen damage but the birds do a number on them. I dont want to spray my plants with a bunch of chemicals if I don't have too. I shouldve replaced the pallets and cleaned the cage better. I think I did a good job sanitizing as I have no wpm. Just this septoria I probably got when the lady mowing the lawn cut all tjis fucking grass and blew it in my pen, throwing bird seed and I'm sure tons of disease into my grow bags. I literally had to harvest a bunch if fucking sunflowers. It looked like my plants had been mulched. Just with small disease carrying shrubs. At some point some of this stuff has to be on purpose. You CAN'T be that stupid. A couple kushes in the back look hungry. I think I may need to up my feed. I've written to much. I'll keep this updated. Thanks if you made it this far.
7/21 I guess it rained last night. Oh well. It was blue skies for hours before dark. It must've rained late/early morning. I'm sure the app of plant doctor will be fine. Like I said I'm considering using citric acid as a foliar spray to help with the septoria and clean up any pests. I don't have enough pests to warrant spraying. I just don't want to put all my eggs in the plant doctor basket. Today is overcast and windy. The wind has really assisted in spreading this virus. I remove anything I see infected immediately and since these plants are reveges they have plenty of leaves. Plants are really stretching. I know I talk about the septoria a lot but realistically if someone looked through my garden they'd have a hard time spotting it. I don't want to exaggerate the problem but I don't like dealing with ANY fungus or molds.
7/22 It was 55° this morning when I went over. I defoliated some septoria leaves and a few that were fading or damaged. I saw almost a whole leaf eaten so it's probably a good idea to move forward with citric acid. I can add that to the plants I've already treated with plant doctor. This is the first year it's been so noticeable. It's the reveg 10th planet that started this off. Oh well. I've dealt with MUCH worse. Plants LOOK good (other than septoria leaves (on bottom of plant). Today is water day for me but it's been raining and it's a lot cooler today. Bags still had weight to them. I want them to have a proper wet dry cycle. Temps top out at 75° so I'll monitor during the day and if something NEEDS WATER I'll give it to it. I'm suprised I have ZERO WPM. The septoria is much more identifiable but pm is usual present in these conditions bur I don't have a spot of it. I may do some defoliation today. I also need to add supports for flowering but one thing at a time.
EDIT: Went over around noon. 70°. Bags seem to be holding weight (it was easier to tell as ONE plant was substantially lighter than the rest) so I decided to hold off on watering. At least until tonight. There are three plants (at least that are going to NEED water). They look phenomenal now though and we've had lots of rain. Plan is to go over later and get the light ones and mix the water for the others so I can administer it in the morning quickly. I have an early doctor's appointment but I don't to overwater or water unnecessarily just because. But when you grow alone sometimes you need to do things when your able. I have people there that would help if I asked. And I have before but its late . I'm very grateful. I defoliated quite a few septoria leaves. They were all from the bottom of the plant. A couole wete bottom interior. I know there are worse things to contend with but still a pain.
EDIT #2 WENT BACK AT FOUR AND PLANTS LOOKED FANTASTIC AND STILL HELD WEIGHT. THE REVEG MK ULTRA IN EARLY FLOWER "MAY" HAVE STARTED TO DROOP AND "SEEMED" LIGHT. THE LARGE SPECIAL KUSH FUETHEST IN FLOWER BY THE DOOR WAS ALSO EXRRENELY LIGHT. I HAVE AN EARLY DOCTORS APPOINTMENT BUT DONT WANT TO OVER WATER MY PLANTS JUST BECAUSE IM IN A HURRY. ITS COOLER THIS WEEK. 70 TODAY AND HIGH OF 80 TOMORROW BUT DAD SAID THATS NOT UNTIL THE AFTERNOON. I MIXED UP ENOUGH WATER TO WATER EVERYTHING IN THE MORNING IF IT NEEDS IT. I HAVE AN IMPORTANT DOCTORS APPOINTMENT EARLY THAT WILL TAKE ME AWAY AND IM FEELING A LITTLE ILL SO I WANTED TO GET DONE WHAT I COULD TODAY. WATERED THE TWO THAT NEEDED IT WITH TWO GALLONS A PIECE (30GAL REVEG MK ULTRA AND THE BIG SPECIAL KUSH IN FRONT I DIDNT TOP THATS FLOWERING THE FASTEST. EVERYTHING ELSE CAN WAIT.
7/24 Surprisingly the plants still held weight this morning! The looked pretty good too! However its going to be highs in the 80's for the next 7 days. Since the plants still had some heft to them I watered everything just a gallon. I gave the 10s a half gallon and skipped the 50gal container plant. I think this is a good happy medium. I'm still seeing random septoria leaves but still no WPM. I defoliate daily sometimes a couple times. I need to get a minute to myself and add a foliar spray. I'll start with a dih Dr. Zymes while I'm looking into other products like bicilus (i have bt but its a different bicilus) or trichodermia. I need to feed sometime this week too.
7/25 Plants looked great this morning. I watered the 10th planet on the end that hadn't been watered in forever. I think I had been overwatering during those 100° days. I didn't water today as everything looks great and they don't seem to need it. I'll check later today. I did water the pink kush beside the 50 as it was much lighter (1/2 gal) to get it on par with the others. I'm starting to see pest damage as well so I think an app of Dr. Zymes would be a good idea. Both for pests and septoria. Plants are REALLY stretching. One special Kush is far ahead of the others.
EDIT:WENT OVER AT NOON AND 4PM. PLANTS LOOKED GREAT APART FROM MIRE SEPTORIA ON THE 10TH PLANET. I NEED TO WATERING DIFFERENT IN THESE TEMPS. IT WAS BREEZY AND 80° BUT THE BAGS DIDNT FEEL TOTALLY LIGHT AND THE PLANTS LOOKED AWESOME! THE HUGE EARLY FLOWERING SPECIAL KUSH IS PRETTY DAMN LUGHT BUT ITS PRAYING AMD LOOKING GREAT. I DECIDED TO WATER AND FEED IN THE MORNING AND HOPFULLY APPLY A DR. ZYMES PRODUCT ON THE ENTIRE GARDEN IN THE EVENING. PLANTS LOOK HUNGRY AND I HAVE RANDOM PESTS. ITS MOSTLY FOR THE FUNGACIDE ASPECT. PLANT SOCTOR SEEMS TO BE WORKING GREAT ON TWO OUT OF THE THREE I USED IT ON. THE THIRD IS A REVEG AND HAS TONS OF FOLIAGE I NEED TO ADDRESS AND CLEAN OUT. IT SEEMS LIKE IT WILL SPIT OFF SOME SEPTORIA LEAVES A DAY OR TWO BEFORE ANOTHER APP IS DUE. I'M LOOKING INTO MY OPTIONS. IF ANY OF YOU HAVE A SURE DIRE WAY TO DEAL WITH LEAF SEPTORIA IN EARLY FLOWER HIT ME UP! IM NOT TOO WORRIED THOUGH. I CAN SUPPRESS IT ENOUGH IF I HAVE TO EVEN IF I GOTTA SPRAY THE LEAVES WITH THAT 9.0PH ALKALINE WATER.
7/26 Supposed to be REALLY hot with thunderstorms. I watered the two thirstiest with a gallon and a half. Everything else got a gallon (but the 10th planet on the end that was still heavy and the 50). I fed everything too. I SHOULD'VE done the DIY Dr. Zymes spray but I wanted to keep feeding and adding an unknown foliar spray seperate in case of any reactions. A day before plant doctor is due to be applied again the 10th planet in the 20 starts showing signs of septoria again. I've defoliated quite a few septoria leaves. I'm not giving up. I assume I'll do something tonight and I MAY just look to see what I can find on Amazon. Luckily my plants still look beautiful. I hope it continues and I can stay on top of it.
7/27 Wow everything looked amazing this morning. EVERYTHING. The runt in the 50 has septoria but it was such nice fine Kong branches. I haven't treated tjat plant with anything. Plant Doctor app is due tomorrow. That product is working wonders and saving my crop. I'll pull a leaf or two here or there but this keeps it suppressed at least. For the most part. I think I might just treat everything with preventative doses and ANYTHING I've seen with a spot a cure dose (even though I know it's not "cured" but it's "supressed"). Plants I think are almost over the stretch. I have one special kush pheno that is much further in flower than the others. I can't wait to see what the flowers look like.
EDIT: WENT OVER AT FOUR TO CHECK ON THE GIRLS. THE REVEGS ARE A LITTLE DROOPY AND A LITTLE LIGHT BUT THEY CAN MAKE IT UNTIL MORNING. IM SURPRISED BY THE DIMINISHOMG NUMBER OF SEPTORIA LEAVES IM SEEING AND IM WONDERING IF THAT HAS ANYTHING TO SO WITH THE CUT DOWN ON WATER. IM CONSIDERING TREATING EVERYTHING IN THE GARDEN TOMORROW WITH AT LEAST A PREVENTATIVE DOSE. IM STILL PLANNING ON DOING THE DIY ZYMES NEXT WEEK THAT WAY IT ATTACKS IT ON BOTH FRONTS. TOMORROW WILL BE THE THIRD APPLICATION FOR THE 10TH PLANET REVEG. I'M VERY GRATEFUL FOR MY GARDEN AND HAVING THE TIME TO MAINTAIN IT. IM SUPRISED I DONT HAVE PM THIS YEAR BUT THERES NOT ONE SINGLE SPOT. KNOCK ON WOOD. IF I DO ZYMES ILL PROBABLY HOLD OFF ON BT. ITS EARLY FLOWER. THE MAKE IT OR BREAK OT TIME. THE TIME ALL THE THINGS THAT CAN RUIN YOUR YEAR COME REARING THEIR UGLY HEAD. IM GOD THOUGH. THIS YEARS GOING TO BE GREAT. I CAN FEEL IT. IT IS DONE.


Processing
Likes
98
Share


@OutForReal
Follow
SONG OF THE WEEK : Isaiah Rashad - 4r Da Squaw
-------
Day 32 - That week is a bit hard to manage as the weather is clearly against me, after the hard sun it is time for the heavy rain to shows up 😧. But it's outdoor rules.
But the ladies are doing good :
-SSW#3 were topped + suppercroped thanks to Tazard & Lumberjack advices I think she's doing right ( many thanks guys 😍). She's 20 cm tall now
-SSW#1 Will not be topped , I'm just doing a light LST on her by bending each secondary stems with my fingers everyday and you can see a "good" result on the pictures. She's 34 cm tall
-SSW#2 is late on the secondary stems but tall , I still don't know if I'm gonna train her. She's the tallest with 39cm
Likes
43
Share


@GODSGIFT_2005_JM
Follow
🍼Greenhouse Feeding BioGrow & Bio Enhancer
⛺️MARSHYDRO
The ⛺️ has a small door 🚪 on the sides which is useful for mid section groom room work. 🤩
☀️ MARSHYDRO FC 3000 LED 300W
☀️Also special thanks to VIPERSPECTRA P2000 (200W) & XS2000(240w) LED growlights
🌱 FastBuds 420


Processing
Likes
4
Share


@Grownewgenetics
Follow
I love these strain's from sweetseeds but special These one , ust the First time i Grow these one on my own, because of these i will havw to wait a little to see the beautiful colors i have see in the other's diaries, but i know the genetic family of these lady and i just can say Bravo, i will love to grow always these strain, has been 8 days and she's is 2 Time's bigger than the other strains for 6 seedbanks i have on my testing.

Likes
20
Share


@bhanga_garden
Follow
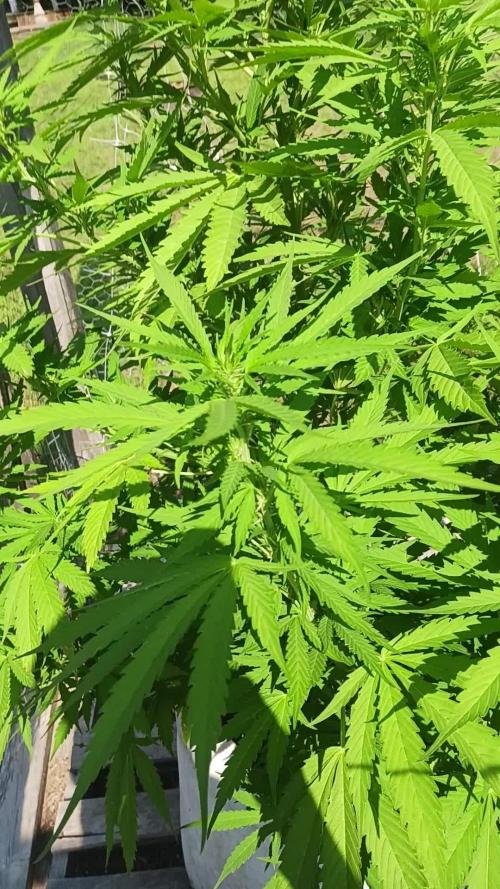
This week has progressed nicely - the plant is starting to work on fresh leaves and is pushing the second node now. This plant is looking really healthy and strong so far! Today marks week three - so I will be switching my light to 18/6 until flower - which wont be for a while since I do mainlining - generally my veg time is stretched out quite a bit because of that. I will be keeping this updated as I go along and I am excited to share the progress!
This is organic living soil - no bottles - nothing made in a lab. Today I harvested about two pounds of worm castings from one of my worm bins - you can see in the pictures some friends decided to come along for the ride! I mixed the castings with basalt, glacial rock dust, crab meal, kranja cake, kelp meal, and neem meal - then top dressed with that mixture, working it down into the soil a bit with my fingers, and then watered that all in with about a gallon of water. I really like to grow in this large raised bed - its the entire size of my tent which makes it completely impossible to move during a grow cycle but I love the fact that each plant in this 2x4 raised bed essentially has 50 gallons of soil all to itself!
Thanks so much for checking out my grow - if you have any questions or comments don't hesitate! Cheers to a great community of growers!


Processing
Likes
14
Share


@Mr_Og_GreenThumb
Follow
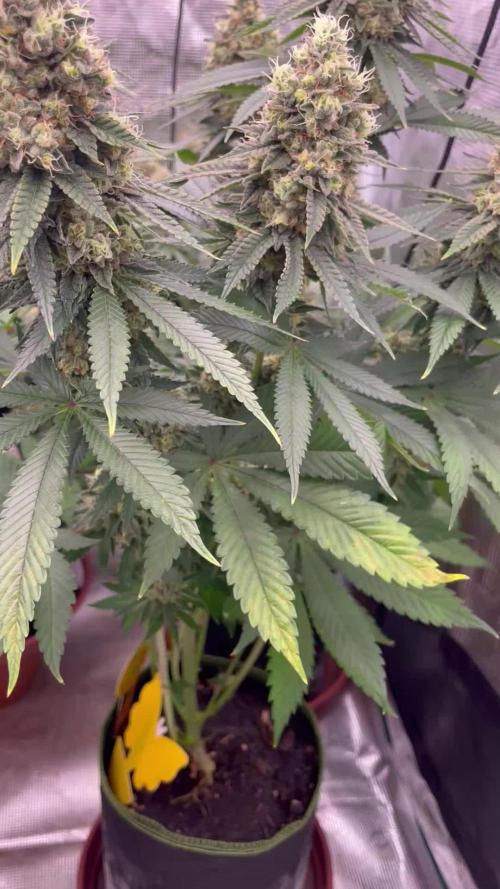
Week 12, Day 83 from seed and 3rd day of flower.....The 5 day of this week officially marked the start of the flowering season!! So I flushed both of these bad boys with ph'd water for two days and then today I switched them to 12/12. I gave them their first dose of bloom nutrients and then lollipoped them as you can see, pixs . Grateful no issues to report for the past 3 weeks have been trouble-free!! I'm going to leave the MH bulb in for an additional 2 weeks to prevent any stretching before switching to the HPS. But so far they are still loving their environment. I'm also in the process of keeping clones of fat banana and hulkberry while i try this new strain of Peanut Butter Tree.
Likes
42
Share


@MrJoint
Follow
✌️🎃 Thank you for checking my cultivation.
✂️ Defoliation Time’s
🌷 Started flower stage


Processing
Likes
14
Share


@WooderIce
Follow
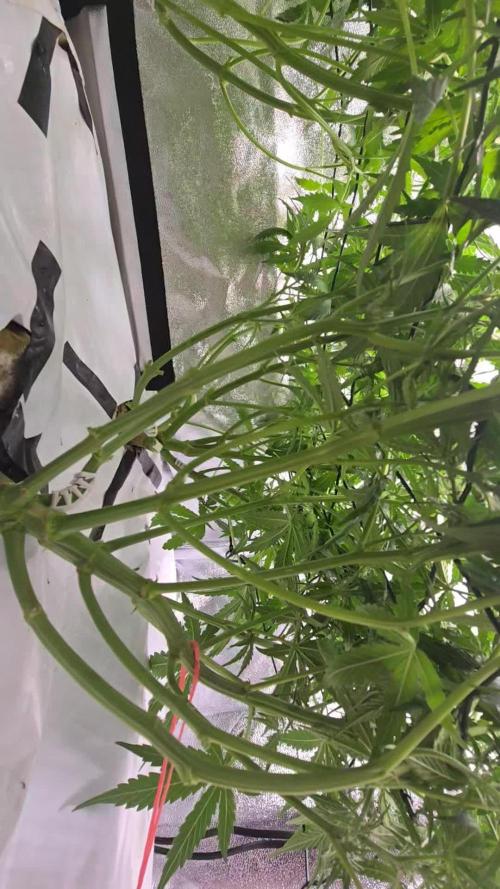
Great veg week. Its an increased nutrient week. Only issue was slightly high ph in soil, so I added a little more vinegar to my water. On previous grows, I would do my LST tie downs on approx day 31-33, but growth was really good, and over 10" on 7 of 9 plants, so tied down early on those 7, on day 28. Great color and stalk girth so far.
Likes
128
Share

@Tropicannibis_Todd
Follow
💩Holy Crap We Are Back At It And Loving It💩
Growmies we are at DAY 28 and she's just killing💀it👌
👉Added straws within the Tiny pot to help with air and watering 👈
So I'm starting to see she needs watering every single day and now need nutrients 🙃 Moved to Bloom and Booster
Lights being readjusted and chart updated .........👍rain water to be used entire growth👈
👉I used NutriNPK for nutrients for my grows and welcome anyone to give them a try .👈
👉 www.nutrinpk.com 👈
NutriNPK Cal MAG 14-0-14
NutriNPK Grow 28-14-14
NutriNPK Bloom 8-20-30
NutriNPK Bloom Booster 0-52-34
I GOT MULTIPLE DIARIES ON THE GO 😱 please check them out 😎
👉THANKS FOR TAKING THE TIME TO GO OVER MY DIARIES 👈
Processing
Likes
7
Share


@FlavoursUk
Follow
Corrected a few minor issues and she seems to be getting on well now. Hopefully i should see some steady and quick growth few minor problems at the start with light leaks causing algae but quickly rectified. Roots are looking healthy and are reaching through to the water. Back with an update soon.
Day 26 - well on her way now, growth occuring everyday, currently at 1.32 EC and around 6.1 pH. Roots have exploded since two days ago. If i kerp this going garvest time will be the best ive ever had and ive had some good harvests in soil/coco. But yeah, very please so far. Updaye soon
Day 27 - Dropped the EC slightly down to 1.28 as she was looking a bit toxic, pH seems more stable now but might lower the EC again slightly. Ill see how it goes for now.
Likes
6
Share


@Plantinator
Follow
Bud sites are getting ready now. I did a bit more LST and removed a few side shoots which never gonna make it due to lack of light.
I replaced the light, under the TS 1000 she was praying all day long.
On the previous run I had problems with the FC3000, it was turning itself off at random times. Mars Hydro was kindly sent me a replacement controller, so far it seems like this problem has been solved.
However, I tried to use the app again and it’s still shite. 💩😂 So I just use the light in manual mode. Such a shame for the extra features I cannot use.
For DLI I will use the following chart:
AUTO FLOWER LED LIGHT INTENSITY
Recommended LED PPF/PAR Values / DLI Based on 20 hrs. of light.
Seedlings 150 - 200 umol / DLI 10.80 - 14.4 moles per day
Veg up to 9" 450 umol / DLI 32.40 moles per day
Early bloom 500 umol / DLI 36.00 moles per day
Mid bloom 650 umol / DLI 46.80 moles per day
Late bloom 750 umol / DLI 54.00 moles per day
Ripen 400 umol / DLI 28.80 moles per day
*** Use extreme caution going 700 umol or higher @ 20 hrs/day this could cause leaf burn***
The only difference is that I will keep this run in 18/6, so I ignore the PAR values above.
IMO the best thing you can do is to read the leaves all the time and use the charts as a guidance.