
Likes
Comments
Share


@Earthsower
Follow
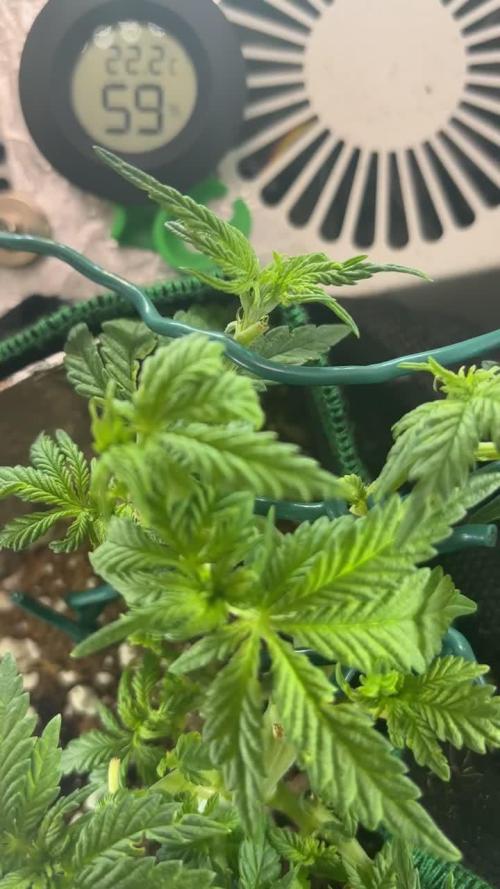
Not much water just a drizzle and she seems to be doing better this week. She is only about 10 cm but she looks like she’s co


Processing
Likes
24
Share


@MadeInGermany
Follow
Hi everyone 🤗.
The buds continue to grow 😀👍.
It starts to smell really good 😍.
The bud structure also looks very nice, and is already covered with resin 😎.
This week they continue to get 4-5 ml / l water from the Canna Bio Flores.
I hope you enjoy the update, stay healthy 🙏🏻 and let it grow 🌱😃
You can buy this Strain at :
www.Zamnesia.com
Type:
Runtz
☝️🏼
Genetics:
Zkittlez x Gelato
👍
Vega lamp: 2 x Todogrow Led
Quantum Board 100 W
💡
Bloom Lamp : 2 x Todogrow Led
Cxb 3590 COB 3500 K 205 W
💡💡☝️🏼
Soil : Canna Bio
☝️🏼
Nutrients : Canna Bio
☝️🏼🌱
Water: Osmosis water mixed with normal water (24 hours stale that the chlorine evaporates) to 0.2 EC. Add Cal / Mag to 0.4 Ec Ph with Organic Ph - to 6.0 - 6.3

Likes
8
Share


@Ferenc
Follow
Purple Punch and Frosty Gelato will be harvested next week. Very hot in the tent and also it is not in my house. Summer time. Hard to look after them this way it can be seen. No problem. Next time. Still love them :)
A.lot of burnt leaves removed from them every week because of heat. I can not change now I need to go this way.
Starnge: Wedding Cheescake is crazy other plants are suffering because of the environmental issues she is acting like this is the best environment. Leaves hardly burn and she grows as fuck. All of them in the same environment.... Hmm.


Likes
26
Share


@Silverback_Guerilla
Follow
11/17:
I fed today but didn't have time for much of a photo session.
Gave them One, Signal, Sweet & Sticky, Cha Ching, and started them on LiquidSoil.
11/19:
The bigger plant just keeps putting on big swollen green calyx every day...such a big lovely freak! Amazing frost and pungent fuel aroma.😋
The smaller plant is a true beauty..got some purple in folage and flower and frosted over wonderfully. This pheno looks more like a Sugar Cane than the other.


Likes
80
Share


@Chuckd502113
Follow
This is my second grow and first soil grow and @Apotforpot came in clutch with the super soil, all I had to do was add water no nutes. The strain is Exotic Seeds Black Haze and took 12 weeks from germination, the plant took a lot of abuse too with cold,high humidity, ect and it grew perfectly so thank you exotic seeds!!! I will be growing again I love this strain and everyone else does too. I want to thank everyone that commented and helped along the way I truly appreciate it! I hope everyone enjoys my journal

Likes
2
Share


@51sGarden
Follow
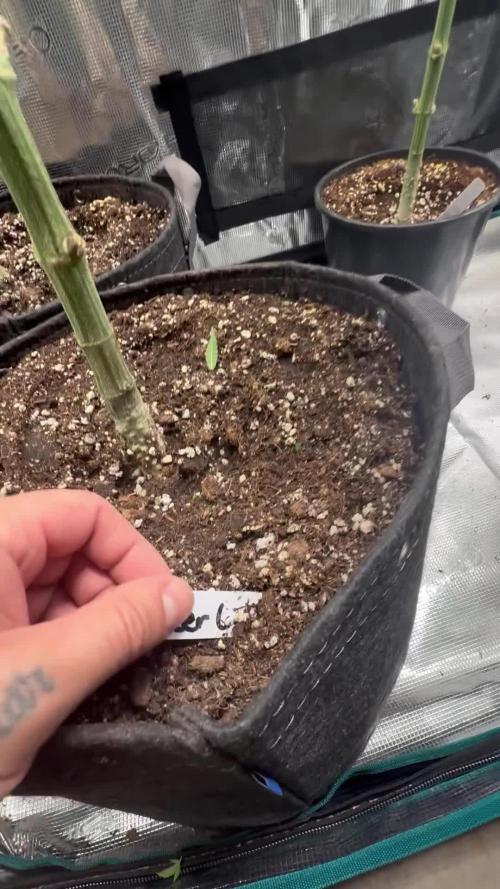
Posting this as I’m on the last few days of the 3rd week from germination
Great progress, a lot of roots for such a short period but not too much plant growth, will start watering daily instead of watering every 2-3 days
Topped the girls today (Day 18 from germ) and starting to do mainline on all the Bubba kush.

Likes
43
Share


@UnorthadoxDude
Follow
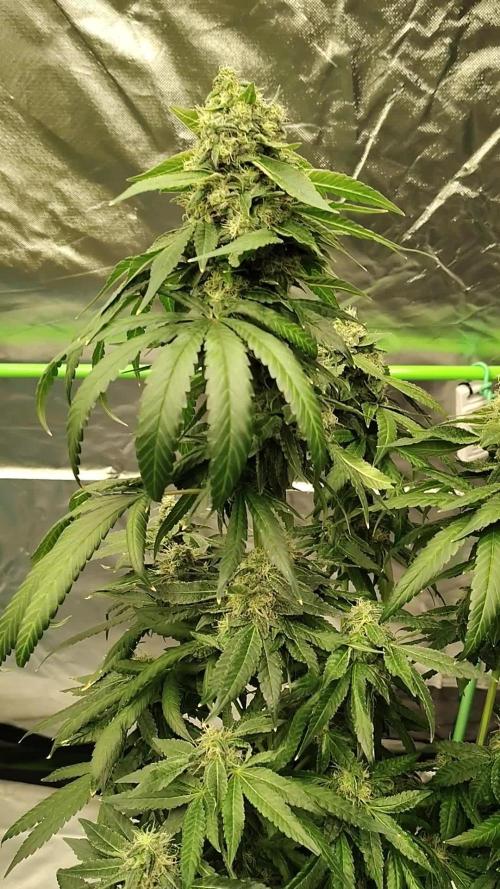
Hello and welcome to week 8 for the quite amazing Nesia. She is growing as if there were no tomorrow... being the largest plant in the series.
Please check last week which is now complete.
Day 50: Fertigated 5l. Height: 56cm.
Yes you read that correctly. 6cm stretch in 1 day. Oh dear.
Also added a couple of carnivorous plants to take care of the odd fungus gnat.
Day 51: I've taken a long video and some better photos to demonstrate Nesia's size. She now measures 60cm tall that's another 4cm in a little over 12 hours. 😔 What a plant!
Day 52: Lazy day no measurements.
Day 53: Fertigated 5l - height 62cm
Day 54: Fertigated 5l - height 65cm.- Nesia is already my largest plant. Larger even than her majesty the Queen. She's not done yet. 3cm vertical stretch in 24h. It is Nesia's turn in the middle so I've trimmed all leaves that extended outward.
Day 56: Height 72cm. Nesia has continued to stretch and is extremely thirsty. She's taking about 5 litres a day at the moment. I fear she is not finished yet.
End of week summary: Nesia has continued to stretch fast and gained 22cm in height this week. She's now putting out a lot of pistils but the stretch hasn't slowed yet.
Likes
5
Share

@psychonaut420
Follow
Decided ima leave her in vegataive stage till she recovers some more from the lst/hst been using cannacure to help with the mystery pests and deformed leaves have been seeing her start to regenerate and new growth is visible thinking week 7 or 8 till I switch her to 12/12 light schedule to flower bit streaching side branches and smaller side branches off the side branches are forming

Likes
31
Share


@BudXs
Follow
Accidently deleted the update video:(
Good week, things are just getting dialed in...........................
Herz IG coming down this week, shes a beast
Fat ass starter leaves on the @Wicked_Stix genetics
BUT!!!!!!!
Scroggernaut needs a Makeover!!!! Stay tuned Next week when I get a whole bunch of new equipment and introduce "Scroggernaut Intense"


Likes
4
Share


@HIAZ_urbanbudfarmer
Follow
Hello , well she started producing pistils & budlets at beginning of the week. I switched the light onto it's super lumen setting, which gives it another 60 watts so now on 660watts , stopped training through the net. Thanks for checking out my diary please leave a comment & also some likes would be great so I can progress from apprentice stage, i will also stop by & check on your grow also. Much love fellow growers👍
Likes
3
Share

@kvnvn
Follow
Not sure why it won’t let me add different strains in earlier weeks on here but, here’s the zeltzer and sour d, along with chem rsv week 2 flower…… also don’t mind the canopy…this is for a pheno hunt on what to run in my mothership. Zeltzer, sour zeltzer, chem rsv x cheese danish, and Cali sour diesel


Processing
Likes
4
Share


@Ageddd
Follow
Switching to full flower nutrients, she loved the transplant, starting with half the recommended doses, growing some hairs so its te perfect moment to apply some Big One 1ml/l + TopBloom 2ml/l twice a week, to boost hairs growing and to create more bud spots.
She really is turning in to a little bush i really like the structure ^^

Likes
4
Share


@Jamesujo
Follow
This adventure started with a friend’s gift and without any bigger efforts I’m able to keep this lady growing, pretty and hopefully, she will give me a good return.
Currently the started the flowering stage, the plant is placed near my kitchen window with a 200W led light and recently a small fan and some nutrients.
Hope I can get some useful comments considering my lower expertise.

Likes
1
Share

@Dabking
Follow
Some more light defoliation, and propped her up as the buds are VERY dense and she started leaning over.
Likes
42
Share


@Maggie_de_Block
Follow
Didn't change anything to the feed because she seems happy
Did remove quite a bit of fan leaves, as I'm planning to send her into flower soon
Not exactly mainlining, but it definitely is a very beautiful canopy
Likes
11
Share


@BushDoctor740
Follow
These girls are doing fantastic at this point her buds are starting to develop.Ill have to do some defoliation here soon as they are all 3 getting bushy.Ive kept the light intensity at 50 percent power as the light is super strong and they have taken it well.Ive also kept up with the advanced nutrient feeding and haven’t noticed any deficiency.As the buds develop more thru the next 2 weeks I’ll introduce the Plagron green sensation along with some bud candy.I have grown some mega buds with the Plagron and I can’t wait 😛
Likes
14
Share

@Dabking
Follow
Chopped on day 87. Smells incredibly pungent. Awaiting cure for the smoke review
