
Likes
Comments
Share


@Genji87
Follow
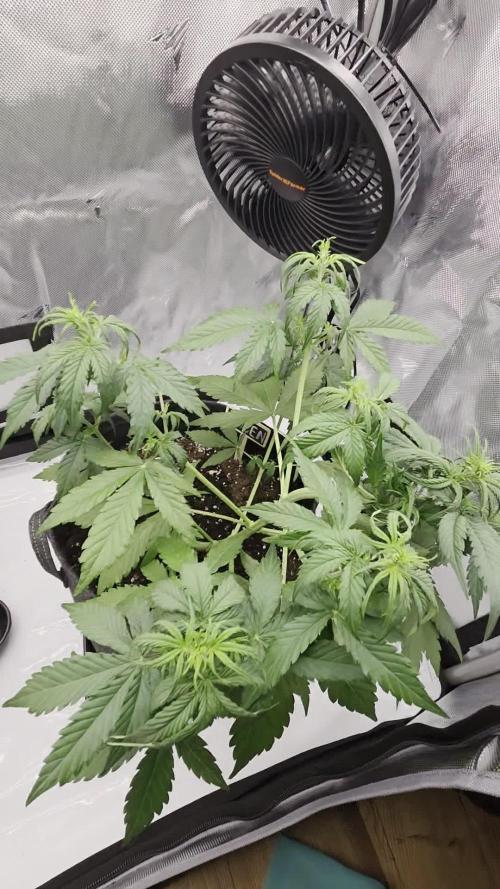
In week 3, I repotted the plants, including the automatics, into nice large 12.5-18 liter pots and, for the first time, watered each plant with 3 liters of water and added fertilizer from Biobizz (Root Juice, Grow, Heaven). After 3 weeks, the plants look very beautiful :)
I want to do some LST on the C99, but i want them to chill for some days after the repotting.
*Edit*New Pics
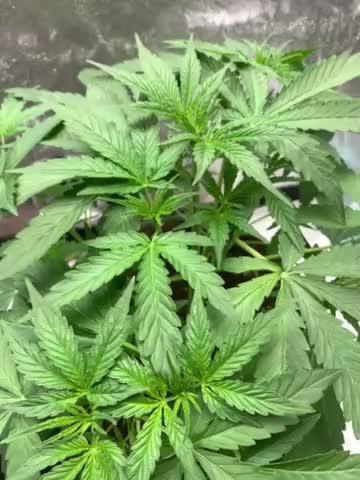
I just wait with the LST because my flowers were really stressed and had in fact some problems.
after i read some informations i just addet a little bit biobizz bloom & top for some iron etc,
I think the flowers look better in shape now, i dont know because they chilled or cause of the fertilizer adding.
LG


Likes
6
Share


@burnout
Follow
Day 21 of flowering more defoliation. Added 7 tablespoons of rock phosphate to each container. House is starting to smell like fruit infused gasoline despite the two carbon filters and Ona gel all over the place.


Likes
7
Share


@eYo4Terpz
Follow
Sie haben in der Vegi 1x Komposttee bekommen und in der Blüte 1x Pro Monat immer am Ende des Monats hin!
Ich nutze mehrere angepasste Rezepte je nach Stadium und Bedarf der Pflanze!
Ein guter Komposttee ist alles!
Ich arbeite außerdem mit 100% Osmosewasser!
BIOCANNA + ZAMNESIA Gute Kombination!


Likes
24
Share


@TerpTurtle
Follow
14 day dry | Curing in Grove bags, filled 7 QP bags & got 56g of keif out the trim bin from only 2 plants!
More pictures coming! STAY FROSTY GROWMIES


Likes
1
Share


@PositiveEnergy
Follow
Week 4 looks good gorilla zkittlez it’s beginning to flowering I will amend the soil soon

Likes
31
Share

@Splashy
Follow
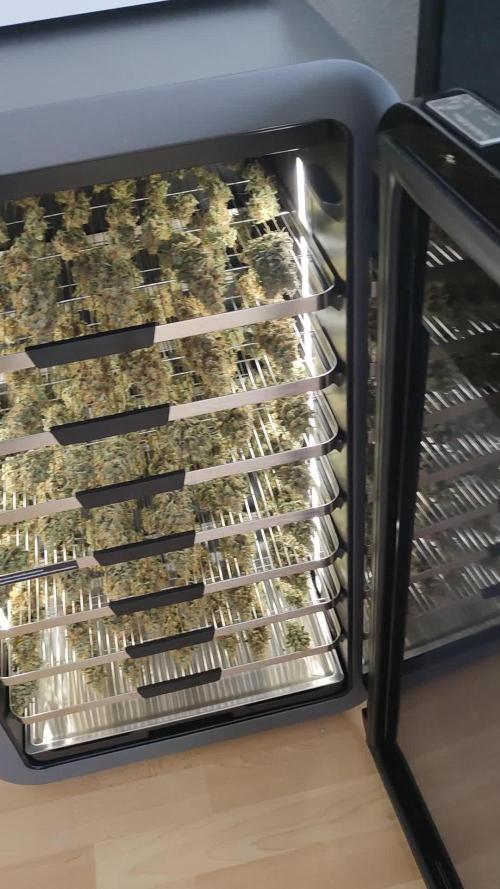
24.04.2026
Heute habe ich mich dazu entschlossen die Damen zu ernten. der Hauptpunkt welcher mich jetzt dazu gebracht hat zu ernten waren die trichome, es sind jetzt auf jeder Pflanze Bernstein farben zu erkennen. sie trinken auch nicht mehr all zu viel und ich musste am Ende nur noch alle 3 tage gießen anstatt alle 2 Tagen.
sie sind jetzt grob getrimmt und trocknen und curen jetzt in der vcure von vivosun. ich werde noch mehr Bilder machen, sobald sie fertig sind. freue mich schon auf das Ergebnis. die buds werden jetzt 5 Tage getrocknet und dann 9 Tage gecured, also gibt es in 14 Tagen neue Bilder.
ich wünsche allen die bei dem Contest mit machen viel glück und einen guten grow, am Ende sind wir alle Gewinner eines guten grows.
danke an zamnesia und plagron für das bereitstellen der Samen und des düngers.
es gab mir Mal die Chance einen Strain von zamnesia zu testen und in den dünger von plagron rein zu schnuppern. hat mir beides gefallen und ich werde drauf zurück greifen in Zukunft, ganz sicher.
Update:
08.05.2026
Heute habe ich die Ernte aus der vcure geholt und habe mich echt gefreut. Sehr gut getrocknet und noch nicht crispy außen. Es gab nochmal eine kleine Beschneidung um die schönheiten von buds zu Geltung kommen zu lassen. Die vcure macht einen super Job und ich muss mich nicht um die ganzen Werte kümmern, das macht alles die vcure.
Da ich in Deutschland lebe, muss ich leider alles bis auf 50g vernichten. Ich habe mir die schönsten headbuds aufgehoben und den Rest mit Katzenstreu von meiner Katze vermischt. Mir hat es im Herzen weh getan das machen zu müssen, jedoch will ich zu meiner eigenen Ruhe und Sicherheit im gesetzlichen Rahmen bleiben.
Ergebnis:
Es kamen getrocknet 481g raus, was ein ordentliches Ergebnis war bei einer 300w LED. Behalten darf ich mir 50g laut des deutschen Gesetzes.
Likes
1
Share

@Professor_Little
Follow
27.11.
She’s really starting to take off — looks like she’s about to flip into flower soon (at least from my noob POV). I can already see some pistils popping. I did stress her a bit though — didn’t water in time and she got a little droopy the next day. Gave her a good drink right after and she bounced back nicely. We’ll see how she goes.

Likes
3
Share

@zenderman
Follow
27/2/26.day 22,fourth week started.
1-27/2.
2-28/2.
3-1/3.
4-2/3.
5-3/3.preflower.
6-4/3

Likes
15
Share


@RamirezDusha
Follow
There was nothing special to mention on that stage. Growing proceeded as normal.
Likes
29
Share


@SalocinSpecial
Follow
***Note that I started to count the days when I placed the seeds between paper towels. The seeds were planted 3 days later and sprouted from the ground 2 days after being planted.
D80 (13/05/2021): I'm looking at the trichomes every other days. Glue Gelato is starting to show amber on top buds. No amber for Banana Kush and Gelato. This time I will chop them all at the same time so the one I will rely on is the Glue Gelato. As soon as she is ready, I will harvest them all. Banana Kush and Gelato would probably need more, but in term of logistic, I need to harvest all my plants at the same time.
D83 (16/05/2021): Not ready yet. I'm checking trichomes closely! 😬
- Light: the lights are at 100% and at 12 inch form the plants.
- Temperature: during the day: 24-25C ; during the night: 20C.
- Humidity: the humidity is maintain around 46-48% all the time.
- Air circulation: There is an oscillating fan on the ground, one fixed fan pointing on top of the canopy and one fixed fan to help cool the lights.
- Water: I gave water every other day or when the ground feel dry or the pots feels light.
- ***IPM: I never mention it but I'm using nematodes pouch as an integrated pest management. I had trouble with pest in my first grow and I learned from it. That's the only thing I do for pest and of course watching closely and regularly at my plants 😊

Likes
21
Share


@puffin_ganja
Follow
Added a second trellis for additional support since they are starting to pack on more weight. Will update more info later...
Likes
13
Share


@Naujas
Follow
63 days!! The girl is still not blooming for reasons I don't understand :D this is the first auto girl that spends so much time in vegetation :) the problem is that I have to go on vacation for 3 weeks in August, so I don't know how I'm going to get out of this situation :( other FastBuds varieties always bloomed +- 5 weeks and here it is already 9!!!!


Likes
34
Share


@crystal_garden_0
Follow
End of week 5. Huge gains in all ways. Plants are quite big and lots of buds developing really fast. So far they are much more ahead of the other strains I'm running. Very fast plant. Very smelly, delicious.


Likes
101
Share


@morganfreeman420
Follow
Una cosecha linda y abundante como toda cosecha exterior las flores de muy lindo color huelen mucho y muy bien, se ve mucho tricoma y mucha resina tengo muchas ganas de probar los resultados


