
Likes
Comments
Share


@Gisbert
Follow
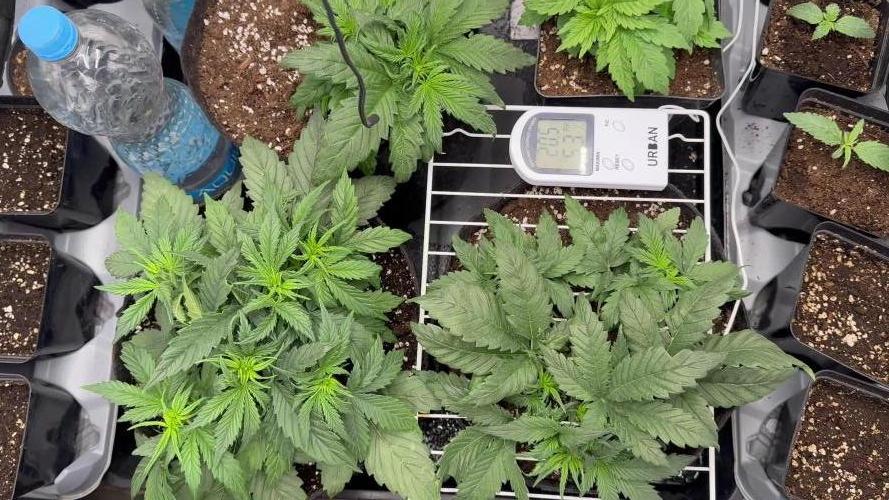
Meine Dame in der Sonne hat trotz Topping die ein Meter Marke geknackt und ist jetzt 1,04m groß, die andere im 12-12 Modus ist nur 76cm groß, bildet dafür aber wundervolle Blüten. Das Wetter bleibt wechselhaft bis schlecht! Das Wetter bessert sich, leider habe ich einen massiven Befall von Trauermücken, Nematoden sind bestellt. In meiner Purple Bud in der Blüte habe ich zusätzlich Milben entdeckt, also sind auch Raubmilben unterwegs😢
Der Sommer ist zurück und das freut mich und die Pflänzlein. Meine Zusatzbeleuchtung habe ich so eingestellt das sie von Sonnenauf bis Sonnenuntergang eingeschaltet ist. Die Dame mit dem Natürlichen Lichtzyklus bekommt nun also auch von Tag zu Tag weniger Licht. Ich bin gespannt wann sie sich auf den Weg in die Blüte macht.


Likes
21
Share


@Bread_n_Buds
Follow
We are really a very short time from the harvest, 5 days compared to the six weeks declared and actually we are. The trichoms and red hair are taking color the plant is mature or still lacks little. The flowers are beautiful, the topping at 16 pounds worked great.
There is a scent of paradise, of Pussy of beautiful Ninfa Devvero.
LIGHT >> MARSHYDRO SP3000 AT 100% OF POWER, we already like it so much because it covers the intact length of the tent.
Tent >> Marshydro 120x60x180
CHECK IG >> https://www.instagram.com/marshydro_aliexpress2/
Buy >> marshydroled.aliexpress.com
GD >> https://growdiaries.com/grow-lights/mars-hydro
#Marsyear

Likes
7
Share


@greenvibez
Follow
Unos cogollos brutales ! Tienen muchísima resina … los olores son de frutas y con el toque Cali que la destaca ! En general chicos es una cepa que si tuviera que repetir no lo dudaría ni un segundo por su fácil cultivo y sus grandes cogollos 17g en seco en maceta d 3l

Likes
11
Share


@LittleBigTrees
Follow
I've been feeding just water and allowing them to dry right back , I will harvest once the soil is dry again .

Likes
3
Share

@Milky_way
Follow
Veg veg veg + lasted vegetation week.
Smoke weed every day and happy chill.

Likes
27
Share


@Mookzer
Follow
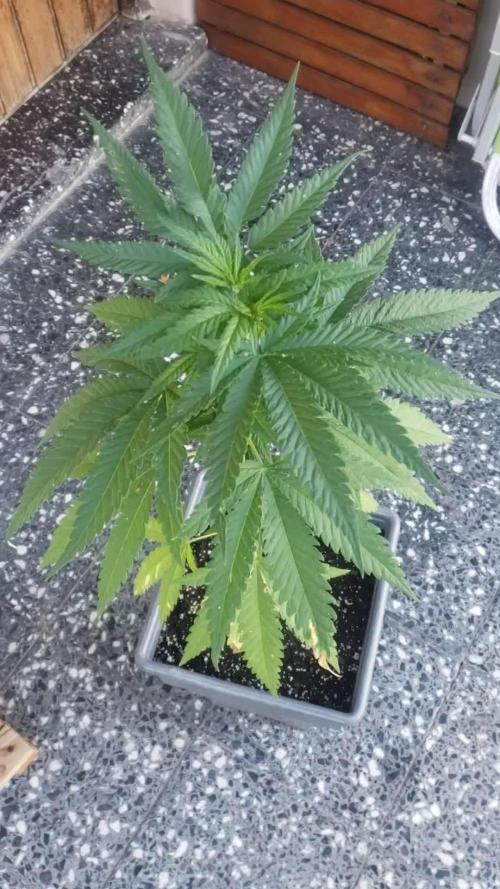
Bonjour je reviens avec des photo est des avis sur ma purple quenn auto mis en terre le 16 août 2021 elle mais extrêmement de temp à fleurir et semble avoir des difficultés à finir sa floraison elle est dans un pot en tissu de 14 cm de haut maos très large avec 30 grm d engrais à diffusion lente de royal quenn seed avis photo svp !


Likes
13
Share


@DonKrika
Follow
Temperatures were quite high this week, 29-30 with the lights on, 27-28 with lights off. Humidity was good, around 46-53%. Otherwise, everything is going smoothly.
DAY 139 -Molasses
PH - 5.91
PPM-765
Solution Temp - 20
Watering Volume - 4L
DAY 142 - Nutes
PH - 5.83
PPM- 2350
Solution Temp - 19
Watering Volume - 4L


Likes
36
Share


@SensimillaP
Follow
Tranfered the plants to a bigger tent and will give them 1 or 2 more weeks before i switch to flower.
Light is set to 75% at 60 cm of the canopy.

Likes
8
Share


@BuddyHolly
Follow
Day 39 of flower. Noticing more bulk daily. Smells like sugary jelly donuts/bakery.

Likes
25
Share


@Prototype0181
Follow
Day day 21,
Gave her on day 20 her first Bio tabs compost tea combined with Bio tabs Orgatrex and some Bio tabs Bactrex and BAC funky funghi for that extra 🌺 power.
To be continued Growmies 🌱


Likes
2
Share

@The_Doctor_Green
Follow
Hola a todos!!!
Como estan??..espero que bien, a esta cepa BIG BANG, sigue estirandose😃🙌 .
Esta semana he regado con top veg 3ml x litro de agua.
Se la ve creciendo bien verde.
El video corresponde al día 28/12/25
No tengo más para contar😅.
Solo deseo que todos tengan un buen 2026.
Y de nuevo gracias a @DivineSeeds por hacer posible este diario🙌🙌🙌👏👏👏🤩🤩🤩🤩

Likes
20
Share


@Ultraviolet
Follow
In 1995, scientists placed human DNA inside a sealed, air tight tube with photons. Without the DNA, the photons arranged themselves in a random scattered patter, but when the DNA was inserted, the photons formed an alignment.
Reflect On:
Are there metaphysical, multidimensional aspects to our DNA? Have we just begun to understand what DNA is and what it represents?
Vladimir Poponin is a well known Russian scientist who in 1995, with his colleagues, including biophysicist Peter Gariaev, conducted a very interesting experiment during their time at the Russian Academy of Sciences. In their paper (P.P. Gariaev and V.P. Poponin. Vacuum DNA phantom effect in vitro and its possible rational explanation. Nanobiology 1995 (in press)), Poponin states, in the introduction of the report, that, “We believe this discovery has tremendous significance for the explanation and deeper understanding of the mechanisms underlying subtle energy phenomena including many of the observed alternative healing phenomena.”
Why did he feel this way? We will get to that.
Poponin and Gariaev tested the behaviour of DNA on photons, little tiny bits of matter, in the “quantum” that our world is made up of. They put photons into a tube specially designed to simulate a vacuum, just like the vacuum of space. With no air inside, they inserted the photons as they wanted to see what they did and how they behaved. The photons were distributed in a way that was completely unordered and random, scattered all over the container. This of course was what the team of researchers expected.
Next, samples of human DNA were placed inside the tube with the photons, and what happened next is what’s truly mysterious. The photons reacted to the DNA, and changed their pattern and formed a specific alignment. In the presence of living material, the human DNA, the photons organized! This signified that the DNA was clearly having a direct influence over the photons. It’s one of many examples hypothesizing that something within us has a direct affect on the physical material matter outside of us. This experiment was repeated and confirmed, and it was further observed that human DNA has a direct affect on the quantum ‘stuff’ that our world is made up of. Fascinating to say the least.
The Next Big Surprise
The next big surprise was observed when the researchers removed the DNA from the container. The scientists assumed that the photons would simply return to their original scattered state, but this didn’t happen. Instead, the photons remained ordered as if the DNA were still in the tube. Poponin described the light as behaving “surprisingly and counter-intuitively.”
The researchers hypothesized and were “forced to accept the working hypothesis that some new field structure is being excited.” Is there something being left behind? Something in non-physical form? This experiment tells us that DNA is communicating with the ‘stuff’ our world is made of, and that there is some sort of invisible field that exists. Perhaps DNA represents a place of storage and communications to the past? To the future? To others in the universe who have left their mark, so to speak. Who knows.
Quantum Physics and Consciousness
Nobel laureate of the twentieth century Richard Feynman once said, with regards to quantum mechanics, “we choose to examine a phenomenon which is impossible, absolutely impossible, to explain in any classical way, and which has in it the heart of quantum mechanics. In reality, it contains the only mystery.”
Another great quote that comes to mind anytime the world of science dives deep into the mysterious world of quantum physics:
There seems to be a deep concern that the whole field will be tarnished by studying a phenomenon that is tainted by its association with superstition, spiritualism and magic. Protecting against this possibility sometimes seems more important than encouraging scientific exploration or protecting academic freedom. But this may be changing.” – Cassandra Vieten, PhD and President/CEO at the Institute of Noetic Sciences.
The reason why the association with superstition, spiritualism and magic mentioned in the quote above exists when it comes to examining certain phenomenon is simply because the observed phenomenon is unexplainable. But it’s important to remember, just because something is unexplainable does not mean that it’s not real, it simply means we don’t fully understand it yet. Academia has a long history of rejecting phenomenon, that’s clearly real, yet simply unexplainable.
Quantum physics clearly has a strong connection to consciousness, and metaphysical phenomenon. Max Planck, a physicist who originated quantum theory, regarded consciousness as “fundamental,” and matter as “derivative from consciousness.” He said that “we cannot get behind consciousness. Everything that we talk about, everything that we regard as existing, postulates consciousness.”
This has been demonstrated quite clearly by multiple experiments, like the quantum double slit experiment.
A paper published in the peer-reviewed journal Physics Essays by Dean Radin, PhD, explains how this experiment has been used multiple times to explore the role of consciousness in shaping the nature of physical reality. (source)
In this experiment, a double-slit optical system was used to test the possible role of consciousness in the collapse of the quantum wave-function. Photons were shot through two slits, in multiple different ways. The study found that factors associated with consciousness “significantly” correlated in predicted ways with perturbations in the double slit interference pattern. In this experiment, tiny bits of matter (photons, electrons, or any atomic-sized object) are shot towards a screen that has two slits in it. On the other side of the screen, a high tech video camera records where each photon lands. When scientists close one slit, the camera will show us an expected pattern, as seen in the video below. But when both slits are opened, an “interference pattern” emerges — they begin to act like waves.
You can refer to the actual study to find out more about that. If you want to see a visual demonstration of the quantum double slit experiment. The point is, consciousness changes the behaviour of the particles.
“Observation not only disturbs what has to be measured, they produce it. We compel the electron to assume a definite position. We ourselves produce the results of the measurement.”
The study sourced above points out that “factors associated with consciousness, such as meditation experience, electrocortical markers of focused attention, and psychological factors including openness and absorption, significantly correlated in predicted ways with perturbations in the double-slit interference pattern. The results appear to be consistent with a consciousness-related interpretation of the quantum measurement problem.”
The Takeaway
DNA is fascinating, and it’s probably the least understood part of our biology. There are definitely interesting metaphysical non-material aspects to our DNA, and changes to our DNA can come as a result of our thoughts, feelings and emotions alone. HeartMath researchers have shown that physical aspects of DNA strands could be influenced by human intention. The article, Modulation of DNA Conformation by Heart-Focused Intention – McCraty, Atkinson, Tomasino, 2003 – describes experiments that achieved such results.

Likes
14
Share


@GandalfTheHigh
Follow
Loved it, spent a few hours last night taking her down and hanging her branches up on a hanger. The smell is reminding me of raspberry puree which is delicious lol. Definitely would recommend this strain to everyone.


Likes
18
Share


@Dunk_Junk
Follow
She's almost done.
Watching pistils to all turn colour and trichomes to go more cloudy.