
Likes
Comments
Share


@Downunder90
Follow
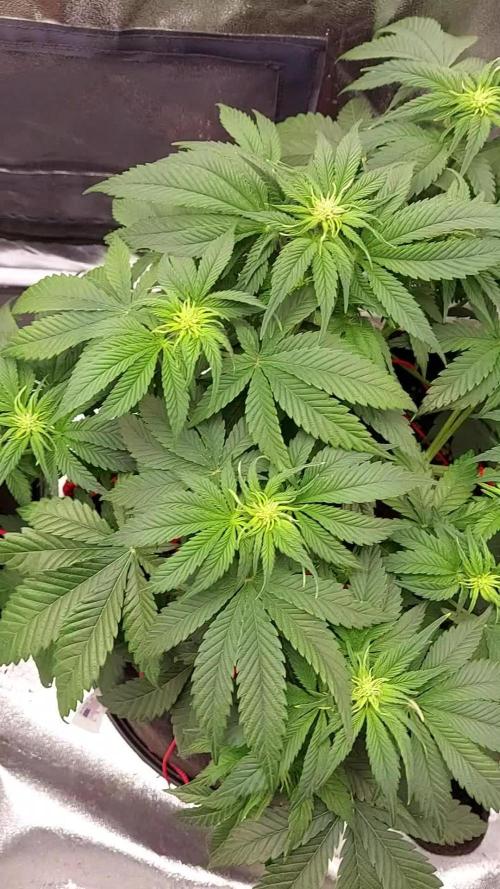
## Week 4 Update: Thriving Growth and New Techniques!
### 🌱 Vigorous Growth with Greenhouse Super Lemon Haze, Humboldt Seed Bubba Kush, and Blueberry Muffin 🌱
Welcome back to another exciting update on my grow journey with Greenhouse Super Lemon Haze, Humboldt Seed Bubba Kush, and Blueberry Muffin. The plants are thriving under optimal conditions, and I’ve started experimenting with new techniques to maximize their potential.
---
### Diary Snippet: Advanced Techniques and Optimal Conditions
In Week 4, the plants are growing like weeds thanks to maintaining high PPFD (Photosynthetic Photon Flux Density) and optimal temperatures in the grow tent. These conditions are essential for maximizing photosynthesis and ensuring vigorous growth.
---
### Techniques Applied: LST and Defoliation
#### Low-Stress Training (LST)
This week, I applied Low-Stress Training (LST) for the first time. By gently bending and tying down the branches, I've created a more even canopy. This technique helps to:
- **Increase Light Exposure:** Ensures all parts of the plant receive sufficient light.
- **Improve Air Circulation:** Reduces the risk of mold and pests by allowing better airflow between the branches.
- **Boost Yield:** Promotes the development of multiple colas, potentially increasing the overall yield.
#### Defoliation
In addition to LST, I also began defoliation, selectively removing some fan leaves to:
- **Enhance Light Penetration:** Allows more light to reach the lower parts of the plant.
- **Stimulate Growth:** Encourages the plant to focus its energy on bud development rather than foliage.
---
### Nutrient Management: Increasing Plagron Dosage
As the plants grow, their nutritional needs increase. I've started to gradually increase the dosage of Plagron nutrients, following a careful schedule to prevent nutrient burn. Key benefits of Plagron nutrients include:
- **Balanced Nutrient Profile:** Provides essential macro and micronutrients for robust plant growth.
- **Improved Soil Structure:** Enhances the soil's ability to retain water and nutrients.
- **Enhanced Flavor and Aroma:** Contributes to the development of rich, flavorful buds.
---
### Technology in Action: TM+ Pro App and TrollMaster
To maintain and monitor the optimal growing conditions, I'm utilizing the TM+ Pro App and TrollMaster system:
#### TM+ Pro App
The TM+ Pro App has been invaluable for tracking and adjusting the environmental conditions in real-time. Key features include:
- **Remote Monitoring:** Allows me to keep an eye on temperature, humidity, and light levels from anywhere.
- **Data Logging:** Records environmental data for analysis, helping to fine-tune the growing conditions.
- **Alerts:** Sends notifications if conditions deviate from the optimal range, enabling quick corrective actions.
#### TrollMaster
The TrollMaster system is integrated with the grow tent to automate and control various aspects of the environment:
- **Climate Control:** Manages temperature and humidity levels to ensure a stable environment.
- **Lighting Automation:** Adjusts the light intensity and schedule to mimic natural sunlight patterns.
- **Nutrient Delivery:** Automates the feeding schedule, ensuring the plants receive nutrients at the right time and in the right amounts.
---
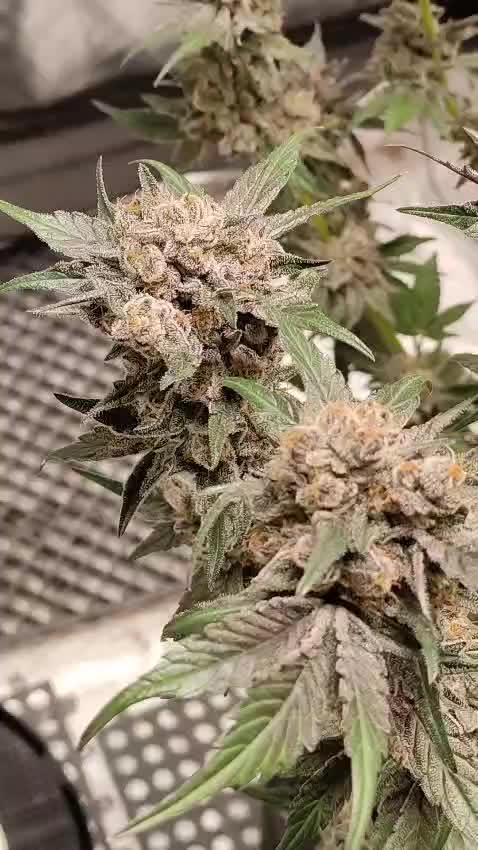
### Spotlight on Blueberry Muffin 🌿 🥦🥦🥦🥦🥦
**Cannabis Strain Benefits** 🧐 🤓
Blueberry Muffin has been a delightful addition to the grow tent. This strain is known for its sweet, berry-like aroma and potent relaxing effects. It's been growing robustly alongside the other strains and is responding well to the advanced techniques applied.
- **Parentals:** Blueberry x Purple Panty Dropper
- **Type:** Indica-dominant Hybrid
- **Flowering Time:** 8-9 Weeks
- **Flavor / Taste / Smell:** Berry, Sweet, Earthy
- **Effect:** Relaxing, Euphoric, Happy
- **THC Content:** 18-22%
- **Characteristics:** Dense Buds, High Resin Production
The Blueberry Muffin plants are showing strong growth and developing beautiful, dense buds with a rich aroma. They are a bit more sensitive to defoliation, so I've been careful to remove only the necessary leaves to ensure optimal growth without stressing the plants too much.
---
### Looking Ahead
With the application of LST, defoliation, and precise nutrient management, the plants are set for an impressive growth phase. The TM+ Pro App and TrollMaster system will continue to play a crucial role in maintaining optimal conditions.
Stay tuned for next week's update as the plants progress and more advanced techniques are applied!
Happy growing! 🌿💚


Likes
57
Share


@Zengrower
Follow
The smell of the Fruity Donutz is getting stronger by the day. It's nice to see how different both phenos are developing. One turning into a trichome covered hash plant while the other lady is growing big purple buds. I water them 2 times per day and they're really thirsty. Going from the strain description they have 2 weeks to go now before harvest, but as always I check the trichomes to see when they are at their top potential.
Likes
21
Share

@squalino
Follow
.
🌿 Journal de Culture : Cherry Cola (Auto)
Date : 26/02/2026
Âge : 35 jours (Semaine 5)
Phase : Début de floraison (Stretch)
📊 Paramètres de l'Environnement
Température : 23°C (Stable, excellent)
Humidité : 60% (Bon pour le stretch, mais attention à la descendre vers 45-50% une fois que les pompons de fleurs seront formés)
Éclairage : Lumatek à 75% d'intensité, placé à 80 cm. C'est un bon réglage pour accompagner la montée en hauteur sans brûler les pointes.
💧 Nutrition & Soins
Apport : 5 ml d'Orgatrex par plante.
Note : Cet apport organique va booster la vie du sol et fournir le potassium/phosphore nécessaire pour lancer la production de fleurs.
Technique : Le LST (palissage) est maintenu avec les attaches rouges pour garder une canopée plate et maximiser l'exposition lumineuse sur les sites de têtes secondaires.
📏 Suivi des Plantes
Plante #1 (La Grande)
Taille : 29 cm (+3 cm depuis le 20/02)
Stade : Pré-floraison confirmée (depuis ~6 jours). On voit bien les premiers pistils blancs apparaître aux nœuds.
État : Elle réagit très bien au palissage. Malgré le LST qui la contraint, elle continue de grimper. La structure est solide et les feuilles sont bien étalées.
Plante #2 (La Petite)
Taille : 20 cm (+4 cm depuis le 20/02)
Stade : Pré-floraison imminente (quelques jours).
État : Elle rattrape son retard ! Elle a pris 4 cm en 6 jours, signe qu'elle entre enfin dans sa phase de "stretch". Elle est très dense au centre, le LST est crucial ici pour bien aérer le cœur de la plante.
📈 Observations visuelles
D'après les photos, le vert est uniforme et profond, ce qui indique qu'il n'y a pas de carence en azote. Le bout des feuilles n'est pas brûlé, donc elles encaissent bien les nutriments. Le palissage avec les fils rouges permet de libérer les pousses inférieures qui deviendront de belles têtes secondaires.
01/03
age 38 jours
fait légère defoliation et un leger LST afin de découvrir les jeunes têtes et branches sous les feuilles afin d'avoir une meilleure penetration de la lumière.
02/03
age 39 jour
donner 1,5 litres d'eau PH 6,3
La plante commence a bien consommer son eau du pot .

Processing
Likes
4
Share


Likes
144
Share


@roro_204
Follow
First photo is the plant before LST and defoliation
Did some light defoliation so air can get through easily.
I took out the little new buds , The little balls in the middle of the forming cola to force the plant to make buds on other stems
Likes
2
Share


@Skinnytalls420
Follow
Day 40-03/09/22 sorry for not updating but haven’t been well and was very busy but again this is second time I’ve grown this now and idk the genetics have a mind of there own but we will see
Likes
56
Share

@GrowerBaal
Follow
For her last week or so she had to move, as i needed the other tent. The temperature and humidity fall over the last days. On day 96 it looks like she can be harvested the next days as first amber trichomes on the side buds have appeared. Probably she will be chopped this weekend.
She got very frosty and looks liked powdered with flour.

Likes
6
Share


@CalGonJim
Follow
1/19 1am MONDAY...TOO STONED TO TYPE..WHAT THE HELL IS THIS THEN..HEY SHUT UP....WAIT...IS THAT ME?😂
1/19 5 AM.🚨 I GOT THE HOLY TRIANGLE OF WEED THE WHOLE FUUCK'N TRAILER PARK IS HERE!!!!! Finally got black tea Tangie in the ground so Julian bubbles and Ricky are all growing with Montel and ice t.
1/20 1:20PM VEGING PERFECT AT 30 WATTS!!!
1/21 10:11 AM. The whole fucking park is here. Julian sprouted!!! Bubbles and Ricky are doing great. I’m gonna top them and then I’m gonna start them over from clones so they grow roughly the same time as Julian and I’ll keep the Ricky and the bubbles others as mother plants and I’ll just keep them going.
1/21 10:15 AM vegging 12 inches 30 W Samsung LED Mars Hydro light perfect
121 1:10 PM I moved black tea Tangie into the germination station. The 2 gallon fits in here just fine. This will be fine for germination.. She’s sprouted only after about 40 hours so she’s really strong.
1/21, 2:54 PM. I made a my own Star Wars movie. Special effects are incredible. It’s very removing made my own Obi-Wan.A CalGonJim Production 🎥🍿


Likes
10
Share


@Barzenegger
Follow
Altough the "anonymous" seedling was still a bit behind, I decided to move the plants into the AutoPots. The pots were still disconnected from the tank and the plants were handwatered for the time being.
3 days later it was clear that "anonymous" had died. I was getting a bit frustrated since the fourth pot was now empty and the other 3 plants were growing happily. I started another germination attempt.

Likes
23
Share


@Bossy_Marmalade
Follow
The time is quickly approaching, when these three girls will be harvested and whole-plant dried for like 2 weeks or so. I believe I will be harvesting this coming weekend after I check the maturity of the trichomes. I'm hoping that Big Lemon produces at least 2 LBS of dried flowers.


Likes
7
Share


@Mrg7667
Follow
Baking soda is a touchy ph up for sure did a couple feedings at 6 on accident over all much happier with everything still a couple adjuments neeeded.

Processing
Likes
8
Share


@Chronicbastard
Follow
I'm pretty excited about this strain.two greats put into one.what else could I ask for.i have really neglected my diaries lately but now that I fixed my room up it will be much easier to take good photos and videos

Likes
10
Share


@Prop207
Follow
3 GAL RO Starting PMM 111
CAL MAG, 10ML
SILICA BLAST, 15ML
PURE Blend Pro Grow 40ml
No issues. Ppm meter shitted, maybe that's why ppm is sick and off the charts.
Likes
35
Share


@Herbz_Unkraut
Follow
dense, sweet, creamy flavored buds, great taste, pleasant high! good stuff!

Likes
13
Share

@MrGrowDiarie
Follow
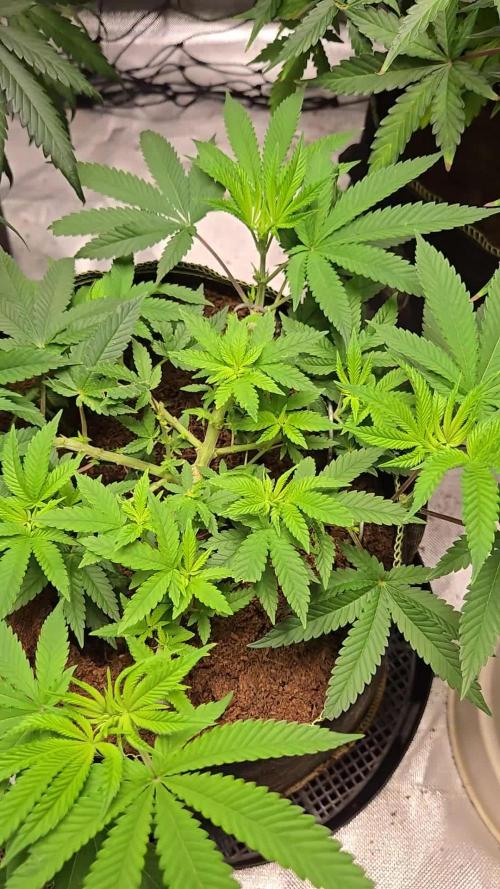
Day 49
The plant is now 49 days old and showing strong, healthy growth. The canopy is filling out nicely with wide, vibrant green fan leaves. The larger fan leaves are a deep healthy green, while the newer growth in the center shows a slightly lighter shade, indicating fresh development.
The plant structure looks bushy with multiple tops forming, suggesting that training (possibly LST or topping) has been applied earlier to encourage a more even canopy and multiple bud sites. The side branches are stretching upwards, and the plant appears to be responding well to the training.
No major signs of deficiencies or stress are visible. The leaves are well-shaped and the color looks balanced, with no obvious spotting or yellowing. The growth is compact, suggesting the internodal spacing is fairly tight, which is good for building a strong structure for flowering.
At this stage, the plant is likely close to transitioning fully into the flowering phase, if not already showing early signs. The canopy is well spread and light penetration looks decent, but a bit more defoliation might help later to open up airflow and light access to lower bud sites.
Overall, the plant looks vigorous, healthy, and ready for the next stage of development.
Likes
26
Share


@eldruida_lamota
Follow
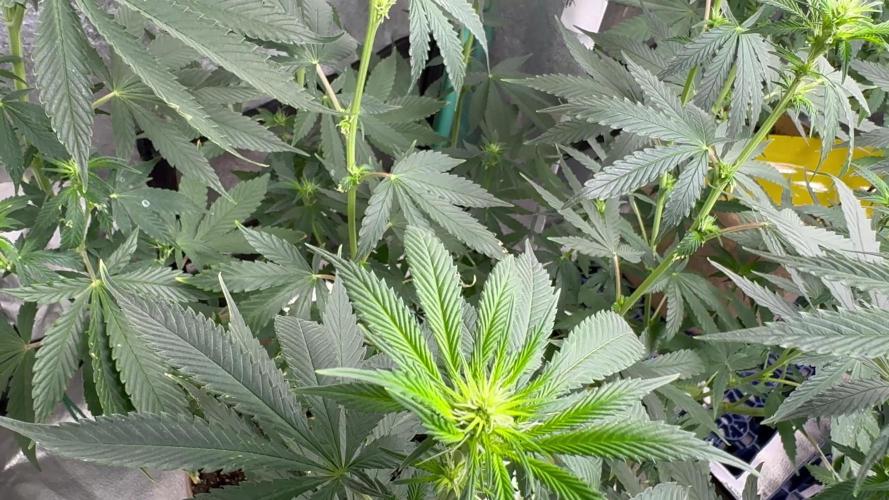
Estoy fascinado, con la velocidad del progreso de las Zkittalicious de Exotic Seeds, en tan solo 5 semanas de floración llevan estos progresos, sin palabras…
Yo creo que no más de 3 semanas las tendré listas.
Apuré a aplicarles el ExplotaCogollos de Agrobeta. Llevan una dosis de medio gramo y a partir del siguiente riego va directamente un Grano de Pk fuerte.
El color es perfecto, se ven bien sanas, y es que no puedo pedir más.
Agrobeta:
https://www.agrobeta.com/agrobetatiendaonline/36-abonos-canamo
Mars hydro:
Code discount: EL420
https://www.mars-hydro.com/
Las maximas de temperatura no superan los 26 grados y las mínimas no bajan 20, así que no me puedo quejar.
Los niveles de humedad también son los correctos van entre 50%/65% de humedad relativa.
Por supuesto el Ph lo estamos dejando alrededor de 6.
Hasta aquí es todo, buenos humos 💨💨💨.

Likes
21
Share

@THcHunteR23
Follow
Elle grandit bien mais j’ai de la difficulté à m’ajuster avec se qu’elle demande en
Nutriments et en eau
Légère brûlure de lumière à quelques endroits.

Likes
Comments
Share


@Mnterpteam
Follow
She stretched a little bit more in the last week, everything very healthy.

Likes
35
Share


@Chedderbob112
Follow
Gave a feed as had let them dry up a wee bit and am good for watering or should I say over watering so need to keep tellin maself less is more less is more also hav enuff feed to last so at least a know the plants won’t go hungry the amount a spent on feed n soil a coulda dun a 2 week shopping at Fukin marks n Spencer’s lol also spent 40 qwid on bio heaven they say it’s the coffee for your plants witever that means anyone who has used this product please comment n let me know how it worked for you even if ye were not impressed let me know