


Likes
20
Share


@Steno
Follow
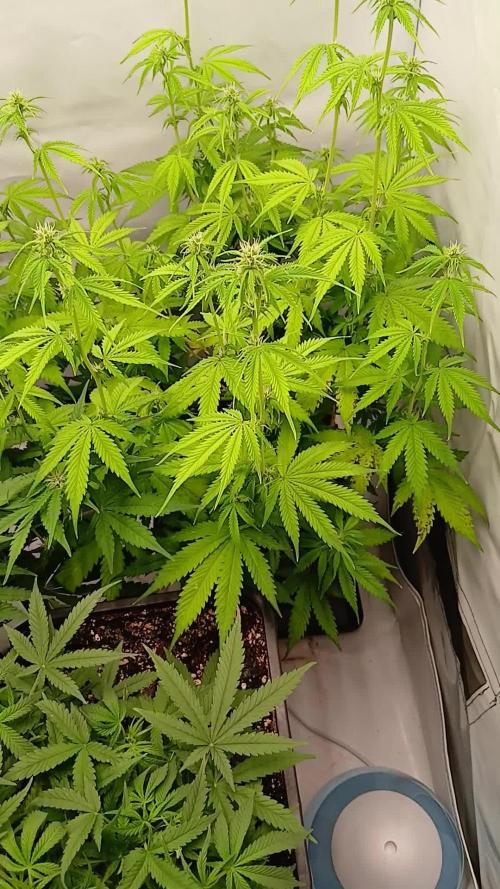
The strain is really strong to various stress, it's felt a difference between the two phenotipes, their are both delicious but one more berry flavoured and the other more exotic one. At the moment the best strain I've ever grow! 💐🍧
Likes
23
Share

@BettyFlores
Follow
25.08.2025 Recovery-Week! Die Afghan Kush befindet sich auf dem Wege der Besserung und ich bin happy, happy, happy 😍
Wie prophezeit, ist die Zkttlz OG mittlerweile die größte und schönste Pflanze. Da sie eine Woche zurückliegt, konnte ich rechtzeitig mit der CalMag-Gabe beginnen.
Also, Pro-Tipp: Aptus Dünger immer mit CalMag supplementieren.
28.08.2025 Die erkrankte Afghan Kush findet so langsam zurück ins Leben und streckt sich ganz gewaltig. Womöglich habe ich ihr, durch zuviel Wasser, auch noch den Rest gegeben 😅.
Aber Hey, here she comes!
Leider fallen die anderen Beiden gerade etwas ins "Pflegehintertreffen". Eigentlich brauchen sie mich gerade gar nicht 💜
30.08.2025 Der Afghan Kush geht es sehr viel besser. Die Blattdüngung mit Bittersalz haben alle drei gut vertragen. Allerdings war dies mein erster Aptus-Run und womöglich auch der letzte.
Ich hoffe, dass es alle drei irgendwie bis zur Ernte schaffen und bitte, bitte auch ordentlich Ertrag bringen 🌸


Likes
Comments
Share


@pippoek
Follow
Nach dem Entlauben haben die Pflanzen sich weiter prächtig entwickelt. Aber nächster Woch egeht es dann in den Blütelichtzyklus.
Likes
15
Share


@HisHope
Follow
Leaves leaves lots of leaves
Trim took a while so plan accordingly
Growing is easy really easy no issues
The strain does seem to be able to grow well on lower nuets than we used, maybe 10-20% less.
Bea dry yield 255 grams fixed the video
Hero dry yield 271 grams
526 total

Likes
226
Share


@Kitties_and_Colas
Follow
~_~_~_~_~_~_~_~_~_~_~_~_~_~_~_~_~_~_~_~_~_~_~_~_~_~_~_~_~_~_~_~_~_~_~_~_~_~_~_~_~_~_~_~_~_~_~_~_~_~_~_~_~_~_~_~_~_~_~_~_~_~_~_~_~_~_~_~_~_~_~_~_~_~_~_~_~_~_~_~_~_~_~
09/04/21
🐱 boy are we ever starting to stretch...too much in fact, im not liking the node spacing with this strain (far too wide)..we lowered both lights in the tent to get this to stop (we never need to do this) and turned up the fans to really beat on these for a few days..hopefully this will strengthen them up and we can avoid steaking them...we'll update again midweek, thanks for reading and happy growing everyone!!
🐱❤️💡🌱
~_~_~_~_~_~_~_~_~_~_~_~_~_~_~_~_~_~_~_~_~_~_~_~_~_~_~_~_~_~_~_~_~_~_~_~_~_~_~_~_~_~_~_~_~_~_~_~_~_~_~_~_~_~_~_~_~_~_~_~_~_~_~_~_~_~_~_~_~_~_~_~_~_~_~_~_~_~_~_~_~_~_~
09/07/21
😺👌
We seem to have gotten the stretch under control, lowering the lights really seemed to have helped (or she's finished lol), the fans have gotten them pretty strong in the last few days, everything is lookinng great..a few leaves with mechanical/ wind dammage but nothing too majior and the high wind has been benificial... this is a very lengthy strain, had i known i would of done a few things differently with the others but still very happy overall..thanks for reading if you made it this far and happy growing everyone!! 😻

Likes
3
Share


@Northern_Ent
Follow
June 7: Tropicana Cookies is growing quickly after the late start. Should be a good strong plant.
June 9: warm today and she’s ready for the first topping to build the manifold. See video.
Tip: spray hose water on the leaves to compensate for the low relative humidity during the daytime. Plants grow much better in the dry air when their leaves get wet. Maybe a couple times a day. Makes a big difference.
June 10: wildfire smoke is back but not as bad as in 2023. At least not here, and not yet. Tropicana Cookies FF growing fast after being topped yesterday. This is going to be a very good plant, I’m sure.
Likes
10
Share


@SgtDoofy
Follow
5/8
Watered both with plain PH'd water yesterday. Both of the plants are sucking up leaves. Trichomes are only really looking amber on the brown leaves, but otherwise milky.
5/10
Decided that these brown-leaved buds on Trainwreck were ready, so I tried a little bro-science and watered an hour before harvesting. Noticed there were some really nice green young buds intertwined, so I did my best to trim around to leave them for another week or so. No weight measurements yet, will wait till after trimming and before curing.

Likes
8
Share


@GroloCup
Follow
A week in and four out of the six are ready to head to the big tent to go into their one gallon hydro buckets... I've been impressed so far with the 100% germination rate as well as the vigor in which these have taken off. The roots are well over 6 inches and they've been guzzling up this diluted nutrient solution I've started them off with.

Likes
1
Share

@ThatOneUKHTA
Follow
Пробуем клонирование перед регами
Тренируемся
Прорастание есть
Ждем всех
Из ошибок - проебал влажность, листья затхли и не восстановились. Эту систему в боксе держим полностью на проветривании


Likes
12
Share


@Chamed33
Follow
Second time flushing it.. I’m also running out of time before harvest I should’ve been flushing it a week earlier.. she’ll be ready in 2 days for chop

Likes
7
Share


@Greenislandfr
Follow
La gorilla Zkittlez a commencer ca croissance en box 400W pendant 3 semaine, j'ai demander à un ami de commencer la croissance dans sa box pour voir la différence avec mes autres fem que j'ai commencer en intérieur. La différence est vraiment incroyable je pense que la variété est pour quelques chose mais débuter la.croissance en box et finir en extérieur est vraiment très bénéfique pour le rendement et n'afflue en rien négativement sur la qualité au contraire
Likes
2
Share


@Not_a_tutorial1990
Follow
Struggled to maintain stretch but just gotta work with her.. didn't start showing signs of flower until 2 weeks into flipping lights to 12/12.


Processing
Likes
68
Share


@themartian911
Follow
hello guys, second flowering week.
i put one big fan for my flowering period.
and some small stigmas coming slowly.
i put more BH,BG and BB. 😀👍

Likes
9
Share


@SeseGrows
Follow
Home Indoor 90x90 //
Do Si Dos 33 - Barneys Farm + Sour Diesel + Roadawg
⠀⠀⠀⠀⠀⠀⠀⠀⠀
// Week 2 // FLOWERING
⠀⠀⠀⠀⠀⠀⠀⠀⠀
- Grotek Nutrients.
- Lumatek LEC 315w+💎.
LEC 315w --> 90%