


Likes
Comments
Share


@Roberts
Follow
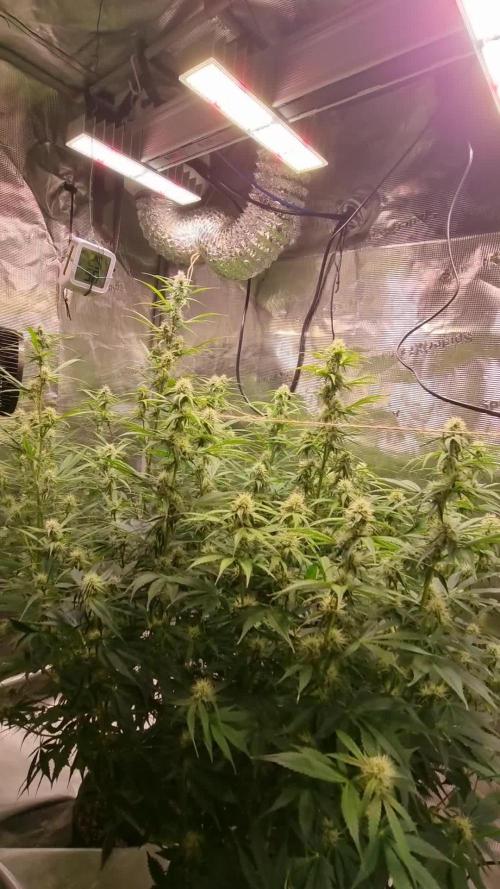
Grand Daddy Purple autoflower is looking really good. She has not shown any pistils yet. I did a bunch of lst to her and defoliation to open her up for the stretching. Everything is looking good. She looks like she is gonna try to get good size in the small potter. Bigger the better. Thank you Medic Grow, and ILGM. 🤜🏻🤛🏻🌱🌱🌱
Thank you grow diaries community for the 👇likes👇, follows, comments, and subscriptions on my YouTube channel👇.
❄️🌱🍻 Happy Growing 🌱🌱🌱
https://youtube.com/channel/UCAhN7yRzWLpcaRHhMIQ7X4g


Likes
10
Share


@3lementa1
Follow
The colas keep filling out and getting longer and smell amazing. It's been warmer and more humid outside so RH in the tent has gone up. I added a mini air purifier I wasn't using (no ozone) as an extra precaution against mildew.
I woke up in the middle of the night on Monday and realized that the air purifier has a light on it so I got up and turned it off. I was worried that I'd messed with the dark cycle so I left them in darkness for an extra 2.5 hours.
My cool tube fan fell off the next day, onto my plants. They look undamaged. I taped it up again and set up a safety wire like the filter and fan have. I need a better solution for next cycle.
The buds are beautiful and having an even canopy is great. It's hard not thinking about the end result. The buds still look small compared to the big colas of a traditional grow shape but there's still a couple weeks left. There is some bud formation under the canopy but it's a little light. The tops of the colas are fat but short on the 7 gallon plants and taller and thinner on the 5 gallon plants.
I did leave a couple offshoots on that developed in late veg/early flower. By the time I caught them, I felt they were too mature to chop and I thought they helped fill out certain areas. But those ones have fewer bud sites and tend to be just a cola on a branch that shoots straight up which is still good. I do wonder if less crowding would have given me bigger buds, but I think it has more to do with pot size.
This is week 7 of flower. I switched to half strength nutes and started adding fancy molasses (18ml/gallon). I broke my pH tester and didn't replace my SCROG net until after I finally watered the next day so the canopy changed a bit. I took the opportunity to rearrange the plants a bit.
Crystal formation increased a crazy amount the day after I started adding molasses. I think I'll keep adding molasses even during flush.
The CBD Blue Shark has this really beautiful white glow. The pistils are very strong and white and the trichromes reflect back this silver light. The leaves are a nice semi-glossy dark green which gives great contrast. It's just a beautiful plant.
The Wedding Cake has a lot more colour with lots of red hairs and some yellow tones in the pistils. The fan leaves are more prone to yellowing and death than the leaves on the CBD BS. The buds seem more structurally dense and are really working on these pyramid shapes that look like delicious orange and green snacks. The buds on the CBD Blue Shark are more symmetrical and kind of otherworldly like some kind of sea creature.


Likes
22
Share


@medicalhydro
Follow
Flush week
Total system power 230w
Dim %10
UV-IR-FR Dim %100
PH:6.0
PPM 285


Likes
27
Share


@Wicked_Stix
Follow
I never know what to put here. Maybe thanks to the 2 people that look at my diaries?
Likes
54
Share


@MadeInGermany
Follow
Hey guys :-)
The ladies are developing really well 😊.
I'll decide spontaneously whether I'll do topping again because I hardly have any space in the flower tent and I'll soon have to set it to 12 / 12 h due to time constraints :-( .
But this week they will definitely get the veggie phase.
Was poured 2 times with 1 l each (groundwater see description at the bottom)
Everything was made clean.
Fresh osmosis water is applied and the plants are sprayed and checked.
Stay healthy 💚🙏🏻
👇🏼👇🏼👇🏼👇🏼👇🏼👇🏼👇🏼👇🏼👇🏼👇🏼👇🏼👇🏼
‘Powered by GreenHouse Feeding’
Copy the link for 10% off all Nutrients 👇🏼
https://shop.greenhousefeeding.com/affiliate/MadeInGermany_PassionGrower
👇🏼👇🏼👇🏼👇🏼👇🏼👇🏼👇🏼👇🏼👇🏼👇🏼👇🏼👇🏼
You can buy this strain at :
https://www.amsterdamgenetics.com/product/choco-cheesecake/
👇🏼👇🏼👇🏼
Use the coupon code: madeingermany
for 10% on all Amsterdam Genetics seeds
Water 💧 💧💧
Osmosis water mixed with Cal/Mag (24 hours stale that the chlorine evaporates) to 290 ppm and Ph with Ph- to 5.8 - 6.4
MadeInGermany

Likes
6
Share


@Greenbean15
Follow
Moved into the flowering tent... running out of room and need to get these girls flowering.
Defoliated and put under the ScrOG net, hopefully I won’t have to defoliate her too heavily. Stretch has started, no pistils yet but she had just went into reveg so I suspect her to throw pistils again pretty soon. Lots and lots of branches on this little plant since the cutting she originally came from was off a flowering mother plant.
Likes
5
Share


@Juiced_Up_Genetix
Follow
Week one of flower. Tied down and spread out. She took up the 4x4 by herself. I’ll scrog her next.
Likes
23
Share


@SonomaSungrown
Follow
Skipped a week in my journal due to travels.
Had my neighbor water my plants.
Having some minor early deficiencies with my photoperiod plants (particularly the chem brulee)... so I decided to go ahead and give everything a solid feeding of Foop Bloom 1, 2 and Sweetener. This is their first ever bottled feeding. Have been running on supersoil and a prayer.
Also top dressed everything and mulched with rice straw to help with the soil drying out a bit too quickly.
Leaves have been yellowing on all three. Mostly relegated to the interior of the plants.
Chem Brulee is looking a bit too yellow overall, as well.
French Macaron is a 66in. Chem Brulee is 56in. Pineapple Meatball is 45in.
I have a sneaking suspicion that my neighbor didn't water them quite enough while I was gone.
Will probably continue with the Foop feedings... probably at least once per week. Don't want to overdo it.
Also top dressed with my flowering top dress mix and mulched all plants with a thin layer of rice straw.
8/4 Sprayed with Neem Oil and Castile Soap
8/5 Sprayed with Gravenstein Apple FFJ and OHN
8/6 Sprayed with Neem Oil and Castile Soap (this will likely be the last time I spray with Neem Oil, as I don't want residual oils as buds start swelling. Also fed 1/4 strength FOOP to ensure we head off any deficiencies.


Likes
8
Share

@RakonGrow
Follow
+
Tag 65:
starting 30-70% watering rule
2.0L bottle water EC 0.35 + 0.35ml/L CalMag + Terra Flores 5.25ml/L Final PH 6.16
Tag 64:
starting 30-70% watering rule
2.25L bottle water EC 0.35 + 0.4ml/L CalMag + Terra Flores 5.25ml/L Final PH 6.20
Tag 63:
starting 30-70% watering rule
2.0L bottle water EC 0.35 + 0.4ml/L CalMag + Terra Flores 5.25ml/L Final PH 6.20
Tag 62:
starting 30-70% watering rule
1.9L bottle water EC 0.35 + 0.4ml/L CalMag + Terra Flores 5.25ml/L Final PH 6.20
Tag 61:
starting 30-70% watering rule
2.25L bottle water EC 0.35 + 0.4ml/L CalMag + Terra Flores 5.25ml/L Final PH 6.20
Tag 60
:starting 30-70% watering rule
1.0L bottle water EC 0.35 + 0.4ml/L CalMag + Terra Flores 5.25ml/L Final PH 6.20
Tag 59:
3.0L bottle water EC 0.35 + 0.4ml/L CalMag + Terra Flores 5ml/L Final PH 6.15
Tag 58: add a "enter growroom and tent" video
---------------------- all values are weight in grams ( assumption : 1000g = 1000ml.) -------------
Day......State...Date Time..................Seed......messure..change...watering.....surplus.....DayLight.....Night.....within 24h
...57...bloom...13.11.2025 07:00.....Runtz...........8099.......3092..........3092...........-402
...57...bloom...13.11.2025 11:00.....Runtz...........8599.........500.............500
...57...bloom...13.11.2025 11:01.....Runtz...........8227.......-372
...57...bloom...13.11.2025 13:00.....Runtz...........8477.........250............250
...57...bloom...13.11.2025 18:00.....Runtz...........7755.......-722
...57...bloom...13.11.2025 23:45.....Runtz...........7363.......-392..................................................-1486
...58...bloom...14.11.2025 06:00.....Runtz...........7111.......-252......................................................................-252...............-1738
...58...bloom...14.11.2025 23:45.....Runtz...........5261.....-1851.................................................-1851
...59...bloom...15.11.2025 06:00.....Runtz...........5064.......-196.......................................................................-196..............-2047
...59...bloom...15.11.2025 07:00.....Runtz...........8080.......3016...........3016..........-769
...59...bloom...15.11.2025 23:45.....Runtz...........6518.....-1562.................................................-1562
...60...bloom...16.11.2025 06:00.....Runtz...........6219.......-299.......................................................................-299..............-1861
...60...bloom...16.11.2025 07:00.....Runtz...........7253.......1034...........1034..........-827
...60...bloom...16.11.2025 23:45.....Runtz...........6067.....-1427.................................................-1427
...61...bloom...17.11.2025 06:00.....Runtz...........5820.......-247.......................................................................-247..............-1674
...61...bloom...17.11.2025 07:00.....Runtz...........7618.......1798...........1798............124
...61...bloom...17.11.2025 23:45.....Runtz...........5911.....-1594.................................................-1432
...62...bloom...18.11.2025 06:00.....Runtz...........5645.......-266.......................................................................-247..............-1674
...62...bloom...18.11.2025 07:00.....Runtz...........7532.......1887...........1887.............27
...62...bloom...18.11.2025 23:45.....Runtz...........5866.....-1666................................................-1666
...63...bloom...19.11.2025 06:00.....Runtz...........5581.......-285.......................................................................-285..............-1951
...63...bloom...19.11.2025 07:00.....Runtz...........7895.......2314...........2314...........363
...63...bloom...19.11.2025 23:45.....Runtz...........6148.....-1711................................................-1711
...64...bloom...20.11.2025 06:00.....Runtz...........5868.......-316.......................................................................-316..............-2027
...64...bloom...20.11.2025 07:00.....Runtz...........7850.......1982...........1982...........-45
...64...bloom...19.11.2025 23:45.....Runtz...........6126.....-1724................................................-1724
...65...bloom...20.11.2025 06:00.....Runtz...........5826.......-300.......................................................................-300..............-2024
...65...bloom...20.11.2025 07:00.....Runtz...........7842.......2016...........2016.............-8
+

Likes
15
Share


@Viccrazyweed
Follow
Guys, i don’t know where is going to take me but this trip is being awesome, as i wanted, the critikal plant has grown in spiral and she is developing a lot of little new leaves, growing gorgeous but im a newbie, i don’t not if its fem or not until flowering I guess (?)
Cookies was growing superslow and i don’t know why i topped it but she is recovering now, might not grow because of then injury
I know this “advanced” training methods are gonna make the growing stage last another month at least for sure
I have improved moist levels by spraying them quite a few times daily, tap water with 1ml of propolis 5% every 0.5L and have turned the ph correct with some natural orange juice, a few drops use to be enough
I turn the heather on sometimes and it comes with fan so perf but im worried the most of the time they are with low airflow levels due to the fact i have not a proper space and they are in a corner of my room
Processing
Likes
10
Share


@Roundhouse
Follow
So far so good
The blueberry g13 is tall with big buds it would seem the crystals are already in full force.
The white widow has lots of leaves and I can’t see any crystals yet.
The red dragon is looking good crystals are starting to show
I wish I would have taken more leaves off the white widow.
Smell is still just normal
All in all a good week.
The buds are growing bigger every day I expect they should be joining up by the end of next week
Likes
Comments
Share


@cronica420
Follow
hey guys just starting this journal off right these ladies just showed pre sex and have been instantly potted up in autopots
Likes
152
Share


@SlowpokeFuegobud
Follow
🍪 🍒 🍰🍩 🎀🍪 🍒 🍰🍩 🎀🍪 🍒 🍰🍩 🎀🍪 🍒 🍰🍩 🎀🍪 🍒 🍰🍩 🎀
Welcome to week 11, dear growmies!! 😘
I'm leaving for 5 days next week and figured out a watering system. I need to actually water them for 1 or 2 days from remoteness.. :thinking:
DAY 71
Watered with 4ml bloom + 4ml pk + 4ml growzyme, humics, bigfruits + 2ml calmag 💧
DAY 73
test bottles for my vacation, it's just plastic bottles (2L and 1.5L), and ceramic cones which will be buried in the soil to hopefully release their water slowly💧
Thanks for showing up and supporting me and the girls, bless you, growmies!! 😘 ❤️
Shouts go out to my sponsors @GreenBuzzNutrients, thanks so much for your support!! 💚 💚 💚
If anyone would like to try their amazing organic products, you can find a generous discount code of 25% in my weekly comments! 😜 🙏
If you want a recommendation which product to get first.. BIGFRUITS!! 😍 I love the tasty terps with this one!!
https://greenbuzznutrients.com/
Thanks also of course @Kannabia, for the beautiful genetics!! 🧡🧡🧡
Pouring all my love into this grow, thank you for joining in, growmies!! 💚 💚 💚 😘 ❤️ ❤️ ❤️
Wishing you all the best for your beautiful gardens!🌱 🙏 Grower love!! 💚
_________________________________________________________
Strain Info:
https://www.kannabia.com/en/feminized-cannabis-seeds/break-up-cake
We need to talk
You’ve got to celebrate everything in this life, and that includes love and heartbreak. Since you’re all familiar with Wedding Cake feminised marijuana seeds, we’ve put a Break-up Cake in the oven at the Kannabia Seed Company – because things don’t always go well, and we sometimes need a friendly seed to lean on.
Break-Up Cake has a base of Girl Scout Cookies, one of North America’s best-known strains, which is earthy with a very potent indica effect. And we top it off with a delicious Cherry Pie which, in addition to giving it an elegant dark attire, adds a silky, deeply sweet flavour of cherries and berries. Look no further – it’s the perfect cake.
This seed will be celebrated for its ease of cultivation and abundant production. It’s one of the best investments you’ll make this year. But if it’s going to be memorable for one thing, it’s for its sweet complex flavour that’s full of contrasts. If we have to break up, let’s do it sweetly and amicably, right?
How to: Break-Up Cake
Break-Up Cake is an “all-terrain” marijuana seed, which will adapt to the place you allocate to it. An ode to independence, it’s a plant with only the most basic needs that knows how to grow by itself.
It’s a pale branching plant with tremendous dark green leaves, purple tips, and an icing sugar coating of trichomes. Its immense buds are some of the stickiest ones we’ve found in our seed bank recently.
Indoors, it needs 60 days of flowering to give no less than 600 grams per square metre. Use a Screen of Green method without hesitation, or plant it using hydroponics if you want to obtain the full benefit of its potency.
Outdoors, it reaches two metres in height with a harvest of 800 grams per plant, which is reason enough to give it a go. Like a good break-up cake, this plant doesn’t need to live with a partner, and knows how to live well in a Guerrilla plot. Between 25th and 10th October is its moment.
Taste and effect of Break-up Cake
Very relaxing but not causing lethargy, it’s a good indica-dominant plant. Its effect is mellow (we’re too old for childish games). It calms the consumer but it also gives rise to creative moments. Head on up to the top floor, later to make your way, little by little, down to the kitchen later (where you might want to give in to temptation if you need to stimulate your hunger).
The flavour is full of nuances. It will remind you of a vanilla sponge or cheese cake: you’ll notice a cherry topping, something sweet that you can’t quite distinguish, and an earthy undertone on a biscuit base… You’ve got to sample it to know it.
_____________________________________________________________________
SETUP:
80x80x180 cm Zelsius
240W Full Spectrum LED IR UV dimmable
DW240H-A6-HS
Heatsink color red
LED Chips:
512pcs SAMSUNG LM301H + 24pcs Osram 660nm + 8pcs Osram IR 730nm + 8pcs UV 385nm
Color mix: 2700K + 4000K
2,8umol/J
Driver HLG-240H-C2100B
Coverage: veg 5x3ft / flower 4x2ft
Product size: 628x205x68mm
Green Buzz Nutrients
Shouts go out to my sponsors @GreenBuzzNutrients, thanks so much for your support! 💚 💚 💚
If anyone would like to try their amazing organic products, use code GD42025 for generous 25% discount (for orders of minimum 75€) ✨
https://greenbuzznutrients.com/
Biobizz Lightmix
custom exhaust fan 320/270cm³/h
Carbon Active Granulate 240cm³/h
tab water pH 8 - EC 0,25 with Calmag to 0,5
Advanced Hydroponics pH minus Grow + Bloom to pH 6.2
🍪 🍒 🍰🍩 🎀🍪 🍒 🍰🍩 🎀🍪 🍒 🍰🍩 🎀🍪 🍒 🍰🍩 🎀🍪 🍒 🍰🍩 🎀

Processing
Likes
18
Share


@Cannibalgardens
Follow
Well this girl has recovered very well she was doing just horrible because I had the lights to low at 22" when 34" was way better . These led lights had me thinking I could go lower then I could ... She is doing great and will be getting the nutrients she needs I'm feeding her a 100% Canadian and organic line that got from a local company .. getting excited to see where we are next week and about do her transplant too. Cheers and thanks for following along .. canna family

Likes
8
Share


@NuttyYeti
Follow
She's growing a little funky but hopefully she'll come around. Probably because the pot is so small my other, bigger pots are stealing it's light

Likes
3
Share


@Rinna
Follow
She's starting to pre flower now. Doing fantastic! She is stretching hard and all those tiny side branches are shooting up like crazy. I hope this one will make it through September, because she would yield a crazy amount 😁



Likes
15
Share


@RussianGrower
Follow
Приветствую всех, кто следить за мной. Ваша поддержка очень важна для меня.
На следующий день после того как я обновил прошлую неделю дневника наступило время пересадить растения в более крупное ведро. Я покажу вам как использовать дешовые пивные стаканы для пересадки ваших растений. Вы можете посмотреть это на первом видео.
Когда я пересаживал растения я дополнительно добавил микоризу в большое ведро. Одно из растений "ЛСД -феминизированное" всё ещё показывает замедленный рост, несмотря на то, что я решил подсветить его LED полный спектр. Так же я внёс базовое питание, корневые стимуляторы и стимуляторы роста, в добавок с гуминовыми кислотами. Я планирую сделать из эти растений много клонов и запустить новый дневник в другой палатке, а эти растения потом переставить в маленькую палатку. Если вам интересно следить за приключениями травки в России, подписывайтесь на мой дневник
--------------------------------------------------------------------------------------------------------------------------------------------------------------------------------------------------
Greetings to all who follow me. Your support is very important to me.
The day after I updated the last week of the diary, it was time to transplant the plants into a larger bucket. I will show you how to use cheap beer glasses to transplant your plants. You can watch it on the first video.
When I transplanted plants, I additionally added mycorrhiza to a large bucket. One of the "LSD-feminized" plants still shows slow growth, despite the fact that I decided to highlight its full spectrum LED. I also added basic nutrition, root stimulators and growth stimulators, in addition to humic acids. I plan to make many clones of these plants and start a new diary in another tent, and then move these plants to a small tent. If you are interested in following the adventures of weed in Russia, subscribe to my diary.
