
Likes
Comments
Share


@pifflestikkz
Follow
Day 121
31/08/24 Saturday
Feed today using de-chlorinated tap water pH 6 with Plagron products.
She is now settled, and now flipped. Like I said she has full roam now.
Video update, I'll get better pictures and videos when light is off ✌️💚
Day 123
02/09/24 Monday
De-chlorinated tap water pH 6 today with calmag.
Day 124
03/09/24 Tuesday
Feed again today using de-chlorinated tap water pH 6 with calmag.
Her pre flowering is in full now.
Day 126
05/09/24 Thursday
(End of week)
De-chlorinated tap water pH 6 only today full 5L no run off now. Will up to 6L next week.

Likes
4
Share


@MoneyMorris
Follow
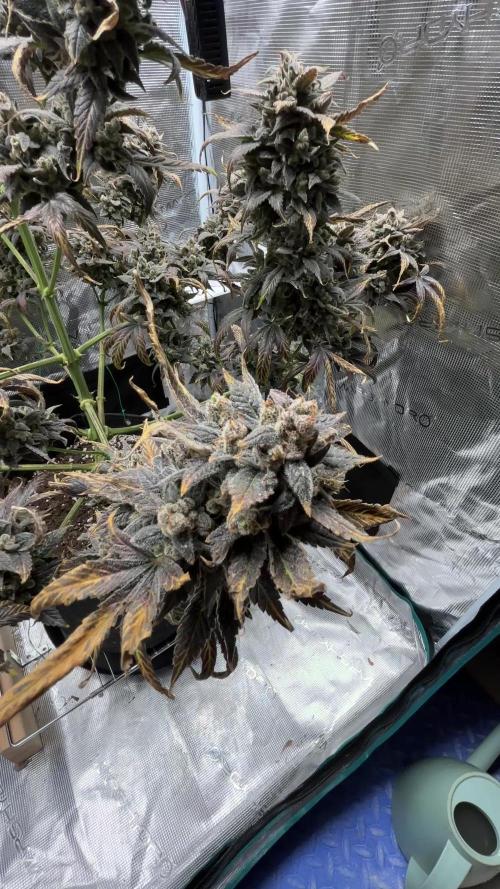
The plants have been flushing for almost a week now. Really starting to change colors. I can't wait to see how much I get from them.

Likes
24
Share

@Momentum
Follow
Bei der Hash Burger ist mir klar geworden, dass der Leafly Strain of the Year Titel sich nur auf das Endprodukt bezieht. Vom Growing her performt sie eher klein und graziös, wird sicher aromatisch und ist ne schöne Pflanze, aber der Wuchs ist nicht die erwartete Bombe bis jetzt.


Likes
4
Share


@KhaVigga
Follow
now im start to using many kind of sugar till harvest, beer-fpj-molasses-coconut water...

Likes
7
Share


@Mr_nugs_lover_David
Follow
Beautiful pair of phenos of Badaz og cheese very excited about what strain is gonna offer me in terms of quality buds, so excited to see what is every of this 2 phenos gonna be like, I really hope that both of them have the exact terpenes profile and the same potency! Let's keep on working! We'll the ladies have been Transplanted on February 2nd after 17 days since planted, they were very big and the pot was completely conquered by strong roots as you can see, now both of them are in their new 11l pot home let's see how they keep developing! 💛❤️💚🔝💎

Likes
5
Share

@HanzzCZ
Follow
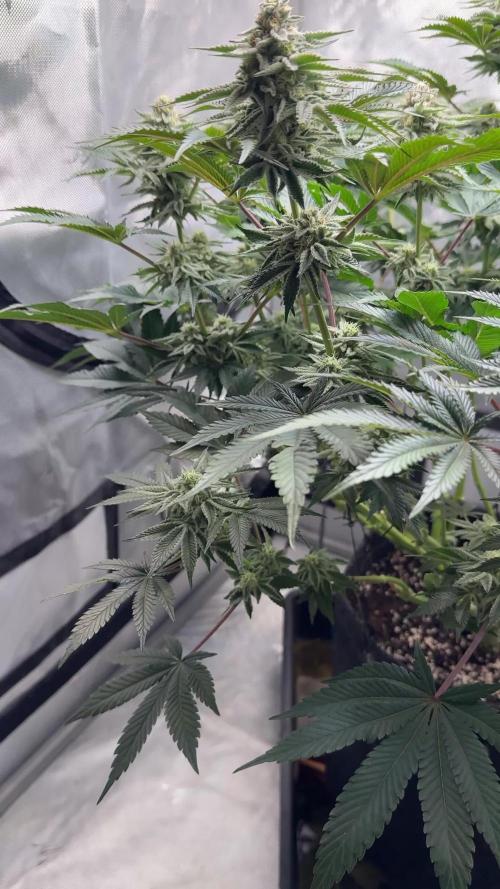
What’s uppp! Week thirteenth (five in bloom) is behind us.✌️🌼
This week, she packed on even more frost. ❄️🍓
I tried increasing the base AN nutrients to 2.5 ml/l, but that seemed to be a bit too much for her and she started showing slight burnt leaf tips. 😅
I adjusted the feeding schedule back to the dosage listed above for the following waterings.
Watering volume was reduced to 6L, but frequency was increased to every other day.
Overall, she seems very happy, and so is the grower! 👌🌱
Good luck every one! ✌️
Any tips or advice are always welcome 😂🔥
CZ
____________________________________________________________________________________________________________________________________________________
Servus, třináctý týden, pátý týden v květu, máme za sebou. ✌️🌼
Tento týden zase o něco víc obalila cukrem. ❄️🍓
Zkusil jsem zvýšit základ AN na 2,5ml/l, na holku už to bylo asi hrana a chytla trochu špičky listu do černa. 😅 Další zálivky jsem upravil dávkování, které je uvedeno výše.
Zálivka snížena na 6l, ale zvýšená četnost na obden.
Myslím, že holka je oukland, panícček je spokojeny! 👌
Ať se daří! ✌️kdyby měl někdo nějaký typy/rady uvítám váš komentář. 😂🔥


Likes
2
Share


@GanjaFarmar
Follow
So far the biggest but least formed plant in the tent. The blue cheese has hit 57 days from seed, and to be honest its looking all healthy! I cant wait for the next few weeks for the nugs to dense up!

Likes
18
Share


@rhodes68
Follow
Adjusted the nuet list to reflect reality at this point dont see need for anything else.
8/31 Still building and looking well so will keep doing what we are, just keep her happy for a few more weeks ;)
9/1 Still not feeding till tomorrow thinking last use of Recharge and Bio-Bloom
9/4 Day 61 Looks good this morning pics later
9/7 Re-adding Big Bloom (Fox Farms) to nuet mix, plants seem to be missing it and I agree. Once a week at 3 tps/gal


Processing
Likes
10
Share


@CanadianFillmore
Follow
Week 5 with Glueberry OG! She's the stickiest of the group! She's growing nicely, lots of bud sites but she continues to show signs of deficiency, cal-mag is my first guess, maybe also a P & K def too. Still, I'm happy with her progress.


Likes
7
Share


@Cogollo_eu
Follow
**Encontrarás la traducción a español al final de la descripción**
From/Desde: 19/04/19 || To/Hasta: 25/04/19
From day/Desde día: 57 || To day/Hasta día: 63
You can find the Gorillas Diary here (Texts are the same this week):
** Podéis encontrar el diario de las Gorilla aquí (Los textos son iguales esta semana):**
https://growdiaries.com/diaries/25675-makingmoney-with-gorilla-mm-vs-gorilla
-----IMAGES & VIDEOS-----
1 - Before defoliation
2 - Defoliation
3 - After defoliation
-----WEEK SUMMARY-----
(Following text was translated with tools and reviewed, sorry for mistakes, misspellings or nosense things)
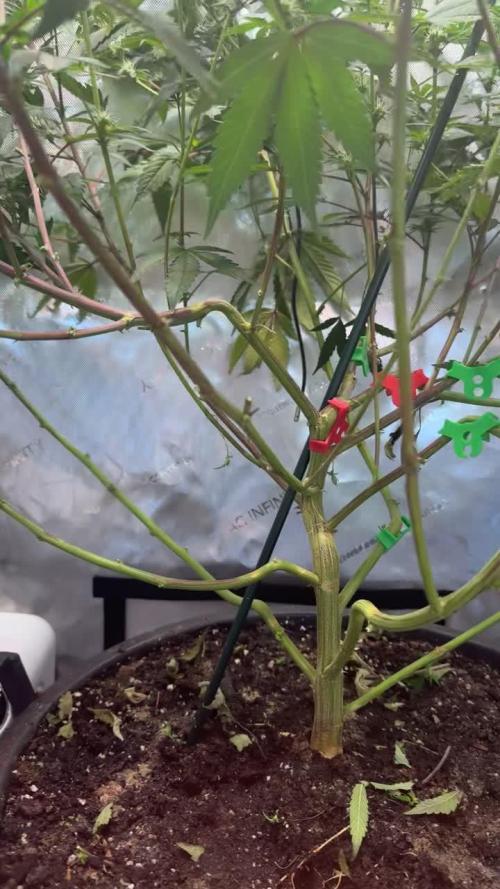
As you can see I've done a defoliation this week. Yes, I have really gone over the top, I have removed many more leaves than I had, and the tails of the plants has not come to join at all due to the failed defoliation.
Being the first defoliation I do, I did not really know what I was doing and I went crazy. Now that it has been several weeks since I made this defoliation, I realize that I should not have removed the leaves from the nodes of the tails, because they have stopped growing and have not joined with their superior parts. Anyway, the plants are beautiful today and although they could be much better I feel very happy with them.
I know I've made 2 fatal mistakes in this grow
- The first has been the massive defoliation badly done, defoliation yes, but with head ... do not follow my example.
- The second failure that I see today, is that I did not leave enough growth time (18/6) after having made the last pruning and that has made the tails have been a length much less than what would have been desired, I think that 2 more weeks of growth would have been perfect.
-----WATERING CALENDAR-----
20/04/19 - 1,250 ml with Sensizym, Silica, Rhino Sk, Bud Ignitor, Big Bud, Bud Candy & Bud Factor-x @ PH6.4 & 1.2 E.C.
23/04/19 - 1,250 ml with All week nutrients - (Silica, Sensizym & Bud Ignitor) @ PH6.5 & 1.5 E.C.
*****ESPAÑOL*****
-----IMÁGENES Y VÍDEOS-----
1 - Antes de la defoliación
2 - Defoliación
3 - Después de la defoliación
-----SUMARIO SEMANAL-----
Como podéis ver esta semana he hecho una defoliación. Si, efectivamente me he pasado de listo, he quitado muchas más hojas de las que debía y las colas de las plantas no ha llegado a unirse del todo debido a la fallida defoliación.
Al ser la primera defoliación que realizo, no sabía muy bien que hacía y me lancé a lo loco. Ahora que han pasado varias semanas desde que realicé esta defoliación, me doy cuenta de que no debí de haber quitado las hojas de los nodos de las colas, pues estos han dejado de crecer y no se han unido con sus partes superioras. De todas maneras, las plantas están preciosas a día de hoy y aunque podrían estar mucho mejor me doy con un canto en los dientes.
Se que he cometido 2 errores gordos en este cultivo
- El primero ha sido la defoliación masiva mal realizada, defoliación si, pero con cabeza.... no sigáis mi ejemplo.
- El segundo fallo que yo veo a día de hoy, es que no dejé suficiente tiempo de crecimiento (18/6) después de haber realizado las últimas podas y eso ha hecho que las colas hayan quedado de una longitud muy inferior a la que hubiera deseado, creo que 2 semanas más de crecimiento hubiera sido perfecto.
-----CALENDARIO DE RIEGO-----
20/04/19 - 1.250 ml con Sensizym, Silica, Rhino Sk, Bud Ignitor, Big Bud, Bud Candy y Bud Factor-x @ PH6.4 & 1,2 E.C.
23/04/19 - 1.250 ml con todos los nutrientes semanales - (Silica, Sensizym y Bud Ignitor) @ PH6,5 & 1,5 E.C.

Likes
18
Share


@ganjameister
Follow
Flowering Day 35
I’ve starting steering vegetatively this week which means less stress on the plants to increase bud size.
Watering has been frequent with low EC. Lower VPD along with other veg crop steering techniques used.
Buds getting bigger every day

Likes
11
Share


@dataTwiiix
Follow
11éme semaine l'attante deviens longue mais faut tenir bon!
bientôt la récolte. j'suis quand même heureux de pouvoir consommer La Rica en attendant la récolte du reste des plants qui ne debvrait plus trop tarder tous les plants on des trichromes laiteux maintenant j'attend 15/20% d'ambrés et bim RECOLTE!
mardi 11/5 20h:
Lampe éteinte pour 48h la récolte (des deux white widow, d'une purpleQueen et d'une dernière "La Rica" qui avait subit un stress qui a bloqué ça croissance de +/- 10j) démare le jeudi 13 mai à 20h😀.


Processing
Likes
13
Share


@Cheesefarmer420
Follow
Week 5 of flowering for the three ladies went well. A couple of the hairs started turning orange and shriveling. Tricomb production is looking grand, smell just continues to grow stronger and stronger. Stinking the whole house up even with a 4” carbon filter and fan constantly scrubbing the closet. Ph fell down to the lower 6.1-6.2, plants started yellowing and loosing older fan leaves, could have something to do with them Inching closer to harvest time, also probably has something to do with the slight ph drop, either way sugar leaves, new growth, and bud is all thriving so as long as the problem doesn’t continue to get server I’m not worried about the plant using up nutrients and offing some at this point in time useless lower fan leaves. Popsicle cake is giving off a straight gas/diesel fuel smell. The tallest unknown plant is solid lemons and Kush, and the middle sized unknown plant has a semi sweet but yet gassy aroma coming off her. Very exciting leading into week 6 of flower!
Likes
2
Share

@HappyFarmer2
Follow
Looking good, seen a few more Amber trichomes, daily monitoring.
Mimosa Orange Punch drying, doing good, ready to cure in a day or two.