


Likes
Comments
Share


@SirDillton
Follow
Day 66 - Day 21 of flower - Master kush
First indoor grow.
Lights 12-12/ PAR 900/ Day temp 23-27/ Night temp 19-22/ RH45%/ Co2 500ppm/ water Ph 6.5/ water ppm 1400 with technaflora nutes/ organic soil/ 7 gal pots/ 4-5l per 3 days for watering.
Week 3 is done. The power went out for a day due to a hurricane. Kept the light cycle going with flashlights lol. Defoliated one final time on day 18. There hasn't been any stretch in 4 days. Looking frosty already. I also included a video of my setup this week!



Likes
7
Share


@Budking420
Follow
This is by far one of my largest autoflowers to date. Shes flowering hard now at week 5 and I'm super happy that I used LST on her. Without LST this lady would be about 5 feet tall without a doubt. I'm really happy with how she accepts the 24 hour lighting as other strains clearly don't like it as much. I hope you guys are enjoying this as much as I. I encourage you to check back next week to see just how fast she buds & remember its 4:20 somewhere!!!!


Likes
3
Share


@Tashtegoo
Follow
9.7.
Smell changed from a mix of orange and maracuja to a whole multi vitamin juice kind of flavor over night.
Under the loupe I can spot the odd amberish trichome, maybe by mishandling , but most are milky or clear, still producing more fresh ones.
12.7.
A bunch of trichomes developing an amber hue.
Also the leaves are turning yellow now.
Harvest Window is open now, wanna see some more amber, but not too much. Mainly hoping for thicker buds.

Likes
16
Share


@DrLaggis
Follow
🌱 Day 36 - Second Week of Flowering 🌱
Hello growing friends! 🌿 Today marks the beginning of the second week of the flowering phase, and I’m very happy with how the buds are developing so far. 🌸✨
Since this is my first grow, I’m truly amazed by how fascinating these plants are. It’s an exciting journey! 🌱🤩
Last week, I struggled with yellow leaves and a calcium & magnesium deficiency. Fortunately, with the help of BioBizz Calmag, things are slowly improving. 🍃💪
Currently, I’ve set the humidity to 45%—according to my research, this is ideal for minimizing the risk of mold. 💧🚫
🌱 Day 42 - Last Day of the Second Flowering Week 🌱
Hello everyone! 🌿 Today marks the last day of the second week of flowering, and I’ve made some updates to my routine. I’ve increased the nutrients to BioBizz Grow (3ml), BioBizz Bloom (2ml), and BioBizz TopMax (1.5ml). The plants are growing well and have recovered from the calcium deficiency. 🍃💪 I’m continuing to add a bit of BioBizz CalMag to prevent any future deficiencies. 🌱✨
This week, I also added some soil to the pots, as the soil level had flattened out quite a bit. I topped up each pot with about 1.5 liters of soil.
Likes
4
Share

@GrowinSho
Follow
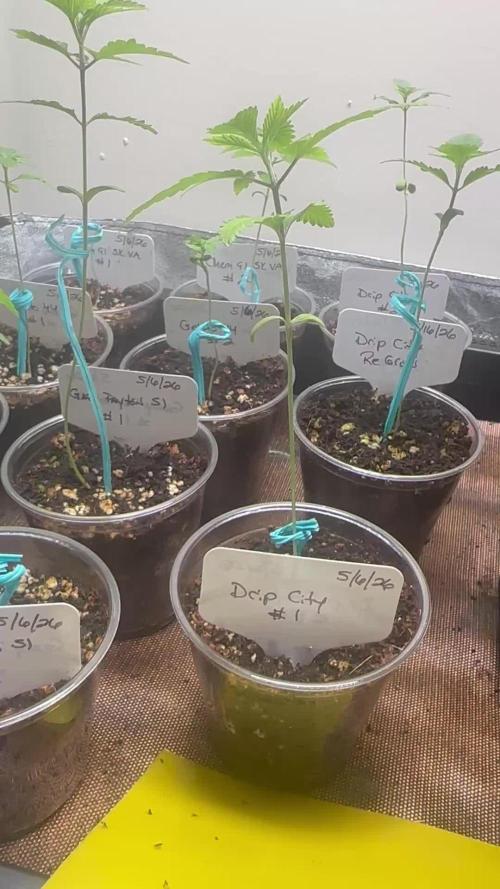
Started clones from a previous plant planned to be a mother.(GG#4) Clones are to replace the seedlings that didn't make it. I planned for 15 total so I added extra clones just in case.


Likes
2
Share


@wavycannabis
Follow
Few days into flowering and the lower internal nodes are already stretching up through the trellis. Hope they keep stretching for another week before they start bulking up.
Likes
12
Share


@Terpyboyz
Follow
Hi growers 👌🏻🍁
This week I’ve had a few slight more issues this run hasn’t been the best so far. But I’m hoping if I can just up my feed as each watering I’m feeding the ppm are only at 450ppm
1ml grow
3ml bloom
2ml top max
4ml heaven
4ml actavira
In a 5litre bottle - every 3 days
I’ve had a few herm on me - which has been a bit of a disappointing, it just tells me my rooms not dialled in at all. Few more issues to fix next run.
All the pink runts autos that finished flowering dried for 1 half weeks then went into canna butter.
If anyone can give me a message or comment of anything I can do to try fix these girls I would appreciate it ✌️🏻🍁


Likes
224
Share


@Hellishjam
Follow
Ladies are on beast mode! Friday they got 4 cups of 4-4-4 Gaia green and 8gal of compost tea. I did some super cropping as there getting pretty tall and I don’t want them over the fence and at this rate there going to be! Hopefully if everything goes as planned I’ll have the boards or at least some to put up the next time I come home. We’re now into the 10 foot in diameter cages, a few branches started poking thru just the other day. These girls are going to be bigger then last year that’s for sure there already way bigger. We’ll see what next week looks like after some hst thanks for stoppin in.

Likes
25
Share


@Blaze_With_Haze
Follow
Week 12 has ended and the girls got an extremely decent purple buds.

Likes
22
Share


@valiotoro
Follow
Hello everyone 😎
Week 6 of flower for the Strawberry🍓
Time to Flush💦
In love with the colors
Photos are coming for the 420 Xmas contest🎄
The smell is divine super fruity 🤤
She’s under the Mars Hydro FCE-6500+adlite for the last Pusshhh


Likes
15
Share


@Dillon1550
Follow
Lots of growing!! Mixed up a molasses based tea. Hitting the girls hard with lots of Gaia green bloom. The purple is nice to see 😍
Just water and bloom, ready for these to finish up so I can start the next batch!!


Likes
9
Share

@Chubbs
Follow
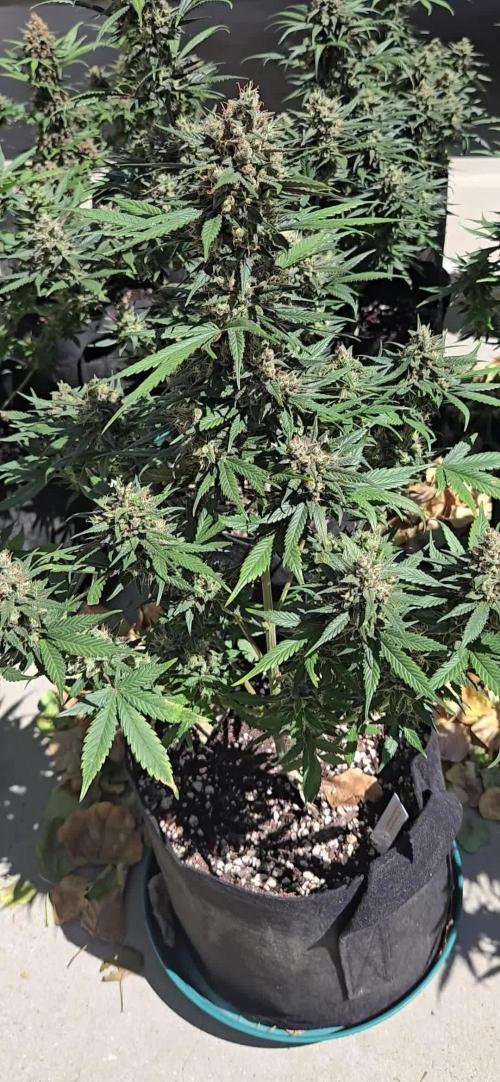
What up fam, took down my 4x8 these where in and figured I'd let them soak up some summer sun. They're getting super close to being finished,I guess another couple days. They smell so good and I really couldn't be happier with how they've grown. Happy Growing.

Likes
244
Share


@DogDoctorOfficial
Follow
And the time for Le Madame Freak Le Chick to come down as arrived!!! This was a wild ride , super emotional and repleted with amazing views, i totally advise everyone to try and grow this wild card , she is a treat and a blessing in our lives
As always thank you all for stopping by , for the love and for it all, i fell blessed to have you all with me for one more love journey, and a different one form the rest i did so far <3 <3 <3 Thank you Thank you Thank you , you guys are great and have been amazing , thank you for everything <3<3<3
#aptus #aptusplanttech #aptusgang #aptusfamily #aptustrueplantscience #inbalancewithnature #trueplantscience #dogdoctorofficial #growerslove
With true love comes happiness , Always believe in your self and always do things expecting nothing and with an open heart , be a giver and the universe will give back to you in ways you could not even imagine so <3 <3 <3
<3 <3 <3 Growers love to you all <3 <3 <3
Here are the words from this peace of art from nature creator Shapeshifter's @ HI-ELEVATION GENETICS <3 <3 <3
"FREQUENTLY ASKED QUESTIONS
Q. How did you create/breed Freakshow?
A. Methodical selection, line breeding, and culling is the short answer. Read our About page for more details.
Q. Is it an indoor or outdoor type?
A. Everything I've ever worked has been outdoors, including of course Freakshow. It has been our experience that outdoor (or sun grown, as it's recently being referred to) cultivars seem to perform extremely well under artificial conditions. This is true of seed starts or clones made from seed starts. The opposite is not always true; indoor clones often give an outdoor grower headaches because they don't always make the transition smoothly. This is due to light spectrum, temperature, and/or photoperiod changes. Yes, Freakshow will do exceedingly well indoors, and will thrive and mature just fine in a wide variety of natural environments as well, so it's definitely both and I think might even prove to be more resilient to those sorts of transitions.
Q. What are the potency and terpenoid levels?
A. Average 18-20% THCa, THC; negligible CBD, CBN with terps variable, averaging 2.5-3.5, primarily limonene and pinene, but this is variable, there was a lot of diversity in terp combinations and compositions in all the prior generations, it's just something that was left "as is" for now. The different parallel lines that we are developing can be directed in a few different pathways flavorwise.
Q. Why are the seeds white?
A. Why is the sky blue? No, the mature seeds are shrouded by a rice paper thin membrane which has coloring and mottling on it, but it's so fragile that it disintegrates in the process of shucking. Stripped of the outer layer the seeds are very pale, nearly white. It came as no surprise that this plant would have abnormal seeds.
Q. Is it a GMO?
A. Wow...? Well, it's seriously "modified" and the modifications are definitely genetic, and it is an organism. (Genuinely Modified Organically!) Uh, no. No radiation, no recombinant DNA, no gene splicing or editing, no TALEN or CRISPR! These biotechnologies don't belong in the food and medicine plant industries. Sadly, in the near future it will become commonplace and widespread in cannabis and other medicinal plants as it is already is with food crops and ornamentals. I'll avoid discussion on this topic for now, but we hope some people enjoy consuming Frankenbud!
Q. What's the floral period length?
A. 8-9 wks, finishes early Oct. at most latitudes and elevations.
Q. Is it a big producer?
A. Freakshow will produce nice, fat, dense colas (see gallery) with remarkable trichome coverage, and you can expect yields according to your veg. time, root space, and general knowledge and expertise as a gardener. The same set of variables apply to expected outcomes regarding cannabinoid levels and terpene profiles.
Q.What is the lineage?
A. (Bigbud x Skunk#1) x (Big Sur Holy Weed x Banana Kush). NLD("Sativa") dominant, but the afghanica influence is apparent. I'm pretty sure that Freakshow contains some Trainwreck and some Maui Wowie based on some research I did on the origins of the Pineapple Express. Interestingly Big Sur Holyweed, OG Kush, Banana, Trainwreck, and Maui Wowie are all of unclear origins. We have to remember that these are all just names and that they don't really mean much. The exact heritage of any cultivar today is impossible to determine accurately. Also, considering the amount of continuous shameless hybridization that has occurred in the last 40 yrs., any modern kind could easily contain over 40 kinds. In the case of Freakshow, it's much more limited because the ancestry is largely older "Sativas" that didn't go through as much outcrossing. In the 70s in Santa Cruz, Haze was a favorite among surfers for the pure energy and I still have (greatly improved) stock of it around, simply because even when I made hybrids with it I always kept the original in pure form for obvious reasons.
Q. What is the psychoactive effect like?
A. Like the flavors, many people have commented that the "buzz" is somewhat different than other mainstream types out there. It's not entirely out of the scope of imagination that given that this strain has new alleles in so many other respects, that it could also contain new, unique cannabinoids, as well as new and unique terpenoids, some of which may not even be among the standard 16 or so that the average lab is testing for. Aside from the up, cerebral, energetic boost, some report a mild time/space warp effect. Creativity and idea induction should be mentioned, for sure. Freakshow has the pure energy effect and greatly alters perception to the positive side, so definitely destroys depression. Appetite suppression is a side effect, but the enjoyment of food is enhanced. I personally will attest to all of the above. We all have different receptor profiles, so these are just generalizations. Couch unlock.
Q. Is it pest and mildew resistant?
A. Indeed it is. On many occasions in the last few years, it has been observed that when pest and mildew issues were affecting other plants adjacent to in the vicinity of Freakshow plants, for unknown reasons the freaks remained entirely unaffected. This includes 0botritis, PM, various mites and insects, soil fungus, etc. We haven't heard any complaints along those lines so far, so if anyone has any problems, especially with a rigorous IPM regimen in place, we would like to hear about it. And if anyone can attest to the extreme level of resistance it seems to have we'd love to hear about that as well.
Q. Does it contain web-leaf genetics?
A. I thought I better clarify this because there are a few people thinking that because of an article "Growing Marijuana that Doesn't look like Marijuana" that mentions that I had worked web-leaf types years ago and had eventually turned that into Freakshow. This is incorrect and I'm needing to get ahold of the writer to have him change it. When I read the piece and saw the mistake I figured it didn't matter that much, that the actual method of breeding could just remain a "trade secret". Recently, I noticed online that a posting, "Freakshow only exists because of duckfoot" by Curious Cannabis Connoisseur, where he explains how I developed Freakshow using Duckfoot. Let me explain, about 20 yrs. ago a friend gave me a jar of seeds labeled "BC Bigbud" and I sprouted flats of hundreds to look for oddities and had found one web-leaf pheno which we named Webster. It was a female so I bred it to a normal leaf male and began selecting and stabilizing a line of Webster. About 5 or 6 generations later I had nailed it to 100% webs and had also stabilized it for a deep purple color and a nice "gingerbread" terp profile. I was busy working other lines at that point so I put Webster in the library. Also, I was having a hell of a time getting a pheno of it that flowered to my satisfaction. (it seemed to finish with a limited number of calyxes). I knew I would have to outcross it to something with a big tasty bud and restabilize it for web-leaf, and I no longer had the original BC Bigbud. I still have the Webster seeds, and trust me the thought has crossed my mind to make the cross with Freakshow, but why? Why mess around crossing things just to create something even weirder? I have heard that the "Duckfoot" also doesn't bud up well so maybe there's a correlation there. Anyway, people can do what they want to and I will too, but crossing Freakshow with some low-THC crap like ABC is in my opinion idiotic. I worked extremely hard stabilizing and perfecting a beautiful new subspecies and I believe it should be kept pure. I won't go on a rant here about the rampant crossing and the lack of line-breeding in the cannabis world in the last several decades, or where this will eventually lead us, but I will say that it's not in a good direction. Bottom line....Freakshow has no web-leaf genes, it was made using top-grade tropical narrow-leaf drug (NLD) cultivars.
Q.Why is Freakshow patented?
A. Although I and most others (including all the folks at HSC) believe in and subscribe to the concept of "open sourcing" because sharing in cannabis genetics was always the cultural norm, it was decided that Freakshow should be protected (1) because it is a novel and unique, not a preexisting strain (or even subspecies), (2) To keep the greedy corporate big boys from exploiting it, (3) To maintain control of the genetic refinement of it in all future generations. We really can't wait to share it with the entire collective world of cannabis enthusiasts and invite experimental breeding for personal use and curiosity."
source https://freakshowcannabis.com


Likes
4
Share


@Ferenc
Follow
Yeah I have already written a review about it in my previous diary. It is really strong not a day time smoke... It makes you really high. The plant is very very stinky when you cut so close all the doors and windows!!!!!! Last 2 pictures in the jar was aken after 4 days of the harvest. The harvest day it was 171g and after 4 days 80g. It needs to be cured. After 6 days its weight 51g. The last 6 pictures show the flower after 3 weeks of curing. The best thing in this smoke that it doesn't have that strong smell at all almost nothing but the effect is in :) All the plants grow at least 40-50 cm but it can grow over 100cm as well if you let it.
4 weeks later : I decided to make some cannabutter. Update: Fucking hell I have never tried brownie or tea like this and also I have never been so high. I put one tsp into my tea and felt nothing so decided to repeat with 3 tsp. I went to take a nap and when I woke up I couldn't see I was so fucking high for several hours. Uhhh was great tho.😂✌️✌️ Last 10 pictures: This is what left after almost 3 months of harvest I smoked and cooked it.

Likes
5
Share

@Ninjabuds
Follow
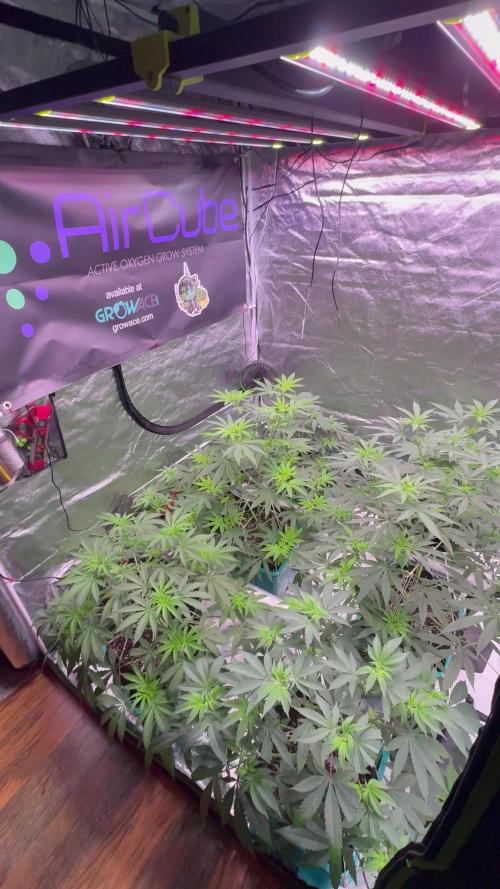
The biggest plant in the tent by far. Definitely gonna have to watch out for this one getting too tall too fast
Likes
6
Share


@Bluemels
Follow
Tag 53: So gut sieht die Cookie Gelato nicht aus. Sie sollte in diesem Alter erheblich größer sein 😱 . Ich vermute das zum Temperatur stress vor 2 Wochen noch eine überwässerung kam 😱 😨 Ich habe es zu gut gemeint, eigentlich Anfänger Fehler. Ich habe zu lange mit der Ballbrause schlückchenweise gegossen. Das habe ich sonst nicht getan, ich wollte es dieses mal besonders richtig machen 😵 zudem habe ich manchmal stessbeding nicht tief genug geschaut ob die Erde schon weit genug getrocknet war 😱
Ich hoffe es gelingt mir noch eine brauchbare Pflanze aus ihr zu machen 😬
Was soll ich sagen, ich habe den Grow abgebrochen, es schien mir nicht sinnvoll weiter auf Besserung zu warten. Ich starte mit neuen Samen.